Wednesday 31 May 2017

Kraft and Bronze by Danielle Vertigan

This week I was inspired by Earth tones and Nature.
Gold, Bronze and Chocolate.....
I was looking for really rich tones sitting on Kraft with a pop of white.
It was one of those layouts that feels rich in texture aswell and has come together
just as I had hoped.

So to get this page going your going to need
Heavy White Gesso (I love, love, love this stuff)
Tissue paper and Gel Medium.
Using the Gesso paint a diamond working in the centre and painting outwards.
This will give you the feathered look around the edges.
Repeat this process in the bottom right corner.

Once dry Paint the gel medium liberally adding the tissue paper to it.
You are going to get tacky fingers as you work in the creases.
You want these as they add a fluffy texture.


In the images below you will see the texture created by lapping the tissue.


The coverage of Heavy white Gesso is A-mazing....


My next selection is Colour Sprays...
I've chosen to work with
Mocha  Colour Spray and Leather  Colour Shimmer Spray


I Spritzed the page first Using the Mocha Colour Spray and dabbed the access using
paper towel.


I repeated the process again using the Leather Shimmer Spray.
Theses colours where then used again on a few chipboard pieces.
I didn't prep these pieces and used the sprays on my chipboard raw.


I spritzed 2 layers. One of mocha and one of Leather,
allowing it to dry in between and then for the third layer I used Bling Colour Shimmer Spray


The Shimmer is gorgeous and colour Rich....
Using the Colour Paste in Bling I coated the frame roughly using my finger.


My Border Pieces where prepped with Heavy White Gesso and left to dry.


I spritzed these using Leather Colour Shimmer Spray.

One the dried frame I Spritzed with the Mocha Colour Spray.

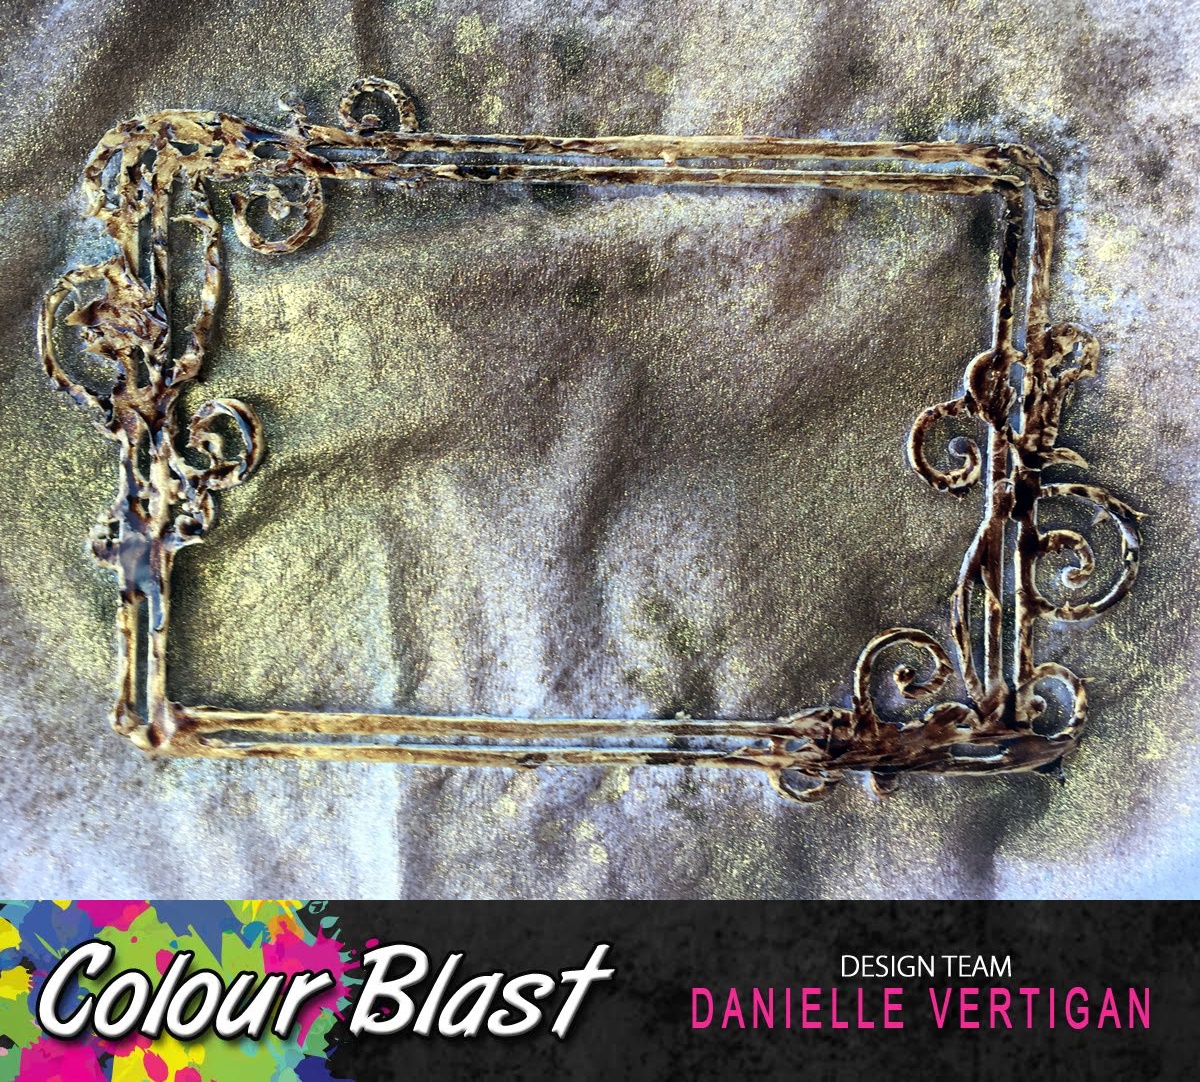
I repeated the process again with Leather Shimmer Spray.
Using and Stencil and the Leather   Colour Paste I added the zigzag pattern before
embellishing.
On My frame pieces I roughly added some speckles of the Bling Colour Paste,
I did this through a small patterned floral stencil.


I repeated the paste and the stencil over my prepared diamond and started layering my
prepared chipboard pieces with muslin, Hessian and a touch of gold.


You can really see the texture from these close ups.


Using a white Gel Pen I added a boarder and few details like
names, location and some general squiggling...
I couldn't help myself.


There is just something really Raw and Earthy that I just love about the finished result.

All these goodies and more can be purchased from
They are very addictive to play with and the results speak for themselves.

Till next time happy Scrapping
Danni


Tuesday 30 May 2017

'Amazing Spiderman' by Rachel Dutko


Hi Colour Blasters!
Rachel here with you today with my layout 
"Amazing Spiderman"


So here's how I created my vibrant page-

I started by applying White Heavy Gesso to the centre third of my page.  Next I sprinkled Cobalt and Peacock Colour Shimmer Dust on the page and then sprayed with some water. I tipped the page around to move the colour where I wanted it to go. 
I then soaked up the excess water with paper towel.


I then used a fan brush to add some tiny splatters of 
water-activated Cobalt and Peacock Colour Shimmer Dust.


Once that was dry my next layer was Just Blue and Fire Engine 
Colour Paste through some stencils.


Next was more splatters - Cobalt and Candy Colour Shimmer Dust,
 then splatters of Saffron Colour Spray.


While that was drying I heat embossed some Imaginarium Designs chipboard letters with Dusty Charcoal Colour Embossing Powder. 
I also embossed some wood veneer stars with Dusty Charcoal and
Fire Engine Colour Embossing Powder. 


I added some stamping, then my embellishments
and this is the end result


And some close ups


Thanks for looking

Rachel x x


Monday 29 May 2017

Bloom by Tracey Campbell

Hello lovely people, it is my turn on the blog again today and I am happy to share with you a lovely layout that was inspired by the pinks and blues in the clothing that my daughters are wearing in the photo. For this layout I used four different types of Colour Blast products.... can you guess which ones just by looking at the final layout? Go on write them down now before reading the step by step and see how much of a Colour Blast Fan you truly are. 1 point for the correct product and 2 points if you can name the correct colour used. Let me know how you go in the comments below and I will pick one random person from the comments to send a small Colour Blast Product to (from my own stash!!).


The first product that I used was Colour Shimmer Dust in Lollipop and Navy. On the cardstock base I sprayed a large circle of water and then slowly added the Colour Shimmer Dust.

  
I wanted a specific look so I built up the colour slowly using first the Lollipop and then the Navy. I use a very soft brush to pick up the Colour Shimmer Dust when doing this technique as I tend to have a lot more control of where the dust falls.


Here you can see that I only placed the Colour Shimmer Dust on some of the large circle I originally sprayed with water. After the background was dried I used a black marker to draw some large sketchy circles over the top of the Colour Shimmer Dust.


My second product I used was the White Heavy Gesso. I snaffled (I was going to say borrowed, but I still haven't given it back to her) one of my daughter's pattern stencils as it had two lovely roses on it. I applied the Heavy White Gesso using a plastic tool over the top of the dried Colour Shimmer Dust.


I repeated the stencilled rose a few time around the circle.


 Here you can see the roses over the top of the Colour Shimmer Dust circle.

Once the White Heavy Gesso was dried I used a black paint pen to outline the edges of the roses.

Next up I started adding a few layers of patterned paper and a title.


 At this stage I decided that I liked the look of the subtle gold accents on the title and knew I needed a touch more gold on the layout.... so I grabbed my third Colour Blast Product - Colour Paste in Bling and using a brush I painted the tips of the rose petals.


 My fourth Colour Blast product was a last minute idea. Looking at the finished layout I thought that it needed to be a bit messy and have a bit more movement, so I took the lid off a Bottle of Colour Spray and gave my layout some splashes and dots of Road Base.


Here are a few close up so that you can see how gorgeous all four of these products go together and how much fun they are to mix and match.


So did you guess all four products? What about the colours?


Thanks for stopping by, don't forget to leave a comment so I can pick one lucky reader to give a small RAK (Random Act of Kindness) too. .... and don't forget to stop by tomorrow to see what one of the other talented Design Team Members does with some more of these fabulously wonderful Colour Blast Products.

Hugs
Tracey

Sunday 28 May 2017

Find Adventure Art Journal by Amy Little

Hello CB friends,


Its a Amy L Sunday ready for a bit of CB fun? I love this art journal page and am really happy to share it with you.


Step One - Use your Colour Mica Powder Cool Mint and Polar and pour a little on a puddle of water on your page. Spread out evenly. Sprinkle Colour Shimmer Dust Navy in a couple of spots. I have used strokes in a circle to spread the pigment.


 Step 2 - I cut some stencils with my silhouette using cardstock. I mixed Heavy White Gesso and Heavy Black Gesso to create the grey and a sponge.

Step 3 - I have splashed on some white for stars, I have used Colour Mica Powder Olive to surround the blue. I have painted the trees in Heavy Black Gesso.

And here is my Art Journal Page Find Adventure!


Stay Scrappy 

Amy x


Saturday 27 May 2017

Autumn Leaves by Ree Peace

Hi all!!!
How amazing is Autumn? And how clever is Colour Blast? Combine the two and you get a Blast of Autumn on your page!

I gathered the Colour Sprays and Shimmer Sprays for this project.
Colour Sprays: Saffron, Rainforest and Coffee
Colour Shimmer Sprays: Leather, Fire Engine, Tangereen Dream


First I drew some fineliner leaf outlines


And misted them lightly with water before colouring them with layers of the above colours...


When I felt they matched those in my chosen pic I dried the cardstock off with my heat gun.

Next I Created highlights with Bling Colour Paste because who can go by some Blingy bits?!?!?!


This dried wonderfully, so much shimmery shine!


Here is the completed background...


And this is how I used it =)
These guys just love to give me the best shots!


Enjoy what is left of the beautiful colours before the bleak greys arrive!

Signing off for now, Ree =)