Friday 28 September 2018

"I adore you", by Amanda H

Hello Colour Blasters!!

I love a good beach page and today is time for another! Neutrals, plus blue - my favourite!!!

Here is a sneak peek of the page....

I started with white cardstock and a resist crayon.

I drew some random circles and crosses on the white background.

Then I sprayed the background with water.
And droppered some Colour Artist Ink in Oasis.
Love how the pattern resists! I used a heat gun to dry this so I can move the colour around and get variations of colour on the page.
Needing some contrast, I then droppered some more blue, this time using Colour Artist Ink in Marine.
Then I added some Colour Paste in Deep Water, through a cross stencil.

 Then I was able to assemble my page. Here it is....
I love the resist patterns on the page!
And finished with some flowers, stickers,  wood veneer, enamel dots, string and muslin - it's perfect!
I love this colour combo!
Thanks for looking,
Amanda

Thursday 27 September 2018

"Live for Today" by Anita Enright


Hi Everyone,  welcome back to my next blog post.
I had heaps of fun playing this week with colours that they say we should never put together... blue and green. 
I don't really understand this as together they look so fresh and happy.  You will see in a future post that I will be combining more 'odd' colours together.


Today's creation I went to town with many Colour Blast products using the White Heavy Gesso, Colour Artists Inks, Colour Embossing Powder  and at little bit of Colour Shimmer Dust.


Preparing the background for all those products is a necessity.  Of course our go to product is the White Heavy Gesso.  This really keeps your creation true in colour.


Next I grabbed one of my many 12x12" stencils that I had yet to use and went to town covering my entire background.  Because the white gesso is 'heavy' it worked beautifully through the stencil. I seriously don't know why I haven't used this stencil either before, it is beautiful.


 Next I poured by Colour Artist Ink in Lime and Oasis in to a couple of spray bottles and then sprayed it over my page.  I dried it with my heat gun and then, taking a baby wipe reactivated the ink to brighten the colour.  I did a light sprinkle of the Colour Shimmer Dust in Lush to add a slight shimmer in places.
By doing the baby wipe technique on the ink it also blended the colour better and really made it vibrant
Below are a couple of closeups of the background.

Next, I heat embossed some wood veneer leaves.  I only did them once lightly as I wanted the leaves to still have a little bit of a mottled finish. For my leaves I used the Colour Embossing Powder in Apple of My Eye.


 I then did the same for my title wood veneer using the Colour Embossing Powder in Envy doing two coats and then using Apple of My Eye sprinkled it lightly across the title to add a highlight.

I was lucky enough to have a stash of the Colour Shimmer Cubes before they disappeared and have used them to add some colour to my large white flower.
I added all the bits and pieces together and below is my finished page.  


Thanks for stopping by today.  

See you next time.

Anita
xx 


Wednesday 26 September 2018

"Beautiful Disaster" Mixed Media Canvas Class - Scrap & Chat Retreat by Sue Plumb


Hi Colour Blast fans!
It's Sue Plumb with something a bit different to share today.
Last month I was lucky enough to attend the annual Scrap & Chat retreat in the Dandenong Ranges near Melbourne with 60 other ladies. If you have never been on a retreat, let me tell you that there is nothing that compares to being around like-minded people for a weekend full of creating. So good for the soul!

While I was there, I was also fortunate to have the opportunity to teach a class to a couple of dozen ladies and I had an absolute (colour) blast! hehe 


The piece I taught was a mixed media canvas panel, entitled "Beautiful Disaster" and it was a great opportunity to fly the flag for a number of fabulous Aussie brands including Colour Blast, Cocoa Vanilla Studio and Flutterby Designs.


The canvas was was coloured with my favourite Colour Blast product - Colour Artist Inks, and we used the warm tones of Slipper, Cranberry, Cider and Citrus for the background; then the cool blue colour of Oasis for adding some contrasting highlights. 


Besides the Colour Artist Inks, we also used one of my other favourite Colour Blast products - Colour Paste. We used Deep Water for contrast and texture through a Flutterby Designs stencil (although there were a couple of ladies who used Lovely Lilac from my stash because we thought it would work better with the pieces they had created). 


We also used both black and white Heavy Gesso on the canvases - using the white to strip back colour and provide the eye a place to rest; and black to add some contrast and tie in with the stencilled image and the Flutterby Designs quote. This was probably the messiest part of the class as I encouraged everyone to test my motto that "fingers make the best brushes" - so fun! 


We finished off the canvases with some vellum embellishments from Cocoa Vanilla Studio. The gorgeous colours of the printed vellum die cuts worked beautifully with the tones of the inks and paste. 


I so enjoyed the opportunity to fly the flag for Colour Blast and share my love of mixed media with such a lovely group of ladies. Thanks to everyone who attended!


If you would like the opportunity to take a class with one of the Colour Blast design team members at your local store, crop or retreat; please ask the store owner or event organiser to contact Tenisha at Colour Blast to enquire and see if we can come to you.
Until next time, happy scrapping! 


Tuesday 25 September 2018

Wonder by Kristy Abela

Hi there... Welcome to my next inspiration.. I am a dab hand at using black.. One of the many reasons that I LOVE Colour Blast products.. 
So much Shimmer and Shine!
I wanted to have a play with the Colour Paste and their resist effect alongside the Colour Mica Powders. I wanted to create backgrounds for dry brushing effects.


I primed a 5" x 7" Canvas with Colour Blast Black Heavy Gesso and used Colour Paste in Deep Water to create these stunning wings through a stencil.


I grabbed some trinkets, chipboard and art stones from my stash and created a collage and painted it all black too. I have a happy box and just rummaged through to find some elements that had the same theme. 


I mixed some Colour Mica Powder (Cool Mint, Polar and Olive Grove) with some gel medium. The Colour Mica Powders are pigment only so if you want them to stick you need to add them to a medium.  I didn't want to dilute the colour so I used the gel medium. I then added a spritz of water to make it fluid consistency.


I dabbed it on haphazardly and then gave it another spritz of water to let it to sink deep into the cracks. Using a paper towel I dabbed off the excess. The white is the water reacting with gel medium, don't worry.. It dries clear..


I repeated the process with all three colours, drying in between. Using my damp paper towel I dabbed over the project to add colour to the rest of the canvas as well. Keep playing until you are satisfied.  
Once this was dry I used some Colour Blast White Heavy Gesso to dry brush the whole project to lift the contours out of the collage. 


I mixed up some colour out of my Colour Shimmer Cube in Singing the Blues and Bling. I used just enough water to activate the pigment and dry brushed them onto the cherub and the butterfly.


Check out the subtle shimmery effect the puddles have left. The Deep Water Colour Paste has a total resist effect and has not lost any of its shine during the process.


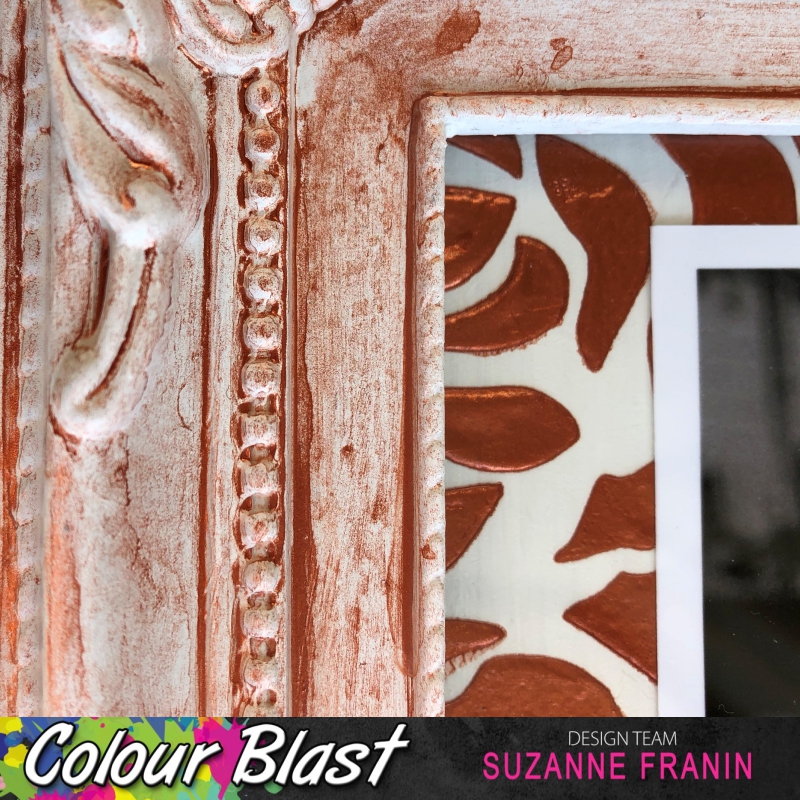
Here are some close ups!!


To finish off the page I used Colour Mica Powder in Leather to a title I had in my stash and were done..  


Thanks for looking and if you like to play with the Black Heavy Gesso and Colour Mica Powders be sure to upload your take in the Colour Blast Creative Corner on Facebook
Ciao for now... Kristy. 


Monday 24 September 2018

Beautiful Moment by Suzanne Franin

Hey Everyone Suzanne here

This picture is of my daughter Natalii and her Godmother Kathy at her wedding it's such a beautiful photo of the two of them 
I made this as a gift for Kathy that's the reason for the colour 
She has copper in her kitchen and family room area and I love the colour so that helps

Make sure you check out the rest of the Blog and check out the creativity of the other Design Team members 
You can also type in one of the products you're interested in and all the projects that have used that product will come up so you will have lots of ideas to look at 

Colour Blast have Sienna in a few of their products including - Colour PasteColour Embossing PowderColour Shimmer Spray and the Colour Shimmer Cubes when they were available (hopefully they will be back again one day soon)


I happen to have the Sienna Colour Shimmer Cube
So I made it into a spray in my little water bottle and sprayed the frame randomly until I was happy with the effect and the amount of colour on it
I love how it's gone into the grooves of the frame and how much of a shimmer it has 
You will get the same shimmer with the Sienna Colour Shimmer Spray (I just don't have that yet) 


I used one of the new stencils with the Sienna Colour Paste in the top corner just for a bit of texture (and I really love how shimmery it is)


Then on a paper clay key hole I added some Sienna Colour Embossing Powder 
The powder didn't really like the clay, so it didn't come out as smooth as it normally does but I still like the texture and love the colour


I  painted on some embossing ink on to the top of the flowers with a brush and then dipped them in the Sienna Colour Embossing Powder


To give some added texture and interest to the flowers instead of just plain white ones


Well that's it from me I hope you liked this project and love the Sienna like I do 

Thank you for visiting and I hope you will come back soon x