Friday 29 March 2019

Abstract Girl by Michelle Henderson

Hello everyone - a very quick page to show you today 😄😀

I started off with my favourite Colour Artist Inks in Citrus, Spice, Oasis and Mermaid.


Using watercolour paper and a soft flat brush I randomly spread colour here and there on my page. Of course I had to splatter a bit too 😄


The face outline is lightly drawn in with a black aquarelle pencil, then blended out with a brush. (I love how the splatters look like freckles!)


It still looked like it needed a little more definition, so I loaded up my liner brush with Soot, and loosely went over the design here and there.


I decided that was enough this time, and left it there - sometimes it's hard to know when to stop!

Thanks for popping in 😁


Wednesday 27 March 2019

"Be Fearless" by Sue Plumb


Hi everyone!
Sue Plumb here to share my latest Colour Blast design team project with you. Today I am sharing a 12x12" mixed media scrapbook layout that features the February release Graffiti Grunge collection; as well as Colour Paste and Colour Artist Ink. I chose to document a fun photo taken with my kids when we were at a theme park.


Before I started, I gathered together my supplies - I chose the Tough paper from the Graffiti Grunge collection for my page base; along with the Direct Links die (also from the GG collection); the Peony Dreams stamp set (from the January Spread Your Wings collection); and Bling Colour Paste.


I began by adding some stamping to my page using the Peony Dreams stamp. Rather than stamping the entire image as a whole, I used parts of the stamp randomly with black ink to define the focal area of my layout where my photo was going to go; along with a small amount of stamping in the bottom right corner where I planned to place my title.


I then chose a Seth Apter designed stencil from StencilGirl to add some Bling Colour Paste over the top of the stamping, to add further interest to the focal area of my page. With the excess paste on my palette knife I simply wiped it off randomly around my page. 


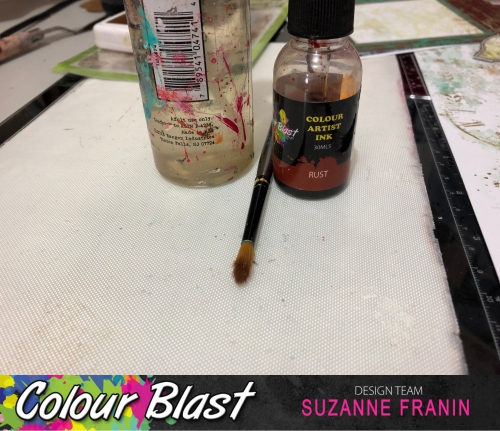
At this point I decided the page needed some extra depth of colour, so I added a splattering of Rust Colour Artist Ink to the page using a small, stiff brush and then dried the page off. (You can see the shine and depth the Bling Colour Paste has once dry.)


Next, I set about creating some layers as a mat for my photo to sit on. I chose additional papers from the Graffiti Grunge collection and cut a variety of pieces; which I layered with book paper and then stapled it all together, bending and scrunching the edges for extra texture.


With my layered photo mat complete, I then attached it to my page, adding some frayed gauze and messy black cotton on top for soft texture. I also cut the Direct Links die twice from the Epic paper, cutting one in half and layering it over the top of the gauze so it the arrow head and tail were sticking out on both sides of the photo mat.


With the second die cut, I cut some of the extra chain links from it and adhered them so they would protrude from below the photo, then stuck an extra arrow head on the right side; before sticking my photo down on top.


With my photo in place, it was now time to embellish my page. I began with my title cluster - adding a couple of small torn scraps of paper (left over from my die cutting) over the stamping and paste I had on the page. To tie in with photo cluster, I also added some messy black cotton; then a butterfly sticker and the words "Be Fearless", which I had fussy cut from the Be Yourself Word Sheet.


I then tucked two butterfly stickers into the photo cluster (because "rule of threes", right?) and a die cut star. I then used several pieces from the Cocoa Vanilla Studio 'Boys Rule' chipboard pack to add a few pops of dimension to the page. I added a few small pentagons, some chipboard stars and used the negative from another piece (cut in half) to frame my title words.
To finish off, I added the "fun and games" chipboard banner piece along the bottom edge of my photo and I was done!


Thanks for stopping by today so I could share this with you. The Graffiti Grunge collection is currently available to purchase in the Colour Blast online store, along with the die, stamp, Colour Paste and Colour Artist Ink I used on this page. Alternatively, you can ask at your favourite craft retailer. 
Until next time, happy scrapping!


Monday 25 March 2019

Eyes of an Owl by Suzanne Franin


Hey Everyone Suzanne here

My turn on the Colour Blast Blog
Make sure you check out the rest of the blog to see what the Design Team have been up too 
And check out the links on the side of the blog for the links to all our Social Media Links

I have an obsession with Owls there's something magical about them
This ones eyes have such depth 


I used Colour Artist Ink Rust with a touch of water

I used paper from the Limited Edition Collection - Imperfect oh my this range is awesome so steampunk but light enough that you can add more depth and texture too it
I used the Peony Dreams Stamp from the Spread your Wings Collection randomly over the paper
After stamping I dripped some the ink down the page 


Adding some water sprays along the way to help it spread

And using the Heat gun to move it around
I also spray some Colour Spray - Mocha on the background for more depth
I decided I wanted to use the Graffiti Grunge Collection - Linked in Die but I didn't want to use another paper so I cut out the middle of the paper I was using and ran it through my Die Cutting machine twice as the paper is quite thick

Colour Blast also have small stencils that aren't on the website (contact them they usually have them at craft shows) I used 3D gel with the grass looking one on the stencil 3 times 
I know Colour Blast know longer have the Colour Shimmer Cubes (you can still find them at some online stores) but the colours are perfect for what I needed 
The resin owl was from a kit I bought from Art and Soul Studio (it was one of their monthly kits and because it had an owl I had to have it)
I started of by spraying him with Mocha Colour Spray then added Leather, Sienna and Bling Shimmer cubes to him 
His beak I added some Snow White and his eyes are done with Dusty Charcoal
I used a white sharpie to add the whites to his eyes
The frame and tags are from the Limited Edition Collection - Glorious I just layered them and added the Linked in Die that I cut up and added some Rust too


Thank you for visiting and I hope you will come back soon x

Thursday 21 March 2019

Escape by Suzy Loudon

Hi everyone. You can find my latest layout on the Colour Blast Blog today.


To begin my layout I used Heavy White Gesso through a stencil.


I mixed up/activated some Navy  Colour Shimmer Dust with water. I made it quite strong/dark. Then using some cling wrap I dabbed it onto my page.

After activating some Midnight  Colour Shimmer Dust I dabbed it onto the bottom section with my cling wrap. Then very lightly over the blue.


Using my Bling Colour  Shimmer Spray I gave it a spritz. The unscrewed the top I splashed some splotches around.


I spread Just Blue  Colour Paste lightly through another stencil. Then lightly went over some of the blue with Dusty Charcoal   Colour Paste


Using the Compass Die I cut out some chipboard before painting it with Heavy Black Gesso.


I sprayed some cheesecloth with my spray I made up with Navy Shimmer Dust. Then dried it gently with my heat gun.


Using the Confidential Stamp Set I stamped around some tags & inked around the edges.


I painted my chipboard palm trees with Heavy Black Gesso before dabbing some Bling Colour Paste with my finger.


I embossed my little letters with Just Blue Colour  Embossing Powder. Once heat activated & before it set I sprinkled a small amount of Dusty Charcoal Colour  Embossing Powder  over the top. Then heat setting it. 


I forgot to take a photo, but I activated my Bling Shimmer Cube with water. Then brushed it over my title.I then put all my elements together finishing it off with some beads & micro beads.
Here are a few close ups.


Thanks for looking.
Don't forget to check out all  the other great projects.
xxx Suzy


Friday 15 March 2019

All Grown Up by Michelle Henderson

I've just seen my baby off to another city to live - she's now 18 and starting Uni, so I've been reflecting on things...it's just so hard to believe she's old enough!!


At least I have more time to scrap!

I thought I'd do a little free style today, to get me back into the swing of things...and flowers being one of my favourite things that's what I started with.


I got out my Colour Artist Inks, and with Slipper thinned right down, painted some loose circles.


I went over them again in a messy spiral with slightly more concentrated Slipper.


Once they were dry, I used some Bordeaux to give more depth.


I did the same process with the leaves, using two different concentrations of Grass, and then a little Mermaid for highlights. I also spattered lightly near the flowers.


For detailing, I used a .3 Uni pen to scribble the flowers and leaves, plus a little at the bottom (I did this later) where I was placing a second cluster.

Time to add the photo and embellies!


Thanks for joining me today 😃