Friday 24 September 2021

Gypsy Heart Art Journal by Aditi Mahajan

 Hello,

Hope you're all doing well! Today I'm sharing an art journal page with you'll, in my square watercolour journal. 

Since I love art journaling, I love experimenting with different shapes, sizes and paper textures of journals. 

Before I jump into the step by step process, here's a look at my page.


Here's a step by step process of creating this page:

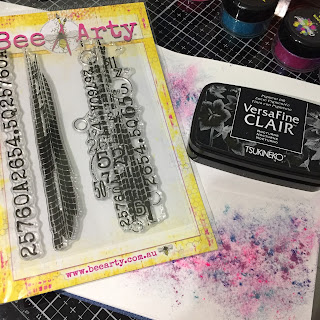
Step 1- Mist the page with water, where you'd like to add colour. I was working on the opposite ends of the page. Using a fan brush next, I sprinkled the Mica powders, one colour at a time. I let this to dry naturally.


I love the play of colours here.

Step 2-  I chose a few background stamps and randomly stamped them with black ink. 


This gave me various textures to further build my composition.

Step 3- I picked out a few stencils and added a next layer of texture with the black ink again.


Step 4- I completed the page with a few die cut elements, phrases, white, purple and blue splatter. 

Wednesday 22 September 2021

'Take a trip journey to travel' by Sandi Spink


 I love revisiting my favourite trips and memories, that why I enjoy photography and making art journals.

Using 'Destination Anywhere' designed by Queenie T, I created my own handmade journal to keep some of my memories of my Swiss holiday and I'd like to share with you how I made it.

Products used from the Destination Anywhere kit: 

12"x12" pages .

Phrases and words from phrase page

Die Cuts: Transport

Stencils: Drippy-A6, .

Wooden, paper and material embellishments.

ColourBlast/BeeArty products: 

White heavy gesso

Colour Artist ink- Rust

Stencils: Pavement

Step1,2 & 3

  • I selected a range of pages and ripped or cut them into different sizes and a edges. 

  • Folding them provided me with a booklet style journal. 

  • I cut out a plane using the Diecut template 'Transport', some words, tags and phrases.


Step 4 & 5:

  • To add texture I applied white gesso over different section of the pages with the 3 different stencils.

Step 6 & 7:

  • To add another effect I used the front of the stencil before the gesso dried and placed it onto a page and used a wet one to rub it over the stencil which left a shadow effect.  On another page I placed gesso over the spotted section and then smeared gesso over it with my soft sponge brush.

Step 8:

  • I also smeared some onto a plain page and when dry dropped small amounts of artist ink 'rust' and wiped it with the same soft sponge brush. 

  • A few other ink colours were dropped from a height to produce large splats.

Step 9:

  • After completing the base additions to the pages I built up the layers with the smaller sections of papers, phrases, natural material elements and photos. The journal was completed by staking the pages together and tying a piece of natural string around the folded sections twice and tying off.


Some closeups:


Thanks for joining me and I hope I inspired you to check out this amazing kit and the products at beearty.com.au . You can find more inspiration and links on BeeArty's facebook page https://www.facebook.com/BeeArtyHive


Monday 20 September 2021

Change is beautiful by Linda Pearson


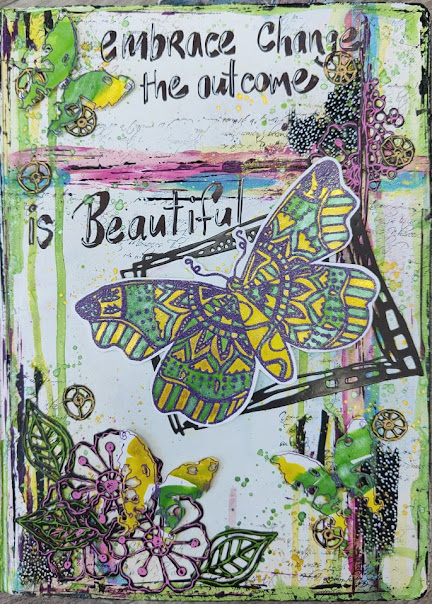
Hi there Bee Arters!  For this entry I have included lots of die cut elements along with a beautiful butterfly embossed image that glistens from the amazing Colour Blast inks and mica powders.  Unfortunately photos don't show just how gorgeous these products can look.  I hope you give the Bee Arty Mica Powders a try, they are a very versatile product.

White Cardstock 350gsm
Gesso
Craft Powder Spoon
Archival Ink Pad Jet Black
Versamark Stamp pad translucent
Colour artist inks
Mica powder
Serendipity clear stamp set
Flowers Metal Die
Frame Metal Die
black and white stripe paper (offcut strips)  – Electric Dreams Mini Collection designed by Tanya Froud and Elisa Ablett
Butterfly Effect metal die
Memories red rubber stamp set - Love and Grace designed by Michelle Grant Designs
 
Black and white paint pens
Black Archival Ink Pad
Paint colours used: Dina Wakely Carnation, Ocean, Lemon, Lime and black
Black cardstock


Gesso, White - cover journal page with 2 coats of gesso.  N.B. the colour on this page is left over paint from another page.  Dry off.


Roughly and loosely draw out ‘cross like’ lines with small amounts of paint (pink and blue) and small paint brush.  Could add some white to add more depth of colour. 

Add organic lines using small amounts of black paint and credit card or palette knife through the paint.  Add some black ‘splotches’ on several spots on the cross and to top and bottom edges with a small brush (loose strokes). Add some watery paint (Lime and Lemon) loosely along the painted areas.  Dry off.

Using the Memories red rubber stamp set and black archival ink stamp randomly around the painted sections, leaving as much white space as possible.

Add splatters of purple paint, lime and lemon.


Tear small strips of black and white stripe paper, then adhere small strips along the painted cross sections across the page.  Dry off.


Close up images showing detailing of the painted sections and stamping.  With a white paint pen add dots to the black ‘splotches’ of paint and blending in with the paper off cuts.


In a paint well add the Colour artist inks (Grass and Citrus), add a couple of scoops of (cool mint and sunshine) Mica powder  mix thoroughly.  

Emboss (Versamark Stamp pad translucent) the butterfly (Serendipity clear stamp set) onto White Cardstock 350gsm, sprinkle Royalty Embossing powder then set with heat gun. 

Use a small paint brush to carefully add the two artist ink mixes to colour the butterfly.


Spread left over Colour artist inks a sheet of White Cardstock 350gsm.  Drip some of the green ink on the page.   Allow to dry.

Prepare the elements for detailing page. 

Run the coloured cardstock through a die cut machine cutting several shapes (Butterfly Effect metal die.

Run the (Flowers Metal Die and Frame Metal Die).

Add some detailing to the leaves, butterflies and flowers with coloured paint pen.


Adhere all the elements to the page, draw a border around the edge of the page to complete.

I hope you find some inspiration from this journal page and look forward to another blog soon.  Add the sentiment to the page with black paint pen.


Cheers from Linda Pearson

linda@yourcreativepalette.com.au


Sunday 19 September 2021

Fierce Mind Brave Spirit by Belinda Spencer

 Hello Arty Bees!!


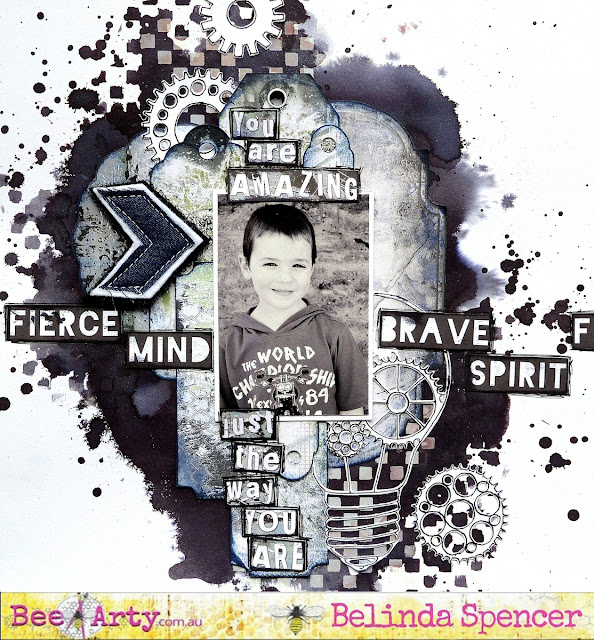
It's Belinda here today to share my latest layout created for Bee Arty featuring the awesome Graffiti Grunge collection.


I cropped a sheet of the fabulous 350gsm White Cardstock and mounted on a sheet of heavy weight black cardstock from my stash. I then spritzed the focal area quite heavily with water and sprinkled some Midnight Colour Shimmer Dust over it. I used a soft paintbrush to move the colour around and to 'mix' the Shimmer Dust and water together. I used the same paintbrush to pick up the colour from the really wet parts and flick it over the page.


Next I cut out the tags I wanted to use from the Perfect Tag Sheet. There were still plenty of tags left over to make another layout or some cards. I inked the edges of the tags with some Cobalt Archival Ink.


Next I added some stencilling using the Gridlock A6 Stencil and White Heavy Gesso. I love how when the gesso dried it had picked up some of the individual colours that make up the Midnight Shimmer Dust. It gave it even more of a grungy look.


I added a little more stencilling. This time I mixed up a little of the Midnight Shimmer Dust with water in a palette and painted it through the stencil on the page. It gave a really messy watercolour effect pattern which just added to the grunginess. 
Once the layout was dry, I layered on the tags and added some cogs and the light bulb using the Cog Globe Metal Die Set with the white cardstock.


I added my photo and a cool chevron from Charm's Creations. I finished by fussy cutting some appropriate words from the Be Yourself  Word Sheet, inking the edges with Jet Black Archival Ink and adding to the page. I used a black journaling pen to add some doodling to the die cuts as well as scribbly borders around the words to make them stand out more.


Thanks so much for stopping by the blog today. Make sure you keep an eye out as this layout will soon be available as a kit so you can create your own version of this layout.

Cheers
Belinda


Saturday 18 September 2021

A Special Moment to Love by Tracey Campbell

 Hello everyone, Tracey Campbell here today to share my latest Bee Arty creation with you, for this project I have used different elements from two separate collection. I have used Three Six Five and Bohemian Bliss as the collections are divine, super soft and feminine, just what I wanted for this sweet photo of my two daughters from a few years ago.

I decided to use the New Year patterned paper from the Three Six Five collection the base as the pins, purples and butterflies kept calling out to me. I wanted to team it with flowers so I also selected the Free Vibe from the Bohemian Bliss collection. Next I used the Pan Water Paints and the Shimmer Cubes to paint the flowers from Free Vibe in a variety of pinks and purple shades. 

Here you can see the shades of pinks and purples on the flowers. After they were dry I fussy cut them all out.


I wanted to introduce a bit of a delicate touch to the paper so I decided to use the flourish from the Love stamp set and some Blush Colour Embossing Powder


Here is where I placed the Blush embossed images on the paper.


I wanted to mat my photo with a purple and pink double mat, so I used some left over purple cardstock  that I created a few weeks ago. If you are interested in how I created my own patterned paper with Bee Arty Products the just click on the link, here. For the pink paper I used some of the Symbolic Patterned Paper from the Three Six Five collection. I hand cut a 2 mm mat of the purple and a 3 mm mat from the Symbolic Patterned Paper. 


Next I adhered the mated photo to the center of the background paper over the embossed flourishes. Then I used 3 dimensional tape to stick the flowers around the photo. 


At this point I decided that I need a bit more texture so placed some cotton thread underneath the fussy cut flowers.


To finish off I cut the words A Special Moment to Love form the Sweet Talk patterned paper in the Bohemian Bliss collection and adhered it them down the left hand side of the flowers. For a finishing touch I added a few pink paper flowers.


Here is the final layout and how it turned out, I really love the soft delicate look, it is pretty and feminine. Bohemian Bliss and Three Six Five collection really work well together and compliment each other nicely.


If you decide to use the two collections together I would really love to see what you come up with, so just leave a comment and I will get in touch to find out how you have used them.


A few  close ups before I go.


I hope I have brought you a bit of inspiration. 
Take care

Hugs
Tracey