Showing posts with label 12x12 layout. Show all posts

Tuesday, 14 March 2023

Be Bold I Mixed Media Layout I Sunila Mahajan

 Hello Bee Arty Lovelies,

Sunila here and I'm back with mixed media inspiration for you all!

Today, I'm sharing a fun and vibrant layout. We all love scrapbooking and memory keeping. The Bee Arty Paper Collection come handy here. The patterned papers and coordinated elements work well for such projects.

Here's a look at the layout:


I have used the paper and added texture with a stencil, and stamping. A little colour using the micas and then for the layers I've fussy cut elements as well as used dies to cut elements. 


I was inspired by the current challenge on Bee Arty Creative Hive. I incorporated the colours and the sketch.

Sunday, 5 December 2021

Us by Belinda Spencer

 Hi Arty Bees!

It's Belinda here with you today to share my take on the fabulous December Sketch Challenge featuring the Grateful Heart collection.


Here's a peek at the sketch:


I cropped a sheet of patterned paper and mounted onto the 350gsm white cardstock for extra sturdiness. I then sprinkled some Midnight Colour Shimmer Dust over the central area and activated by spritzing water on it.


I love the variation in colour from the Shimmer Dust!


I turned the sketch on its side like this:


And here is my completed layout:


I fussy cut lots of images from the Grateful Heart collection and had fun layering them together for the little clusters. I fussy cut some leaves from the patterned paper using the Autumn Trio Metal Die.


How cute are the little bird images?!


The transparency butterfly was from my stash.


THAT quote couldn't be more appropriate for our 'annus horribilus' last year with Covid and my son's cancer diagnosis and battle.


Here's what I used:


Thanks so much for stopping by the blog today. I do hope you can play along with the challenge this month.

Cheers
Belinda


Sunday, 21 November 2021

Be Fearless with Belinda Spencer

 Hello Arty Bees!!


It's Belinda here with you today to share my latest layout featuring the stunning Fearless, Brave and Free Collection by Fiona Paltridge.


I started my layout by cropping a sheet of the Positive patterned paper and mounting it on a sheet of the fabulous 350gsm White Cardstock. I love to have a border around my page and also I love the sturdiness this double layer gives. 


Next I grabbed the beautiful Indigo Colour Spray and spritzed some of that on the background. I titled my page and let some drip down in the area where I knew my photo was going to be. The background design on the paper was so nice that it didn't need too much added to it. I didn't want to obliterate what was already there just add a little bit more to it.


Once the layout was dry, I then added some stencilling using the Ecliptic A6 Stencil with Snow White Colour Paste. I applied the paste through the stencil using a palette knife. 
I added some stamping too using the Say It Clear Stamp Set with Archival Ink.


I fussy cut some images from the Fearless, Brave and Free Collection patterned papers. I also used the String Wreath and the Create Metal Dies to add more layers behind my photo. I used the Create die with patterned paper as well as with the white cardstock. One of the die cuts I sprayed with the Indigo Colour Spray. I then layered them together behind my photo.


Finally I added my embellishments, title and quote.

Here's what I used:


Metal Dies:


Thanks so much for stopping by the blog today.

Cheers
Belinda


Sunday, 7 November 2021

Go For It with Belinda Spencer

 Hello Arty Bees!!


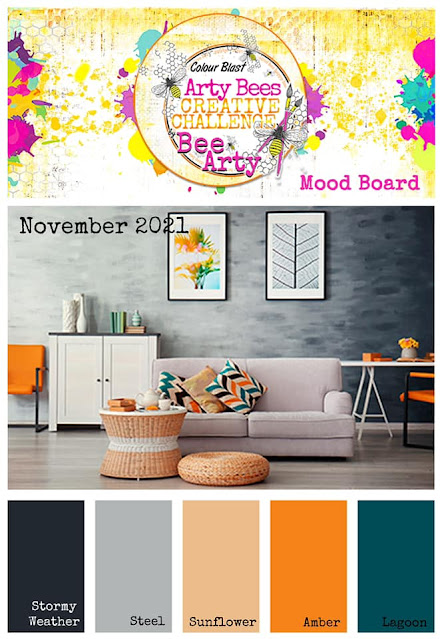
It's Belinda here today to share my latest layout for Bee Arty inspired by the November Mood Board.


Here's a peek at the mood board for November:


I started my layout by cropping a piece of Graffiti Grunge patterned paper and mounting it onto a sheet of the 350gsm White Cardstock. I then spritzed a little Sunset Colour Spray in three places and then placed a piece of plastic over the top to spread out the ink.


I repeated this process using Lagoon Colour Spray.


And for a third time adding Road Base Colour Spray. I then flicked all three colours over the page and dried with a heat gun.


I added some stencilling using the Three Six Five A5 Stencil Three Six Five and the Black Heavy Gesso. I stamped some stars over the page too using the Going My Way Clear Stamps and Ranger Jet Black Archival Ink.


I used the Graffiti Grunge Linked In Metal Die to cut two pieces from extra white cardstock and stapled them onto the page.


I added a paper stack on top of the die cuts using some patterned papers from both the Graffiti Grunge and Fearless, Brave And Free collections. I added my photo on top.


Next I used some Ranger Archival Inks to stamp some more stars using the Going My Way Clear Stamp set again. I fussy cut the stars and added to the layout along with all remaining elements.


I cut the quotes from the Graffiti Grunge Be Yourself Word Sheet and added them to the layout using 3D foam.


Thanks so much for stopping by the blog today. I hope you find some time to play along with the November challenge too.

Cheers
Belinda


Sunday, 17 October 2021

Paint Rainbows by Belinda Spencer

 Hello Arty Bees!!


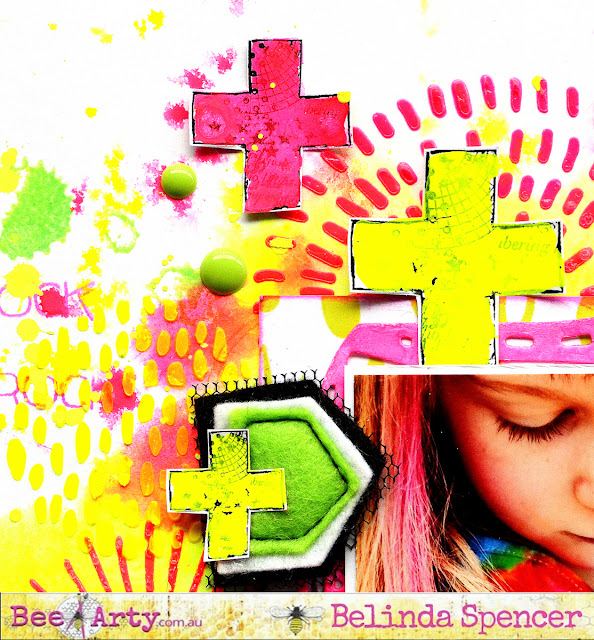
It's Belinda here with you today to share my latest layout for Bee Arty featuring the Electric Dreams Mini Collection.


I started my layout by spritzing my 350gsm White Cardstock with a liberal amount of water. I then used a soft wet paintbrush to pick up some Fluro Yellow Colour Blast Mica Powder and applied it to parts of the wet area. I played around with the colour on the page making sure the powder was all mixed in with the water and spreading it around a little. I then repeated this process using the Fluro Pink Mica Powder. I picked up some of the colour and flicked it over the page too.


I dried my page with a heat gun and then added some stencilling using the Circulate A5 Stencil and both the Fluro Pink and Fluro Yellow Colour Blast Colour Pastes.


Next I added some stamping using the Watermark Clear Stamp Set and a fluro green ink pad and the Embrace Change Say It Clear Stamp Set with a fluro pink ink pad. 


I added a couple of pieces of cropped patterned paper from the Electric Dreams Mini Collection. Then I die cut a frame using the Frame Metal Die. I painted the frame with some of the Fluro Pink Mica Powder mixed with water.


I fussy cut some plus signs from the Electric Dreams patterned paper, painted them with the Mica Powders and added to my page once dry. I added a couple of fluro Charm's Creations too.


To finish, I added my title and a quote cut from the Electric Dreams patterned papers.


Thank you for stopping by the blog today. I hope you are inspired to have a play with some super bright colours today too.

Cheers
Belinda


Sunday, 19 September 2021

Fierce Mind Brave Spirit by Belinda Spencer

 Hello Arty Bees!!


It's Belinda here today to share my latest layout created for Bee Arty featuring the awesome Graffiti Grunge collection.


I cropped a sheet of the fabulous 350gsm White Cardstock and mounted on a sheet of heavy weight black cardstock from my stash. I then spritzed the focal area quite heavily with water and sprinkled some Midnight Colour Shimmer Dust over it. I used a soft paintbrush to move the colour around and to 'mix' the Shimmer Dust and water together. I used the same paintbrush to pick up the colour from the really wet parts and flick it over the page.


Next I cut out the tags I wanted to use from the Perfect Tag Sheet. There were still plenty of tags left over to make another layout or some cards. I inked the edges of the tags with some Cobalt Archival Ink.


Next I added some stencilling using the Gridlock A6 Stencil and White Heavy Gesso. I love how when the gesso dried it had picked up some of the individual colours that make up the Midnight Shimmer Dust. It gave it even more of a grungy look.


I added a little more stencilling. This time I mixed up a little of the Midnight Shimmer Dust with water in a palette and painted it through the stencil on the page. It gave a really messy watercolour effect pattern which just added to the grunginess. 
Once the layout was dry, I layered on the tags and added some cogs and the light bulb using the Cog Globe Metal Die Set with the white cardstock.


I added my photo and a cool chevron from Charm's Creations. I finished by fussy cutting some appropriate words from the Be Yourself  Word Sheet, inking the edges with Jet Black Archival Ink and adding to the page. I used a black journaling pen to add some doodling to the die cuts as well as scribbly borders around the words to make them stand out more.


Thanks so much for stopping by the blog today. Make sure you keep an eye out as this layout will soon be available as a kit so you can create your own version of this layout.

Cheers
Belinda