For today's blog I let my imagination take me to a place of fantasy and beauty. Using the Flux and Foliage stencils to create some fantasy flowers to attract its winged lover. The Bee Arty stencils provide a wonderful avenue for challenging your creative mind to produce wonder journal pages or photo layouts. Enjoy the process.
Colour
Spray – Bubblegum, Caribbean Colourblast
colour sprays
Gesso – Bee Arty heavy primer 250ml white
Flux
A6 stencil
Cascading
leaves A5 stencil
Butterfly
A4 stencil
Sparkles
12”x12” cardstock paper (Fireworks collection)
Mica
powder – sunflower, cobalt, lollipop
Colourblast mica powder
Catalyst
silicone mini blades tool
Dina Wakley Acrylic
paint - (Lemon, Orchid, Syrup, Green, Olive, White, Orchid, Magenta, Fuschia)
Modge Podge
Dimensional Magic
Nuvo Crystal Drops
white
Silver Rhinestones
Moulding Paste
(texture paste)
Makeup sponges,
Paint brushes,
Silicone Spreader
Tool

Apply 2 coats of Gesso. Dry off.
First background layer - 2-3 green colours into paste through the Cascading
leaves A5 stencil over the entire page by tapping the
paste with a silicone sponge. Can add
some white Gesso to lighten the green paint.

Second background layer – Apply a second
spread of green colours through the Cascading
leaves A5 stencil – this time turn the stencil on
angles over the entire page again. Dry
off.

Third background layer – For this layer
apply Gesso through the Cascading
leaves A5 stencil again changing the direction of the
stencil to cover some of the gaps in the previous layers. Dry off.
Flowers – Create 3 flowers on
left hand side of page. Using the Flux
A6 stencil to create abstract flowers, mix quantities
of DW orchid (light shade), Magenta
(medium shade) and Fushcia (dark shade) into the moulding paste. Pounce the light shade through the stencil using
a makeup sponge. Repeat this process
using the medium shade then the darker shade in turn to add depth to the petals. Dry off between each pass.
Stamens – Mix some DW lemon
paint into a small amount of moulding paste.
Swipe a good amount of paint through the berry shapes on the Foliage
A4 stencil to resemble flower stamens.
Add one stamen to the centre of each flower. Dry off.
Use a stipple
brush to tap some textured lemon paste into the centre of each flower.

Add white dots
around the stamens and on some of the petals using the Nuvo crystal drops.

Add silver
rhinestones to the stamens and on some of the smaller petals using dimensional
magic. Use a paint pen to highlight
around the textured shapes.

Add spatters of
paint in DW fuschia and olive over the entire paint (not flowers). Dry off.

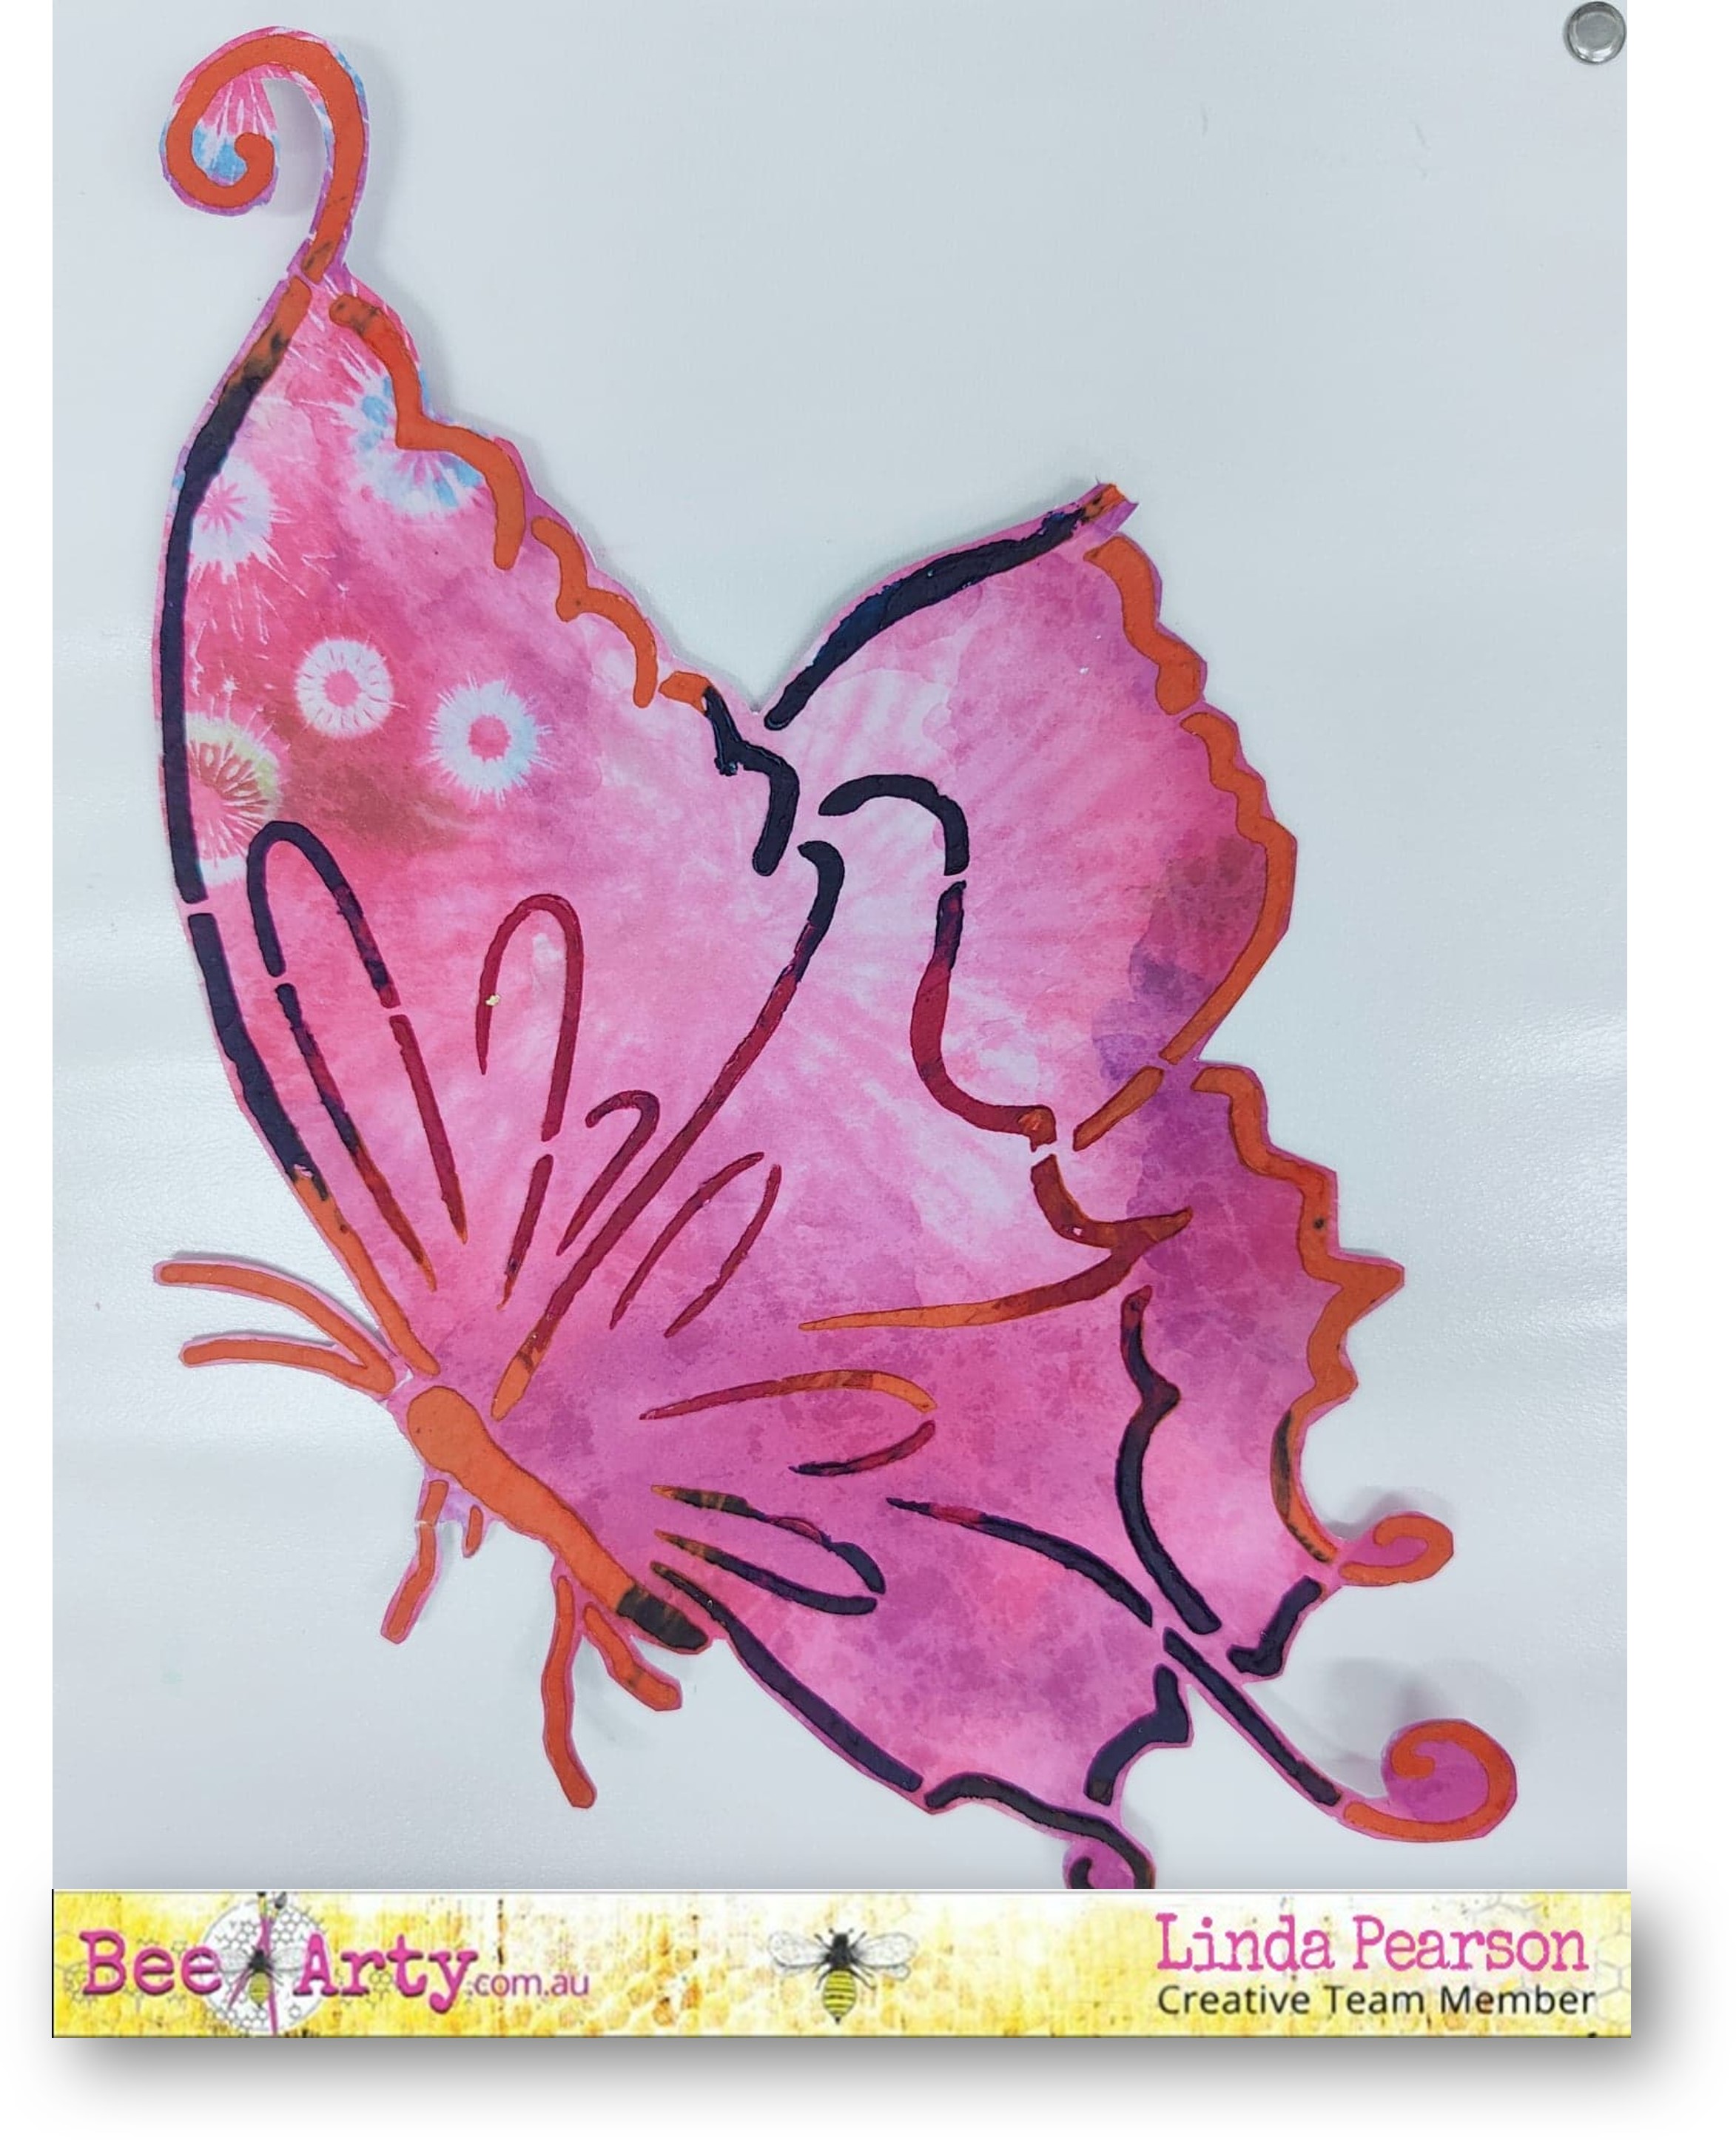
Butterfly – Use a
sheet of Sparkles 12”x12” cardstock paper as a coloured base to add Butterfly
A4 stencil. Mix small quantities of moulding paste, adding Mica
powder – sunflower, cobalt and
lollipop. Spread the 3 colours through
the Butterfly
A4 stencil. Allow to dry.
Spray some Colour
Spray in bubblegum and Caribbean to the butterfly shape,
spray with water to spread (Note: some
of the colour in the moulding paste outline will move also). Cut out the shape from the paper when completely
dry.
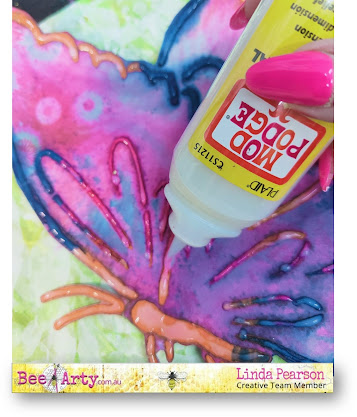
Add dimensional
magic and silver rhinestones over the textured shape to add shine and
dimension.

Adhere the butterfly
to the right-hand side of the page using mounting tape.
Add silver rhinestones to the butterfly with dimensional magic adhesive.
Outline the butterfly with fine black paint pen.
Add the sentiment
to the page and border to the page with paint pen.
Thank you for stopping by and hope this project has triggered your imagination to create your own fantasy page.
Bye for now from Linda

linda@yourcreativepalette.com.au