Sunday 29 November 2020

Forever & Always byTracy Jackson

                                                                  Morning Bee Arty Fans

Today I'd like to share a messy way of making a card - but ohhh so satisfying!!


I didnt really have any idea at all when I started to stamp images for this project ...(seems to be my theme ;-) )
But I did know that I wanted to use this stamp and because I feel its a little busy for me, wanted to keep it simple!
Stamp set called New Dawn


And then because I havent played with my Colour Artist Inks from Bee Arty for a while - it was time to find them and dust them off

I placed random droplets of ink on image then blew them around page with a drinking straw


Messy - and finally forming an idea....


Yes involves scissors and fussy cutting


Fussy cut in 3 stages
Inks used are Sunburnt, Grass and Citrus
I found a background paper from Love & Grace Collection that matched (normally I would find paper first then colour to match... but hey, nothing wrong with shaking it up a bit!!)
And finally stuck it all together, 
Quick, Messy and Fun


Until next time... Happy crafting

Friday 27 November 2020

'Game on Grandma' by Elisa Ablett


Hi Crafters, 

Elisa here from the design team with my latest inspiration project for you for this month, featuring the new collection by Tanya Froud, King of the Cave!

Tanya and I went away together recently for some self imposed 'time out' and created up a storm with our Bee Arty goodies. This is one of the layouts I created using the new collection, a mixed media layout with loads of colour and texture. We created the chess pieces together by hand drawing the bases and adding the crown and negative offcuts from the 'King' metal die.

I just love this photo of my mum and my youngest son playing chess together, the concentration and the sore losers are real, but I love that I captured this moment of them spending quality time together.

Let's take a closer look -


I continued on the circular themed design by adding large handdrawn scribbled circles with Black Soot Colour Artist Ink, die cut Wheelz with metallique waxes and stamping with 'Checkers' stamp set.

The centre of the layout features the 'Game on' Stencil from the King of the Cave collection and it was stencilled using the Deep Water Paste and one of the new fine Embossing Powders in Lime.

I added a bit of colour to the background using Colour Artist Inks in Mermaid, Soot and Barley. 


To create the title, I stencilled ink through the Game On Stencil and embossed and then I used the 
365 Alpha die to create the word Grandma from white cardstock, I then used Mermaid Colour Artist Ink to add colour to the title. 

Products from the Bee Arty Website : - 


Black modelling paste
Metallique Waxes - Prima
Black Cardstock
White Gel Pen
Black Ink Pad

Thanks for stopping by the blog today, make sure you visit the Bee Arty Hive group on Facebook to get more inspiration! 

Hugs

Elisa 


Wednesday 25 November 2020

Inhale Confidence Exhale Doubt by Ros Aggett-Madley

Hi, back with another art journal page.


Today I have used the Kind Heart Stamp for the focal point of my page.
I first stamped this, then sprayed over a light cover of water.  
Colour Artist Ink in Calypso, Lime, Mermaid and Citrus, and Bubblegum Colour Spray has been dropped into the water.  I let this pool for a bit and then mopped up the excess with paper towel.


After heat drying I went around the outline of the stamp with a black pen and added white to some of the gaps in the stamp.
A mask has been made with some paper towel to allow some stamping with the text from the Memories Stamp Set.  I filled in any missed gaps with some messy writing.


The title is from a Scrap FX rice paper sheet.


Hope you've all been inspired 💙


Tuesday 24 November 2020

Christmas Cards - With Karyn Schultz!

  Hi Bee Arty Lovelies!

It's Karyn here and today I have some Christmas cards to share with you made using lots of amazing products from Bee Arty! I have also used non-Christmasy supplies to create the cards. I'm always looking for different ways to use my supplies to extend their use and I'm really happy with how these turned out.
 
 
For this first set of 5 cards I've used stencils and metal dies from the Find Paradise Collection. You can also see a video of how I created this set of cards here.
 
For each of the cards I created a background on heavy duty 350gsm white cardstock. I also used the same cardstock to create the card base. I used Kraft cardstock as a mat.
 
For the first card I used the Foliage A4 stencil and Bling Colour Paste to create a "tree-like" image. I just applied the paste through the berry part of the stencil to achieve this. I then added a sentiment using a word stamp, versamark ink and Bling Colour Embossing Powder.
 
 
 For the next card I used the Foliage A4 stencil and Bling Colour Paste to create a different "tree-like" image. I just applied the paste through leaf part of the stencil to achieve this. I then added a sentiment using a word stamp, versamark ink and Bling Colour Embossing Powder.
 
 
For the next 3 cards I used the the Leaves of Paradise metal die set with Kraft cardstock to create 3 "tree-like" images to add to the card fronts. I then added a sentiment using a word stamp, versamark ink and Bling Colour Embossing Powder. I then added pearls to embellish the trees. Lastly I used a clear Shimmer Pen to make the trees sparkle.


 For this next card I used the Kind Heart stamp to provide the focal point for the card. This mandalla looked so Christmasy to me.
 
 
I started by stamping the Kind Heart stamp with versamark then using the Taupe embossing powder from the Elegant Rose embossing powder bundle. I then added an embossed sentiment, gold thread and some rhinestones for sparkle.


Thanks so much for stopping by

Crafty Hugs xx


Monday 23 November 2020

"Heartfelt" by Anita Enright

 Hi Everyone


Wow!! I can't believe it is nearly December. 2020 has been such a weird year and challenging year for all of us in one way or another, some of us more than others.

A large part of my immediate family were in Melbourne's lockdown and where their new normal is coming in to affect I love seeing the experiences they are all having to bring some normality back to their family.

For today's share I chose to use some photos of my gorgeous nephew Thomas choosing some flowers for his Mumma.  The way he touched the petals in a couple of the photos and then choosing a bunch to give to his Daddy to pay for is just adorable.  I hope I have done them justice.

 This layout just brings a smile to my face 😄


To start my layout I work out approximately where i wanted to use the shimmer dust and then applied a layer of Heavy White Gesso to the white cardstock.  Once the gesso was drive I sprinkled a small amount of Duke Shimmer Dust to the cardstock and lightly sprayed with water.  

Remember to apply shimmer dust lightly.  It is easier to continue to add more than apply too much to start and then not be able to bring it back.

Next I stamped a heap of flowers using an archival black ink using the flowers from the Floral Delights Stamp Sets No. 1 and No. 2.  I used the Colour Blast water colours in Scarlet however you can colour them with whatever medium you have.  Artist Inks from Colour Blast work equally as well. Once you have coloured them the way you want (I left some just white) fussy cut them out.


Once the Shimmer Dust has dried and you have it to the shade you like, using the Meridian Stamp Set stamp some circles to the cardstock. I added some splatters of red using the Scarlet watercolour pan.

I then mounted my photos on some chipboard offcuts and attached them to my page.

Next, using the Honeycomb metal die and the Flowers metal die, cut out a couple of flowers and one of the honeycomb.  Cut the honeycomb in a couple of pieces.

 
Arrange the fussy cut flowers and die cut flowers and honeycomb on to the page, layering them under the photos, mounting some on foam tape/dots and layering over the edges of the photos.
Next I stamped one of the bees and dragonflies on to the page from the Make me Happy stamp set, and the small sentiment from set as well.
To finish I coloured a chipboard title with my shimmer cubes, glued it to the page and added a gorgeous red Charms Creations heart.

Check out the finished page below and another close up.


Products Used
Watercolour Pan - Scarlet
Shimmer Cube - Stormy Weather
 
 
Thank you all so much for stopping by.
Please make sure you take the time to enjoy some 'me' time and create. There is nothing better for the soul.

Ciao for now,
Anita
xx


Friday 20 November 2020

Confidence by Tracey Campbell

 Hello everyone, Tracey Campbell here with you today to share a creation that I have done where I have challenged myself to use some of my leftover Trendsetter collection and to create a scrapbook page without using my paper trimmer!! This means I can use the leftovers as is or use my scissors only!!

I started by gathering all of my leftovers from the Trendsetter collection, I've used this collection a few times now so I was actually shocked with how much I still have left. As you can see I had a wide variety of different sized pieces.

 
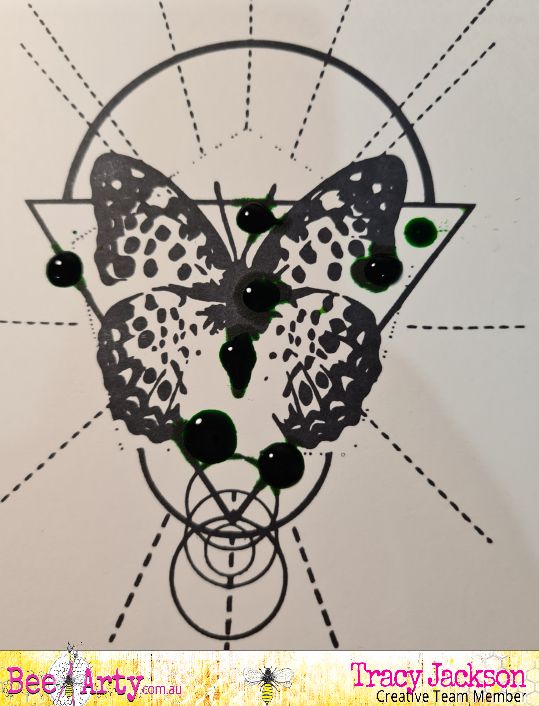
I didn't have a full 12x12 sheet left so I need to create a base so out came a 12x12 piece of white cardstock and Colour Sprays in Bubble Gum, Violet and Carribean, where I used the straw from the bottle to create splatters on the cardstock.

I didn't feel like waiting for the Colour Spray to dry today so I rolled some paper towel over the top of the Colour Spray to soak up the excess splats. Hint: When you roll a tube of paper towel over a liquid it absorbs it and doesn't smudge the shape of the ink, it also dilutes the colour so that it isn't as vibrant.

Next I used my first piece of left over Trendsetter paper to my cardstock. I adhered a 9.5 x 30.5 cm rectangle down, postioned about 4.5 cm from the right-hand side of the cardstock. I then used some Blush Colour Paste and spread it through the Laced Stencil with a pallet knife.

In the photo below you can see the positioning of the patterned paper and the stencilling.

Next I riffled through my other left over pieces to find some fussy cut lace boarder, a striped strip and a smaller rectangle of 22 x 8 cm to mat my photos. I adhered them as you can see in the photo below. I chose to use two black and white photos that are 10 x 7.5 cms and place them stacked on top of each other.

Right so far I have not used my paper trimmer and I plan on keeping to that condition of my self challenge... so I grabbed my scissors and fussy cut the flowers that I had remaining on my left over pieces of Trendsetter.

I then adhered the flower clusters to my page.

From the cut-apart sheet I cut out the words "Looking Good & Feeling Great" and "The Most Beautiful Thing You Can Wear is Confidence" and attached them to the page. I picked these words, which I would normally use for my daughters and not myself, as I like these photos (not often I say that) of myself. My make up in the photos, including the fake eyelashes was done by my 13 year old daughter!!

Finish off by adding a fussy flower cluster to the top of the title.

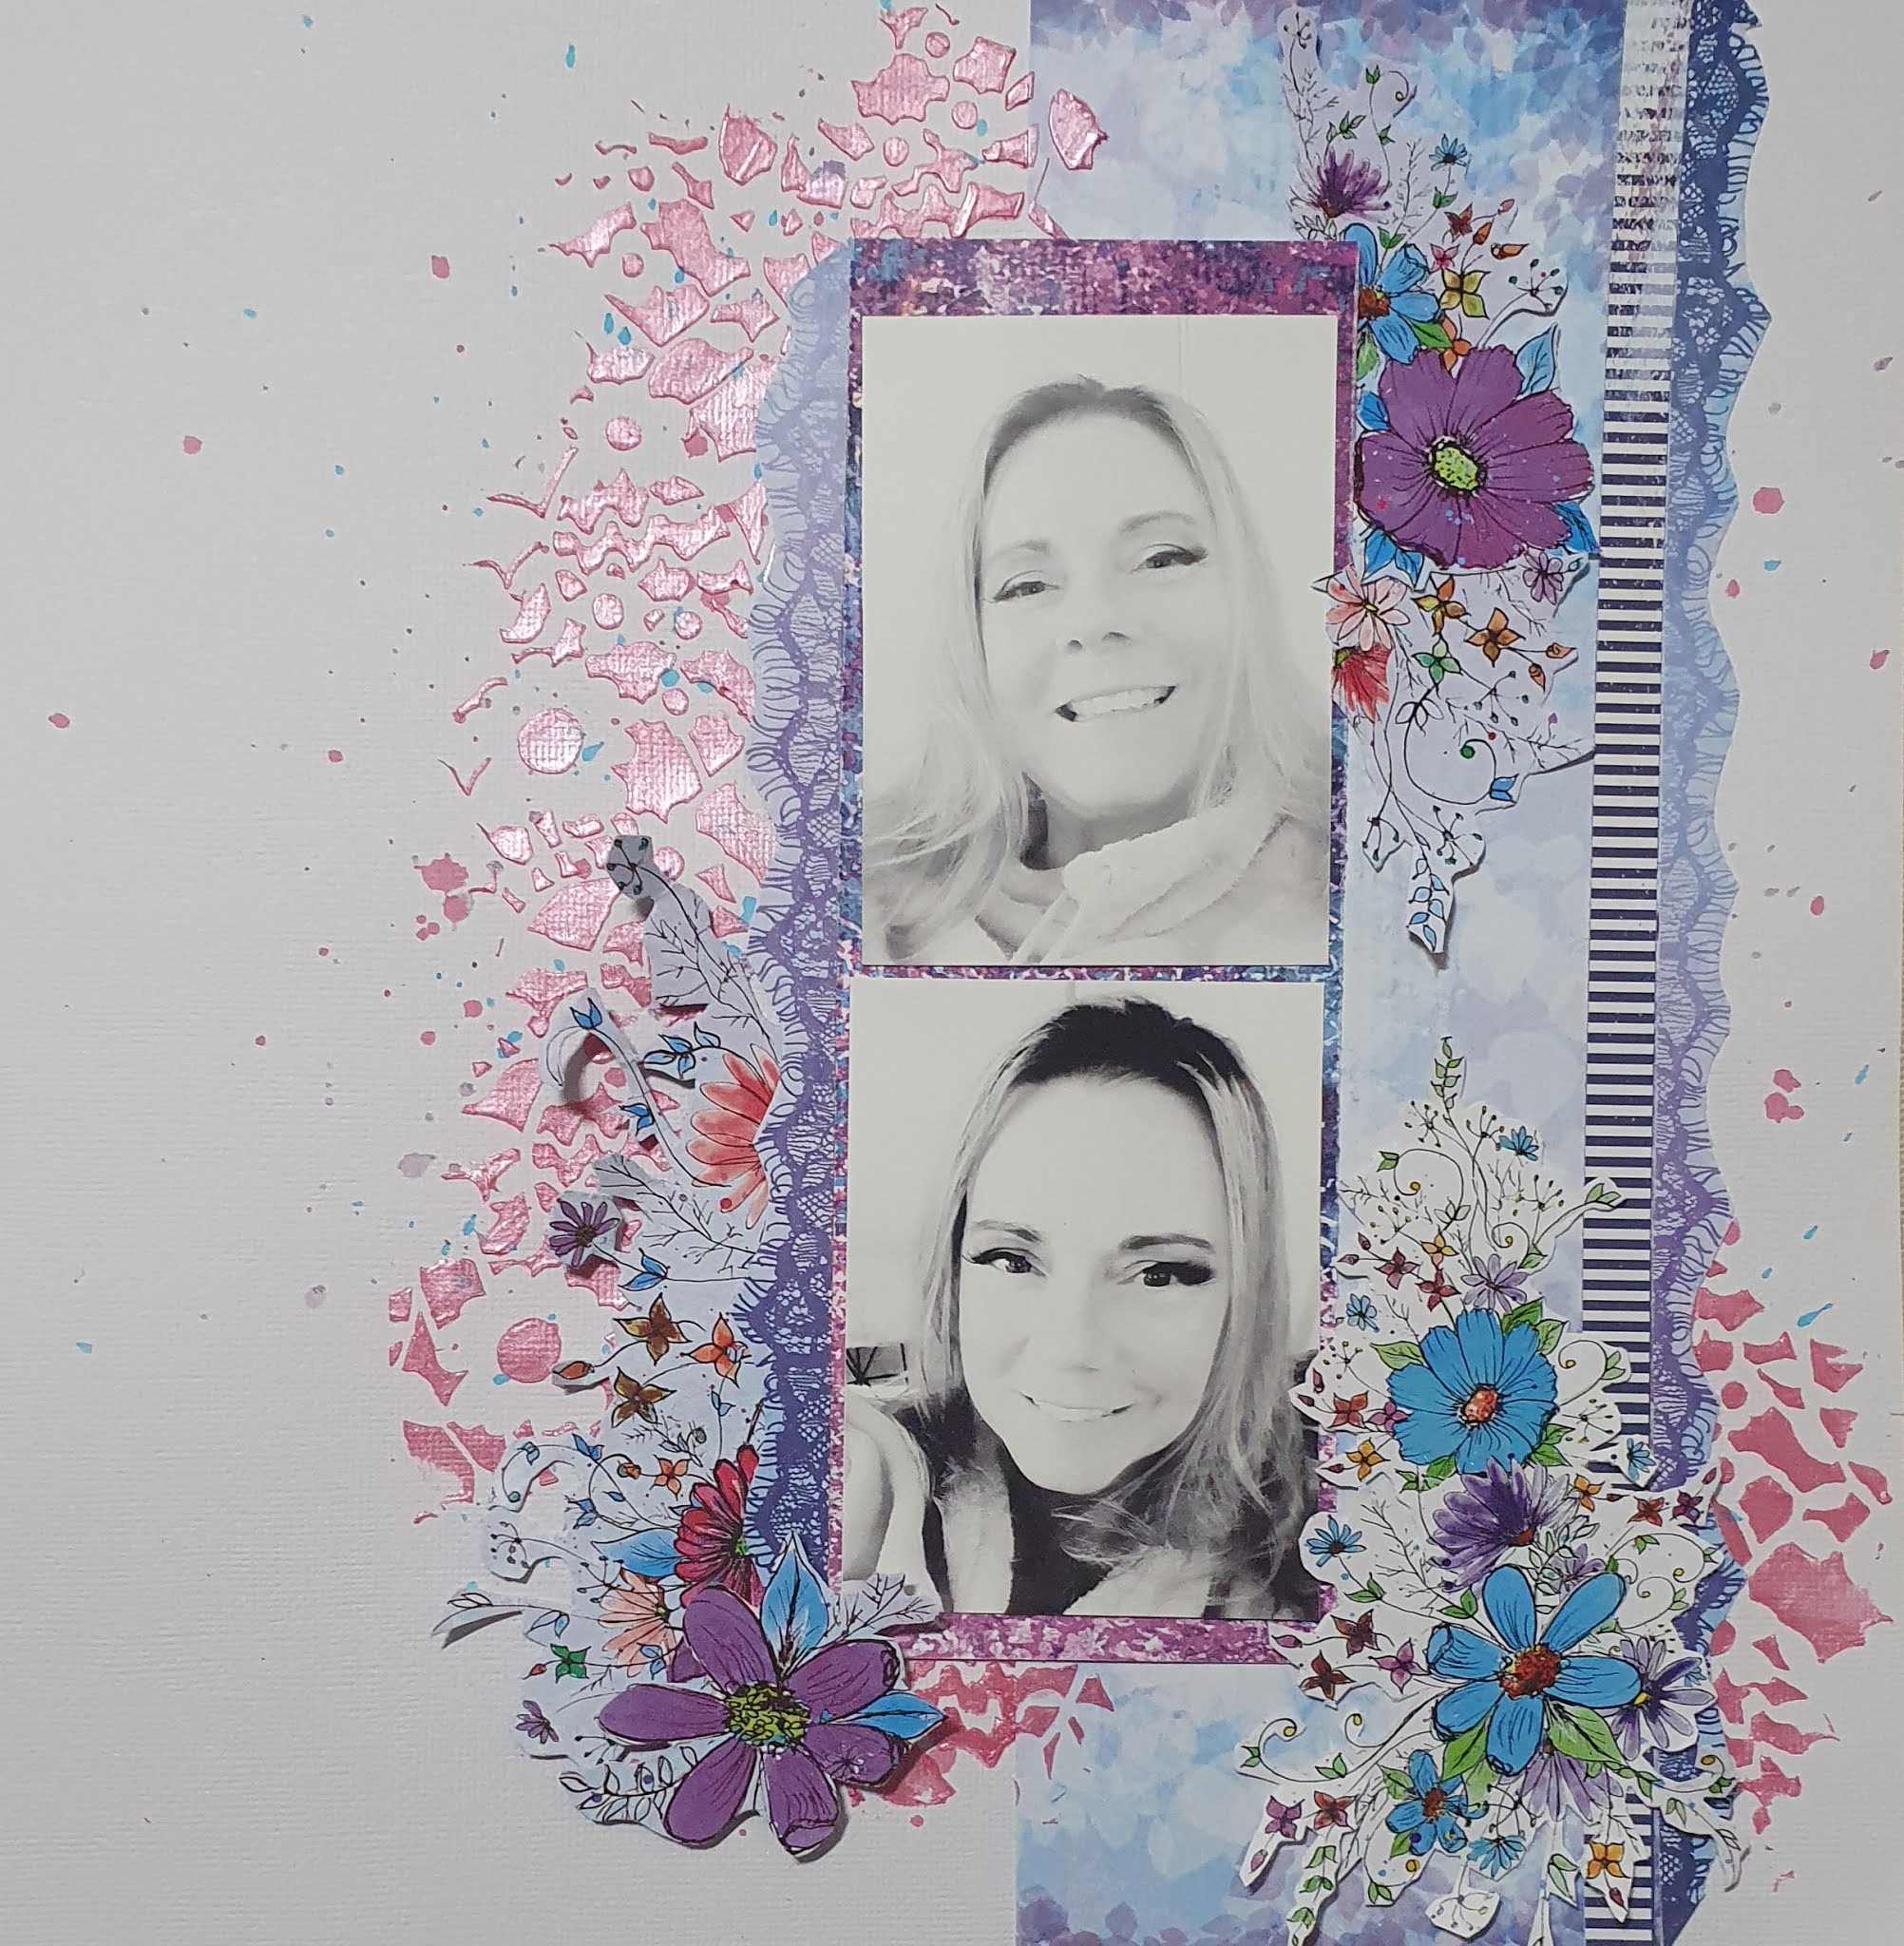
Here is the final layout, I actually stuck to my challenge and I like how it has turned out.

Thanks for popping in and I hope that you I inspired you to pull out some of your older collection and challenge yourself.

Hugs

Tracey