Monday 28 January 2019

Fly by Suzanne Franin


Hey Everyone Suzanne here

Here's a little project I did using the Colour Blast Colour Pastes 

Make sure you visit the Colour Blast Blog and see all the awesome creations from the Design Team and look out for all the new products that are coming out
And don't forget we have a Colour Blast Kit Club make sure to check that out as well


I started by using the Heavy White Gesso on this timber frame giving it a good coat


I used the Colour Paste in Sunshine, Tangerine Dream and Blush trying to blend each one after the other (not that successfully but I think it still looks good) through this flourish stencil


After the paste was dry I used the string to wrap around the frame in every angle I could go 


I painted some paper clay leaves with some Colour Shimmer Cube Apple of Eye (are no longer available but you might find some online stores still stock them)


I just got this Colour Spray Carribean and it's so nice- it has a matte finish but it still pops 
I sprayed it onto this paper clay filigree 
I love the way it was depth it went into the grooves and stayed darker
I then stuck the quote onto it 


Added a few different flowers I think then end one is Prima and the other two are Little Birdie Crafts
You can see the paper clay leaves sticking out of the sides of the flowers  


The butterfly was a photo I found on the internet and just loved it I printed it out then fussy cut around all the white it had
I folded the wings up so it looks like it was flying


I then glued the butterfly to a metal ring that has flowers all the way around


I love this flower from Little Birdie with the Smile cabochon in the middle so I made the butterfly fly to that and used some metal leaves off to the side


Thank you for visiting and I hope you come back soon x

Thursday 24 January 2019

Best Friends Forever by Suzy Loudon

Hello everyone. Today I'm sharing a bright summer layout...perfect for our hot summer days. 


To begin my layout I stamped flowers using the Michelle Grant Floral Delights 1 & 2 stamp sets with black Stazon Ink onto watercolour paper.


I then randomly painted them with Colour Artist Inks. I used Oasis, Mermaid, Lime, Slipper, Calypso & Cranberry. I didn't worry about going outside the lines as I was going to fussy cut them out.


I tore the edges of my paper before sticking it down onto black card.I then randomly stamped using the Michelle Grant Stardust Butterflies Stamp.


I then did some random paint strips using a big wet paintbrush in Oasis  Colour Artist Ink. Then on top with Mermaid Colour  Artist Inks.


I painted my title in Heavy Black Gesso.

I assembled my page adding some thread, die cuts and art stones. To finish off I sprinkled watered down Heavy Black Gesso.


A few close ups.


Thanks for looking.
xxx Suzy


Monday 21 January 2019

Product Education Video by Cindy Porter - Colour Pastes

Hi Colour Blast Fans

 Today I would like to share with you all my first 'Product Education Video.'
This video is about the basic uses and care of our Colour Pastes.


I hope you find this video both informative and useful.  If you would like to follow our range of 'Product Education Videos' - subscribe to the Colour Blast You Tube Channel here: https://www.youtube.com/colourblastaust


Happy Creating!


Friday 18 January 2019

Shine Bright by Michelle Henderson

Today I've gone to the dark side.....dark paper that is😁

I have a bundle of Colour Pastes I used in this one. All the warms, plus purple and gold to weld it all together 😍
In all I used Apple of my Eye, Bling, Fire Engine, Royalty, Sunshine and Tangareen Dream.


I spread some directly on to cardstock with my palette knife and stamped with some script and background stamps while it was still wet. I stamped directly into the paste, then on to the cardstock to stamp the excess off. I only did 2-3 colours at a time and dried them off before moving on to the next colours.


Loved how it looked once it was all dry!


Then I used my Gold Shimmer Brush Marker to colour my chipboard,  but I found it wasn't quite gold enough,  so I also used the Colour Shimmer cube in Bling to strengthen it. It was sunny while I was doing it and I kept getting distracted by how beautifully the paint sparkled in the sun.


I also used the same pen to splatter a little around the edges of my background mainly, but also a little on top of the dry pastes.
When I was adding my photo it was hard to know where to put it so as not to cover it too much!

So this is what it ended up like...


And here's a couple of close ups too.


Thanks for checking it out!


Wednesday 16 January 2019

"Right Here" scrapbook layout by Sue Plumb


Hi everyone!
Sue Plumb here to share my latest design team project with you. Today I have a mixed media scrapbook layout to share that I created using my very favourite Colour Blast product - Colour Artist Inks. I just love the bright, vibrant colours of the inks which were perfect for pairing with this photo of my boys with their friend. 


I began my page with a sheet of heavy weight white cardstock and a couple of Colour Shimmer Cubes - Blush and Apple Of My Eye. I wanted to create a simple watercolour background using a couple of contrasting colours.
(Unfortunately the Colour Shimmer Cubes have now been discontinued, but I am sure there are many of you who still have them in your stash waiting to be used. As an alternative, you could use Colour Shimmer Sprays in the same colours applied with a brush.)


To use the cubes, I first sprayed the surface liberally with some water, then left them to moisten for a few minutes. I then used a round brush to apply the colors over my background, starting with Blush applied to a few random areas, then moving onto Apple Of My Eye to fill in the gaps. I used extra water to keep the cube surface wet, and used a clean, wet brush to help the colours move around the page. 
It is important to ensure the pink is dry before moving onto the green, and take care not to overlap them, as this product is a watercolour and WILL reactivate (and pink + green = mud)

Once the shimmer cubes had dried, it was time to start applying some vibrant colour using the Colour Artist Inks. (As the inks are flat colours, I planned to overlap the shimmery colours from the cubes to reactivate them and supply some extra sparkle.) 


I started with Oasis, Cider and Slipper; and simply applied the ink like a watercolour paint using a small round brush. I dipped my brush into the water a couple of times as well, just to add some extra moisture to the page and help the inks move more. I applied each colour one at a time, tipping the page up vertically to create small colour runs, before drying it off. 

I then went back with more Colour Artist Inks (Citrus and Spice) to layer some extra colour over the top. I followed the same process as with the previous colours, tilting the page to create small runs and drying between colours. 


The next step in my process was to add some depth to my page with some stamping. I used the 'Sky of Stars' background stamp from Viva Las VegaStamps, along with black StazOn ink.


At this point I wanted to add some subtle texture to my page, and I also wanted to tie in the subtle green colour I had began my page with; so I used Apple Of My Eye Colour Paste, along with a stencil to add some whimsical style tree branches. (You can see the difference in the paste colour in the process shots between the wet vs dry product - it's much deeper and shimmery!)


After the paste had dried, I wanted to define the focal area of my page, so I added some black spotted tissue paper and some torn pieces of washi tape. I used a small amount of gel matte medium to apply the tissue, and I love the way the paper then "disappears" into the background, just leaving the pattern visible. 


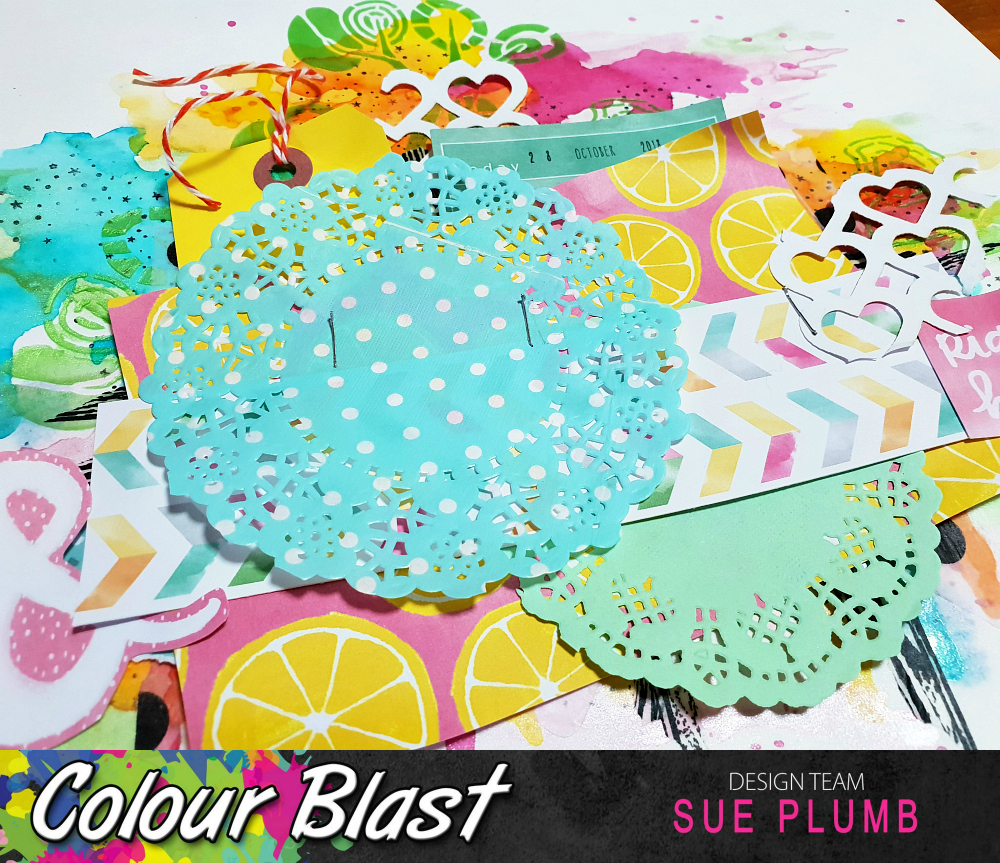
Now it was time for some papery layers. I wanted something bright to match my bright inks and photo, and I found some old Amy Tan papers in my stash that worked perfectly. I also added a couple of coloured paper doilies, a tag tied with twine and some left over pieces of a heart cut file. I secured all my layers in place using a stapler. 


To finish off my page I adhered my photo, a small journalling tag, and a few pieces from the coordinating die cut ephemera pack. 


I then added some small splatters of Calypso Colour Artist Ink. (I know that I usually reach for Soot, but I felt black would be too harsh in this case.)


You can see in the close up how the layers of colour work on top of each other to give the background depth.


I love how the small runs of inky colour extend out below the paper layers.


I couldn't resist but include the cute little acetate pineapple on this page (I had been hoarding it for FAR too long!)


That's all from me today. I hope I have inspired you to get creative - maybe play with some bright colours or pull out some inks and try an easy background like this too?
Until next time, happy scrapping! 


Monday 14 January 2019

Graduation by Suzanne Franin


Hey Everyone

This weeks project is of my son's Graduation from SEDA 
He did so well, it was the best decision we made to send him there for his last two years of High School
He excelled at all that he did and put 100% into everything
His teacher even said on stage in front of the whole Year 12 classes that Jack was the best student he'd taught in the 7 years that he had worked at SEDA 
So needless to say we were very happy and proud parents

Make sure to check out the Colour Blast Blog and the Shop where you will find links to Facebook and Instagram so you won't miss out on anything that's happening


I started with some Colour Blast Colour Artist Ink Spice drips on the paper (Kaisercraft Time Machine it's embossed so it has parts that the ink won't stay on)


I used the Colour Shimmer Dust Midnight which I made into a spray bottle on the background paper as well and then sprayed some paper clay embellishments you can just see a little bit of shimmer in the photo but if you could see them they have so much shimmer


I had a little dot stencil that I used randomly with the Colour Paste Stormy Weather


I added an Art Pebble to the basketball to give it dimension


I had a Flair Button that I thought was perfect for the page so I added it to a bottle cap but it left a gap so I filled in the gap with some Zinc glass beads and added some wings


Awhile ago I had won a pack and it had the word #swag in it so I coloured it with the Colour Artist Ink Spice that was left over on some paper towel that was still wet by patting it till it was all coloured 
I added some metal accents for some interest and dimension


And I added this Make a Difference disc because that's what I think Jack will do with his life.

Thank you for visiting and I hope you come back soon x