Showing posts with label Colour Artist Inks. Show all posts

Thursday, 2 February 2023

Tough as, by Amanda Hartmann

Hello Bee Arty fans!

My turn to share today... "Tough as"...

It features:
1. A mixed media background
2. Bee Arty die cuts
3. Embossing powders for the title letters
4. Coloured embellishments

Read on to see the links to the products and see some close ups...


1. Mixed media background:


White modeling paste through the A4 Linear stencil from the Chit Chat - Kit collection

I then used Colour Mica Powder in Deep Water and Apple of my Eye - mixed with water and smooshed, splattered and painted onto the background.


2. Bee Arty die cuts


I made and added some die cuts using Bee Arty Dies:
Keylock - Metal Die from the Rustic Blooms collection
Moon Rock - Metal Die from the MoonShadowns collection, and
Flower Stems - Metal Die from the Bee the Sunshine collection.


3. Embossing powders

Heat embossed my title chipboard letters with:
Apple of my Eye Embossing Powder
Teal sparkle from this Embossing Powder Bundle


4. Coloured muslin


I coloured the muslin to match the layout using Colour Artist Dye Ink in Citrus and Mermaid colours.


Saturday, 8 January 2022

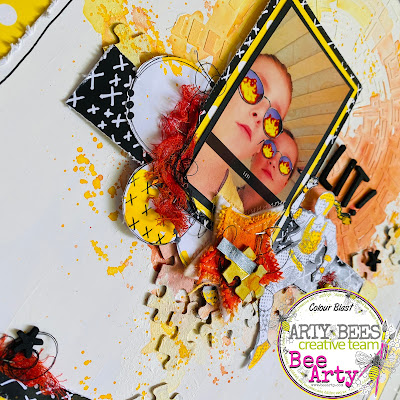
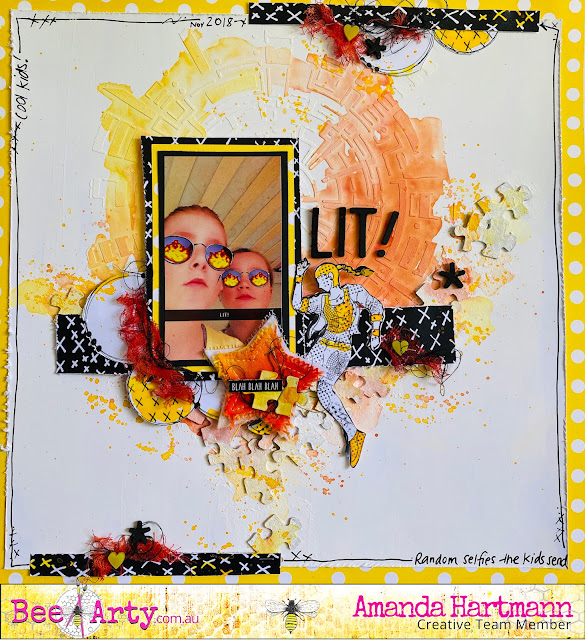
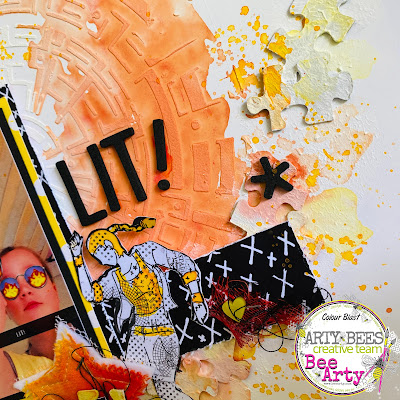
"Lit!" by Amanda Hartmann

 Hello Bee Arty fans!

Welcome to January 2022! Hopefully it will be totally "Lit!"


Today I am sharing a fun and quirky page - full of colour and technique!


I created a mixed media background, and finished with some papers fussy cut from the  Electric Dreams - Mini Collection Paper Pack.

The background:
If you want to see how I created the background - with Gesso, stenciling, puzzle pieces and Colour Artist Inks - you can watch this video: https://www.facebook.com/amanda.hartmann1/videos/10160036158493066/
This was a Facebook live video and I ended up with a spare background - finally pulled it out, and finished a page! Please skip the first 5 or so minutes on the video where I am mucking about, and then see how I create this mixed media background.

Products used for the background:
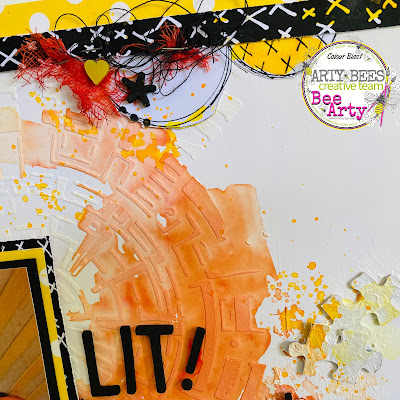
  • The stencil used is: Interwoven - A4 Stencil – Bee Arty - one of my favourite stencils of all time - I used modeling paste through the stencil
  • Heavy white Gesso - gesso'd background and more gesso over the puzzle pieces.
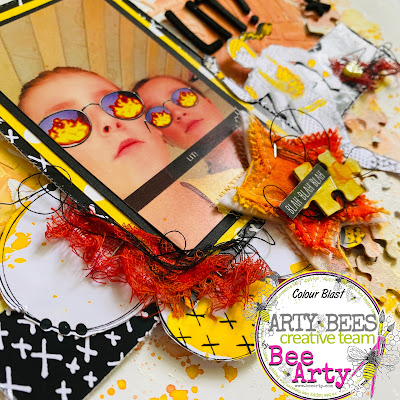
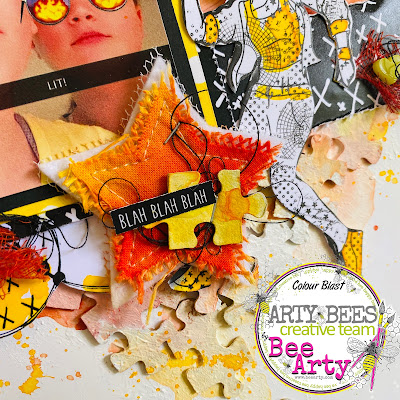
  • Added colour with Colour Artist Inks - I used Citrus, Cider and Spice. - used to colour puzzle pieces, stenciling, the Charm Creations star, to paint some fussy cut elements and to add splatters. Also used to colour the muslin.
Here are some close ups to see the details!


Thanks for looking,
Amanda


Monday, 21 June 2021

A Colourful Life! by Linda Pearson


Hi Bee Arters ... today I am sharing a ‘by chance’ page I created recently.  Working on another project I had a quantity of .. colourblast colour paste left over so applied the paste through the Beautiful mess stencil in my kraft paper journal.

Bee Arty Products used:

-   Beautiful mess – stencil from the Arty Farty collection designed by Michelle Grant

-   Colourblast Colour paste - Rose Petal

-   Colourblast Colour artist inks – slipper, barley, marine, calypso, grass

-   Colourblast Shimmer dust  – duke (added to grass ink with water to make a spray)

-   Craft Powder Spoon

Kraft paper journal
Water spray
Black watercolour pencil
Acrylic gloss spray – white
Pipette


Later after the paste had dried, I decided to add some ink colours to the page.  Firstly, I sprayed the Kraft paper with water then added some drops of the Colour artist inks (slipper, barley, marine, calypso), drying off each colour in turn.  I used a paint brush to spread the ink over the surface.  I mixed grass Colour artist inks with water and some Shimmer dust duke to make a shimmer mix with a pipette over the page.

The colours dried a little darker due to the Kraft paper.

I added some Acrylic Gloss spray paint lightly over the page.  Using the black pencil, I outlined the wording to highlight then added water to the pencil to blend the pencil and anchor the text.


Thank you, it was a pleasure sharing this simple page with you and look forward to seeing you next time!


Linda Pearson

https://www.yourcreativepalette.com.au

Monday, 1 February 2021

FREE SPIRIT! by Linda Pearson

Today's journal page was inspired by a recent workshop Paige presented.  I have mixed it up a bit using Colour artist inks however, I chose to use some elements from the upcoming Bohemian Bliss collection designed by Sue Smyth. This journal page can of course be adapted to include photo images for a scrapbook layout.

This collection will be released in mid-February and you can order your kit now using this link - 

 Bee Arty Kit Club


The Free Spirit journal page is a culmination of alcohol inks, stencils, stamps and dies some of which belong to the upcoming Bohemian Bliss collection designed by Sue Smyth.  The title is also a nod to the 'spirit' relating to the use of Isocol rubbing alcohol (available from Chemist shops).

Bee Arty products used in the project:
Basic kit requirements:
  • Yupo paper 
  • palette knife 
  • archival black ink
  • light green, deep green, white and black acrylic paint 
  • exacto craft knife
  • Isocol rubbing alcohol
  • die cut machine
  • silicone sponges (make up)
  • foil card (rose gold, blue, white)


A selection of Bee Arty products used in this project, refer to the weblinks above.


Pour some Isocol rubbing alcohol into the wells of the small palette (Darice 6 well paint palette)
, add a few drops of each of the Colour artist inks (citrus, marine, grass, slipper) in each of the wells.  
Sprinkle some Isocol over the Yupo paper then using the dropper from each of the colours, drop the Colour artist inks over the Yupo paper.  


      Use the puffer tool to spread the alcohol inks around the page.  Add more ink and Isocol as required.


Leave the Yupo page aside to dry organically (no heat tool).


Apply a good amount of Gesso on to the cardstock, add a couple of drops of Colour artist inks in Grass to the Gesso then randomly spread the gesso and ink over the page.  The finished layer will be very light in colour. dry off completely.


Use the silicone sponge to add some deep green and white paint onto the sponge then apply the paint (don't over mix the paint to get a variegated effect) through the Leafy A5 stencil on to the White Cardstock 350gsm.  Add some of the light green through the stencil to create textured effect.  Dry off.


Apply the stencil over the entire White Cardstock 350gsm using white paint through the Leafy A5 stencil.  Dry off ... see image below.


Apply the Bokeh clear stamp set with archival black ink around the page.


Apply clumps of Colour paste (Singin in the rain), with a palette knife, through the stencil (Bohemian Bliss collection) across the page.  Dry off.
Repeat the process using the Tangerine Dream Colour paste across the page close to the blue flowers.


Once the Yupo paper and inks are completely dry, cut the paper into several strips of different sizes.


Cut small strips of Rose Gold of foil card, paste the foil card to the back of the inked paper.  Glue all the strips to the back paper, Art Glitter Designer Adhesive.  Add the script stamp across the page with archival ink.

Using the flower die cut from the Bohemian Bliss collection to cut out lots of flower shapes in the 3 colours (blue, rose gold, white).  Glue bunches of flowers across the page.


Cut the Free Spirit words from the Bohemian Bliss collection word sheet.  Back the words onto an off cut of inked page and rose gold foil.  
Add spatters across the page in black acrylic paint.
Using the Life of colour pens in black to outline around the inked strips and flowers.  Distress the White Cardstock 350gsm edges with archival black ink with blending tool.


Project created by Linda Pearson
linda@yourcreativepalette.com.au


Tuesday, 5 January 2021

Sparkle! by Linda Pearson

Happy New Year Bee Arter's ... welcome to a bee-utiful start to 2021.

We could all do with a bit of sparkle at this time of year so I have incorporated some papers from the Trendsetter collection by Michelle Grant to create a mixed media journal page.  There is also opportunity for 'scrappers' to convert this page into a photo layout by adding an image or two to compliment the sentiment and cutout.


Step by step process for creating the 'sparkle' journal page follows:


Prepare the White Cardstock 350gsm page by applying a thin layer of Bee Arty white heavy gesso. 


Add 5-6 drops of Colour artist inks (3 colours; marine, slipper, berry) into 2 separate small amounts of gesso mix into pastel shades of colour.  Please note: berry and slipper were mixed together in gesso to brighten the colour.


Loosely apply the pastel (blue) gesso into clusters over the page, dry off, then apply the pink gesso to fill in the gaps, it's okay to blend some colour to completely cover the page.  Dry off.


Applying the Lined A5 stencil to the page.  Firstly, add more white gesso to the previous left over pastel colours.  Using a soft silicone sponge, lightly apply blue pastel gesso randomly over the pink areas of the page.  Then apply the pink pastel gesso over the blue areas as before.  Dry off.


When creating journal pages I like to add lots and lots of layers, this helps to build up the layers and adds textural element to the page.
The next step I added another quantity of gesso to any left over from the previous step                    (I mixed the two colours together and loaded up with white gesso to make a very light hue).  
Apply the Lined A5 stencil again, this time all over the page in a random and loose fashion.


        whole page after stenciling                                                    detail image of stenciling


Once the stenciled layers are dry, now is the time to add some collage papers.  In this instance, after I had fussy cut out the girl from the Fashionista - 12"x12" Scrapbooking Paper.  
Tear a couple of large strips of the heavy coloured side of the paper as well as a strip from the lighter side of the sheet.  
Adhere the strips of paper to the background using matte medium or glue.


Adding some decorative stencils - 
I like a more textured look so I added a little texture paste to the heavy body gesso.  Apply sections the Starry Night A6 stencil  in several places over the page.  Dry off.  
Next apply sections of the Scripted A5 stencil randomly over the page also.  Dry off.


The next layer on the page is to add depth of colour to tie all the layers together.  I used colours reflected in the Fashionista - 12"x12" Scrapbooking Paper;  violet, magenta and          cobalt blue.
Randomly scrap the individual colours over the page with a palette knife.  
Ensure the colour is scraped over the stenciling layers to create depth in layers.


Once again, using the Starry Night A6 stencil apply some Colour paste (singing the blues) over the page (being mindful of where the girl cut out will be placed on the page, add blue stars around the cutout placement) with a palette.


Dry off the Colour paste,  
Fussy cut the fashonista girl from the Fashionista - 12"x12" Scrapbooking Paper.  
Add strips of mounting tape to the back of the cut out then add to the page.  


Use a black fineline marker to highlight the shape to help the image stand out against the background colour.   I felt the cutout still needed more depth from background so I added water colour pencil in french ultramarine blue then smudge the outline with water to blend out the pencil.


Add sentiment to the page from the Sparkle - 12"x12" Scrapbooking Paper Word Sheet, again I added mounting tape to the back of the words.  Added some payne's grey paint to the edge of the word strips.


List of materials used  

Fashionista - 12"x12" Scrapbooking Paper designed by Michelle Grant for the Trendsetter collection

   https://beearty.com.au/products/fashionista-12x12-scrapbooking-paper 

Sparkle - 12"x12" Scrapbooking Paper Word Sheet  - designed by Michelle Grant for the Trendsetter collection

   https://beearty.com.au/products/sparkle-12x12-scrapbooking-paper-word-sheet

Lined A5 stencil - designed by Michelle Grant for the Grateful Heart collection

   https://beearty.com.au/products/lined-a5-stencil

Starry Night A6 stencil - designed by Michelle Grant for the Grateful Heart collection

   https://beearty.com.au/products/starry-night-a6-stencil

Scripted A5 stencil - designed by Michelle Grant for the Love and grace collection

   https://beearty.com.au/collections/stencils/products/scripted-a5-stencil

Bee Arty white heavy gesso

   https://beearty.com.au/collections/mixed-media/products/gesso

 Colour artist inks  -  marine, slipper and berry

   https://beearty.com.au/collections/mixed-media/products/colour-artist-die-ink

 Colour paste – singing the blues

   https://beearty.com.au/collections/mixed-media/products/colour-paste

 White Cardstock 350gsm 10 pack - 12"x12"

   https://beearty.com.au/collections/tools/products/white-paper-12x12-scrapbooking-paper


Thank you for joining me in this post and look forward to seeing your interpretations  ... see you next time!

Linda Pearson

linda@yourcreativepalette.com.au