Monday 23 May 2022

ALICE’S TEA PARTY by Linda Pearson


Today I have created a journal page using the Tea Time in Wonderland mini paper collection designed by Sue Smyth.  I went a little crazy fussy cutting all the images from both cut out pages in this collection.


Tea Time in Wonderland A4 cut apart sheet

Archival Ink Pads in Hickory Smoke and Plum

Blending Tool

Liquid adhesive

Mounting Tape

Madhatter’s hat image accessed from Google Images, enlarged and printed onto A4 paper, 2 copies

White Paint Pen


Cut out the printed hat image then trace onto the Tea Time scrapbook paper.   Cut out scrapbook paper with the traced hat image.

Cut out the hat band section then trace onto pink diamond (reverse side) scrapbook paper.  Cut the band from the cardstock paper.


Add shading to the Madhatter’s hat shape with Hickory Smoke and blending tool.

Add shading to the band with the plum archival ink and blending tool. 
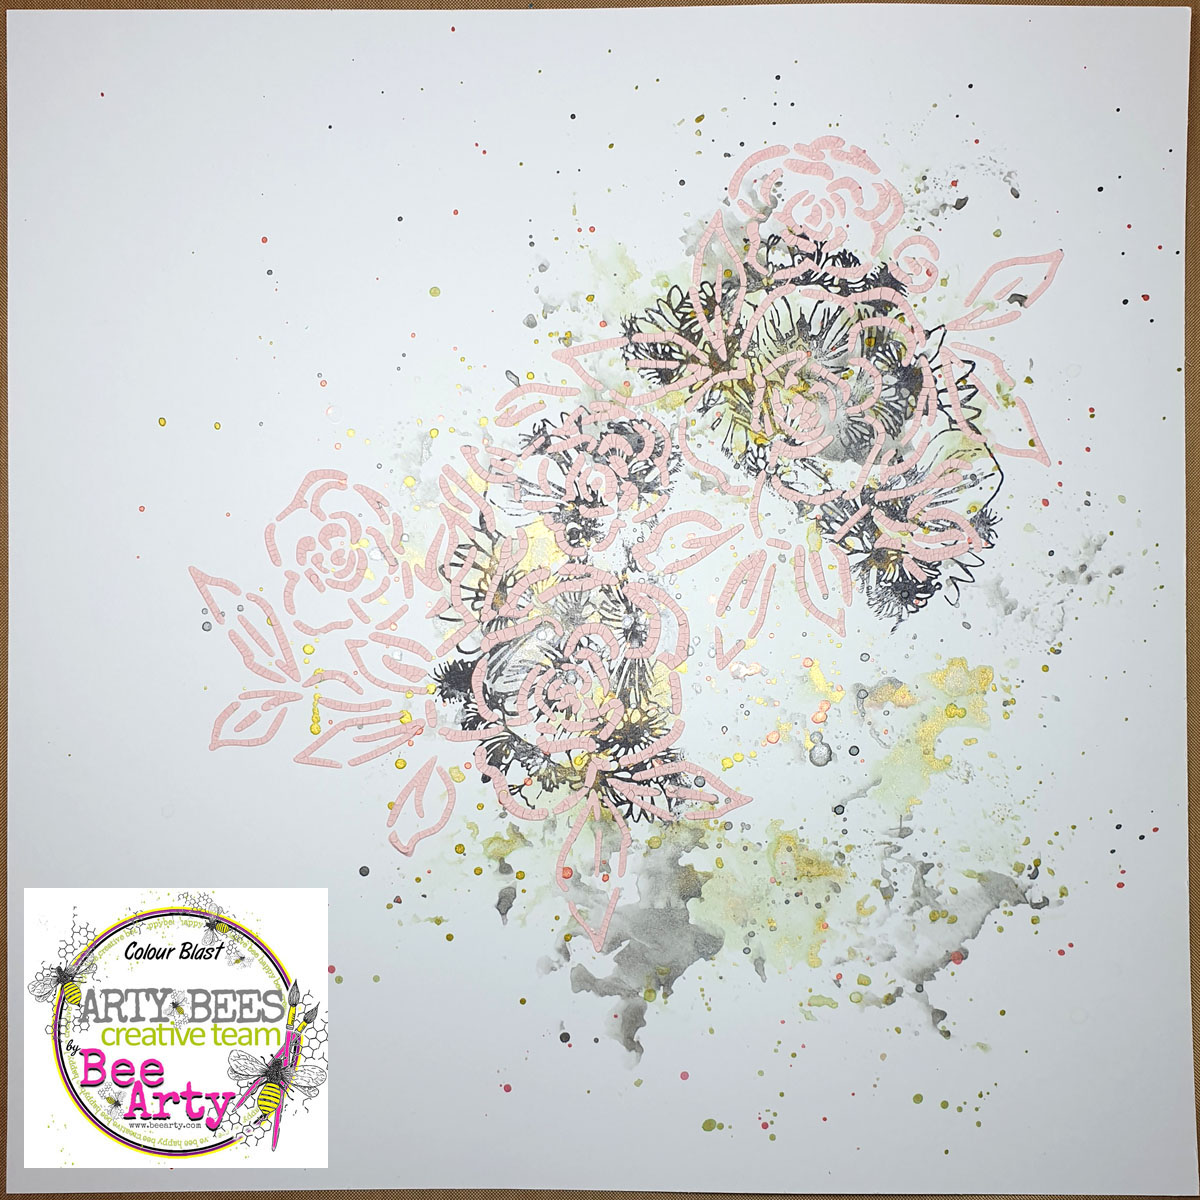
Trace around the Madhatter’s hat shape onto the background cardstock using Alice and Rabbit scrapbook paper.  Add shading to the outer edge of traced outline, blend colour outwards.


Cut the upper edge of the hat brim where the pink band will be placed (see red line above).  Slip the the coloured band onto the hat and secure with small mounting dots (leave the top section of band open so fussy cut elements can be inserted between band and hat. 


Fussy cut the images from the A4 cut apart sheet and the cover cut apart sheet from the pack.


Begin by selecting the cut out images you would like to add, all the images were initially’ spot glued’ into place before adhering the Madhatter’s hat to the background cardstock. 

Tuck 2 or 3 larger tags into the rim of the band add some of the round tags along the edge of the brim of the hat.  Match up cut images with sentiment cards, add to the page.


Continue to sort and add a variety of images to the page, adding lots of sentiment/word tags to break the composition overall.
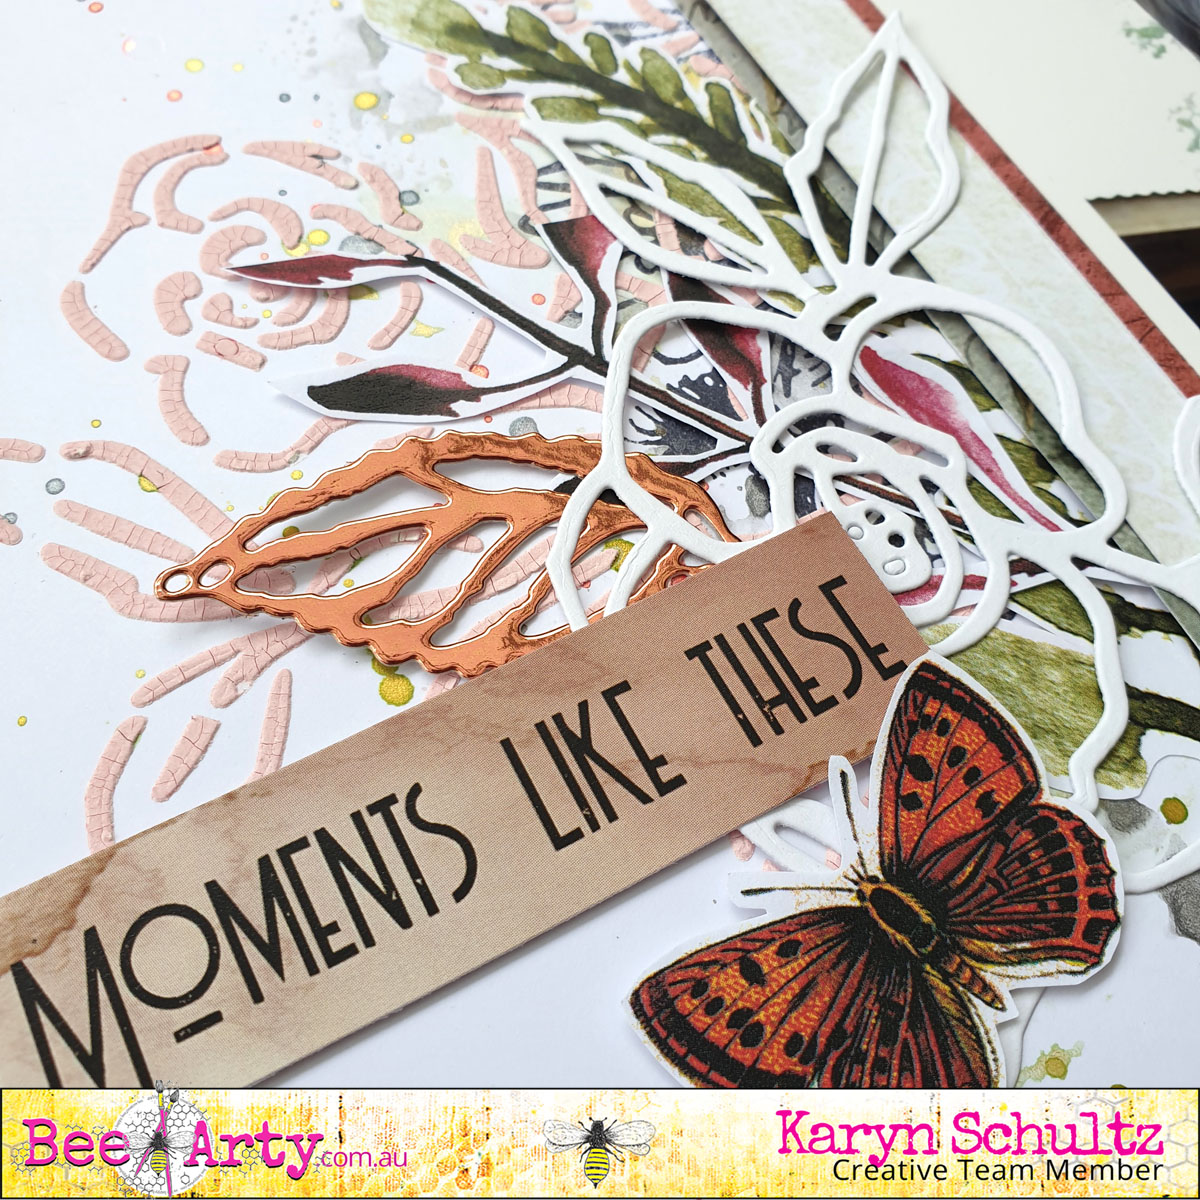


Add white outline highlights to all the elements using a paint pen.  Distress the outside edge of the page with Plum Archival Ink and blending tool.

Thanks for stopping by and I'm sure you will have so much fun cutting and tucking all these amazing elements into your page too.  


Bye for now from Linda xx

linda@yourcreativepalette.com.au 

Sunday 22 May 2022

Enjoying the Sunshine by Tracey Campbell

Hello everyone, it is Tracey Campbell with you today, welcome to Bee Arty's Creative Team share for today. For my project I have used the newest Collection to the Bee Arty range, Bee the Sunshine and let me tell you it really is a pocket full of sunshine. A collection that is so pretty and delicate that it feels like you are working with rays of sunshine while you use it. For my share today I have teamed it with two photo strips of my time in Hawaii at a traditional luau.

Enjoy the Sunshine


Trim a 2cm off the top and left hand side of a 12x12 inch sheet of white cardstock
Adhere it to the centre of the Bee to A Flower patterned paper, have the floral side showing slightly around the white cardstock.  Tip: If you are going to cover up the majority of paper you are using for a base with another piece of paper or cardstock, then cut out the middle of the base and save some of that pattern for another use.


Cut a 20x23 cm rectangle from the Bee to Flower patterned paper. Tip: This is the perfect time to use the centre of your patterned paper that was cut out in the tip in the step above. On the floral side Using a palette knife, spread some Bling Colour Paste through the Abstract Daisy stencil over the top of the floral side of Bee to Flower patterned paper.


While you still have the palette knife, Bling Colour Paste and the Abstract Daisy stencil out use them to add some daisies to the white cardstock.


Below is the distribution of the daisies across the white cardstock.


While the Bling Colour Paste is still wet sprinkle a little bit of pink glitter into the centre of the daisies, on both the Bee to Flower patterned paper and white cardstock.


Using a distressing tool, distress the edges of the white cardstock and Bee to Flower patterned paper.


 Hint: unlike what I did, distress the cardstock before sticking it to the larger Bee to Flower patterned paper.


Adhere the base together so that it looks similar to the photo above. Stick two photo strips slightly off centre.


Fussy cut flowers, leaves, a title and two jars from the Honey and Sunny Days patterned paper.


Using 3 dimensional tape adhere the fussy cut elements out around the photos and the bottom corners of the Bee to Flower patterned paper.


Making sure to tuck some of the elements underneath the photo and patterned paper. Using a black inked pen journal around the inside edge of the Bee to Flower patterned paper rectangle.


Thanks for stopping in, I hope that I have given you some ideas on how you can use the newest Bee Arty Bee the Sunshine Collection. 

Hugs 
Tracey


Saturday 21 May 2022

Romantic Layout by Sunila Mahajan

 Hello everyone,


Sunila here, and today I'm sharing a mixed media style layout with you all. I was inspired by this month's sketch for the challenge and I thought I'll inspire you all with a layout. 

I've used the chit chat collection for my fun layout today. 

Here's a look at the layout:


 The collection helped me create a cute, romantic layout. I've added texture with background stamping, colour paste with a stencil, and then layered die cut and fussy cut elements for complete the composition.


To balance out my main photo composition in the centre right, I've added a small cluster of elements on the bottom left. This creates a sense of movement and balance in the entire layout, still keeping the focus on the main cluster. 


Products used:

Bee Arty Chit Chat Collection

Stamps- Memories, Wonderful

Stencil- Interwoven

Colour Blast Colour Paste

Die Cuts- Polaroid Butterfly


Have a great weekend!

Hugs,

Sunila

Thursday 19 May 2022

Find the words created by Tracey Thorne

Hello creative friends. 

I have just had the privelege of attending Bee Arty's retreat last week and oh my - how good.... unfortunately because of the floods in Brisbane we were unable to go to our destination but Paige organised an alternate location for us all to meet up and get creative and a big thank you goes to Shelley at Shelley's Land at Rochedale for accommodating quite a few of us over the weekend to get our craft on. Next up was the kindness and fun that was in store with all the challenges organised from Paige - so many fabulous creations being put together - thank you everyone involved for filling my arty bucket.

I picked up a few extra bits and pieces this weekend and got to create with them to share with you today.

I have created on a base of white cardstock 250gsm and to that I have made up a cup of Colourblast Artist Ink in Lime  and a little soap and water, I've then used a straw, blew bubbles and collected those on the page to create the background. I have used some Colourblast Artist Ink in Oasis with the Watermark clear stamp set - this helped to add more colour to the page. Once dry I have then used the  A4 stencil -  Encircles  with a little texture paste. Using black ink I have added the  Bokeh Clear stamp set above and below where the photo would go.


I have stitched a border of black cotton to frame the photo. I have added snippets of different printed papers to compliment the photo including  Fireworks - Big Hugs & Fearless Brave & Free - Collection. I have also adhered the words  Be Fearless from the Fearless Brave & Free - Within range.


After adhering the photo and the title to the page I have stamped a little more background stamping using the Meridian - Clear stamp set . To finish the page I have added some Blue glass chips and Uniquely creative glass domes. The page was bordered with a black pen line border scribble.


This is the only project I created at retreat - I absolutely loved catching up with good friends watching them create & enjoying the energy to fill my bucket over the weekend. 


thanks for checking in 


Tuesday 17 May 2022

"All You Need Is Love" by Charmane Koch

 Hello & Happy Tuesday to you all!

Well, I have just got back Sunday night from a lovely Bee Arty Retreat! And it was definitely what I needed to refresh & reboot! Although now, I am in recovery mode - Retreat Hangover! LOL!

Thanks so much to Paige for EVERYTHING! I would be beside myself, with last minute changes to the venue & sorting everything out! But it did in the end, and it was AMAZING!

Anyway, so while I was there I managed to scrap a "few" layouts - too much chatting does limit the amount to create!

I wanted to share with you one of the two layouts I created based on the May Moodboard/Sketch Challenge at Bee Arty... 

I went with the colours and added a few flowers based on the image of the flowers too....

I started off by gathering all the Bee Arty colours - Candy, Sunflower, Apple of My Eye & Blush - either in Mica Powder or Shimmer Dust - splattering these colours to Bee Arty Thick White Cardstock that I had added White Heavy Gesso too.

I have then collected some bits and pieces that I have accumulated on my scrappy table to create clusters around my photo. The photo I have matted using one of the lovely NEW Bee the Sunshine papers, I have also backed the White Cardstock with Bee the Sunshine Paper too.


I've coloured the #bestday chipboard with Wine Shimmer Dust & also the Diamond Metal Die.


I've stamped the cute Man & Woman stamp from the Scrabble - Clear Stamp Set randomly on the page using the Apple of my Eye Mica Powder & Water.

Here is the end result...


So, if you haven't already make sure you give it a go if you haven't already!


PS... here's a sneak of the other layout I created based on the sketch.... using the NEW Snow White Shimmer Spray - it's so gorgeous!


Thanks for popping in! Now, time to get scrappy!

XO Charm


Sunday 15 May 2022

Moments Like These - With Karyn Schultz!

  Hi Bee Arty Lovelies! 
 
It's Karyn here and today I have a scrapbook page to share with you made using lots of fabulous arty products from Bee Arty.
 
 
I'm playing along with the May mood-sketch challenge. We would love for you to join in with this challenge and be in the running to win a Bee Arty online voucher. You have until May 30th and you need to upload your challenge here (please follow challenge rules). 
 
 
For my page I've been inspired by both the colours and the sketch of this mood-sketch challenge.
I started with a sheet of 350gsm Heavy White Cardstock and used a painting with plastic technique to add Apple of my Eye and Stormy Weather Mica powders.
Then I added splatters of Apple of my Eye, Stormy Weather and Peach Nectar Mica powders.
I added stamping using the Forever Always stamp, from the Forever My Always collection, and Black Archival ink.
 
 
I added texture to my page using the My Lady A4 stencil (from the Forever My Always collection) and some Peach Nectar Mica powder mixed with a white crackle texture paste (or heavy white gesso would work well also). 

 
Here is my completed page. My Horse Tommy is such a character - he makes me laugh!
 
 
To complete the page I've added photo mats and strips of paper along the top of the page using Embrace Change paper offcuts. 
I've added fussy cut images also from the Embrace Change paper collection.  
I've added a bird diecut from the Bird Talk metal die set
  a flower diecut from the Calendula metal die set (Bohemian Bliss collection),
and a large flower from the My Flower metal die
The diecuts were created using 250gsm White Cardstock and Matte Brown foil Mirror cardstock.

 
Words were cut from the Embrace Change paper collection. 
 
 
 I added a metal flair, paperclip and chevron wood veneer from my stash.

 
Lastly I've added journalling using a fine black Life of Colour paint pen

 
Thanks so much for stopping by

Crafty Hugs xx