Showing posts with label Bling Colour Paste. Show all posts

Saturday, 7 January 2023

2023 ATC Coins I Mixed Media I Sunila Mahajan

 Hello Bee Arty Lovelies,


Wishing you all a fantastic 2023! Sunila here and I'm back with a mixed media pictorial for you all!

Today I'm creating mixed media style ATC coins that I can share with my friends at the start of this year. 

Here's a look at them:


Let's dive into the process:

1. I started out by cutting three circles measuring 2.5" on white mixed media paper. I coloured these with Slipper Artist Ink.


2. I added colour paste through a stencil for contrast and texture.


3. I stamped a background stamp with black ink for more texture.


4. I stamped and heat embossed elements for layers. I then fussy cut these. 


5. I tested a few artist inks, and then die cut 2023 for the layering.


6. I added some die cut and fussy cut words to complete these. I mounted them on black card stock with a scallop border. 


Here's a closer look at them:


Hope you enjoyed this and are inspired to create your own ATCs. For more inspiration follow me on Instagram- www.instagram.com/sunilamahajan

Supplies used:


Saturday, 27 August 2022

Sunshine Altered Hoop by Sunila Mahajan

 Hello Bee Arty Lovelies,

Hope you're all doing well! Sunila here, and today I'm sharing a pictorial on altering an embroidery hoop. 

I enjoy  mixed media because it opens up plenty of opportunities to play with. Layers, elements, textures all come together beautifully in a single piece. The altered hoop makes for a great home decor piece as well as a gift for someone special.  

Here's a look at the hoop:


Let's begin creating it!


Step 1- I've chosen the Bee The Sunshine Collection for my Hoop. Fussy cut elements, pick out papers for the base and to die cut some elements. Paint the rim of the hoop with Bling Colour Paste. 


Step 2- Die cut elements for the hoop. The round frame makes for a great shaker element. Die cut it several times, adhere together for a thicker layer. Cut a circle on a transparent sheet and white cardstock to back it up for the shaker. I've used a piece from the collection with the quote to back my shaker. 


Step 3: On the base paper, stencil with colour pastes. 


Step 4: Add black stamping on the dried stenciled base.


Step 5- Adhere the hoop onto the base paper. Stamp on the rim of the hoop.


Step 6-  Glue the fussy cut elements, the die cut pieces and the focal shaker element to complete the composition. 


Hope you enjoyed this creation!

Hugs,

Sunila


Supplies used:

Bee The Sunshine Collection

Colour Paste- Bling, Rosewood

Stencil- Stardust

Stamp- Memories

Die- String Leaves


Sunday, 22 May 2022

Enjoying the Sunshine by Tracey Campbell

Hello everyone, it is Tracey Campbell with you today, welcome to Bee Arty's Creative Team share for today. For my project I have used the newest Collection to the Bee Arty range, Bee the Sunshine and let me tell you it really is a pocket full of sunshine. A collection that is so pretty and delicate that it feels like you are working with rays of sunshine while you use it. For my share today I have teamed it with two photo strips of my time in Hawaii at a traditional luau.

Enjoy the Sunshine


Trim a 2cm off the top and left hand side of a 12x12 inch sheet of white cardstock
Adhere it to the centre of the Bee to A Flower patterned paper, have the floral side showing slightly around the white cardstock.  Tip: If you are going to cover up the majority of paper you are using for a base with another piece of paper or cardstock, then cut out the middle of the base and save some of that pattern for another use.


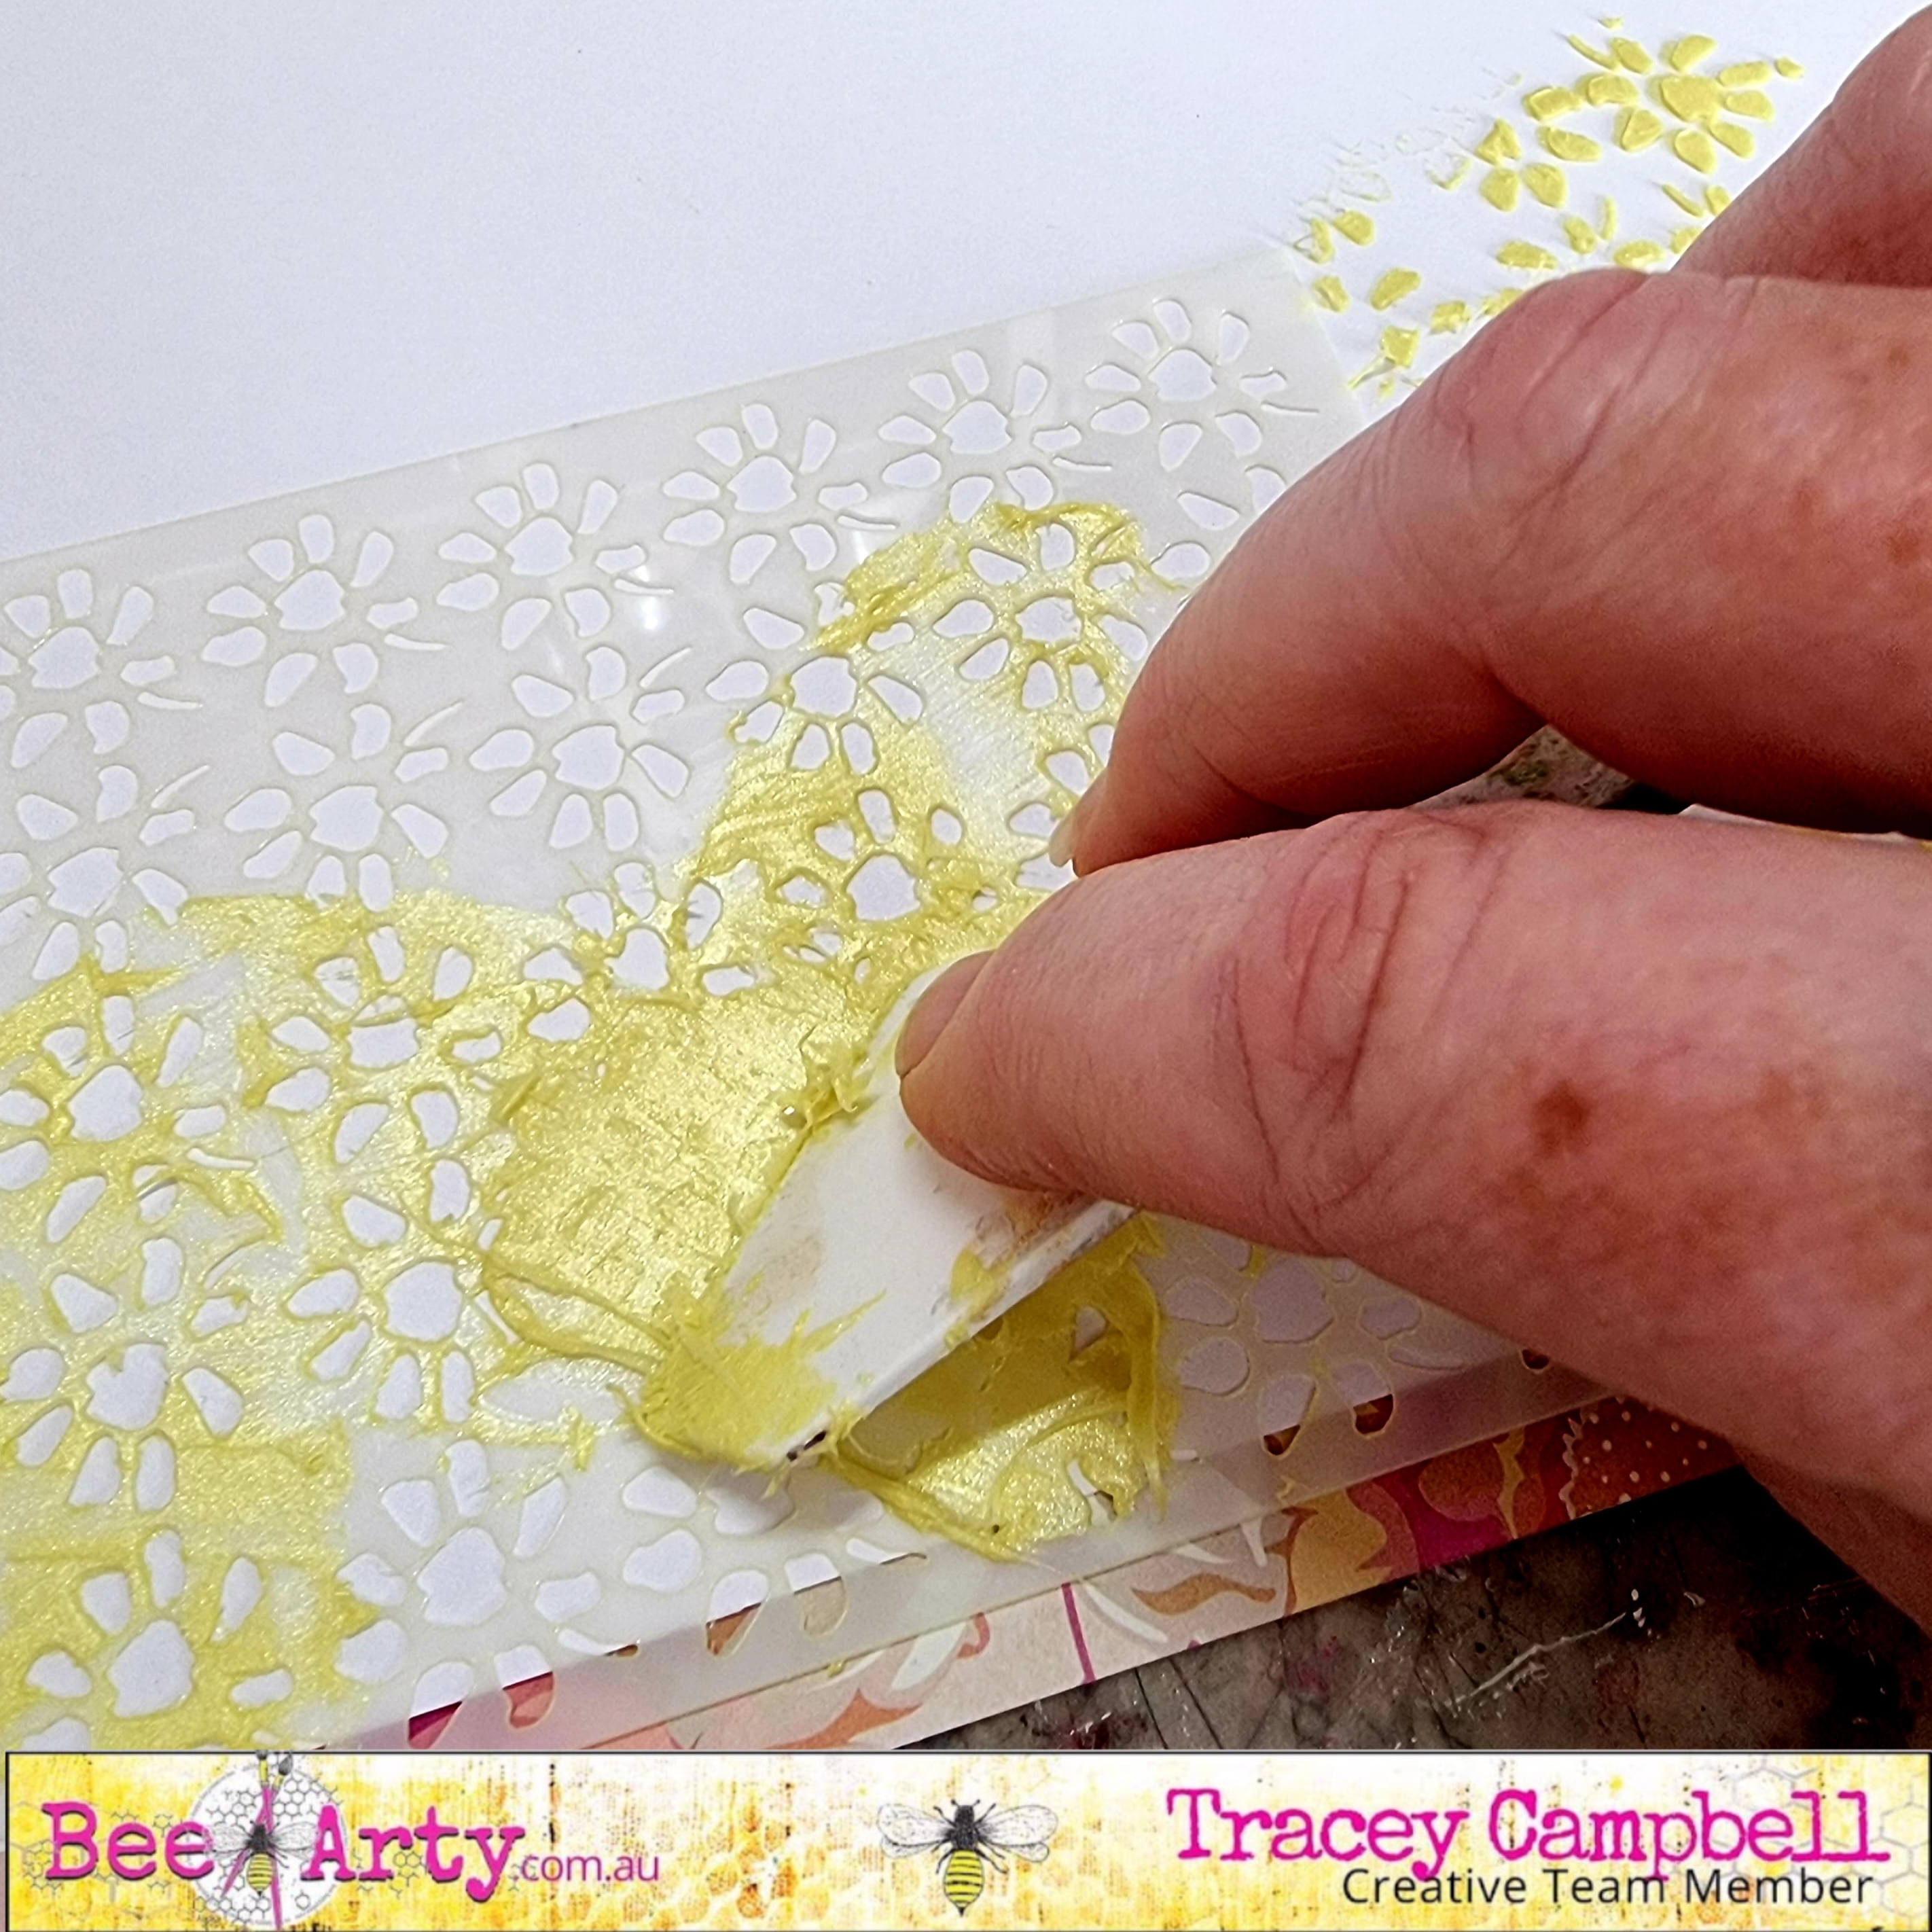
Cut a 20x23 cm rectangle from the Bee to Flower patterned paper. Tip: This is the perfect time to use the centre of your patterned paper that was cut out in the tip in the step above. On the floral side Using a palette knife, spread some Bling Colour Paste through the Abstract Daisy stencil over the top of the floral side of Bee to Flower patterned paper.


While you still have the palette knife, Bling Colour Paste and the Abstract Daisy stencil out use them to add some daisies to the white cardstock.


Below is the distribution of the daisies across the white cardstock.


While the Bling Colour Paste is still wet sprinkle a little bit of pink glitter into the centre of the daisies, on both the Bee to Flower patterned paper and white cardstock.


Using a distressing tool, distress the edges of the white cardstock and Bee to Flower patterned paper.


 Hint: unlike what I did, distress the cardstock before sticking it to the larger Bee to Flower patterned paper.


Adhere the base together so that it looks similar to the photo above. Stick two photo strips slightly off centre.


Fussy cut flowers, leaves, a title and two jars from the Honey and Sunny Days patterned paper.


Using 3 dimensional tape adhere the fussy cut elements out around the photos and the bottom corners of the Bee to Flower patterned paper.


Making sure to tuck some of the elements underneath the photo and patterned paper. Using a black inked pen journal around the inside edge of the Bee to Flower patterned paper rectangle.


Thanks for stopping in, I hope that I have given you some ideas on how you can use the newest Bee Arty Bee the Sunshine Collection. 

Hugs 
Tracey


Sunday, 13 February 2022

Beautiful Mistake part two by Tracey Campbell

Hello everyone, happy Sunday to you all. Here is my latest layout I have created.

The other week I ended up creating this Dream Catcher from a mistake that I made. 
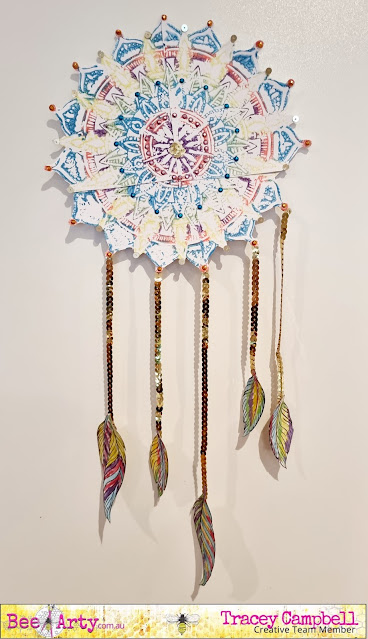
I blogged about it here... if you want to see how I create it. This week I am using the Dream Catcher on a layout and continuing my Beautiful Mistake journey. 
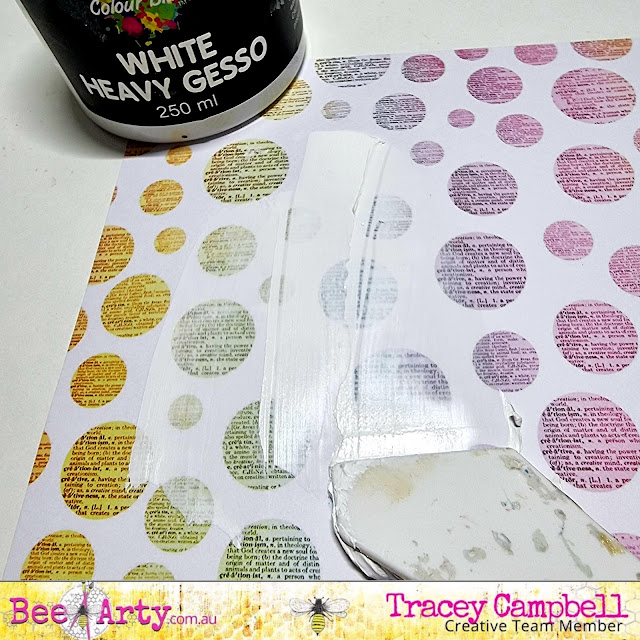
I used the patterned paper with the word circles on from the Arty Farty Collection as my background I applied a layer of Heavy White Gesso to the area where I was going to position the Dream Catcher. 


Applying the Gesso dulls down the printed area of the paper to create a colour block, " a perfect space" to create. The duller background allows the photo or the embellishment to stand out more.


When the gesso was dry, I used some Bling Colour Paste and the Boho Mandal Stencil to add the beading of the Dream Catcher back. When fussing cutting the Mandal out to create a Dream Catcher I had to cut off the vines and beads, as they were way too fiddly for me to cut out. I positioned the beads roughly to the positon where they would have sit fir still attached and where I knew I wanted to glue my Dream Catcher down to, on the background.


I also added the small half mandala from the Boho Mandala Stencil to the right hand side of my background paper.


Here is the positioning of the stencilling with the Bling Colour Paste. I must admit of all the colours of the Colour Paste, the Bling is my favourite, the gold is perfect (not too yellow or dull) and the way it dries makes my heart pitter patter. Once dried I adhered the Dream Catcher over the top, see the final photo for the positioning.


Next I found a photo (4x6 inches) that I thought would suit and cut out 6 different rectangles, the same size of the photo. I also cut out two pieces of vellum the same size. For my papers I used a variety of patterns and colours from the following collections:


Next I distressed the edges of the rectangles with a distressing tool, then screwed them up into loose balls of paper, untangled them and flattened them out. Tip: if you don't have a distressing tool use the edge of a pair of sharp scissors and run the blade across the paper edge but be careful of your fingers. 


Once flat I stacked them under my photo so that at least two of the edges of each rectangle were peaking out. This creates a photo mat with "attitude"  :) it is quiet hight and adds lots of dimension to the layout. Adhere the photo stack to the bottom right hand side of the Dream Catcher. 


To create some addition layouts I tucked in some gold paper doilies and string wreaths that I cut out of some white cardstock with the Sting Wreath metal die. 
I shortened up the gold sequins string, that attached the feather to the Dream Catcher so that they didn't dangle off the page.


Next I cur out a stack of single words from Sweet Talker cut apart in the Bohemian Bliss Collection and distressed the edges. I then adhered them around the layout in random places (see final layout below for positions).


Some close ups.


So I hope I have inspired you to keep going if you make a mistake and not to throw it away, try and create something from it. 

Hugs until next time,
Tracey