Saturday 31 July 2021

Road Trip Sneak Peek I - With Karyn Schultz!

  Hi Bee Arty Lovelies!

It's Karyn here and today I have a Sneak Peek of one of my creations that will feature in the upcoming  Bee Arty Road Trip kit. This sneak is from a scrapbook page titled "Rest Stop".
 

  Road Trip has a grunge/watercolour beachy colour palette with versatile elements, and is designed by the talented Michelle Grant. You will love this collection - the stamps, stencils and dies are not to be missed! You can subscribe to the kit here. Kits come with a paper pack, stencils, metal dies, stamp sets, embellishments and full colour kit instructions.


Thanks so much for stopping by

Crafty Hugs xx


Thursday 29 July 2021

Magic Journal Page

 Hello everyone,


Today I'm sharing a quick journal page with you'll. I love art journaling, especially when I don't have time to create. I find that a journal page can be created without any fuss and with minimal elements. This is also my favourite art activity when I'm travelling. I can create with minimal supplies on the go. 


Here's a look at the page


For this page, I'm using my mini art journal which comes with with textured paper. This is best when I'm playing with water based mediums. 

To begin with I splatted Sunshine Mica Powder and misted it with water. On my wet page, I dropped Cider Artist's ink and let the two magically blend. When my page was still went I sprinkled Candy Shimmer dust and slightly misted it with water. I did not use any heat tool, but left my page to naturally dry and that gave me the beautiful blend, shimmer and texture.


Next, I used the party lights stencil with black ink to add my next element. I also lightly stamped a few circles and stars few copper ink. 


I finally added a few feathers cut out for the "Fearless, Brave and Free"  collection. I used foam tape to create dimension. From the same collection I also chose a phrase and adhered that. That gave my page meaning.

Monday 26 July 2021

Be the change! .... with shaker window by Linda Pearson

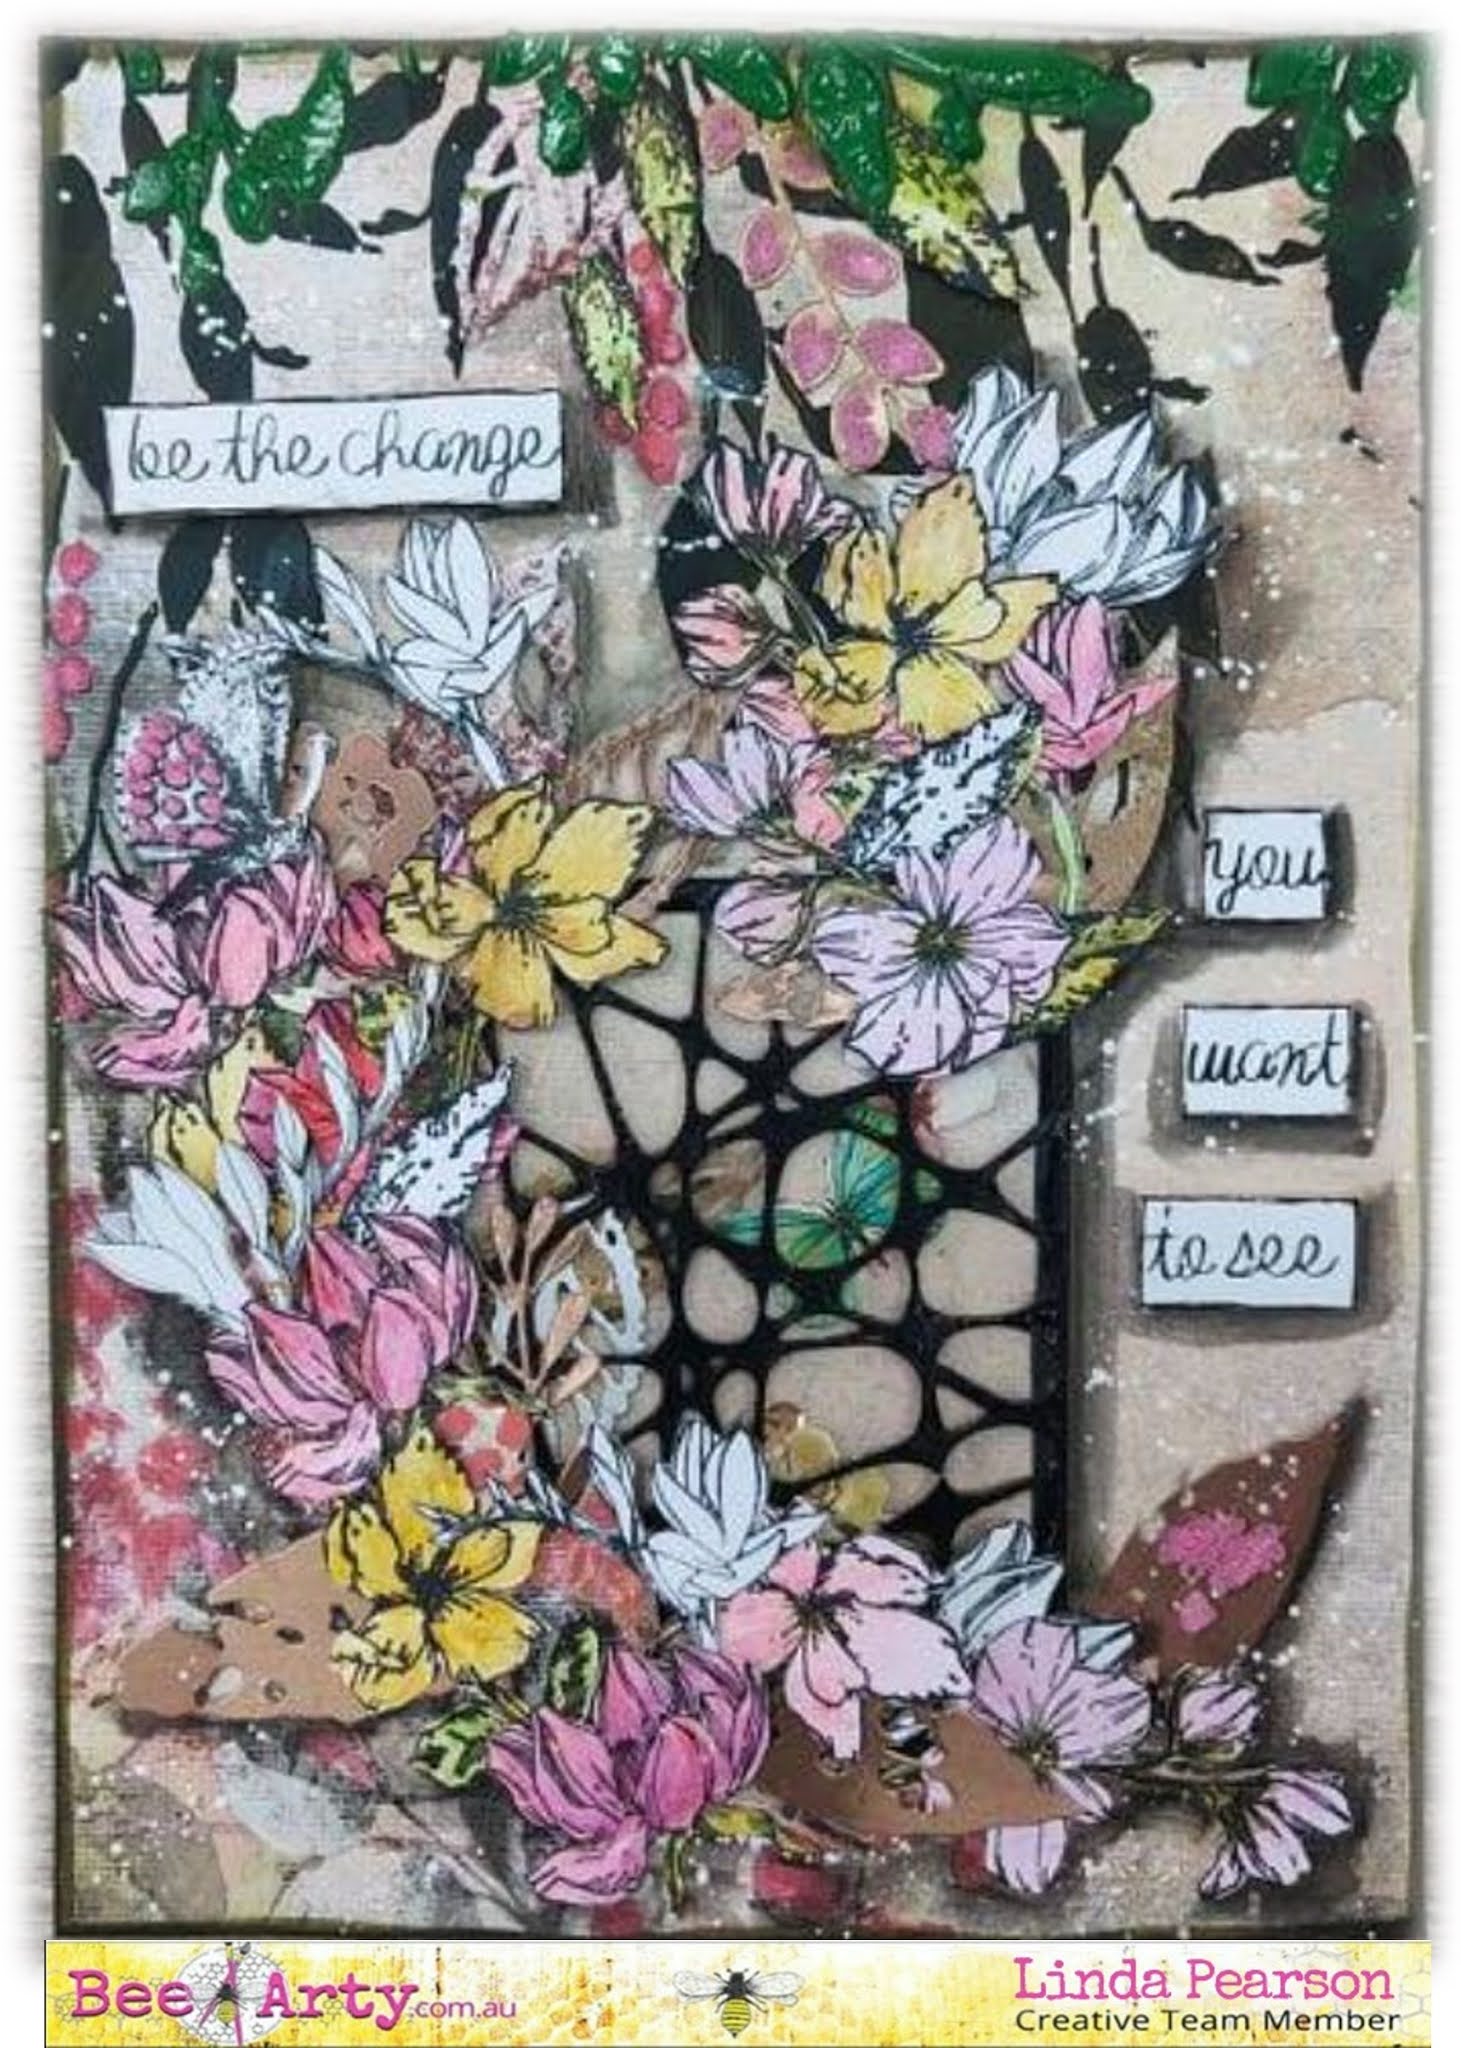
 Be the change ...! with shaker window by Linda Pearson


Hi Bee Arters!! 

For today’s blog I am embracing change by ‘Being the change I want to see’ using the gorgeous collection designed by Fiona Paltridge.  Focus techniques explored in this post include lots of fussy cutting, colouring, stencilling and crafting a shaker window for interest.


Living 12x12 scrapbook paper  from the Embrace Change collection designed by Fiona Paltridge

White Cardstock 350gsm 10 pack - 12"x12"

Old leaves metal die from the Embrace Change collection designed by Fiona Paltridge -

Autumn trio metal die from the Embrace Change collection designed by Fiona Paltridge

Turning 12x12 scrapbook paper   from the Embrace Change collection designed by Fiona Paltridge

Perfect petals clear stamp set  from the Embrace Change collection designed by Fiona Paltridge

Cascading leaves A5 stencil  from the Embrace Change collection designed by Fiona Paltridge

Poetry 12x12 scrapbooking paper word sheet  from the Embrace Change collection designed by Fiona Paltridge

Web metal die   from the Untangled collection designed by Tanya Froud

Colour blast embossing powder – stormy weather or black

Life of colour pens   -  black white

Stabilo All Pencil Black – Bee Arty

12x12 clear acetate sheet

Small offcut of cardboard (shaker window frame)

Rose Gold metallic sheet

Water colour pencils or equivalent for subtle colouring of stamped flowers

Adhesive

Pink micro beads

Rose gold sequins

Green paints

Texture Paste


Firstly, I cut the Turning 12x12 scrapbook paper to fit my A4 art journal.  I kept the offcut for die-cutting some leaves using the Old leaves metal die.


Using a sheet 
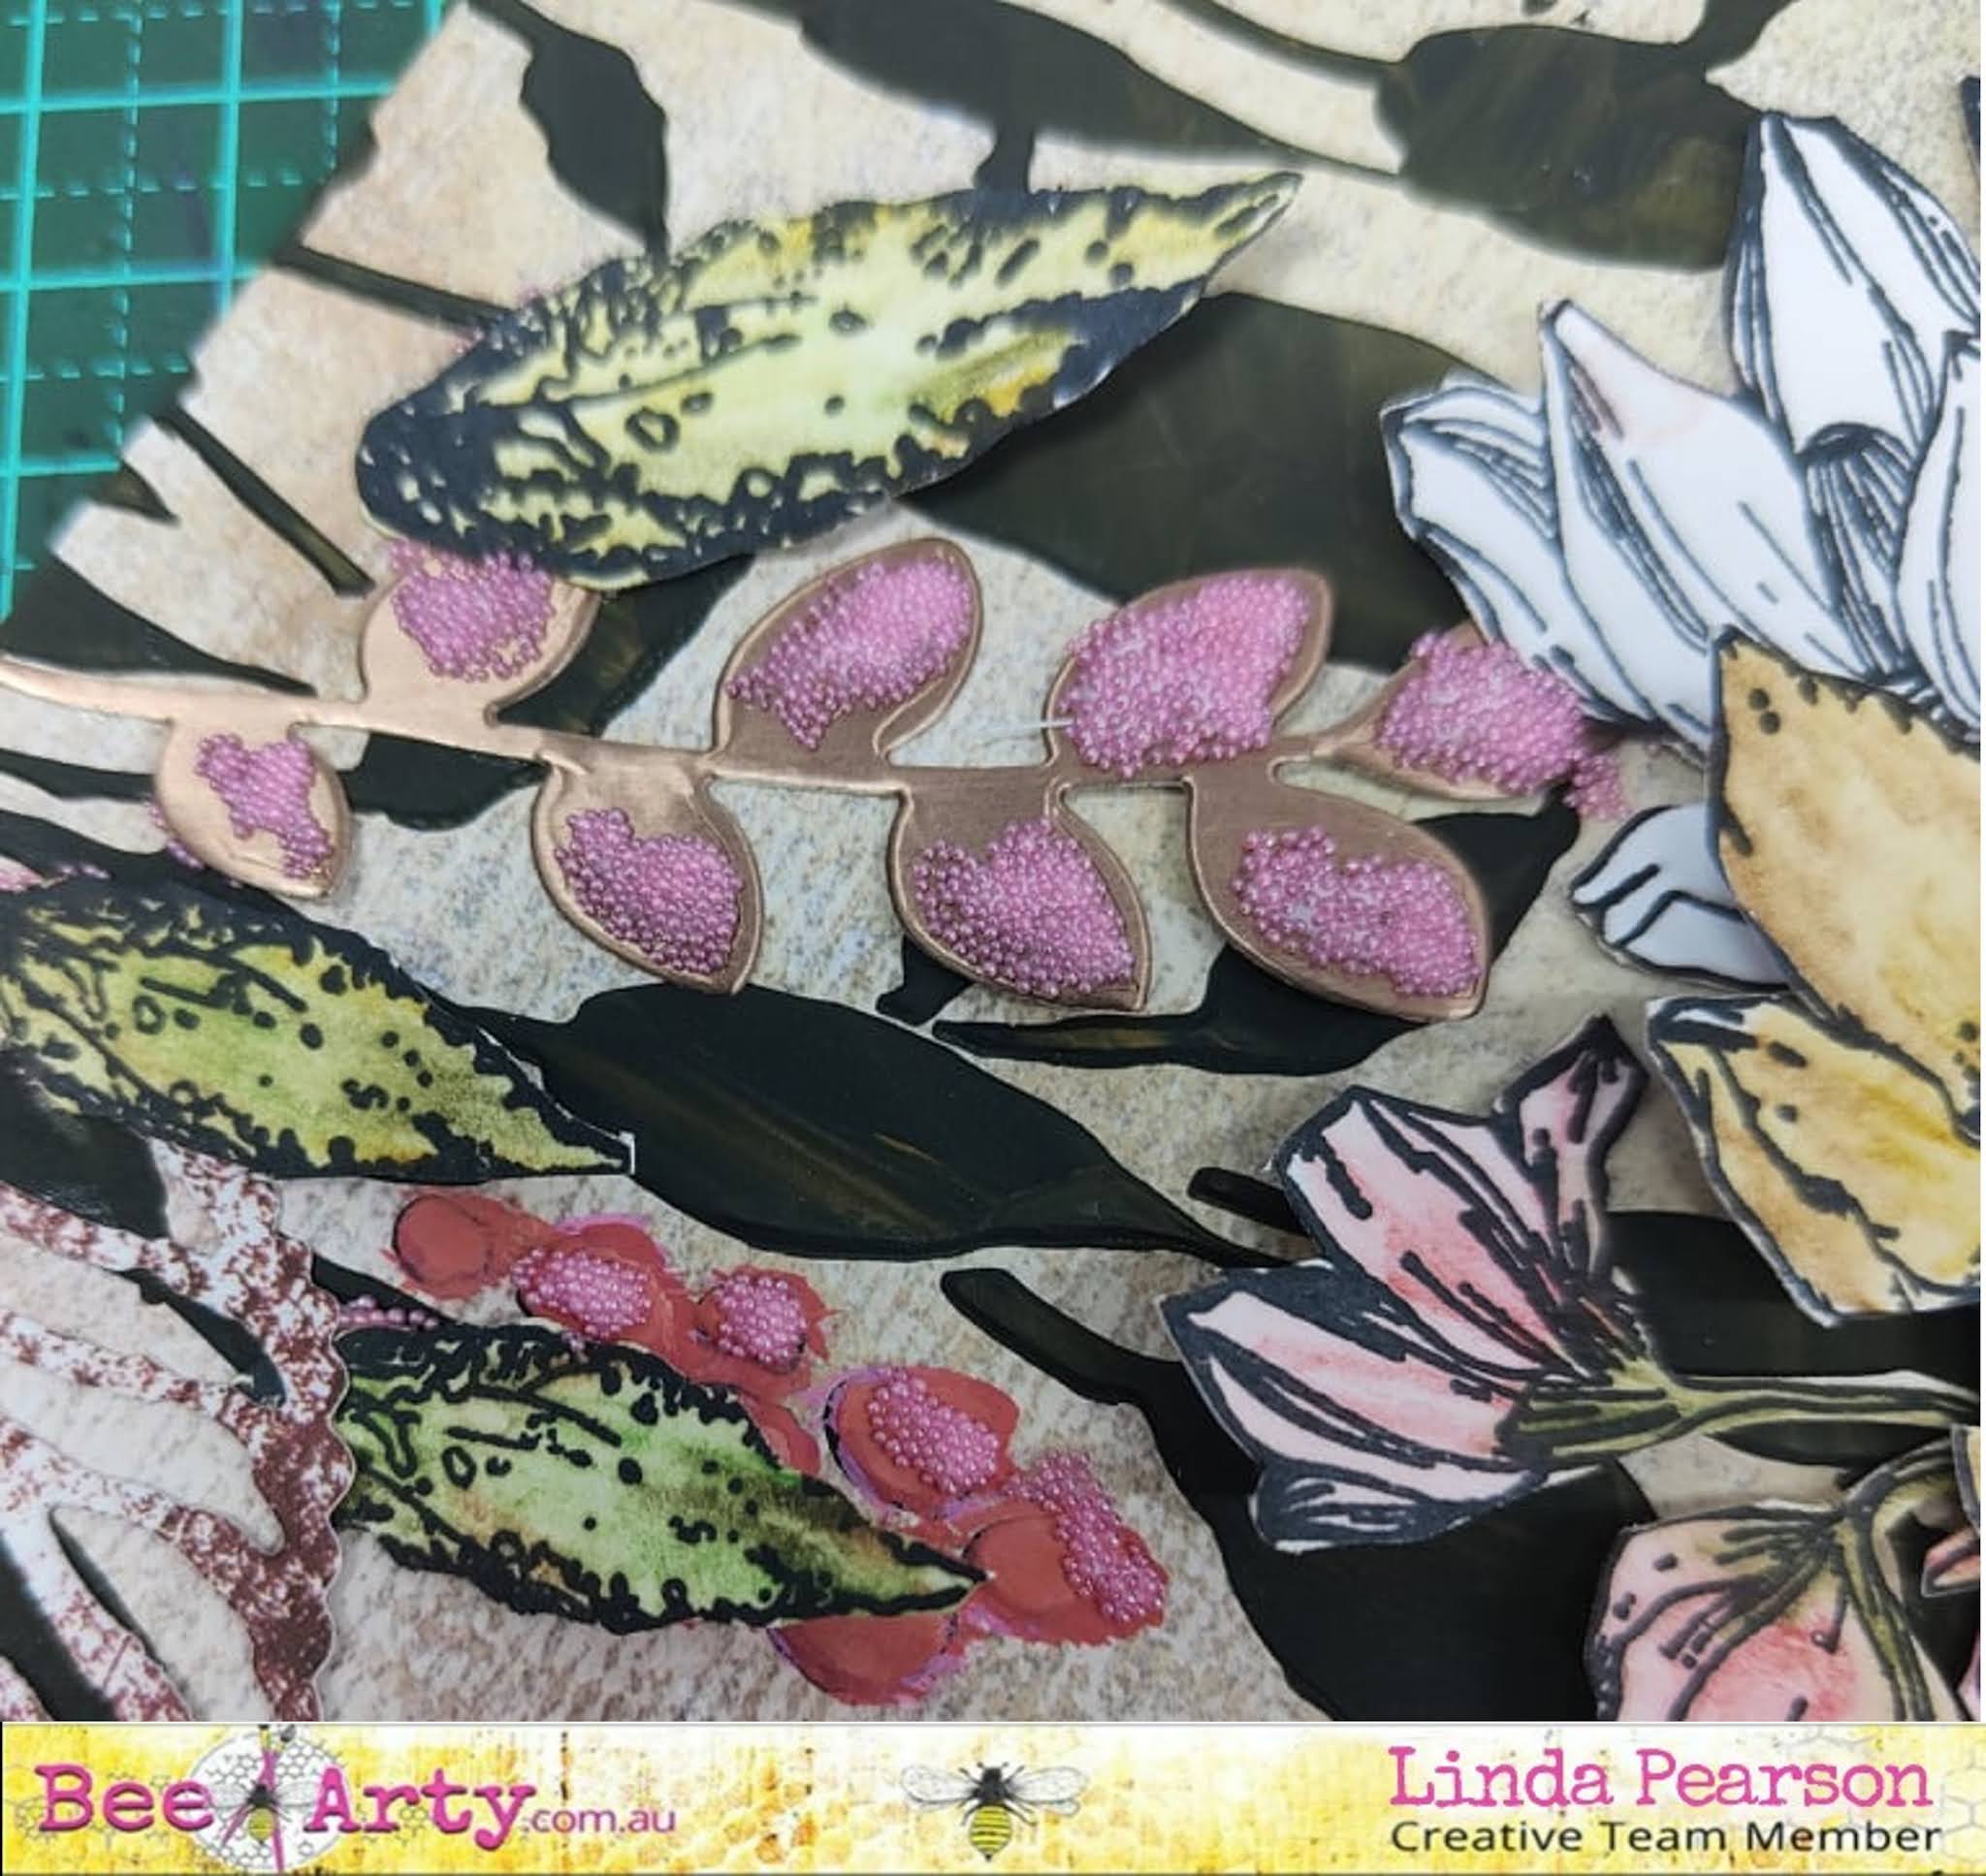
of  White Cardstock 350gsm I stamped heaps of flowers using the Perfect petals clear stamp set.  I coloured the flowers with inktense water colour pens to create a soft look to match the backing sheet of   .  This image shows the fussy cut flowers as well as the die cut leaves using the Old leaves metal die and Autumn trio metal die in rose gold metallic card.


Using another sheet of White Cardstock 350gsm   
Run the Web metal die through the machine. 
I used the ranger embossing dauber to the web cut out before sprinkling the embossing powder over the web then heat drying to activate the powder.


Not easy to see in this image but next cut out the clear acetate to fit the web cut out.  Carefully adhere together.  As I was making a shaker window I also cut a cardboard frame the same size and painted black (forgot to take photo).  Then adhere the card frame to the the acetate for creating depth in the window.


Preparing the background layer (Turning 12x12 scrapbook paper), add some stencilling to the top of the page using the Cascading leaves A5 stencil  using dark green coloured paint added to texture paste. 


The next stage of the project is adding the shaker window to the background page.  I cut into the page around the printed pattern to slip the window in behind, however, after adding all the flowers this step becomes a bit redundant as the flower covered up this section.  So, cutting the sheet is optional.  

You could bypass the above step and just adhere the window to the page BUT not before you add some cut out flowers, leaves and a butterfly from the coloured cut out embellishments.  Add some micro beads and sequins to the window before sealing the top of the window. 


Go to town adding the flowers to the page around the 3 edges of the window (spot glue in the middle of the flower shapes so the edges are independent of the page.


For detailing and finishing off the project adhere some micro beads to the berries, leaves and the butterfly wing for added texture.


Cut the word phrase from the Poetry 12x12 scrapbooking paper word sheet  add some mounting tape behind the words to lift them off the page.  Using the Stabilo All Pencil Black – Bee Arty add shadows around the wording and flowers around the page and blend to soften the effect using water and a brush. 

Finally add some Stabilo All Pencil Black – Bee Arty  around the edge of page again wetting with water to blend as you go.


I hope you enjoyed this project and thanks for stopping by …. Happy creating!


Cheers from Linda Pearson
linda@yourcreativepalette.com.au 


Sunday 25 July 2021

Before Now After - With Karyn Schultz!

 Hi Bee Arty Lovelies!

It's Karyn here and today I have an art journal page to share with you made using lots of crafty goodies from Bee Arty.  

  
I created this page in my DWM Multi Media Journal on cotton watercolour paper.  Then I painted Rust and Walnut Colour Artist ink across the page using a painting with plastic technique. This colour scheme is my current favourite :)

 
I added stamping using the script stamp from the Bokeh stamp set and stamping using the Life Is Tough Stamp Set

 
Next I used the Pavement Stencil with Bling Colour Paste

 
Here is my completed page. I found a picture on Pinterest and printed it on photo paper and added to the page.

 
I created embellishment clusters using flowers cut from the Embrace Change collection pack paper as well as hessian, gauze and kraft tags from my stash. I drew around the edge of my page (and the word stickers) using a thin black Life Of Colour pen.

 
 The leaves are created by stamping with the perfect petals stamp set onto paper offcuts from the Embrace Change collection pack paper.


Thanks so much for stopping by

Crafty Hugs xx


Friday 23 July 2021

Sparkle - With Karyn Schultz!

  Hi Bee Arty Lovelies!

It's Karyn here and today I have a scrapbook page to share with you made using lots of fun products available from Bee Arty.  
 
  
I started with a sheet of heavyweight 350gsm white cardstock. I used a painting with plastic technique to add Bling, Leather and Deep water Mica Powders to the page (colours that complemented the "Forever My Always" Collection).  
 
 
Next I applied Leather Colour Paste through the My Lady A4 stencil on my page. I did this upside down as I wanted to showcase the flowers in the stencil.  

 
Here is my finished page. The photo is of my daughter Jessica after she had purchased a new phone and purse (many months of pocket money saved for this!).
 
 
Here are some close-ups of the page. The photo is matted on papers from the Forever My Always paper pack. The flowers and leaves were fussy cut from the Gentle Heart paper. The words are cut from the Love Is Golden paper. I've also added some diecuts using Kraft cardstock and the Old Leaves metal die from the Embrace Change collection.
 
 
 I've added word stamping using the Say It clear stamp set from the Embrace Change collection.


I've added more diecuts using Kraft cardstock and the Autumn Trio metal die from the Embrace Change collection and some paper flowers to finish it off.
 

Thanks so much for stopping by

Crafty Hugs xx


Thursday 22 July 2021

Grateful Heart TN Spread with Aditi

 Hello everyone,


I'm back on the blog and happy to be sharing my creations with you all! Today I decided to create a layout in my Traveler's Notebook. I enjoying this way of documenting memories, and creating compact layouts. 

Here's a look at the layout before we dive in:


I've used the Grateful Heart Collection to create this layout. I've also shared a quick process video on the Bee Arty Facebook Group.

Monday 19 July 2021

Catch Up With Mum by Charmane Koch

 Happy Monday People! Although I'm guessing it would feel like Ground Hog Day for a lot of you!

Today I wanted to share with you a layout I created recently for the Scrap the Girls Challenge, using a sketch...

I just love the Grateful Heart Collection & with a few extras I've come up with this layout...


I started off by using the "Family" paper from Grateful Heart


It was a perfect colour match to the photo I was using...

To colour the Mum chipboard, I have gesso'd and then I have coloured with Just Blue Mica Powder with a little water.


I also used the String Wreath Metal Die, by cutting it out with White 350gsm Cardstock & embossing it using Olive Sparkle Embossing Powder - you can find this in the Sweet Stuff Embossing Bundle!


I have also cut out a doily from the Gathers Cut & Colour Paper from the Grateful Heart Collection...


You may also notice that I have used a piece from the Fearless Brave & Free Collection - because the colour matched!

I also decided to make my main paper with the Chic Trendsetter Paper, as the colour of the Houndstooth matched my layout too!

And this is how my layout turned out after adding a few extra bits from my stash and a bit of distressing and machine sewing around the edges...


Nothing like a bit of Mix & Match to come up with this layout!

Thanks for popping by!


XO Charm