Showing posts with label Fearless Brave and Free Collection. Show all posts

Sunday, 14 May 2023

Dream - Rikki G

 Good morning how are you? Rikki here today to share with you part two of how to break down Moodboards and Sketches. 

Now if you're a bit like me find Moodboards harder to work with than sketches.... its the colour combinations that sometimes I struggle to find the balance with. How much of what colour? Do I have to use all the colours? What Ratio should I do?


Tuesday, 9 May 2023

Adventure Bound - Rikki G

 Hi Rikki here kicking off my May design team shares. You would have seen that we run a monthly challenge and it  has a moodboard and a sketch.... did you know you can enter either challenge? Or  you can combine the challenges.


So I had a little brain wave, why dont I work my posts this month around the challenge. So I will start with the sketch, how to break down each step, each layer and each embellishment.

Theres even a process  video for you to follow along with.


*** If you do the sketch part of the challenge you  can complete it in any colour you like.

Saturday, 21 January 2023

Stretch your supplies I Mobile Case I Sunila Mahajan

Hello Bee Arty lovelies, Sunila here and I'm back with inspiration for you'll.

Today I decided to create a custom mobile case using my Bee Arty Supplies. With this I want to show you how these supplies aren't limited to paper crafting and can be used to decorate objects we use in our everyday life.

Here's a look at the case:


To create this I'm using a clear mobile case. I've tinted it on the inside with Artist Ink first. I then use coloured collage pieces and apply mod podge to hold them down in place. Since I wanted the quote to be visible, I've first glued that inside and then added colour and other layers. I seal it all with a larger piece of plain white paper, so the pieces not tear when I use the case on my mobile.

Here's a look at it from different angles:


Hope you enjoyed this! Follow me on instagram for more inspiration- www.instagram.com/sunilamahajan

Supplies used:


Saturday, 26 February 2022

Altered stationary box by Sunila Mahajan

 Hello friends,

Sunila, here and I'm back with some quick inspiration for you all. I have an eye for altering and upcycling objects. At home, everyone checks with me before discarding anything, just in case I can upcycle it. 

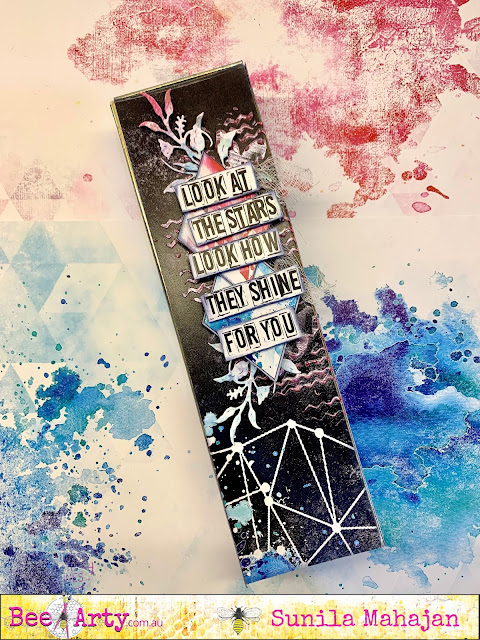
Today, I've upcycled an incense stick box, to create a stationary holder. It makes for a perfect gift, as well as utility item to hold pens, pencils, brushes, etc. in place. 

Here's a look at it:


I've used the Fearless. Brave and Free Collection. 


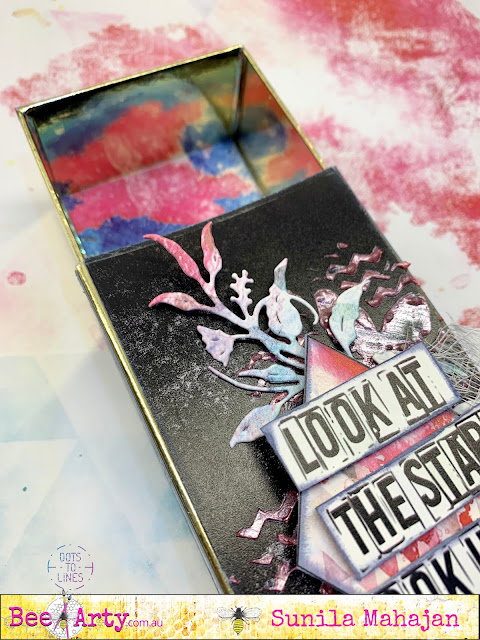
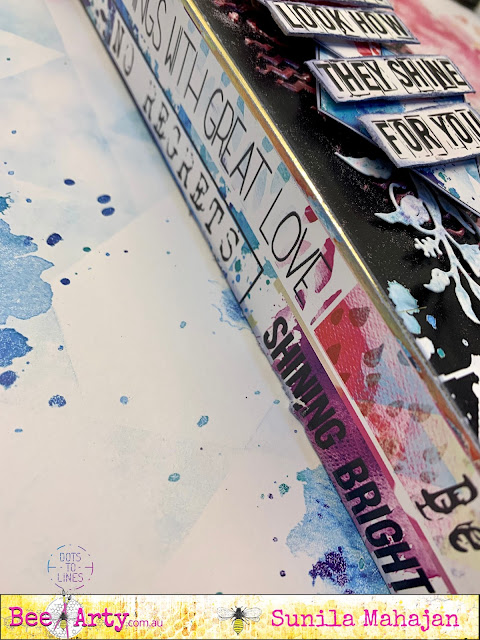
I trimmed pieces of paper to glue on the inside as well as outside front and sides of my box.


After gluing these, I used a stencil and colour paste to add texture on the top, and added some elements from the same paper pack to create a focal point.


I cut out a phrase and added that to add more  meaning to my box. I particularly loves the sides with all these optimistic words, that I'm bound to read every time I pick it up. 

Sunday, 21 November 2021

Be Fearless with Belinda Spencer

 Hello Arty Bees!!


It's Belinda here with you today to share my latest layout featuring the stunning Fearless, Brave and Free Collection by Fiona Paltridge.


I started my layout by cropping a sheet of the Positive patterned paper and mounting it on a sheet of the fabulous 350gsm White Cardstock. I love to have a border around my page and also I love the sturdiness this double layer gives. 


Next I grabbed the beautiful Indigo Colour Spray and spritzed some of that on the background. I titled my page and let some drip down in the area where I knew my photo was going to be. The background design on the paper was so nice that it didn't need too much added to it. I didn't want to obliterate what was already there just add a little bit more to it.


Once the layout was dry, I then added some stencilling using the Ecliptic A6 Stencil with Snow White Colour Paste. I applied the paste through the stencil using a palette knife. 
I added some stamping too using the Say It Clear Stamp Set with Archival Ink.


I fussy cut some images from the Fearless, Brave and Free Collection patterned papers. I also used the String Wreath and the Create Metal Dies to add more layers behind my photo. I used the Create die with patterned paper as well as with the white cardstock. One of the die cuts I sprayed with the Indigo Colour Spray. I then layered them together behind my photo.


Finally I added my embellishments, title and quote.

Here's what I used:


Metal Dies:


Thanks so much for stopping by the blog today.

Cheers
Belinda


Sunday, 7 November 2021

Go For It with Belinda Spencer

 Hello Arty Bees!!


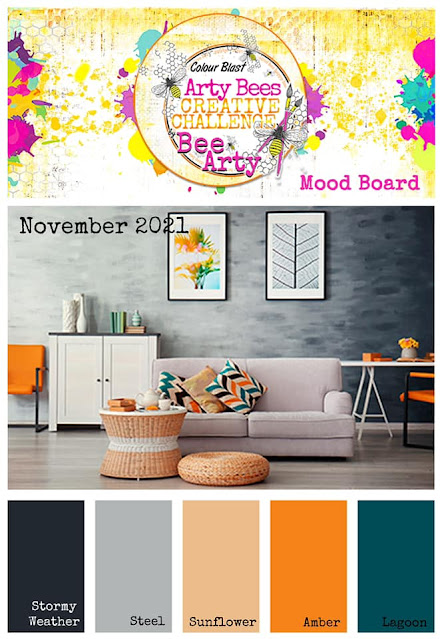
It's Belinda here today to share my latest layout for Bee Arty inspired by the November Mood Board.


Here's a peek at the mood board for November:


I started my layout by cropping a piece of Graffiti Grunge patterned paper and mounting it onto a sheet of the 350gsm White Cardstock. I then spritzed a little Sunset Colour Spray in three places and then placed a piece of plastic over the top to spread out the ink.


I repeated this process using Lagoon Colour Spray.


And for a third time adding Road Base Colour Spray. I then flicked all three colours over the page and dried with a heat gun.


I added some stencilling using the Three Six Five A5 Stencil Three Six Five and the Black Heavy Gesso. I stamped some stars over the page too using the Going My Way Clear Stamps and Ranger Jet Black Archival Ink.


I used the Graffiti Grunge Linked In Metal Die to cut two pieces from extra white cardstock and stapled them onto the page.


I added a paper stack on top of the die cuts using some patterned papers from both the Graffiti Grunge and Fearless, Brave And Free collections. I added my photo on top.


Next I used some Ranger Archival Inks to stamp some more stars using the Going My Way Clear Stamp set again. I fussy cut the stars and added to the layout along with all remaining elements.


I cut the quotes from the Graffiti Grunge Be Yourself Word Sheet and added them to the layout using 3D foam.


Thanks so much for stopping by the blog today. I hope you find some time to play along with the November challenge too.

Cheers
Belinda


Friday, 24 September 2021

Gypsy Heart Art Journal by Aditi Mahajan

 Hello,

Hope you're all doing well! Today I'm sharing an art journal page with you'll, in my square watercolour journal. 

Since I love art journaling, I love experimenting with different shapes, sizes and paper textures of journals. 

Before I jump into the step by step process, here's a look at my page.


Here's a step by step process of creating this page:

Step 1- Mist the page with water, where you'd like to add colour. I was working on the opposite ends of the page. Using a fan brush next, I sprinkled the Mica powders, one colour at a time. I let this to dry naturally.


I love the play of colours here.

Step 2-  I chose a few background stamps and randomly stamped them with black ink. 


This gave me various textures to further build my composition.

Step 3- I picked out a few stencils and added a next layer of texture with the black ink again.


Step 4- I completed the page with a few die cut elements, phrases, white, purple and blue splatter. 

Thursday, 26 August 2021

Creating Beautiful Dreams- ATC coins with Aditi

 Hello everyone,


Hope you're all well! Today, I creating a set of ATC coins. A twist to the standard Artist Trading Cards, making them coins, which means circular. Sometimes, it's good to break free from the monotonous.

Here's a look at them


I have a a video tutorial creating this on the Bee Arty Hive FB group


I have used a stamp and heat embossed it on my background. Sprinkled mica powders and misted them with water to add the colours. Fussy cut and die cut elements and adhered them to create these mini beauties. 


Supplies used- 


Monday, 9 August 2021

FABULOUS DARLING!! by Linda Pearson

Hi Bee Arters... welcome to my post and hope you are inspired to have a play with the new Colourblast fluoro products.


In this art journalling project I chose to use the new Fluro colour paste products from Bee Arty. 
This page was created in a Dina Wakely multi-media art journal (burlap) but a 12x12” black cardstock could be substituted to turn this page into a scrapbook layout very easily.

Bee Arty products used in creating this project:
White Cardstock 350gsm 12”x12” (10 Pack)
x-press it double sided tape 2mm thick
Art Glitter Designer Adhesive - all sizes
Organised Chaos A4 stencil - ‘Fearless Brave and Free’ collection designed by Fiona Paltridge
Flowers Metal Die ‘Untangle’ collection designed by Tanya Froud
String Leaves Die – ‘Grateful Heart’ collection designed by Michelle Grant
Butterfly Effect Die – ‘Butterfly Stardust’ Collection designed by Michelle Grant
Cool Words clear stamp set – ‘Fearless Brave and Free’ collection designed by Fiona Paltridge
Organised Chaos A4 stencil - – ‘Fearless Brave and Free’ collection designed by Fiona Paltridge
Positive 12x12 scrapbook paper - ‘Fearless Brave and Free’ collection designed by Fiona Paltridge (black and white off cut or similar could be used instead)
Mica powder – Fluro Pink, Fluro Green, Fluro Orange, Fluro Yellow (new product)
Gesso – white (mix the fluoro mica colours with gesso)

Black card
Fluro Pink, Fluro Green, Fluro Orange, Fluro Yellow acrylic paint
Black paint or ink for splatters
Die cut machine
Art journal
Muslin off cut
Black Archival stamp pad
Gelli plate and brayer
Fluro Pink Posca pen


Using the Gelli plate add a little fluoro green/gesso and some fluoro yellow mixes onto the gelli plate and spread over a sheet of white card.   I used A4 card, adjust accordingly to suit your purpose (Journal or scrapbook layout).  Place the Organised Chaos A4 stencil onto the gelli plate then spread black paint over the stencil.  Remove the stencil (rub off excess paint onto spare paper, wash the stencil).  Place the card onto the plate and rub to transfer the paint from the plate to the paper.  Allow to dry.


Cut the A4 card down to a 10x15cm tag size.  Outline the black marks and border of card using the Pink Posca pen.
 
Using another sheet of White Cardstock 350gsm, cut a 10cm strip off the sheet.  Colour the larger piece with fluoro orange gesso mix and paint the smaller piece with fluoro green gesso mix, dry off.  (no image)


Run the fluoro orange card through the die cut machine using the Flowers Metal Die as well as the Butterfly Effect Die then with the fluoro green card run the String Leaves Die through also.  Run the leaf from the Flowers Metal Die through with a small offcut of white card stock too.


I coloured an offcut of printed paper with a wash of fluoro pink paint adhere as a backing for a couple of the flower die-cut shapes.


On the stenciled background, the leaf die-cuts add some black spatters.


Go to town placing and adhering the die-cut shapes over the card.  I also added some muslin strips to the card to help the butterfly and flowers stand out a little.  Note:  I also added a strip of builders plaster tape to the backing card and a strip of the Positive 12x12 scrapbook paper. 


Stamp out the Cool Words clear stamp set onto a sheet of White Cardstock 350gsm.  Cut and edge the word cards with black archival ink pad.


Apply a liberal amount of fluoro pink/gesso mix loosely over the main substrate (DW art journal – burlap page in this instance).  Allow to dry.


Adhere the decorated tag to the black card cut to the desired size to suit your situation.  
Finally, add the words to the page also (I used mounting tape to lift off page).


Cheers and thank you for stopping by ...
Linda Pearson
linda@yourcreativepalette.com.au