Sunday 29 April 2018

Cute by Tracey Campbell

Today I have created a fun page with the Colour Blast products that will be great for any special event page. I picked a photo of my daughters 10th Birthday celebration on trend with stars and unicorns to boot.
First up I did the tried and tested fabulous plastic package technique. What you haven't heard of it or used it yet?? Why not - it is so simple and creates a great background for you to build you layout on. All you need to do is paint or spray some Colour Blast product onto a scrap of plastic packaging. In this layout I used some of the Colour Shimmer Cube but you can spray some Colour Shimmer Spray or Artist Inks onto the plastic, then simply flip it over and rub it down on the cardstock.  
Keep doing this all over the cardstock with various colours, until you build up splotches of colour to create a fun background.
I used Royalty, Deep Water and Envy as my background colours.


Once the background was dry I used a thick paintbrush and dipped it in the Colour Shimmer Spray to flick across the page, I matched the colours Rose Petal to the Royalty, Envy to Envy, Singin the Blue to Deep Water, to create a messier look.
Over the top of the background colours I used the Colour Shimmer Cubes again and painted them through a 12x12 star stencil. With the Colour Blast products being so flexible you can use other products to paint through the stencil; such as the Colour Shimmer Spray or the Artist Inks. I used a rainbow of the Colour Shimmer Cubes; Singing the Blues, Sunshine, Royalty, Envy, Tangareen Dream and Punch.
I then added the final touches to my layout with photo, title, diecuts and journaling.
Here I am finishing off with some Soot Artist Ink loaded into a calligraphy pen to journal with. You can also see the black lined boarder around the outside of the cardstock - I did that with the straw from inside the Roadbase Colour Spray, I simply used the straw as a pen and dragged it across the cardstock to create a messy boarder and then used the remain spray in the straw to flick across the layout to create black splats.
Thanks for stopping in and I hope that you like my page and that I have inspired you to dig out your Colour Blast products and get creating.

Hugs
Tracey

Surfs Up by Tracey Campbell

The flexibility of these Colour Blast products is only one of the many reasons why I reach for them each and every layout. For example in this layout I am sharing with you today I have used them in a few different ways and each way is so easy and fun to do.
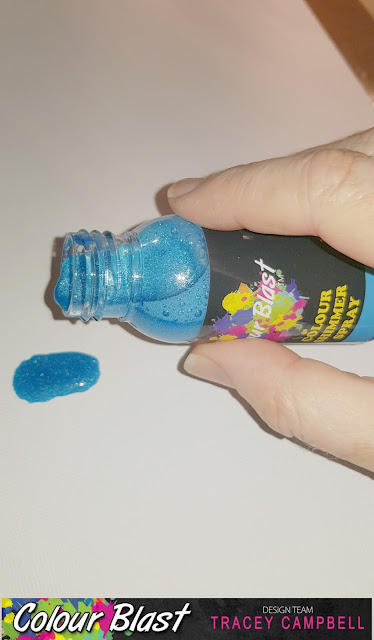
My first way I want to share with you now is how I used the Colour Shimmer Spray to create a back ground that I wanted to kind of link back to a body of water.... to relate to "Surf" to tie in the photo. I simply shook the bottle of Singin the Blues Colour Shimmer Spray and then poured a few drops straight onto the cardstock.
Using my finger I spread out the blobs across the cardstock until I got the look of water spread across the page.
I did add a bit more Colour Shimmer Spray and kept spreading it until I got the look that I was after.
As I wanted to hurry the process up I used a paper towel to mop up the excess.
While the back ground was drying I hand cut out three shapes that resembled surfboards from cardstock.
The first two surfboards I sprayed with Leather Colour Shimmer Spray and let them dry.
Once dry I spread some Heavy White Gesso through a stencil over one of the Leather Colour Shimmer Sprayed surfboards. Let dry and it is finished.
The second sprayed surfboard I placed some thin strips of washi tape over it and then spread some Just Blue Colour Paste over the top. Let dry.
For the third surfboard I wet the edges of the cardstock with water and then painted them again with some Sapphire Colour Spray. I added the water to the edges to make the Colour Spray bleed across the page. When it was dry it dried a bit lighter than what I wanted so I repeated the process but this time I used Calypso Artist Ink to give a more vivid colour.
Next I loaded a calligraphy pen up with Soot Artist Ink and used the pen to journal on the dried surf board.


The calligraphy pen with the Artist Ink in it is a great way to doodle on your layout to create highlights under titles and interest to the page.
I then simply put it all together to create this simple, fun page.
So such easy ways to use the Colour Blast products but as you can see the simple ways are often the best.
Hugs
Tracey

Saturday 28 April 2018

"Birthday Dinner", by Amanda H

Hello Colour Blast fans!

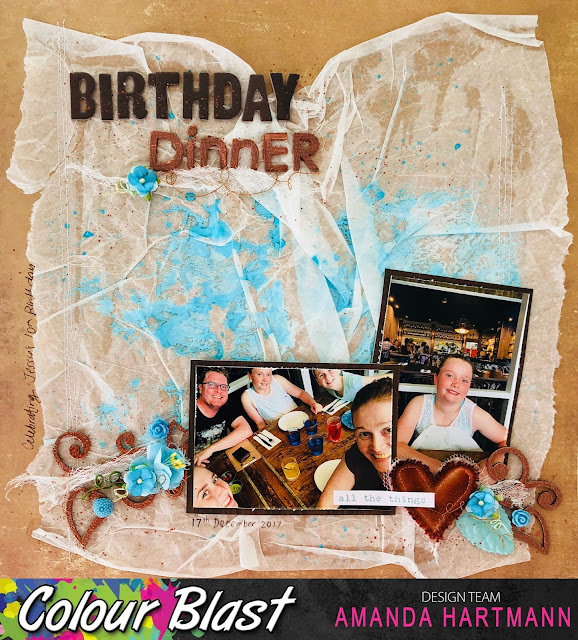
Today I use humble kitchen baking paper to create an interesting background - made all the better with some Colour Blast of course!

Here is a sneak peek of the project... You can't go past a white, blue and copper colour combo!


Let's look at the steps I took to create the page.

On a messy mat I added some Heavy White Gesso, Colour Artist Ink in Oasis, and some sprays of water.

I mixed and combined the products in a messy random way on the mat.
Then I took a sheet of kitchen baking paper and placed it on the paint mixture.
I pressed and scrunched the paper, creases and all, into the paint. And then I left it to dry overnight.
Once it had dried totally, I turned it over to see wonderful variations in colour and loads of texture to the paper. To attach the baking paper to my Kraft cardstock base, I used glue, and my brayer to make sure it was flattened and adhered well to the background. I also used some machine stitching to attach the paper, which you will see in some of the close ups later.
  
While everything had been drying, I used my Colour Blast products to add colour to my chosen embellishments.
Firstly, I coloured a Charms Creations DIY heart. These hearts are white and canvas and are perfect for colouring with Colour Blast. After spraying with some water, I painted the heart with Colour Artist Inks in Rust.
I chose some canvas letters for my title, and needing some colour and shine, I grabbed by Colour Shimmer Spray in Sienna. The cooper tones of Sienna make it one of my favourites!
I gave both the letters and the heart a good spray with the Sienna spray.
I chose a few 2Crafty chipboard pieces, and inked with Versamark ink before embossing with Colour Embossing Powder, also in Sienna. I only did a single coat of embossing powder on this occasion. This gave a rough textured feel to the chipboard, which I feel suited the page. For a smoother embossed finish, you need to do two coats of embossing.
Once I started assembling my page, I knew I needed some splatters. I used my Colour Shimmer Cube in Sienna, to add some lovely copper splatters to the entire page.
And now to put it all together! Here is my completed page!
 I love the colour and texture of that baking powder!
Here are some  close ups. You will see how I combined my chipboard, Charms heart, with flowers, muslin, leaves, wire and stickers to create some interesting clusters.

Thanks for looking !

Amanda


Thursday 26 April 2018

"Dance Off" by Sue Plumb


Hi everyone!
Sue Plumb here to share my latest Colour Blast design team project with you. Today I have a mixed media scrapbook page featuring Colour Shimmer Dust, Colour Paste and Colour Artist Ink. I documented some fun snaps of my boys in a "dance off" at a party one night. To go with the theme of my photos, I gave my page a grungy urban style.


I started my page by mixing up some 'Duke' Colour Shimmer Dust with a little water; then brushed it across my cardstock using a wide brush. I then took a small brush and used it to splatter some of the excess around the page before drying it off with a heat gun.


I then added some 'Stormy Weather' Colour Paste roughly (so that it showed some "chunky" texture) through a brick stencil. I applied the paste to three areas of my page (as I tend to follow the visual triangle rule of design); before drying it off.


Whilst the paste was drying, I used some Uniquely Creative metal dies to cut 3 lightbulb shapes from cardstock. I then used 'Cranberry' Colour Artist Ink and a thin brush to colour them (I gave them 2 coats for extra vibrancy); before using he excess ink on the brush to add a few splatters around the page.


I then began constructing my page. I created a small mat for my photo strip using some music paper; a felt heart doily; and some frayed gauze; before mounting my photos on top. (I chose a photo strip collage for my pics as they had been taken late at night on my phone and were not the best quality.)


I added two of the lightbulb shapes alongside my photo strip.


I then added the third lightbulb above my photos, along with a handmade arrow embellishment from Charms Creations.


For my page title, I used some Jillibean Soup alpha stickers, which I outlined with a felt pen to help them stand out more from the background. I also added some stamped phrases around my page using some stamps from Uniquely Creative.


To finish off my layout, I added my handwritten journalling; stamped the date; and scattered some sequins around my page.


That's all from me today, thanks for stopping by so I could share this with you. I hope I have inspired you to get stuck into your Colour Blast products - perhaps pick up something you haven't used in a while, or try that new one you bought but haven't used yet? Whatever you do, have fun!
Until next time, happy scrapping!