Showing posts with label duke. Show all posts

Friday, 22 May 2020

Shine Within by Tracey Campbell

Hello everyone, Tracey Campbell here with a Creative Team share using the beautiful Trendsetter collection designed by Michelle Grant. This collection is full of stunning blues and purples with a fashion runway theme to it, but versatile enough to use for other themes. I have teamed it with a photo of me taken in Hawaii in 2018. I have put together a few step-by-steps here in the blog on how the layout came about and also a link to where I have filmed my process in full, so grab a cuppa and have a read or watch. 

Shine Within

To create the background cut of a 10 cm strip from the Classy patterned paper - make sure that you include one of the lace boarders, adhere the strip to the left hand side of some white cardstock. Sprinkle a small amount of Duke and Passion Colour Shimmer dust on the bottom right corner and the centre of the Classy patterned paper and cardstock (you can see the exact positioning of the Shimmer Dust in the final layout). Activate the Shimmer Dust with a fine spray of water, blot off excess liquid with a paper towel. I felt that I needed a bit more colour so I repeated the process using the tiniest amount of Lollipop and Sunshine Shimmer Dust. Let dry.
Using a paint palette spread some Heavy White Gesso through the flowers on the Sparkle stencil. Concentrate on the bottom right hand corner and the area where the Classy patterned paper and white cardstock over laps - where the Shimmer Dust is. 
Fussy cut the flowers out of the Sparkle Patterned Paper cut-apart sheet and using the Sunshine, Carrot, Grape, Fuchsia and Ultramarine Watercolour Inspired Pan Set paint the flowers. If you don't have the Watercolour Inspired Pan Set you can used the Artist Inks diluted down with water or any other water colours.
From the "B" Sides of Classy and Runway Patterned Paper cut out three 10x10 cm squares and then cut out the centre to make square Frames. Interlock the frames together. Layer up the photo mount area but placing down half a white doily, a 7x10 cm portrait photo and the frames.
Cut out the word title "Nothing Can Dim the Light That Shines Within" from the Sparkle Patterned Paper cut-apart sheet and using the Watercolour Inspired Pan Set and a very thin paint brush fill in the letters with a blue, purple and pink ombre effect. 
Build up a cluster in the bottom right hand corner using a few strips of patterned paper. I used piece of 4x8cm from Chic and 1x10 strip from Classy Patterned Papers. Build up a cluster by placing the Patterned Paper strips and three flowers. 
Using 3 Dimensional tap adhere the remain flowers around the photo cluster, have some of the larger flowers tucked behind the frames and the smaller flowers overlapping over the top.
Cut the work title into for pieces and using a pair of scissors destress the edges of the title. Place the words "Nothing Can Dim the Light That" down the bottom right hand side of the photo cluster area and the words "Shine Within" over the cluster on the bottom right hand side. See finished layout for exact positioning. 
I have created a process video if you would like to watch how the layout was created. You can find it here on my YouTube channel. 
Thanks for stopping in and I hope I inspired you to pull out your Trend Setter range and get creating. 


Sunday, 26 April 2020

Live Your Art Tags by Tracy Jackson

Morning Bee Arty fans...

Today I am sharing my monthly project - 3 tags


Before i start any project, I always pick out my paper, not only does this give me a colour scheme to go off, it also tends to give me ideas depending how much of it I have.
I had left overs from Arty Farty paper range that I couldn't bear throwing out, which gave me the idea to make tags.


After cutting out a tag shape and gluing a strip down the side and picking out a stencil called Bricked,  I then mixed in some Shimmer Dust - Velvet into some Gesso and put a layer over the stencil on 2 tags and a Shimmer Dust - Paris/Gesso mix onto the last tag.


I then set aside to dry, which didn't take that long while I gathered up what I needed for next stage.


So for Tag 1 - I picked matching flowers that were 2 different sizes. Stamped each a couple times each with Archival Ink onto watercolour paper so the black outline wouldn't run when I coloured them with Shimmer Dust - Duke
Stamp set I used for this is called Floral Delights 2. ( I actually used the flowers from this set for all 3 tags), I also stamped on the tag to cover in some spaces one of the stamps from Meridian
Got to love fussy cutting!


I repeated the process for Tag 2,  but also added the paint brushes and words from Live Your Art stamp set. Shimmer Dust colours used for these flowers are Peacock and Lollipop


Lastly Tag 3 - I stamped on background one of the stamps from Geo Grunge
Shimmer Dust colours used were Duke and Velvet
I also used for the first time in center of flowers... Shimmer Pen... OMGeeee... squeal ... this pen is so cool and leaves such a shimmer!!
..
And so, after assembling them all together, free hand drawing lines around the edges, hole punching and adding twine, I have ended up with 3 bright and fun tags


Hope you have enjoyed this and I have given you some inspiration to not throw out any leftover paper.
Happy Crafting


Friday, 29 November 2019

Relaxing by Suzy Loudon

Hi everyone. I was very excited when I got my hands on some of the Love & Grace Paper range. I just LOVE it. So first opportunity I grabbed one of my favourites & this is what I came up with.


To begin with I tore the edges of "Lucinda" & stuck it down on some black card.


Using the 'Imagine' Stencil I first spread Just Blue Colour Paste then lightly spread Singin' The Blues Colour Paste over the top.
  

Then using one of the earlier Colour Blast Stamp sets I did some random stamping.

Using Duke Shimmer Dust I activated a small amount with water. Using plastic I stamped it on my page.


Using Navy Shimmer Dust I lightly sprayed some cheese cloth with a spray I have made up. I gently dried it with my heat gun.


I embossed my chipboard with Jet Black Embossing Powder.


To colour my white flowers I used Marine Artist Ink. I varied from dipping the flower into the pot to mixing with various amounts of water to give various shades.


Using Snow White Colour Paste I used a mould to make flourishes.


Assembling my page I added art stones, butterflies & a flair. Keeping it pretty simple. Here's some close-ups.


Thanks for looking.
xxx Suzy


Friday, 13 September 2019

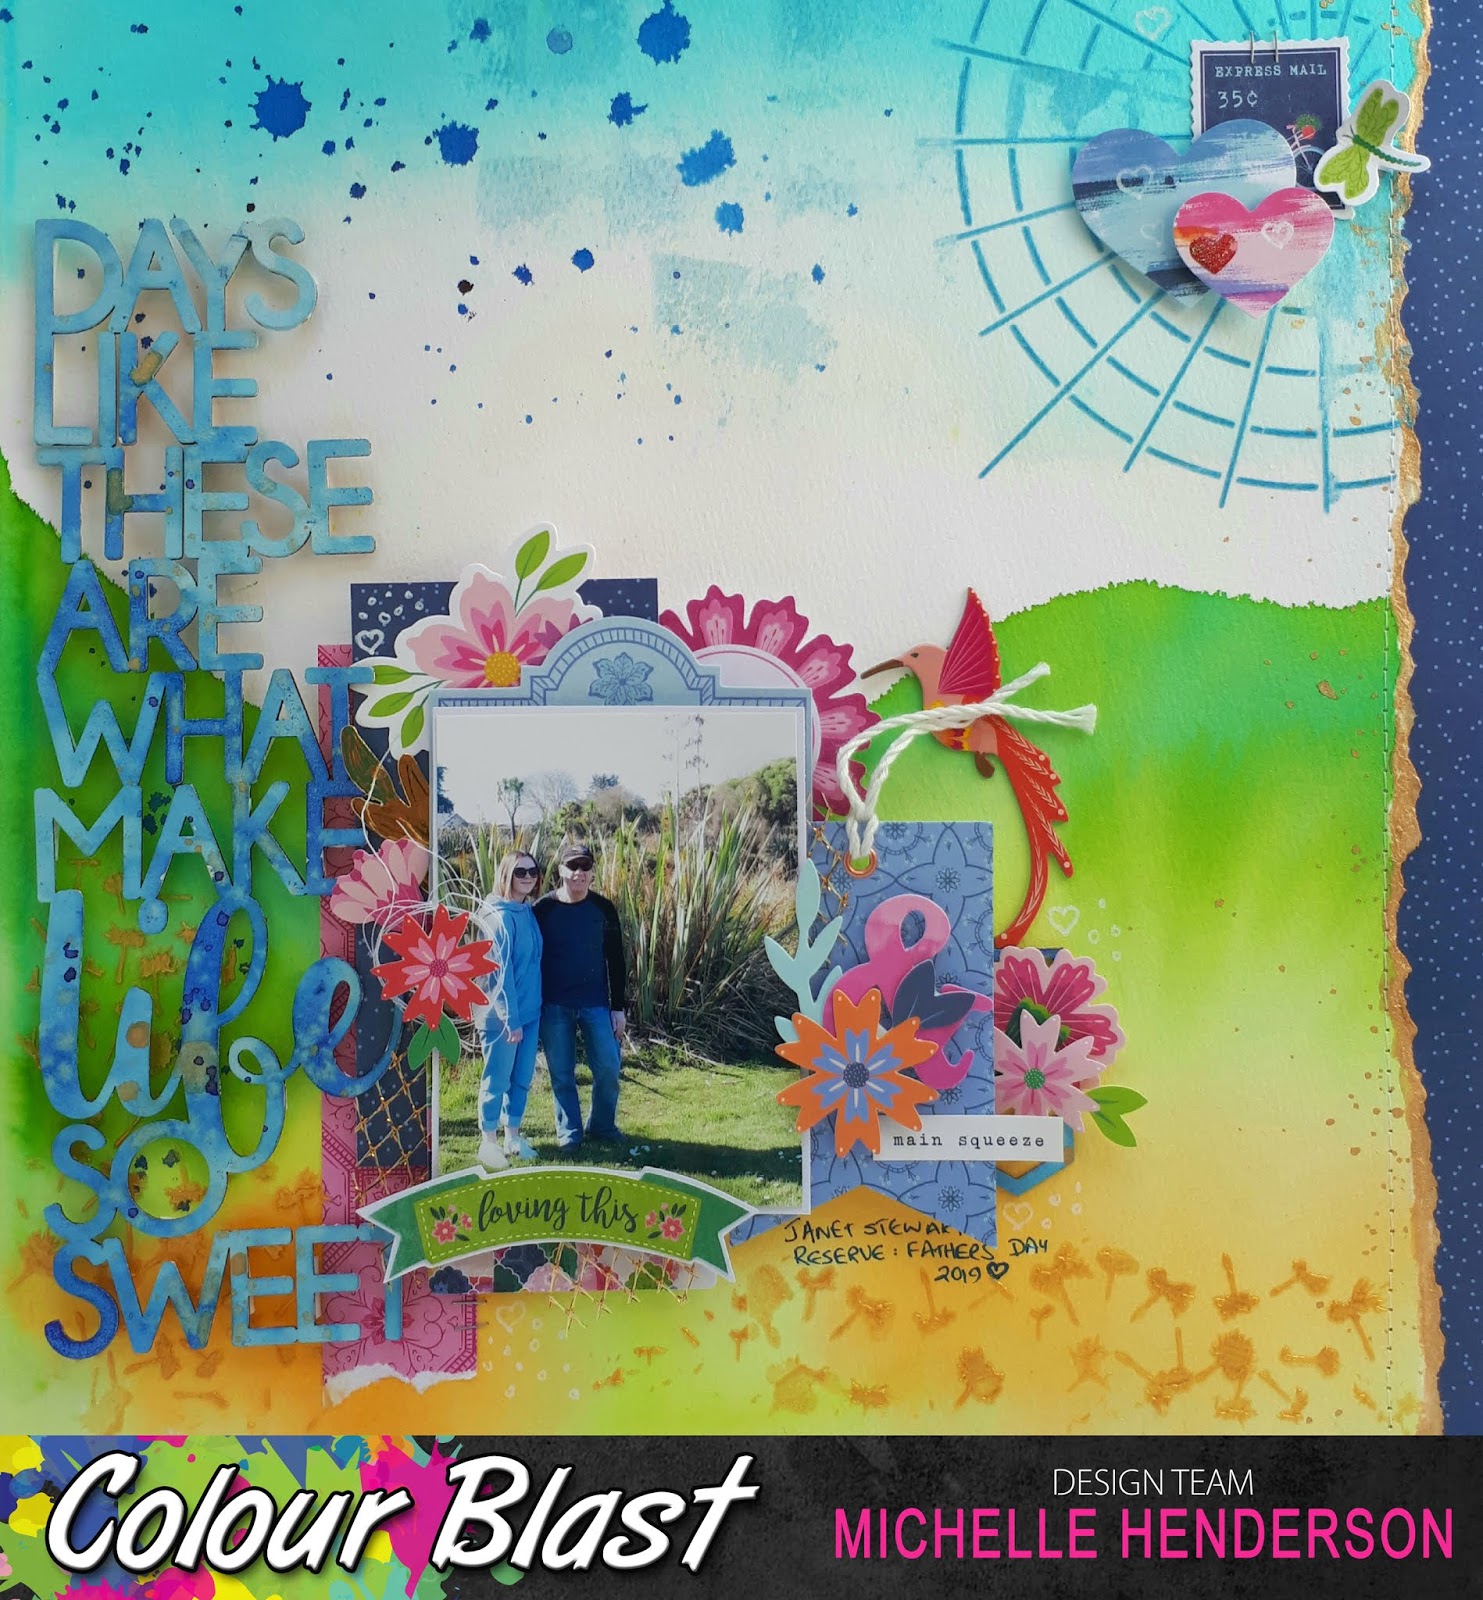
Days like these....by Michelle Henderson

Hello and happy Friday everyone! I'm at a retreat so busy working on my next projects as well as some things just for me 😀
I have a watercolour page today using a little bit of everything - here's s little hint...


  My background was done on watercolour paper, and I used the wet on wet technique with Colour Artist Inks in Lime, Mermaid, Grass, and Barley. By wet on wet, I mean I painted the edge if my hills with water only to start, then went over it with thinned colour so it would blend down the page.


I then did the same thing at the top of the page with Calypso Colour Artist Ink.


While that was drying, I prepped the chipboard title with Heavy White Gesso.


I mixed a little Colour Shimmer Dust in Duke up on my (very!) messy mat, and then swiped the title through it, patting it into the colour again where I needed it. This gave me the lovely mottled look I was going for.


I wasn't keen on the way the right edge looked, so I ripped it off and added some navy paper, after edging the rip with Light Gold from the Shimmery Gold Watercolour Pan set. I also splattered a little of it down this edge, and on the title. 

I used Colour Paste in Singin' the Blues and Bling through stencils, and also smudged a little in the sky.


I still had a little bit of the Duke left over, so I made some big splatters and drips using a water brush, in the sky.


I added my photo cluster and another small cluster, along with the title. I'm so pleased to have already made my Fathers day page!!!
Here's the finished page 💕
 

Thanks for joining us here!


Thursday, 8 August 2019

Beautiful life by Suzy Loudon

Hello again. Today I cracked out the Shimmer Dusts again. One of my favourite Colour Blast products.


To begin with I spread Heavy White Gesso across my black card.


I started with my Duke  Colour Shimmer Dust. Sprinkling a little before water activating it. Using my heat gun I moved it around as I heated it as well as spraying it with more water as I went, continuing to dry.


I then added Cobalt  Colour Shimmer Dust. Using the same process & filling in all the gaps.


I gave my title a coat of Heavy White Gesso


Then added some small areas of Cobalt Colour Shimmer Dust.


Once dry I embossed it with Singin' The Blues  Colour Embossing Powder.(I forgot to get a process shot...sorry)


Using Cobalt  Colour Shimmer Dust. I coloured some flowers, using different intensities of the dust to vary the colours.


As I started to put my page together I decided it needed some splatters with some watered down Gesso.


Then all was left was to stick it all down. 
Here's some close ups.


Thanks for looking.
xxx Suzy