Showing posts with label Colour Shimmer Dusts. Show all posts

Saturday, 25 June 2022

Time to sparkle, by Amanda Hartmann

Hello Bee Arty fans!

My turn to share today!

You will see these things on my page:

* Products from the Fireworks collection
Colour Shimmer Dusts - Cobalt, Jacaranda and Lollipop
* Black splatters from Colour Artist Dye Ink {Soot}
* Resist technique using Leviathan Marking Crayon


And here is my page!


I started with some white cardstock and drew hugs and kisses (XOXO) with the Leviathan Marking Crayon. I then painted watered Colour Shimmer Dusts - Cobalt, Jacaranda and Lollipop over the XOXOs.

To the background I also added:

* Stamping - the star bursts and mini hearts from the Fireworks Uppercase - Clear Stamp Set, and

* Splatters - once the background was dry I added black splatters from Colour Artist Dye Ink {Soot} and splatters from Colour Shimmer Dust {Cobalt and Lollipop} 


Extras:
* Added some papers from the Firework collection, as well as fussy cutting some of the black and white elements from the Collection paper. I painted black and white cut outs with  Colour Shimmer Dust {Lollipop} 

* Die cut  Chit Chat - Metal Die Speech bubbles with white and black cardstock. Painted white pieces with Colour Shimmer Dust {Cobalt} 

* Painted a Charms Creations DIY banner with Colour Shimmer Dust {Cobalt} also and added stamped mini-hearts.


 Thanks for looking today!


Amanda


Saturday, 20 February 2021

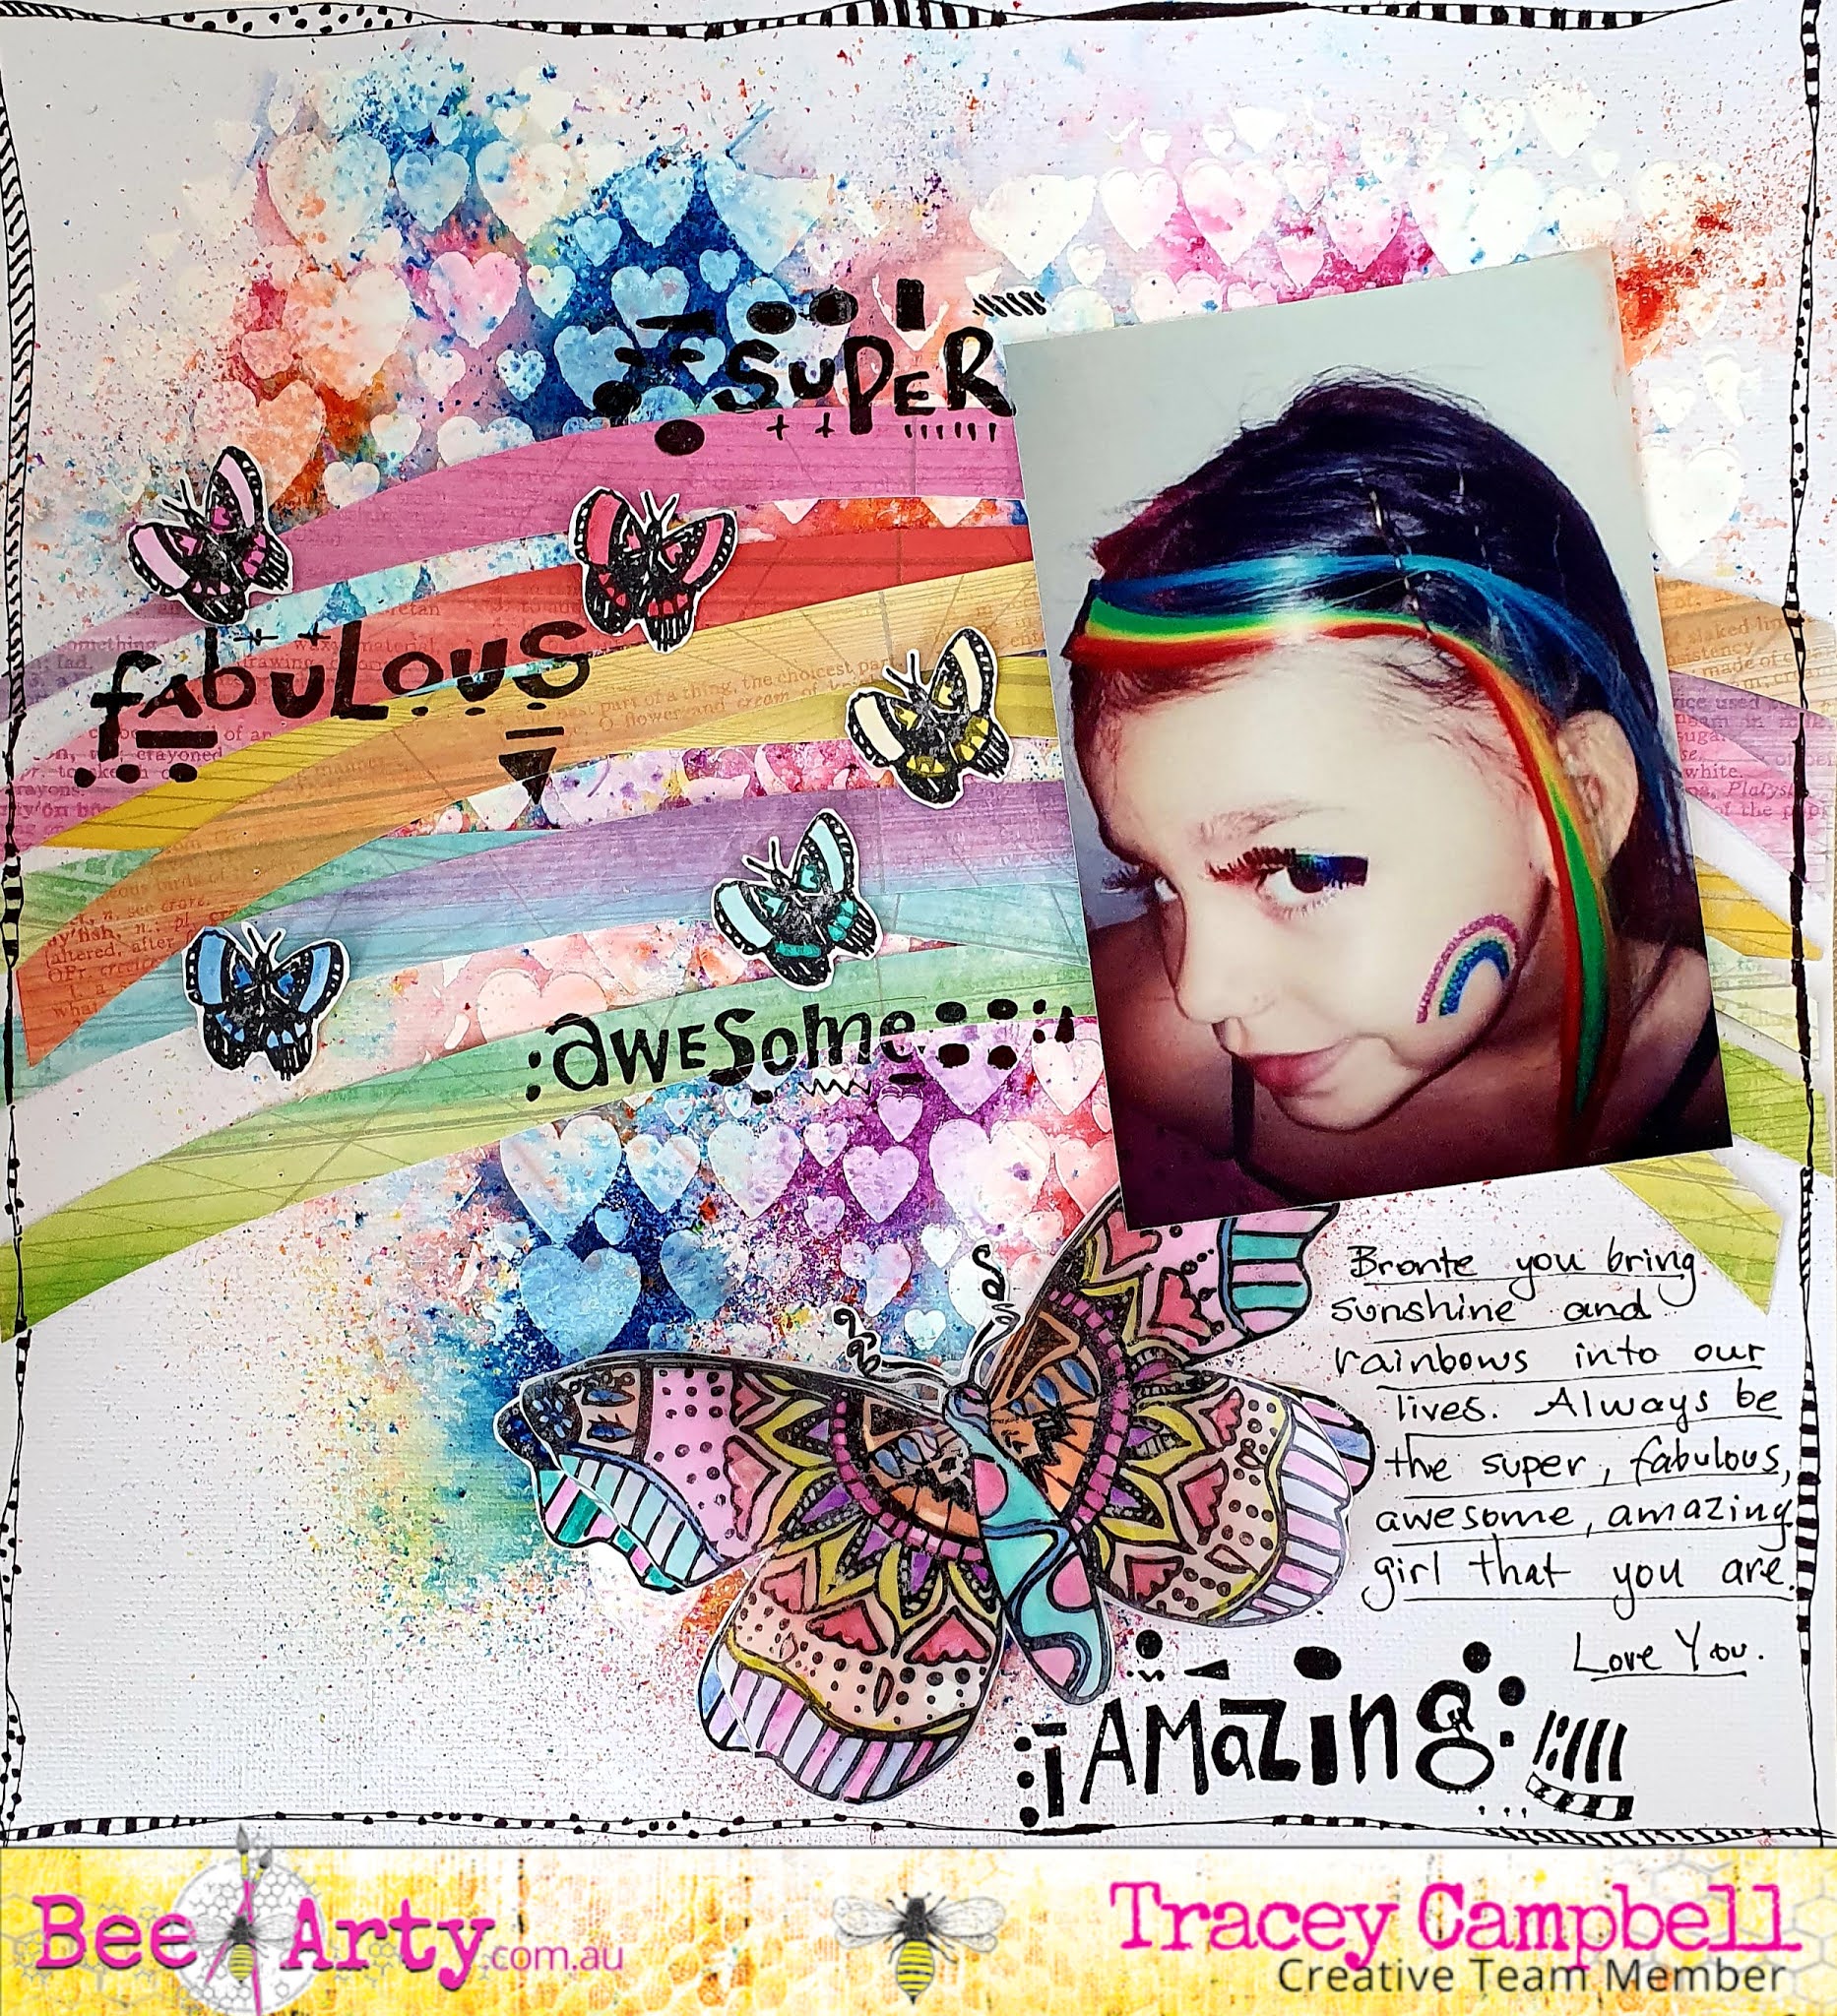
Super, Fabulous, Awesome, Amazing by Tracey Campbell

Hi Bee Arty fans. Tracey Campbell here today with a colourful rainbow Creative Team share highlighting the magical Shimmer Dusts. I'm going to let you in on a little secret of mine..... the Shimmer Dusts are my all time favourite Colour Blast by Bee Arty Product ever!!! Yes ever. I mean where else can a little dust sprinkled onto a project create such vibrant shimmery colours and as an extra bonus.... a tiny pot last such a long time.  

My layout today is of my oldest Daughter when they had a"Circus" theme at school and had to go in dress-ups. Bronte being Bronte just couldn't go as a clown, she had to be something different a "Rainbow Acrobat".   

Here is a list of all the products that I have used to:

Bee Arty Products:

Stamps: Cool Words set, Serendipity, the butterfly from City Lights.

Paper: Artist from the Arty Farty collection

Colour Shimmer Dust: Sunflower, Duke, Amber, Lollipop, Candy, Peacock and Passion

Heavy White Gesso

Stencil: Devotion

Inspired Collection Pan Watercolour set


Other materials:

White cardstock

Black Stazon ink

Black marker pen

3 Dimensional tape

Glue

Velum 

Scissors 

Lead pencil

Paint pallet Knife 

To create by back ground I started by using the Devotion stencil with some Heavy White Gesso, I  used a Paint Pallet knife to spread the gesso through the hearts pattern of the stencil and onto a 12x12 sheet of cardstock.
In the photo below you can see how I spread the gesso through the stencil in a thick "T" shape. Put aside to dry.
While the gesso was drying I cut some arches, roughly 1 cm in thickness from the Artist pattern paper in the Arty Farty collection
Making sure that the arches stretched across the whole patterned paper and at least one of each colour.
Using some Stazon black ink stamp the Serendipity butterfly onto some white cardstock and then repeat and stamp the image onto some vellum. Next stamp five small butterflies from the City Lights stamp set.
Using the Inspired Collection Pan Watercolour set and a water paint brush paint all five small and the two large butterflies. TIP: Only use a small amount of water on the vellum butterfly and it will curl and buckle if too much water is applied. 
Once the Heavy White Gesso is dry lightly sprinkle the Colour Shimmer Dust over the hearts. I have used seven different colours, Sunflower, Duke, Amber, Lollipop, Candy, Peacock and Passion. I actually sprinkled all seven colours onto the page making sure not to over lap them too much as I didn't want it turning into a "hot mess" nor mix colours too much. Then I sprinkled a little water onto the background and activate the Colour Shimmer Dust. 
I must admit, watching the colours magically appear and move together is one of the reason I love this product. It makes my heart happy. 
Before the water dried I took a roll of paper towel and rolled it over the top of the activated Colour Shimmer Dust. TIP: Not sure why this works but it does - rolling the paper towel stops the colours from running or smudging together, if you place a piece of paper towel over the top of the Activated Colour Spray it smudges!  
Here is the background. I love the rainbow patches of bright colour and how the hearts show through. 
Now I put it all together by layering the arches across the page, roughly in the centre of the page but more towards the top to create a rainbow. I used white glue to adhere them to the page. Adhere the velum stamped butterfly image to the white cardstock butterfly to create a double butterfly. The photo was next, I placed it on the right side of the layout and tucked the large butterfly underneath the bottom left hand corner. 
Lastly pop the smaller butterflies across the rainbow as if they are randomly flying in all directions. 
Here you can see the position of the elements as they come together.
Next I used Stazon black ink to stamp the words form the Cool Words stamp set across the page.
Here you can see where I have positioned the words; Super, Fabulous, Awesome and Amazing on the page.
To finish off I doodled a funky boarder around the edge of the cardstock and did a bit of journaling with a black marker. 
I really love how fun this was to create and how bright and funky it turned out. 
I hope I have inspired you to try using a few different Colour Shimmer Dust colours at the same time. It can be a bit scary giving it a go but the result is awesome. 

Hugs
Tracey


Friday, 29 May 2020

'You are loved' by Elisa Ablett


Hi Everyone,

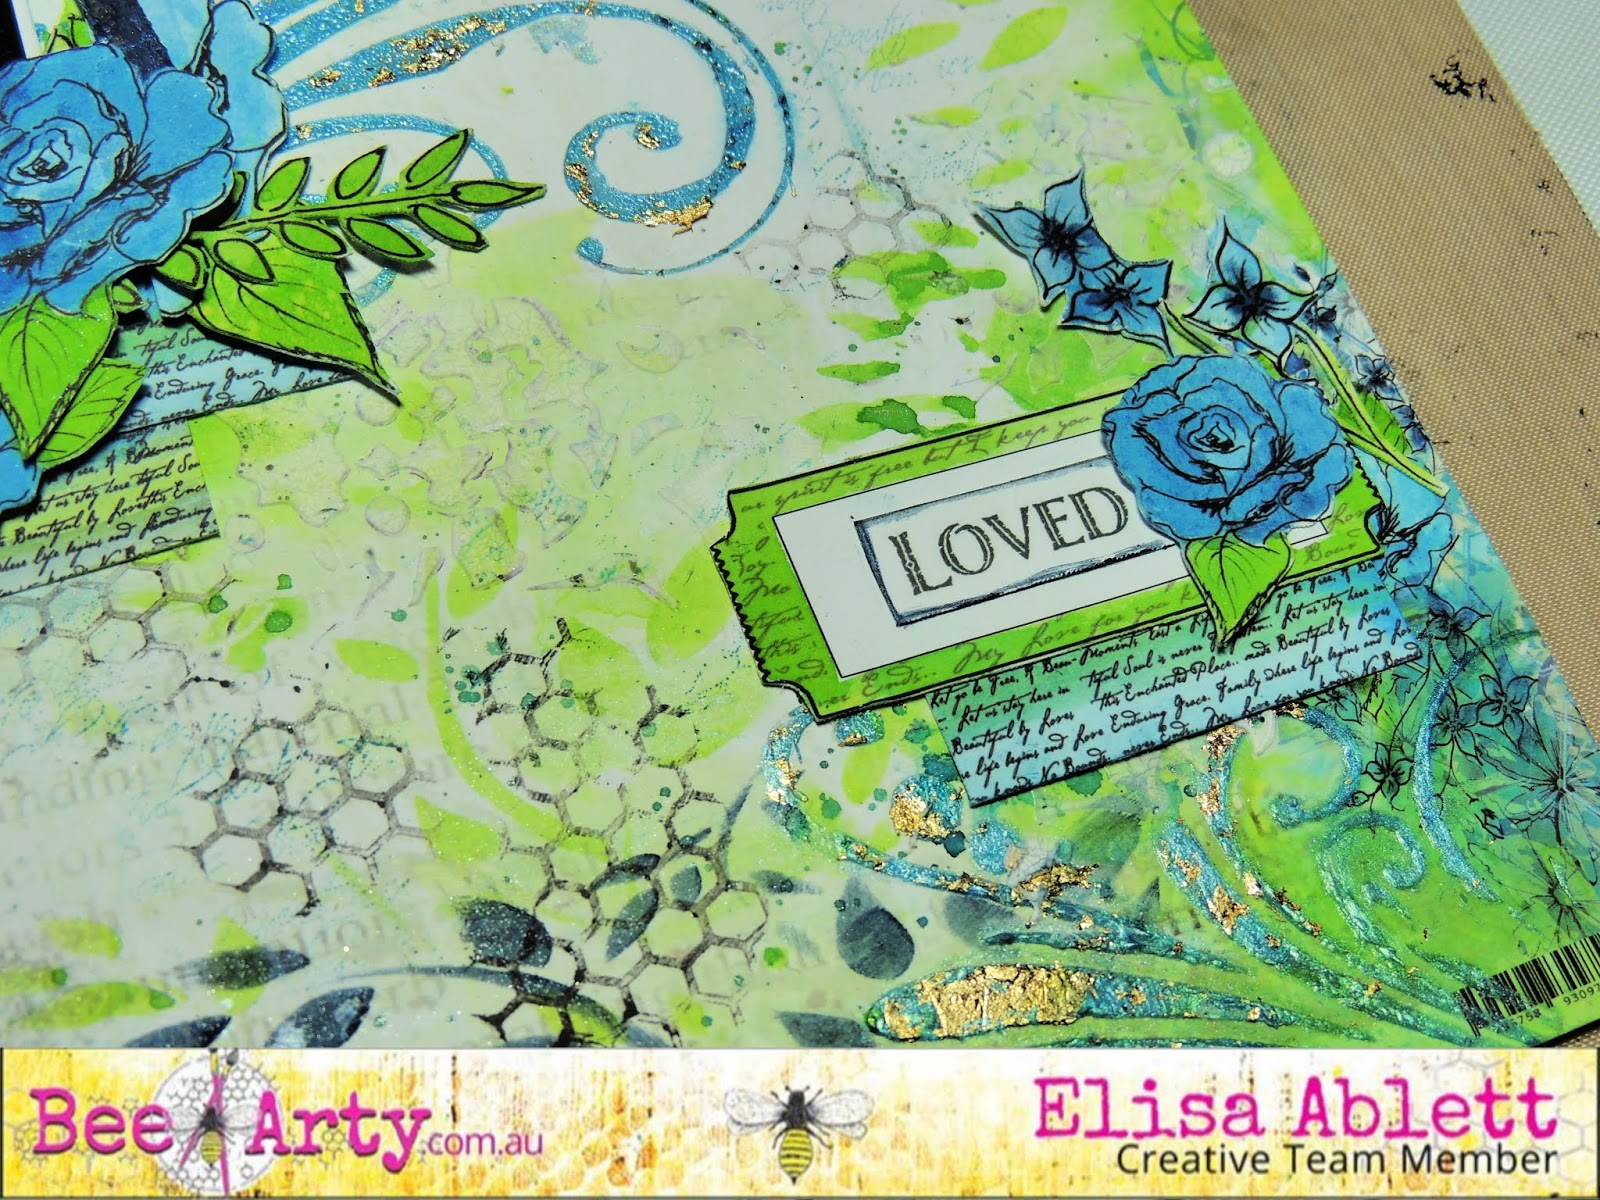
My turn up on the blog today with my latest inspiration for you, a vibrant mixed media layout !

I think you can all guess what my favourite colours are to work with - blues and greens and all shades inbetween and what better products to start your layout with other than those sparkling shimmer dusts. The colours and other products I used to complete this layout are listed below with links.

But first lets take a closer look -


Here are the product links and names:


and I have a step by step for you though I must apologise that the first few photos I took of the background unfortunately were corrupted on my camera's memory SD card:- 


Step 1 - Using Lucinda paper from the Love and Grace range by Michelle Grant as your background paper. Add small amounts of each of the shimmer dusts named above into a paint palette and add a small amount of water to each. Using a spritzer bottle, spritz water over the areas on your background paper that you wish to add colour and using a paint brush, add colour washes in layers to your page. I accentuated the hexagon shapes with the Lush green shimmer dust and also in between the hexagons with the Duke Shimmer Dust. Use the main photo to guide you where to add your extra colour.


Step 2 - Fussy cut out these elements from the Love and Grace - Heart Cut and Colour Sheet and colour using a small paint brush and your left over shimmer dusts and put aside to dry.


Step 3 - Stencil using the Imagine Stencil and Colour Paste Singing the Blue as shown in the main photo above. While the paste is drying and is tacky to touch, put the stencil back over the stencilled area - matching it perfectly and then lay small amounts of gold foil flakes or gold foil sheet and lightly press down, heat with a gentle heat gun and then lift the stencil carefully off. You should have gold foil accents on all your stencilled areas.


Step 4 - Using the Laced Stencil and the white gesso, stencil light amounts of the gesso or you could use crackle paste etc on the left hand side of the layout below the hexagons and also on the right hand side near the smaller hexagons. 


Step 5 - Add some stamping using the Memories Stamp Set and Tanya Froud's technique of adding liquid shimmer dusts to a make up sponge and using that as a stamp pad. I love this technique as it allows you to coordinate all the colours and techniques on your layout.


Step 6 - Using the Leafy Stencil and a make up sponge wet with Navy shimmer dust, stencil by gently dabbing the make up sponge through the stencil in the places as shown in the photo above. 


Step 7 - Check with this progress photo to see if you have completed all your steps and also take the time to add some splatters in your chosen colour! I went with Navy Shimmer Dust splatters. 


Step 8 - I have a great technique to use on chipboard, using your finger smooth Singing the Blues Colour Paste over the chipboard frame and while it is wet press your stamp into the wet paste. Dry with a gentle heat or leave to dry naturally. Once dry, paint a darker colour shimmer dust liquid (Navy) over the top of the stamped areas, making sure you get the darker liquid into the grooves etc. 

Once dry, wipe gently with a baby wipe to reveal some of the underneath Colour paste, giving your chipboard a multitoned textured effect. 

Start putting all your elements together on the layout as shown below.


and you are finished!


Thanks for stopping by the blog today, hope you have enjoyed the step by step.

Elisa x

Hugs 


Friday, 22 May 2020

Shine Within by Tracey Campbell

Hello everyone, Tracey Campbell here with a Creative Team share using the beautiful Trendsetter collection designed by Michelle Grant. This collection is full of stunning blues and purples with a fashion runway theme to it, but versatile enough to use for other themes. I have teamed it with a photo of me taken in Hawaii in 2018. I have put together a few step-by-steps here in the blog on how the layout came about and also a link to where I have filmed my process in full, so grab a cuppa and have a read or watch. 

Shine Within

To create the background cut of a 10 cm strip from the Classy patterned paper - make sure that you include one of the lace boarders, adhere the strip to the left hand side of some white cardstock. Sprinkle a small amount of Duke and Passion Colour Shimmer dust on the bottom right corner and the centre of the Classy patterned paper and cardstock (you can see the exact positioning of the Shimmer Dust in the final layout). Activate the Shimmer Dust with a fine spray of water, blot off excess liquid with a paper towel. I felt that I needed a bit more colour so I repeated the process using the tiniest amount of Lollipop and Sunshine Shimmer Dust. Let dry.
Using a paint palette spread some Heavy White Gesso through the flowers on the Sparkle stencil. Concentrate on the bottom right hand corner and the area where the Classy patterned paper and white cardstock over laps - where the Shimmer Dust is. 
Fussy cut the flowers out of the Sparkle Patterned Paper cut-apart sheet and using the Sunshine, Carrot, Grape, Fuchsia and Ultramarine Watercolour Inspired Pan Set paint the flowers. If you don't have the Watercolour Inspired Pan Set you can used the Artist Inks diluted down with water or any other water colours.
From the "B" Sides of Classy and Runway Patterned Paper cut out three 10x10 cm squares and then cut out the centre to make square Frames. Interlock the frames together. Layer up the photo mount area but placing down half a white doily, a 7x10 cm portrait photo and the frames.
Cut out the word title "Nothing Can Dim the Light That Shines Within" from the Sparkle Patterned Paper cut-apart sheet and using the Watercolour Inspired Pan Set and a very thin paint brush fill in the letters with a blue, purple and pink ombre effect. 
Build up a cluster in the bottom right hand corner using a few strips of patterned paper. I used piece of 4x8cm from Chic and 1x10 strip from Classy Patterned Papers. Build up a cluster by placing the Patterned Paper strips and three flowers. 
Using 3 Dimensional tap adhere the remain flowers around the photo cluster, have some of the larger flowers tucked behind the frames and the smaller flowers overlapping over the top.
Cut the work title into for pieces and using a pair of scissors destress the edges of the title. Place the words "Nothing Can Dim the Light That" down the bottom right hand side of the photo cluster area and the words "Shine Within" over the cluster on the bottom right hand side. See finished layout for exact positioning. 
I have created a process video if you would like to watch how the layout was created. You can find it here on my YouTube channel. 
Thanks for stopping in and I hope I inspired you to pull out your Trend Setter range and get creating. 


Tuesday, 17 April 2018

"Colour Run" by Rachel Dutko

Hi Colour Blasters!

Today I have a 12x12 layout to share with you. 
It's quite a 'messy' page, but that is to highlight the fun and 
messy aftermath of the Colour Run. 
It looked like so much fun that I'd love to participate myself!!!


I started my page by applying some Black Heavy Gesso through a stencil.


I then wanted to add some colour to my background to look like the colour on my son's shirt. To do this I sprinkled small amounts of Colour Shimmer Dust on the page ( I used Duke and Candy) then sprayed with water. I wanted to emulate the 'sprinkled' colour effect.


I then added some splatters with Saffron and Carribean Colour Sprays 
and Singin The Blues Colour Shimmer Spray.


To bring my photo out of the 'mess' of my background I added some yellow cardstock, 
a yellow title and embellishments.


Thanks for looking

Rachel x x