Showing posts with label Cool Words stamp set. Show all posts

Friday, 6 August 2021

"get on ya bike!" by Charmane Koch

 OK, so it's LOCKDOWN for most of Australia, HOWEVER... SA is lucky at the moment! I have to say I am feeling for each and everyone of you, and although we are safe for the moment, it's like walking on eggshells and feels like anything can happen at any moment!

SO.... WE NEED SOME BRIGHT HAPPY COLOURS! Let's GO FLURO!


I've played with the fabulous {get it?} NEW Fluro Coloured Mica Powders - Fluoro Pink, Green & Yellow...


And the Circulate Stencil from Michelle Grants Arty Farty Collection, and the Cool Words Stamp from Fiona Partridges Fearless, Brave & Free Collection...

First of all I used the Heavy White Gesso through the Circulate stencil onto the Inspirations paper from the Untangle Collection designed by Tanya Froud - just LOVE that it's quite possible to mix so many ranges together!


Once dried, I got out the 3 different Fluro Mica Powders and mixed with water, and coloured each "circle" with alternate colours...


I stamped the "cool" stamps after positioning my photo, that I matted using black cardstock and coloured tissue paper...


I then doodled around the edge of the circles to highlight them...


I decided that I need to also Matte the background paper with black cardstock as well. I cut about half cm around the background Inspirations paper, then distressed it and stuck it onto the black cardstock.

I then added the Charms Creations Fluoro Stars and title, along with the journalling on the page.

Here are some closeups...


I hope I have brightened your day... and you are inspired to play with some Fluoro Colours!


Thanks for popping by!

XO Charm

Saturday, 20 March 2021

You Amaze Me by Tracey Campbell

Hello everyone, Tracey Campbell here with with my latest 12x12 layout using awesome Colour Blast by Bee Arty products. Do you ever set yourself a challenge? If I'm in a scrapping rut or finding myself without any mojo I set myself a challenge. As I have been busy with work and with my family I have found that my mojo is lacking so it was self challenge time..... "The Three Challenge". Pick three pattern papers, three stencils and three stamps and use them on a page. I picked the following materials to start my self challenge with from the Bee Arty range:

Stamp Sets: Meridian, Cool Words and Fearless

Stencils: Organised Chaos, Keep Going and Encircled

Patterned Papers: Transform, Fearless, Brave & Free, and Strength 


So this is what I did to create my layout. Fussy cut a few squares, triangles and a circle from the Fearless, Brave and Free patterned paper.  Chose and cut out a word title, I picked You Amaze Me. 
Place the Organised Chaos Stencil over the top of the Transform patterned paper spray the image using Envy and Singin The Blues Shimmer Spray. I sprayed the centre of the stencil with the Singin The Blues colour and used Envy on the outer edges.  Tip: place scrap paper over laying the edges of the stencil so that you do not get spray over the stencil to avoid the straight edges on your patterned paper. 

I sprayed in two parts, the top of the page first, then cleaned off the stencil and did the bottom half of the paper. Tip: Flip the stencil while it is still wet with spray onto another sheet of paper of some cardstock to get a reverse image to use as a starting point for another layout.  The photo below shows the imprint left from spaying the Shimmer Sprays on to the patterned paper. 

Using Stormy Weather Embossing Powder, the Meridian stamp and an embossing ink stamp down the right side of the of the patterned paper. 

Set with a heat tool.

Now more stencilling, grab some Heavy Black Gesso, a palette knife and the Encircled stencil. Position the stencil so that it run vertically down the right hand side of the page over lapping the embossing and spray images already on the paper. Spread the Gesso through with a palette knife. 


Flip the stencil and run the lines of the stencil horizontally across the paper, but only stencil half of the image. Set aside to dry.


Use the Strength patterned paper and mat two 3x4 inch portrait photos. Use black ink and stamp the Cool Words down the page running them over the top of the mixed media work you have already done. I apologise that I did not take a photo of me doing this, but you can see the position of the Cool Words in the finished layout. 


Finish off the layout by adhering the photos in the centre of the page where the lines of the Encircled stencil work intersect. Stick with white glue the triangles, squares and the circle so that they overlap with each other (shape cluster) and tuck them under the top left, top right and bottom right corners of the photos.
Adhere the title over the top of the top right hand shape cluster.  
Use a black Sharpie pen and add a bit of journalling and a circle and line boarder around the outer edge of the layout. 


Here are a few close ups.


The finished layout, a colourful funky layout of my youngest daughter just after her Colour Run at school.


If you have scrolled back to the start of my post to see the list of the 3 stamps, the 3 stencil and the 3 papers to see if I did actually use them all..... well I can say that I came close. I didn't end up using one stamp set and one stencil!! :) I got to the stage where I was happy with the layout and felt it was complete without using them all so I just popped them to the side, after all the really challenge was to find my mojo and I think I found it. I hope that I have given you an idea on how to help yourself of a scrapping rut when mojo is low. Let me know if this works for you. 

Hug
Tracey

Saturday, 20 February 2021

Super, Fabulous, Awesome, Amazing by Tracey Campbell

Hi Bee Arty fans. Tracey Campbell here today with a colourful rainbow Creative Team share highlighting the magical Shimmer Dusts. I'm going to let you in on a little secret of mine..... the Shimmer Dusts are my all time favourite Colour Blast by Bee Arty Product ever!!! Yes ever. I mean where else can a little dust sprinkled onto a project create such vibrant shimmery colours and as an extra bonus.... a tiny pot last such a long time.  

My layout today is of my oldest Daughter when they had a"Circus" theme at school and had to go in dress-ups. Bronte being Bronte just couldn't go as a clown, she had to be something different a "Rainbow Acrobat".   

Here is a list of all the products that I have used to:

Bee Arty Products:

Stamps: Cool Words set, Serendipity, the butterfly from City Lights.

Paper: Artist from the Arty Farty collection

Colour Shimmer Dust: Sunflower, Duke, Amber, Lollipop, Candy, Peacock and Passion

Heavy White Gesso

Stencil: Devotion

Inspired Collection Pan Watercolour set


Other materials:

White cardstock

Black Stazon ink

Black marker pen

3 Dimensional tape

Glue

Velum 

Scissors 

Lead pencil

Paint pallet Knife 

To create by back ground I started by using the Devotion stencil with some Heavy White Gesso, I  used a Paint Pallet knife to spread the gesso through the hearts pattern of the stencil and onto a 12x12 sheet of cardstock.
In the photo below you can see how I spread the gesso through the stencil in a thick "T" shape. Put aside to dry.
While the gesso was drying I cut some arches, roughly 1 cm in thickness from the Artist pattern paper in the Arty Farty collection
Making sure that the arches stretched across the whole patterned paper and at least one of each colour.
Using some Stazon black ink stamp the Serendipity butterfly onto some white cardstock and then repeat and stamp the image onto some vellum. Next stamp five small butterflies from the City Lights stamp set.
Using the Inspired Collection Pan Watercolour set and a water paint brush paint all five small and the two large butterflies. TIP: Only use a small amount of water on the vellum butterfly and it will curl and buckle if too much water is applied. 
Once the Heavy White Gesso is dry lightly sprinkle the Colour Shimmer Dust over the hearts. I have used seven different colours, Sunflower, Duke, Amber, Lollipop, Candy, Peacock and Passion. I actually sprinkled all seven colours onto the page making sure not to over lap them too much as I didn't want it turning into a "hot mess" nor mix colours too much. Then I sprinkled a little water onto the background and activate the Colour Shimmer Dust. 
I must admit, watching the colours magically appear and move together is one of the reason I love this product. It makes my heart happy. 
Before the water dried I took a roll of paper towel and rolled it over the top of the activated Colour Shimmer Dust. TIP: Not sure why this works but it does - rolling the paper towel stops the colours from running or smudging together, if you place a piece of paper towel over the top of the Activated Colour Spray it smudges!  
Here is the background. I love the rainbow patches of bright colour and how the hearts show through. 
Now I put it all together by layering the arches across the page, roughly in the centre of the page but more towards the top to create a rainbow. I used white glue to adhere them to the page. Adhere the velum stamped butterfly image to the white cardstock butterfly to create a double butterfly. The photo was next, I placed it on the right side of the layout and tucked the large butterfly underneath the bottom left hand corner. 
Lastly pop the smaller butterflies across the rainbow as if they are randomly flying in all directions. 
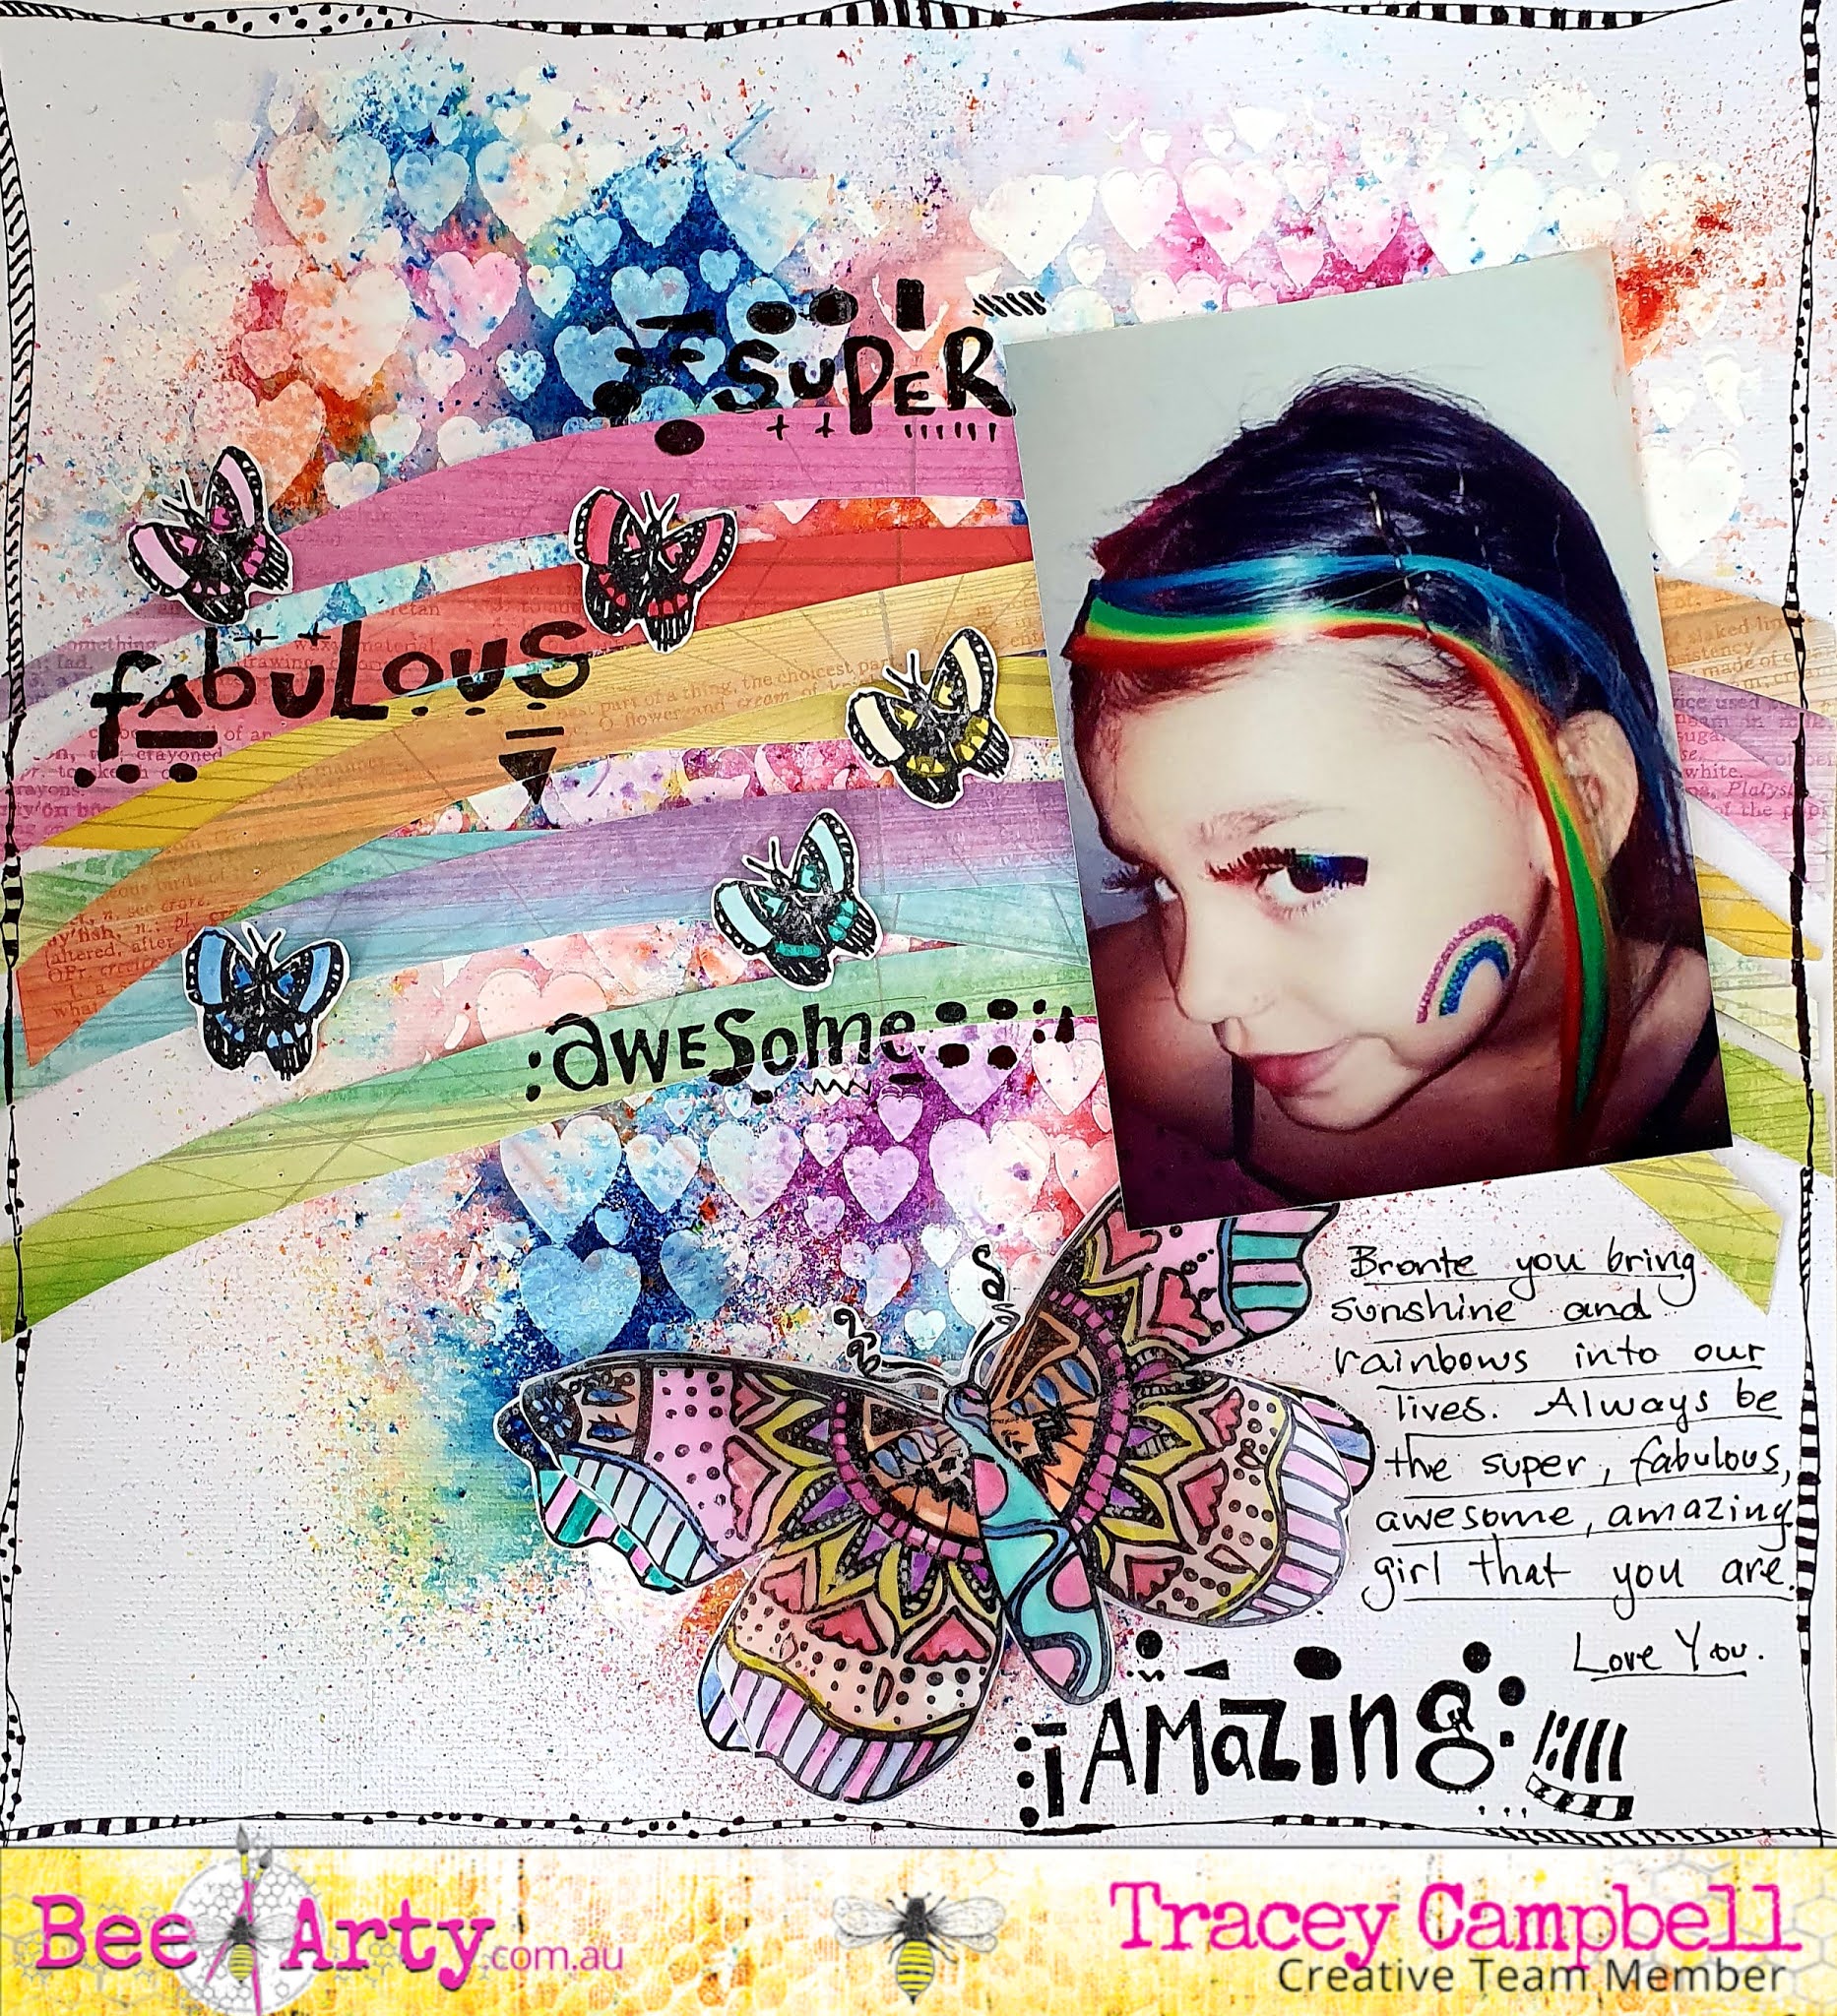
Here you can see the position of the elements as they come together.
Next I used Stazon black ink to stamp the words form the Cool Words stamp set across the page.
Here you can see where I have positioned the words; Super, Fabulous, Awesome and Amazing on the page.
To finish off I doodled a funky boarder around the edge of the cardstock and did a bit of journaling with a black marker. 
I really love how fun this was to create and how bright and funky it turned out. 
I hope I have inspired you to try using a few different Colour Shimmer Dust colours at the same time. It can be a bit scary giving it a go but the result is awesome. 

Hugs
Tracey