Showing posts with label Love and Grace by Michelle Grant. Show all posts

Saturday, 5 June 2021

Never Give Up On Yourself by Tracey Campbell

 Rainbows and Butterflies! What more could a girl ask for? Good day lovely people, Tracey here with you to share a fun and bright layout that is simple to make and looks lovely when finished. It brings a smile to my face when I look at it and I hope it does to you too. 

For this layout I gathered the following Bee Arty products:

Artist, Vision and the wordsheet from the patterned papers of the Arty Farty Collection

The cover sheet of the Love and Grace Collection 

The Serendipity stamp

Colour Artist Inks in the following colours; Sunburnt, Spice, Citrus, Lime, Slipper, Mermaid and Calypso, 


I created the butterflies first by stamping with Stazon Black Ink onto some velum. Tip: Stazon takes around 20 minutes to actually dry on velum so put it aside somewhere you won't be tempted to start working on the colouring until it is fully dry. 


Draw some arched lines across the Artist patterned paper, try and keep the arches in roughly the same colour sections as these will be used to create the rainbow.


Cut the arches from the Artist paper.


Group the strips in a shape of a rainbow, making sure that you have one at least one line to represent each colour in the rainbow colour spectrum. Adhere them to the Vision pattern paper.


I know that I really love a range of papers when I am looking at the title/advertising sheet of the collection and contemplating using it for my layout (as the old saying goes; waste not, want not). I did actually fussy cut the flower and bird clusters from the cover sheet for this layout - but if you have any of the Love and Grace papers left just use those to fussy cut. 


Next up was colouring the velum butterflies. I used a paint brush and the Colour Artist Inks to do little sections at a time. 


I took my time to colour separate sections as I did not want the inks to run and blend together. I was trying to get a stain glassed window effect. It took awhile but I eventually got the butterflies coloured and let them to dry. The ink does not go on to the velum very well, it tends to pool together away from the Stazon Ink leaving a white edge but I did find that when the ink was also dry you could spread it out more.


I finished the layout by matting a 4x6 inch portrait photo with white cardstock and adhering it to the bottom of the rainbow. I then placed a butterfly behind the top right hand side of the photo and the other one to the left of the paper so that it looks like it is flying off the page. I then finished off with the fussy cut bird and flower clusters, the title and some journaling. 

I hope that I have brought a little brightness to your day.

Hugs
Tracey


Wednesday, 19 May 2021

Spread Your Wings Part 2 by Tracy Jackson

                                                                   Hello Bee Arty Fans

I am back to share my second set of cards using Spread Your Wings collection  from Bee Arty

Firstly I selected the Background paper I wanted to use from Spread Your Wings Collection - this was just left scraps I had left over from other projects.

I then mounted onto card stock

Fussy cut the background shapes from Spread Your Wings


And then I coloured and fussy cut flowers from a page called Heart


Once all elements were cut out I then stuck together and below you can see all 3 cards individually


I have really enjoyed using up my scraps for these projects this month and are looking forward to the next project I Have planned using a new stamp release...

Until then
Happy crafting

Tuesday, 18 May 2021

Together With you by Tracey Campbell

Greetings and salutations Arty Bees, it is my turn on the blog today and I wanted to try my hand at the monthly Mood Board. I thought that it would be a good challenge as it is certainly not my unusual colour combination that I would put together.

So this is what the May Mood Board looks like; 

The first thing I did was riffle through my Colour Blast by Bee Arty papers to see what I had that would suit. I found some left over pieces of Hope from the Grateful Hearts Collection, Luca from the Love and Grace Collection, Paradise from Life's A Beach and Ideas from the Arty Farty Collection that I thought fitted the colour palette of the Mood Board. Next was looking at the mixed media and choosing Colour Sprays in Sunshine, Tangerine Dream, Punch, Bubblegum and Lagoon. Colour Shimmer Dust in Midnight. Colour Paste in Punch (I didn't end up using the Colour Paste). Citrus in the Artist Inks.

As I only had a few pieces to work with I decided to create my own background to match, so I had a play with the mixed media to see if I could recreate the beach. I started by using Heavy White Gesso to coat a piece of 12x12 cardstock. I knew I would probably layer up a few different mixed media elements so I wanted a good base to work on. Once the Heavy White Gesso was dry I sprinkling some of the Midnight Shimmer Dust across the top of the page. 

Usually I activate the Shimmer Dust with water but as I wanted the dark blue (Peacock) that fades into a lighter shade of the blue (Peacock) I decided to activate it with Lagoon Colour Spray. I actually did this while I had the cardstock on an angle so that the liquid would blend and run down the page.  

Here is how the Midnight Shimmer Dust and the Lagoon Colour Spray turned out. Put aside to dry.

Now for the Blush and Peach Nectar, I didn't quiet have the right colours so I decided to have a bit of a play to mix my own. In a little mister bottle I mixed some Heavy White Gesso with a bit of water to thin it down and then added tiny amounts of Tangerine Dream and Punch Colour Spray together to create a light Blush colour. In another mister bottle I put in a touch of Bubblegum Colour Spray, a drop of Citrus Colour Artist Ink with the watered down Gesso for a Peach Nectar colour. It did take awhile to get the colours right, I just kept adding a tiny amount of colour at a time and spraying onto a scrap of cardstock until I got it right.

I then sprayed the Blush and Peach Nectar colours onto the cardstock with the Peacock blues on it. If I did this again I would do the Blush and Peach Nectar colours first then the Peacock as it kept reactivating when I sprayed it. But I am happy with how it turned out. 

While the background was drying I used the Desire Metal Die to cut out two images from Hope (Grateful Hearts Collection) and six images of vines from the Metal Die set String Leaves using the blue woodgrain pattern from Paradise (Life's A Beach Collection).

I cut the patterned papers into various sized rectangles and layered them to create a large mat for my photo. 


Once happy with the layering I adhered it to the background and added the die cut images around the photo, see the photo below for the positioning. 


Using the Metal Dies 365 Alphas I cut out the main word for my title from some yellow patterned paper. Which I glued on the left hand side of my layout, I did  add a few other letters from some foam Thickers.


I finished off the layout with some peach and peacock paper flowers then doodling and splattering with a white paint pen.


Here is the final layout, it is a bit different than my normal work, but I love how it has turned out and think that it is a good representation of the May Mood Board. 


Thanks for popping in and I hope that I have inspired you to try your hand at the Mood Board. Let me know if you give it a go, I would love to see what you come up with.

Hugs
Tracey

Sunday, 26 July 2020

Bee Happy by Tracy Jackson

Good morning Bee Arty fans...

Today I have a card I wanted to share using this stunning stamp called Forever Always 


As with any cards I make I always pick out the paper first and base my colours around that.
So for inspiration I picked out a sheet from the Love and Grace paper collection


The following photos gives you an idea of the colouring sequence I tend to use. Although I would normally do the skin in any image first I was quite keen to start on the flowers.
I used copics as my basic background the prisma pencils to highlight.


All red and blue spaces filled - time for the yellow daises


And finally the skin and hair. 
Time to fussy cut


At this stage I inked all around the edges of the lady, cut all my paper layers, and because her face will take up the majority of the card face I felt it didn't need any embellishments
I also for "Bee Happy" in the Love and Grace collection to use for my words


Finally I placed all together.
I really enjoyed losing myself in this card while colouring her. Its the sort of image that calls for a lot of colouring but you will be rewarded with the end result

Until next time... Happy crafting

Sunday, 31 May 2020

You make me happy - by Tracy Jackson

Good morning Bee Arty fans...

I'm back again to show you a nice simple card and tag set


I have been eyeing up these stamps for a while now and finally got my hands on them. Its perfect for all you card makers out there who love colouring. Its called "You make me Happy" which is mounted with firm red rubber. It makes a nice crisp outline when stamped which is always a winner in my eyes.

So after stamping the flowers several times and the words with Memento Ink so my copics wouldn't run I was ready to colour.


7 flowers later... time to find my scissors for a bit of fussy cutting while watching a TV program


At this stage I decided the centers needed a bit of bling, so out comes the Shimmer pen which I love, its mess free and easily adds some blingy goodness


So next I picked out a background paper which I cut from Love & Grace collection, I played around with the arrangement of flowers and words until I was happy


At this stage I had 1 flower left so made a tag by cutting one out from the same paper collection, added a bit more detail by stamping a stamp from the Textiles stamp set


After drawing my boarder around the outside, finding a word and a few leaves from the same paper collection I cut and inked all the edges then put my card and tag together.


Hope you have enjoyed this card and tag set. I love how it turned out, and will defiantly be getting a lot of use out of this stamps set

Happy Crafting


Friday, 29 May 2020

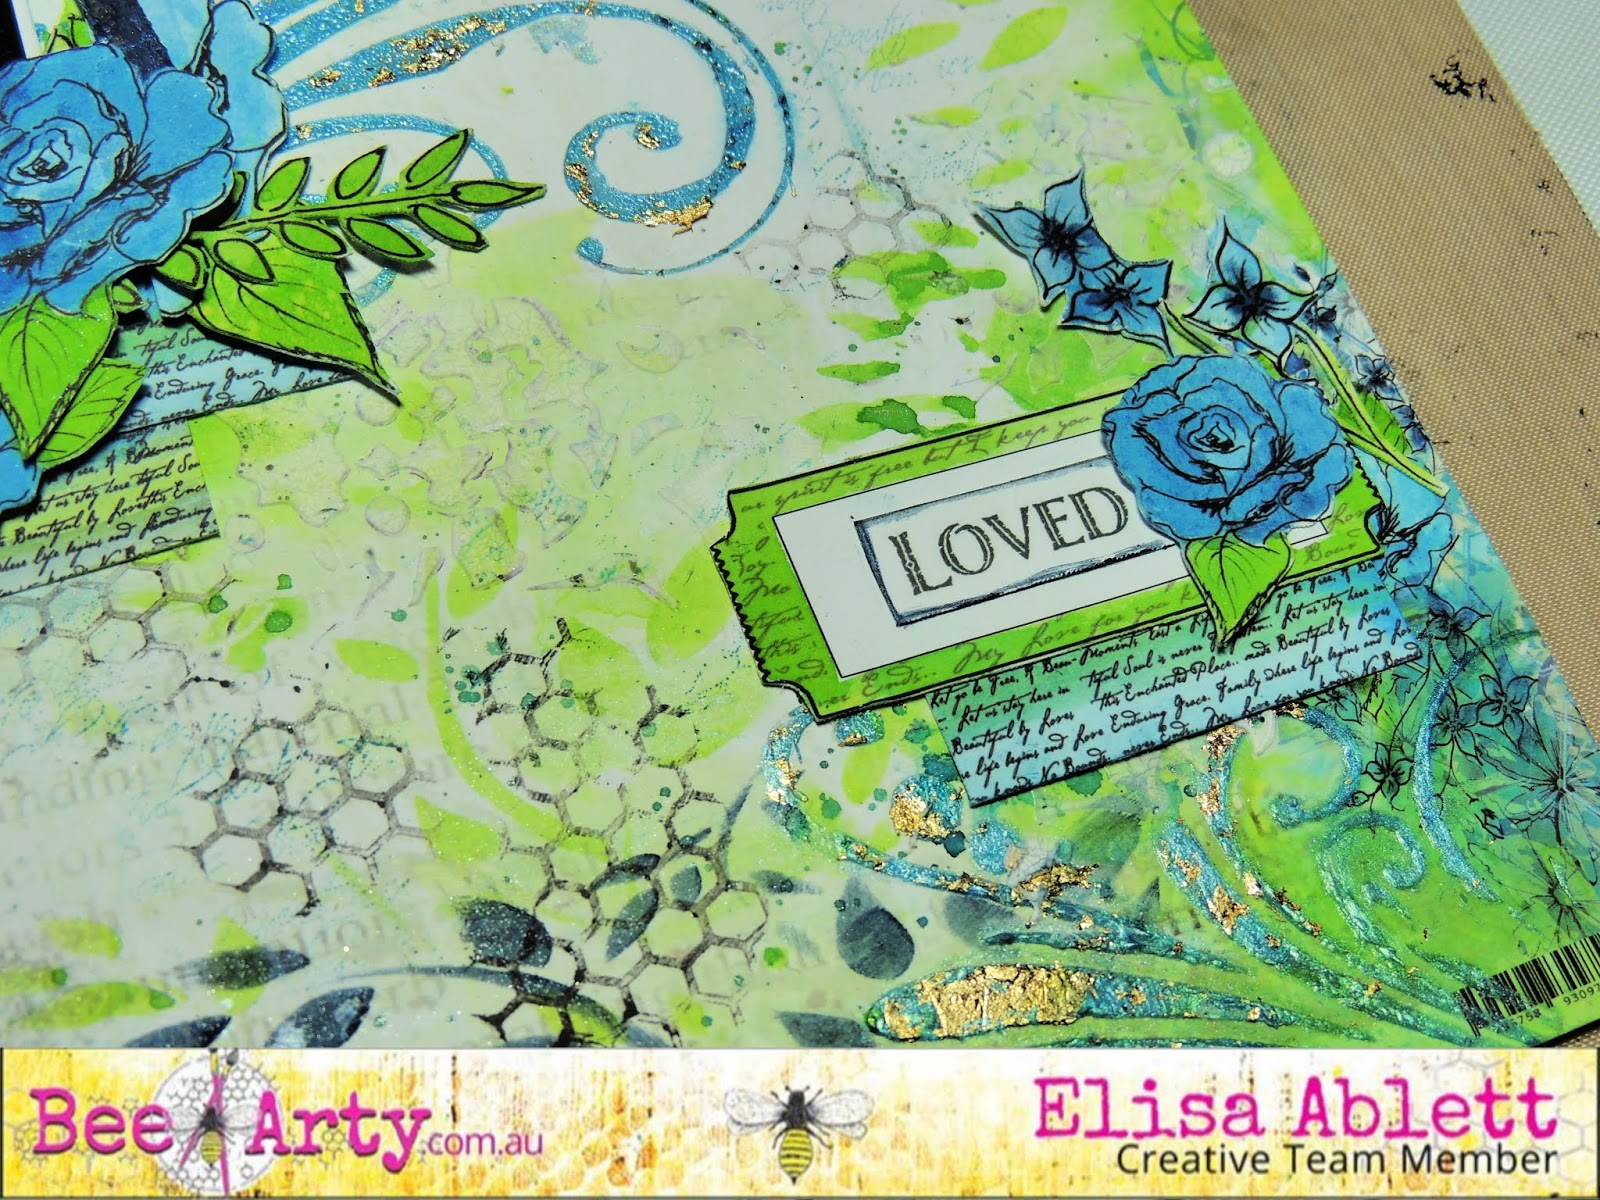
'You are loved' by Elisa Ablett


Hi Everyone,

My turn up on the blog today with my latest inspiration for you, a vibrant mixed media layout !

I think you can all guess what my favourite colours are to work with - blues and greens and all shades inbetween and what better products to start your layout with other than those sparkling shimmer dusts. The colours and other products I used to complete this layout are listed below with links.

But first lets take a closer look -


Here are the product links and names:


and I have a step by step for you though I must apologise that the first few photos I took of the background unfortunately were corrupted on my camera's memory SD card:- 


Step 1 - Using Lucinda paper from the Love and Grace range by Michelle Grant as your background paper. Add small amounts of each of the shimmer dusts named above into a paint palette and add a small amount of water to each. Using a spritzer bottle, spritz water over the areas on your background paper that you wish to add colour and using a paint brush, add colour washes in layers to your page. I accentuated the hexagon shapes with the Lush green shimmer dust and also in between the hexagons with the Duke Shimmer Dust. Use the main photo to guide you where to add your extra colour.


Step 2 - Fussy cut out these elements from the Love and Grace - Heart Cut and Colour Sheet and colour using a small paint brush and your left over shimmer dusts and put aside to dry.


Step 3 - Stencil using the Imagine Stencil and Colour Paste Singing the Blue as shown in the main photo above. While the paste is drying and is tacky to touch, put the stencil back over the stencilled area - matching it perfectly and then lay small amounts of gold foil flakes or gold foil sheet and lightly press down, heat with a gentle heat gun and then lift the stencil carefully off. You should have gold foil accents on all your stencilled areas.


Step 4 - Using the Laced Stencil and the white gesso, stencil light amounts of the gesso or you could use crackle paste etc on the left hand side of the layout below the hexagons and also on the right hand side near the smaller hexagons. 


Step 5 - Add some stamping using the Memories Stamp Set and Tanya Froud's technique of adding liquid shimmer dusts to a make up sponge and using that as a stamp pad. I love this technique as it allows you to coordinate all the colours and techniques on your layout.


Step 6 - Using the Leafy Stencil and a make up sponge wet with Navy shimmer dust, stencil by gently dabbing the make up sponge through the stencil in the places as shown in the photo above. 


Step 7 - Check with this progress photo to see if you have completed all your steps and also take the time to add some splatters in your chosen colour! I went with Navy Shimmer Dust splatters. 


Step 8 - I have a great technique to use on chipboard, using your finger smooth Singing the Blues Colour Paste over the chipboard frame and while it is wet press your stamp into the wet paste. Dry with a gentle heat or leave to dry naturally. Once dry, paint a darker colour shimmer dust liquid (Navy) over the top of the stamped areas, making sure you get the darker liquid into the grooves etc. 

Once dry, wipe gently with a baby wipe to reveal some of the underneath Colour paste, giving your chipboard a multitoned textured effect. 

Start putting all your elements together on the layout as shown below.


and you are finished!


Thanks for stopping by the blog today, hope you have enjoyed the step by step.

Elisa x

Hugs