Rainbows and Butterflies! What more could a girl ask for? Good day lovely people, Tracey here with you to share a fun and bright layout that is simple to make and looks lovely when finished. It brings a smile to my face when I look at it and I hope it does to you too.
For this layout I gathered the following Bee Arty products:
Artist, Vision and the wordsheet from the patterned papers of the Arty Farty Collection
The cover sheet of the Love and Grace Collection
The Serendipity stamp
Colour Artist Inks in the following colours; Sunburnt, Spice, Citrus, Lime, Slipper, Mermaid and Calypso,
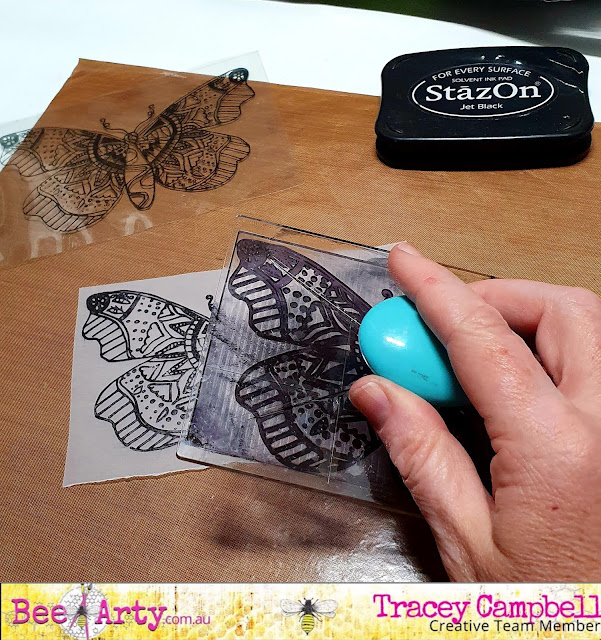
I created the butterflies first by stamping with Stazon Black Ink onto some velum. Tip: Stazon takes around 20 minutes to actually dry on velum so put it aside somewhere you won't be tempted to start working on the colouring until it is fully dry.
Draw some arched lines across the Artist patterned paper, try and keep the arches in roughly the same colour sections as these will be used to create the rainbow.
Cut the arches from the Artist paper.
Group the strips in a shape of a rainbow, making sure that you have one at least one line to represent each colour in the rainbow colour spectrum. Adhere them to the Vision pattern paper.
I know that I really love a range of papers when I am looking at the title/advertising sheet of the collection and contemplating using it for my layout (as the old saying goes; waste not, want not). I did actually fussy cut the flower and bird clusters from the cover sheet for this layout - but if you have any of the Love and Grace papers left just use those to fussy cut.
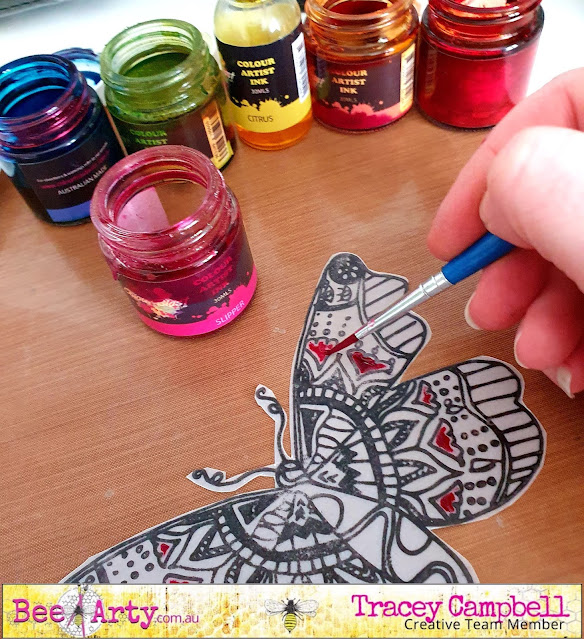
Next up was colouring the velum butterflies. I used a paint brush and the Colour Artist Inks to do little sections at a time.
I took my time to colour separate sections as I did not want the inks to run and blend together. I was trying to get a stain glassed window effect. It took awhile but I eventually got the butterflies coloured and let them to dry. The ink does not go on to the velum very well, it tends to pool together away from the Stazon Ink leaving a white edge but I did find that when the ink was also dry you could spread it out more.
I finished the layout by matting a 4x6 inch portrait photo with white cardstock and adhering it to the bottom of the rainbow. I then placed a butterfly behind the top right hand side of the photo and the other one to the left of the paper so that it looks like it is flying off the page. I then finished off with the fussy cut bird and flower clusters, the title and some journaling.
I hope that I have brought a little brightness to your day.
Hugs
Tracey


No comments:
Post a Comment