Showing posts with label Colour Shimmer Powder. Show all posts

Sunday, 9 April 2023

Beautiful just the way you are - Rikki G

  Good morning, how are you? Well if you from Australia no doubt the Easter Bunny has been and gone and left you some chocolatey goodness and hopefully your spending sometime with your nearest and dearest. 

Thats the plan today for my fam bam, just chilling and spending the day relaxing maybe a little bit of fussy cutting thrown in there for good measure......

Today I have a layout using the stunning Moon Shadows Collection, and as a added bonus I have a little process video so you can follow along.


You can follow along with a process video:


The Pretty Posy stamp is back in use again, stamped on 200gsm cardstock with archival ink. 

This will allow you to flood your work and not have any ink bleed out.


Once your flowers are dry, you can sculpted them into 3d flowers, curl them in your fingers, fold the petals and add some foam tape in the center and add a small one on the top. To give the center some more definition use the bottom side of a paint brush and give it a push, it will allow the petals to curl inwards more.


Now repeat the flooding effect with the Aussie leaves Die.

*** Handy tip: pre cut a heap of leaves in white and pop them into a bag that way your more likely to use them in your layouts more regularly, rather than pulling out your die cut machine every time you create.


Add silk flowers in with your paper flower clusters.


By flicking glue you will get a more splattered effect with your glitter, as you tap the excess off it will catch in other areas.


Hope this has inspired you.

Till next time have a creative day.


Moonburst - 12"x12" Scrapbooking Paper


Pretty Posy Clear Stamp Set


Friday, 13 September 2019

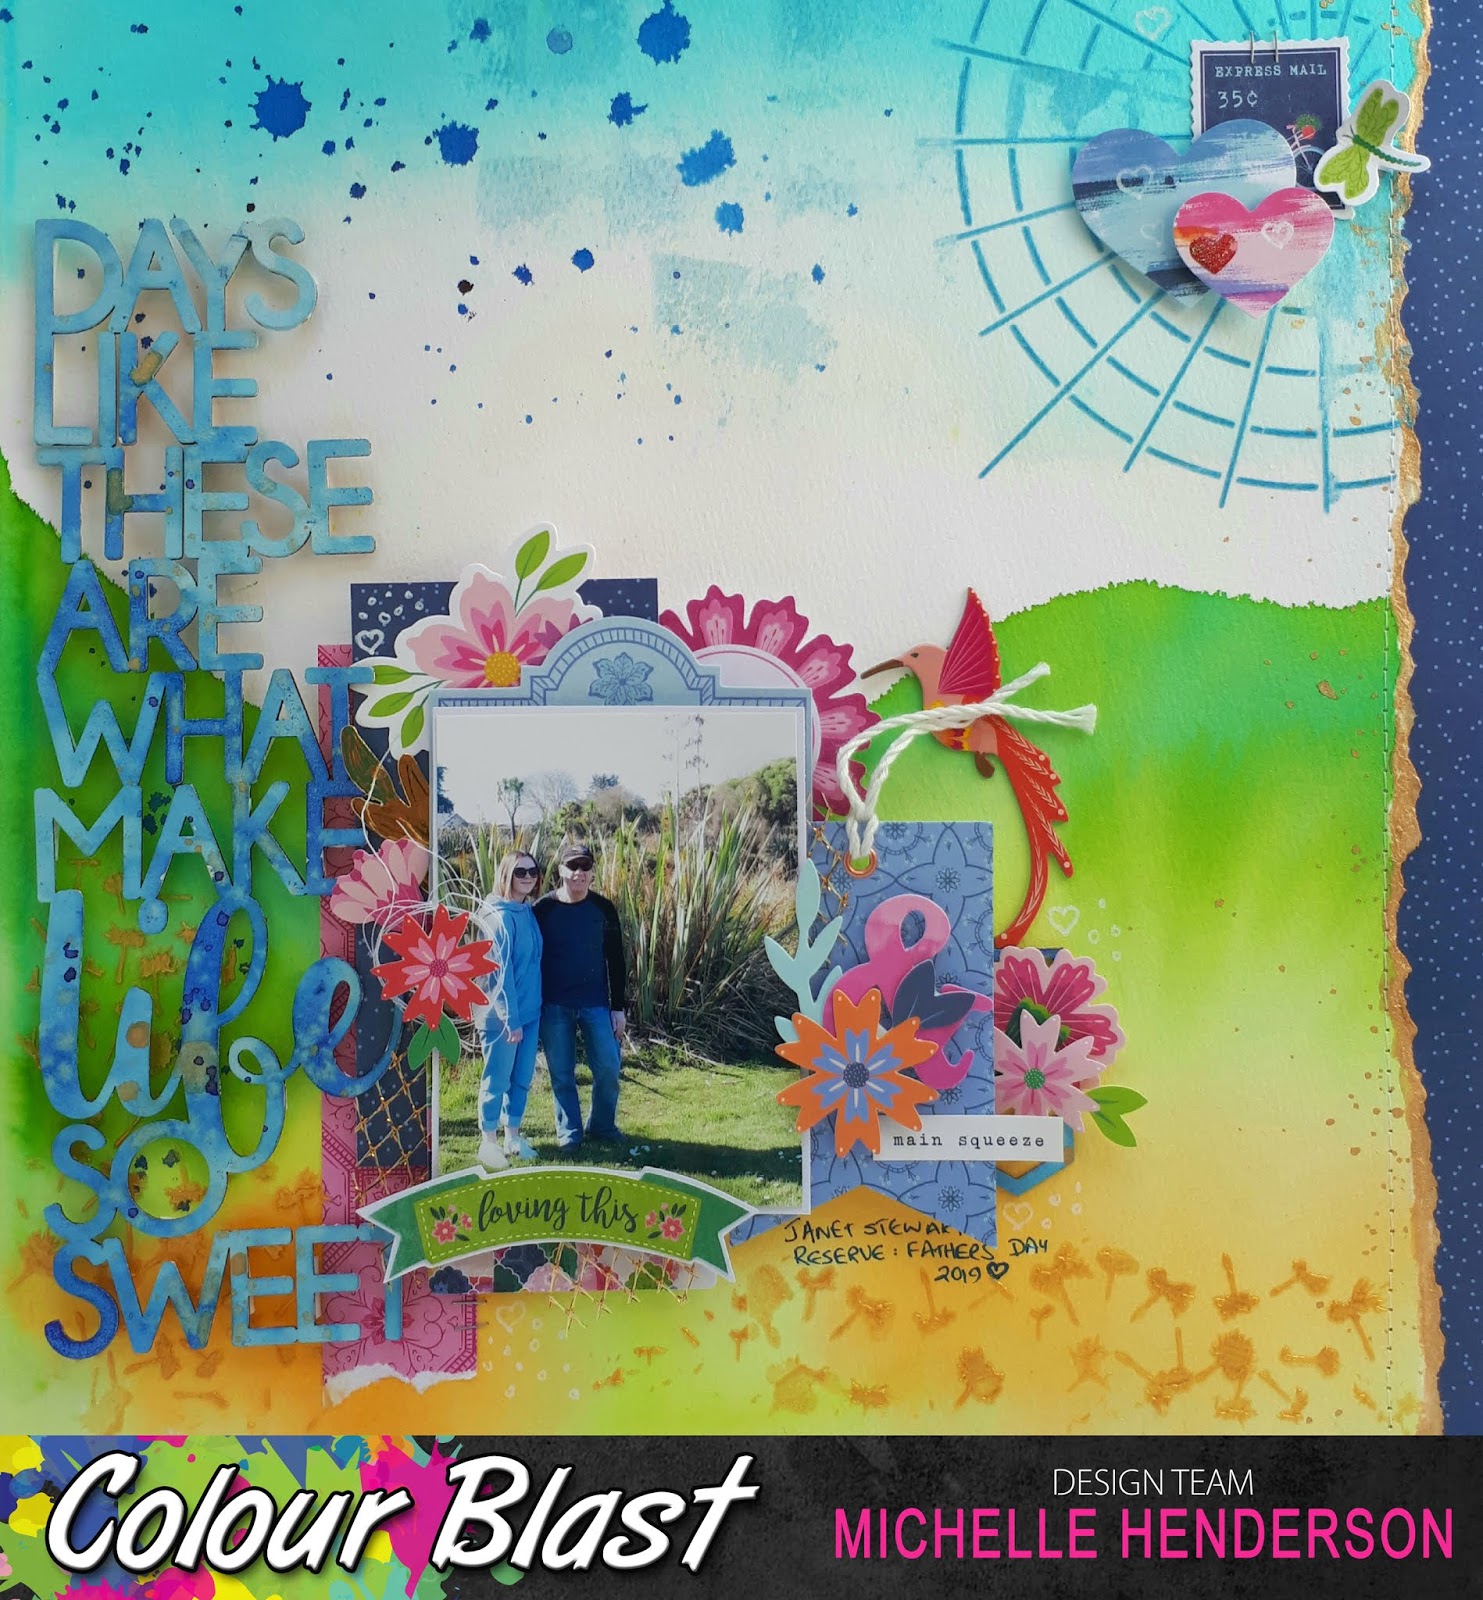
Days like these....by Michelle Henderson

Hello and happy Friday everyone! I'm at a retreat so busy working on my next projects as well as some things just for me 😀
I have a watercolour page today using a little bit of everything - here's s little hint...


  My background was done on watercolour paper, and I used the wet on wet technique with Colour Artist Inks in Lime, Mermaid, Grass, and Barley. By wet on wet, I mean I painted the edge if my hills with water only to start, then went over it with thinned colour so it would blend down the page.


I then did the same thing at the top of the page with Calypso Colour Artist Ink.


While that was drying, I prepped the chipboard title with Heavy White Gesso.


I mixed a little Colour Shimmer Dust in Duke up on my (very!) messy mat, and then swiped the title through it, patting it into the colour again where I needed it. This gave me the lovely mottled look I was going for.


I wasn't keen on the way the right edge looked, so I ripped it off and added some navy paper, after edging the rip with Light Gold from the Shimmery Gold Watercolour Pan set. I also splattered a little of it down this edge, and on the title. 

I used Colour Paste in Singin' the Blues and Bling through stencils, and also smudged a little in the sky.


I still had a little bit of the Duke left over, so I made some big splatters and drips using a water brush, in the sky.


I added my photo cluster and another small cluster, along with the title. I'm so pleased to have already made my Fathers day page!!!
Here's the finished page 💕
 

Thanks for joining us here!


Tuesday, 19 December 2017

"Cheers" Scrapbook layout + process video by Louise

Hi Crafters

I've been experimenting with Colour Shimmer Dust and I hope you'll enjoy this new technique from me.

My layout "Cheers"


For this project you'll need 
Colour Shimmer Dust Navy
Colour Shimmer Dust Cobalt
Colour Embossing Powder Snow White

I'm really drawn to the Colour Shimmer Dusts at the moment and this layout was a little experiment in a new technique.

What you see below is the second attempt - My first attempt ended up in the bin all because I didn't follow the single most important rule of the colour wheel!!!
Yep - I did this same technique but with three colours and I ended up with mud!!!

Read on and I'll explain more ...

Firstly I've taken the White Heavy Gesso and the Colour Shimmer Dusts in Navy and Cobalt + a piece of white 12x12 cardstock.


Next I've used a spatula to spread the White Heavy gesso down one side of the page - amount is important here - not to much or it's a gluggy mess that will never dry but too little and you won't be able to spread with the Colour Shimmer Dusts - I would suggest experimenting first.


While the gesso is wet sprinkle alternating similar colours along the length of the gesso and then with a spatula spread the colour into the centre of the page.
I love how it mixes and gives different layers of colour with the gesso.


I chose to repeat the process on the opposite side of the page, filling in some of the gaps.


When it's dried, you get this awesome background.
I can't wait to try this with other colour combinations.


As the edges where a little messy, I chose to cover them with paper layers.


Normally I would use these fabulous blues for a boys page but I opened my printed photo stash and saw this one of myself wearing a blue dress and fascinator for the races and knew it was perfect for this page. 
I created my large cluster and a smaller area diagonally opposite.


Finally I needed a title.
I made the title with the Cameo - cutting it three times and layering them on top of each other for a chipboard effect.
I originally was going to use "Just Blue" embossing powder but thought it would get lost in the blue background.

So I chose to add a little sparkle instead and used the Snow White Colour Embossing Powder.


I love the sparkly finish on the blue background.


Lastly I've added computer journalling and a couple of little embellishments - allowing the background to shine.


Here is the final layout ...


I've also created a process video for this page too.


Thanks for visiting.
Happy Scrapping


Monday, 17 October 2016

A splash of yellow - Card tutorial by Anguree

Hello dear friends

I'm back from my holiday in Bali and happy to be sharing another quick tutorial with you.


The  Colour Shimmer Dusts are definitely my favorite products at the moment and today we will be using the colour Sunflower.

Cut 2 pieces of white watercolor card stock and lay them down on your Kraft sheet.


Spray a  plastic wrapper with water and use a dry paintbrush to add a tiny bit of Sunflower Colour Shimmer Dust to the water you sprayed onto the wrapper.


Stamp the colour drops onto your cardstock by picking up the plastic and turing wet side onto the cardstock. You will see you can move the colour with your fingers by moving them over the dry side of the plastic. Remove the plastic and let it dry or use a heat tool.


Choose your selection of embellishments and arrange on the cards. I used a silluette image and chipboard from ScrapFX plus a couple of flowers and metal leaves I purchased whilst on holiday.


I wanted to make the yellow a little bit more prominent so I repeated the process of mixing the Sunflower Colour Shimmer Dust with water and used a paintbrush to colour my paper flowers.


Once they were dry I simply attached everything with clear glue.

I hope you enjoyed this post with us today and hope to see you visiting us again. Please share your ideas and projects with us in Colour Blast Creative Corner on Facebook We are always happy to see how you use the products and inspiration so don't be shy.

Till next time have fun creating xxx