Showing posts with label Mermaid. Show all posts

Monday, 20 April 2020

'All things grow better with love' by Amy

Hi everyone! Last month, Bee Arty had a creative challenge. The theme was 'Flower Power'. I was super-impressed with the fantastic entries that came through: thank you Bee Arty fans!

So today I am sharing a page inspired by the 'Flower Power' theme...


...and this is my take on it...


I created this colourful page by using various Colour Artist Inks, stamps and a stencil from the Bee Arty Store

I started by using Colour Artist Inks mixed with water inside my hand drawn circles. I applied one colour at a time using the following colours: 'Citrus', 'Oasis', 'Slipper', 'Mermaid' and 'Cider'. 


Next, I placed the white cardstock ready for my stencil pattern. I dipped the Bee Arty 'Devotion' A4 Stencil in 'Road Base' Colour Spray mixed with water. I then transferred it across to the coloured areas on the white cardstock and allowed to completely dry.


To continue with this flower theme, I stamped in various places with the 'Floral Delights 2' Clear Stamp Set by Colour Blast. N.B. I used a permanent based ink in black. This is advisable, as it prevents the ink from bleeding and allows for sharp images.


Before I added the photo to the page I added splatters over the background with the Colour Artist Ink in 'Soot' and allowed to dry. I then embellished the page with paper flowers, doily, chipboard by Kinder Kreations. 

The title was a rubon from my stash.

Take a look at these close ups.


Here are the products in store that I used:

Colour Artist Ink - Citrus, Mermaid, Oasis, Slipper, Cider and Soot
Colour Spray - Road Base
Stamp - Floral Delights 2 Clear Stamp Set by Colour Blast
Devotion A4 Stencil by Bee Arty

Other products:
White card stock
Permanent Ink - Black
Fan brush (for splatters)
Paper Flowers 
Doily
Chipboard by Kinder Kreations
Black Sharpie Pen

That's it for today! Thank you for stopping by. Amy 😊


Monday, 25 November 2019

Sweet Little Sucker by Michelle Henderson

Hi all you crafty people!

My latest layout started out as a grid pattern, but I just couldn't bear to cover too much of the background 😁

Here's a wee taste...just look at that sparkle!


I used Colour Artist Inks to tint some Heavy White Gesso, starting with Oasis. I brayered a section with this, applying it quite heavily as I wanted to create some texture with it.


I added some Colour Shimmer Dust in Peacock, and mixed it a little, but not fully so there would be some striations. 


For the pink parts of the grid, I used Slipper Colour Artist Ink and Lollipop Colour Shimmer Dust. 


After that, I used plain Heavy White Gesso through a stencil for added texture.


As a final touch for the background, I splattered a little of the clear Colour Shimmer Marker


I put everything together using some Cocoa Vanilla that was on my desk. I so love this photo of my great niece!


Thanks for visiting!


Friday, 15 November 2019

Spread Your Wings and Fly. by Suzy Loudon

Hi everyone. Today I'm sharing a layout using  the gorgeous Spread Your Wings Collection.
 

To begin with I matted my photo using sections from Keep Calm, Spread Kindness & Earth Angels papers. I added cardboard between sheets to add height.


I painted some chipboard with Heavy White Gesso.


I made up my own paint colours. To begin with I added 3 drops of Mermaid Artist Ink & 1 drop of Calypso Artist Ink to some Heavy White Gesso. Once mixed well I painted some flowers & parts of my chipboard.


I then add 4 more drops of Mermaid Artist Ink for a deeper colour. And again painted some flowers & more of the chipboard.


I then added a few drops of Grass Artist Ink for a more greener colour. Again I painted the chipboard & some flowers.


I then used the paint that was just in my lid & added more Mermaid. And painted. 


And then some more Mermaid!!


Using the Seeker metal die I cut out some black card.


Using both the darker paint on the lid & lighter in container I splattered around the page.


I then Splattered some watered down Heavy White Gesso.


I was really impatient so dried with a heat gun. It was really cool when some of the thick splotches raised right up.


I fussy cut the green butterflies from the collection, and along with the gesso painted butterflies I went over them with the Clear Shimmer Pen


I used the Clear Shimmer pen to highlight the flowers also.


I didn't add much more.


Thanks for looking.
xxx Suzy


Monday, 11 November 2019

Be True 2 You by Michelle Henderson

Hello all!
I have a quick project for you here today.

Here's a little preview..😉 


I started out with a couple of my favourite Colour Artist Inks  - Spice and Cranberry. I thinned them down a lot as I wanted a watercolour look.
I combined them to get the colour I wanted, then smooshed them on to my cardstock.


The next step was to mix a little Colour Artist Ink in Mermaid in with some moulding paste and apply it through a stencil.


Before it dried I dropped a little Bling Colour Embossing Powder on to the paste, then heated it to activate it at the same time as drying the paste.


After that I used some papers from my stash to put the whole page together...


See? Told you it was a quick one today! 
Sometimes we need to just not overthink things...

Anyway, hope you like it!


Friday, 13 September 2019

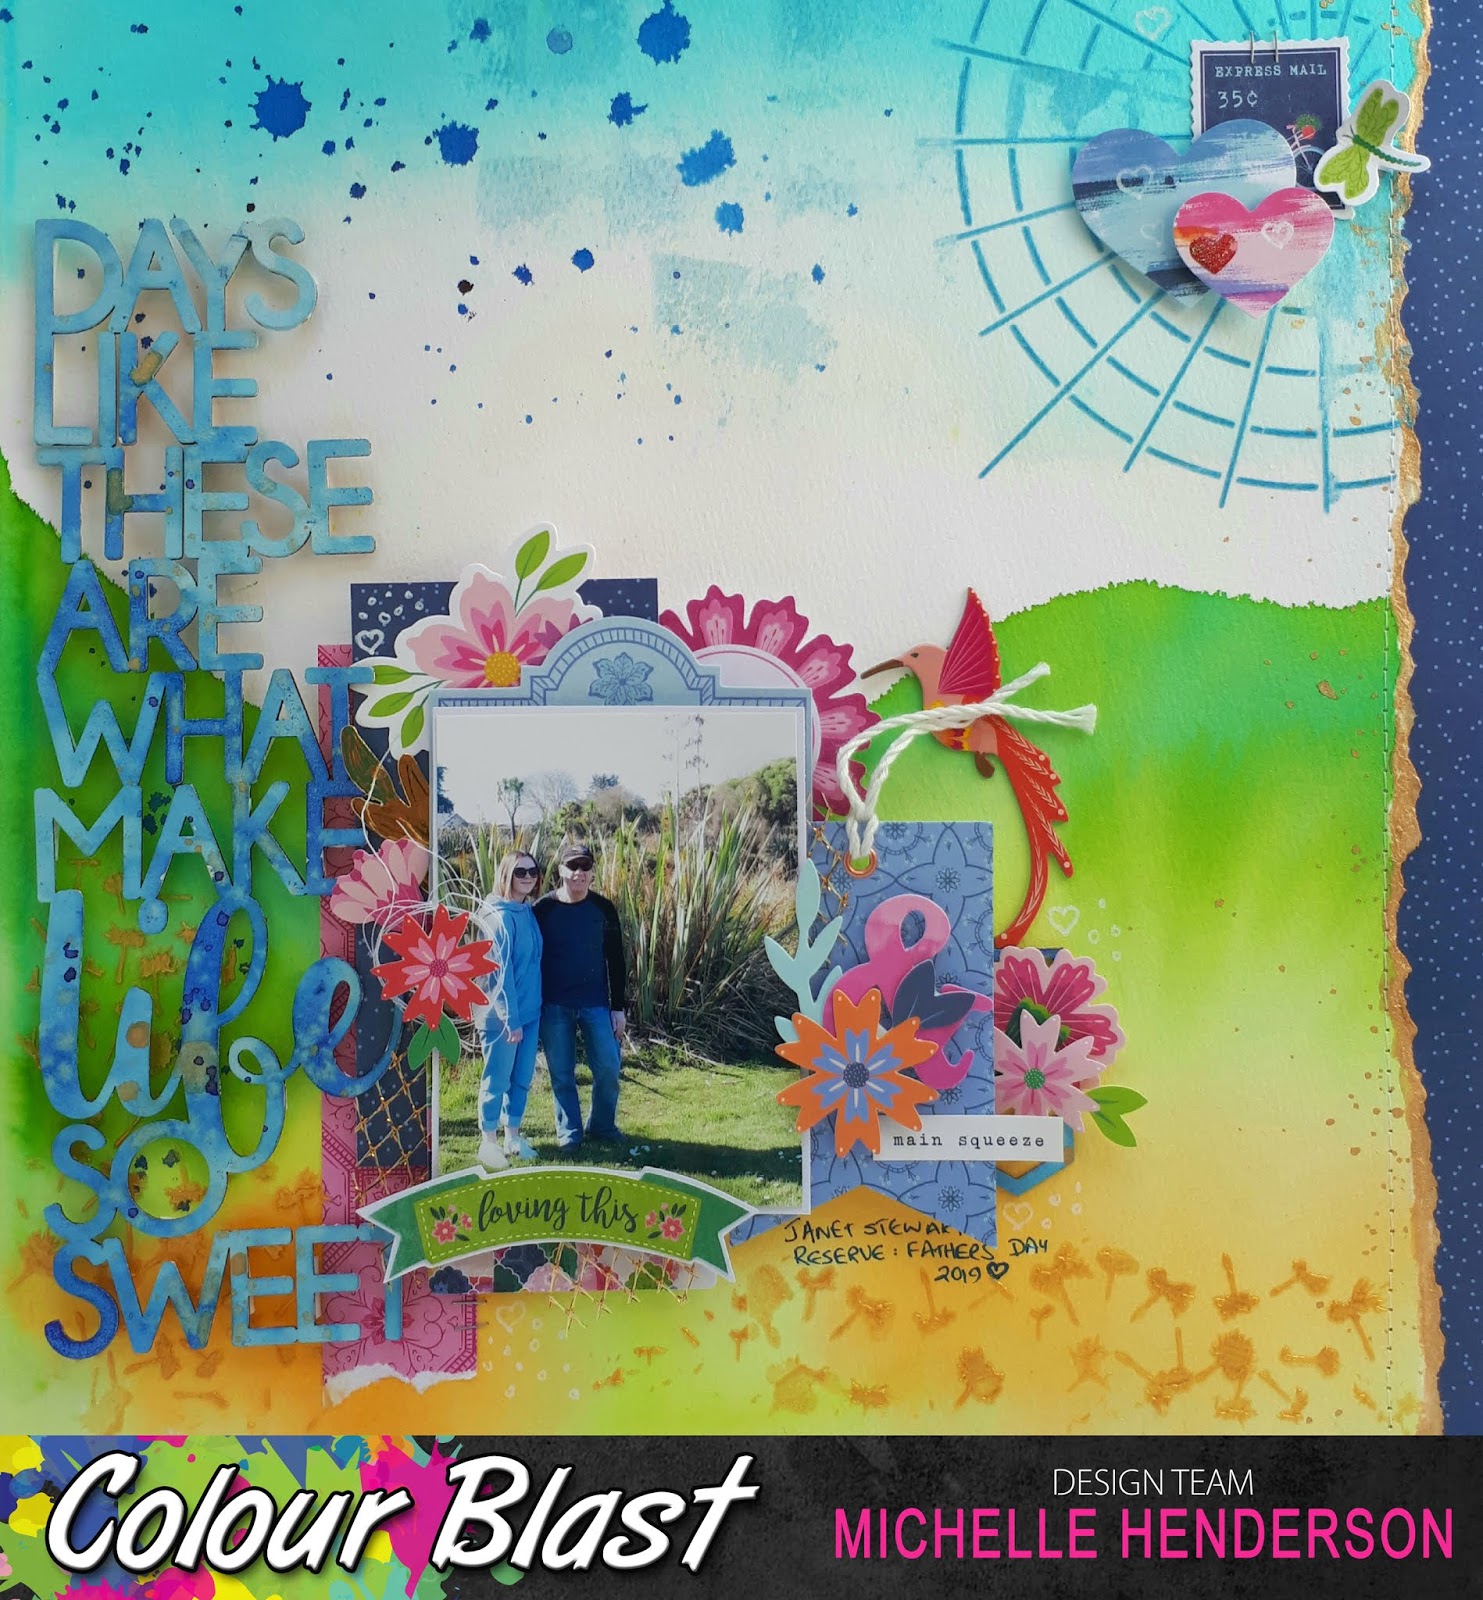
Days like these....by Michelle Henderson

Hello and happy Friday everyone! I'm at a retreat so busy working on my next projects as well as some things just for me 😀
I have a watercolour page today using a little bit of everything - here's s little hint...


  My background was done on watercolour paper, and I used the wet on wet technique with Colour Artist Inks in Lime, Mermaid, Grass, and Barley. By wet on wet, I mean I painted the edge if my hills with water only to start, then went over it with thinned colour so it would blend down the page.


I then did the same thing at the top of the page with Calypso Colour Artist Ink.


While that was drying, I prepped the chipboard title with Heavy White Gesso.


I mixed a little Colour Shimmer Dust in Duke up on my (very!) messy mat, and then swiped the title through it, patting it into the colour again where I needed it. This gave me the lovely mottled look I was going for.


I wasn't keen on the way the right edge looked, so I ripped it off and added some navy paper, after edging the rip with Light Gold from the Shimmery Gold Watercolour Pan set. I also splattered a little of it down this edge, and on the title. 

I used Colour Paste in Singin' the Blues and Bling through stencils, and also smudged a little in the sky.


I still had a little bit of the Duke left over, so I made some big splatters and drips using a water brush, in the sky.


I added my photo cluster and another small cluster, along with the title. I'm so pleased to have already made my Fathers day page!!!
Here's the finished page 💕
 

Thanks for joining us here!