Showing posts with label White Heavy Gesso. Show all posts

Monday, 6 April 2020

'Colourful handmade cards' by Amy

Hi all you crafty people! It's Amy here with some colourful handmade cards. 

Here's a little teaser - just look at the brightness of these little beauties!


To start, I took three ready-made A5 white cards from my stash that were already scored. (They are 210 x 148 mm.)

Next, I trimmed three pieces of cardstock to be mounted onto the front of the cards.

For the white inserts, I primed with White Heavy Gesso - using an old gift card to apply the Gesso.

I also used some cellophane (actually some left over clear plastic packaging) to apply some water mixed with Colour Artist Ink in 'Citrus' and dried it with my heatgun.


On another sheet of heavy white cardstock I repeated the same technique - to be used for the flowers.


As you can see, I have done this technique for the three colours: 'Oasis', 'Slipper' as well as the 'Citrus'. Note to allow plenty of drying time between each colour - or, alternatively,to speed up the process you could use a heatgun.


Using a permanent-based ink, stamp the Floral Delights 2 clear stamp flowers over the three colours! ...and then fussy-cut the flowers out.


As pictured, I stamped a strip of the Meridian Clear Stamp Set over the water colour background. The flowers will be placed over this black strip.


After I layered the pretty flowers onto the cards - to add some bling - I used a Shimmer Pen in 'Clear'. It is hard to see all the shimmer and shine in the photos, but it is there! πŸ˜Š


Finally, for the sentiment on the black card I die-cut using the Bee Arty '365 Alphas' die set with my trusty Cuttlebug. Then I finished off the cards by adding some embellishments as pictured. 


Take a look at these close ups.


Products used:
- Colour Artist Inks - Citrus, Oasis, Slipper
- Heavy Gesso - White
- Shimmer Pen - Clear
- Bee Arty Die Set - 365 Alphas
- Stamp Sets - Floral Delights 2; Meridian

Other products:
- A5 cards - white
- Cardstock - black; heavy white
- Permanent ink - black

Thank you for stopping by - and happy crafting! Amy


Wednesday, 4 March 2020

'Celebrate' by Amy C


Hi everyone! It's Amy here! ... am super excited to be sharing my first DT post for Bee Arty!


I have here a bright and fun mixed media page using various - but all awesome - Bee Arty products. 

To start, I primed a piece of white cardstock with Colour Blast White Heavy Gesso. It is important to prime your page before working with wet mediums as a means to protect your page. 

Once dried, I lightly marked where my photo was to be placed. This helped me as I added the mixed media layers to the page.


Next, I took the Bricked A6 Stencil and used a spatula to spread some modelling paste through the stencil over the page. You could then either set aside to dry or use a heatgun to speed up the drying process. 


After it dried, it was time to add some colour, but before I applied some colour - using the Colour Artist Inks - I lightly sprayed water over the areas where the colour was to be added. This allowed the inks to easily run on the page creating the desired effect.


I started with the Colour Artist Ink in 'Slipper' first and gently squeezed over various areas of the page as pictured. It is quite concentrated and super bright. I moved the page around to allow the ink to run a little. I heat-dried this colour before moving on to the next colour.


As pictured, I have repeated this process for three colours: 'Slipper', 'Citrus', and 'Cider'.
Note: it is important to dry well in between each colour, to prevent the colours 'bleeding' into each other. 


Next I took the 'Life is Tough' and 'Textiles' Clear Stamps Sets and - with a permanent-based ink - stamped over the coloured areas. These stamps work so beautifully - and so I used them vertically and horizontally around the page.


Next I added some splatters of the Colour Artist Ink in 'Soot' mixed with water. You could use either a fan brush or a normal small tipped paint brush for this. 


Before I adhered my photo to the page, using a permanent black pen and a household item I drew a circle and placed the photo inside the circle.


Once the page background was complete I finished it off with a few embellishments. 

Have a look at these close ups:


Thank you for looking and I hope this might inspire you to try some of these techniques! 

Amy


Products Used:
Clear Stamp Sets - Life is Tough and Textiles

Other Products:
Heavy white cardstock
Spatula
Paint brush
Water
Black permanent pen
Black permanent ink


Friday, 13 September 2019

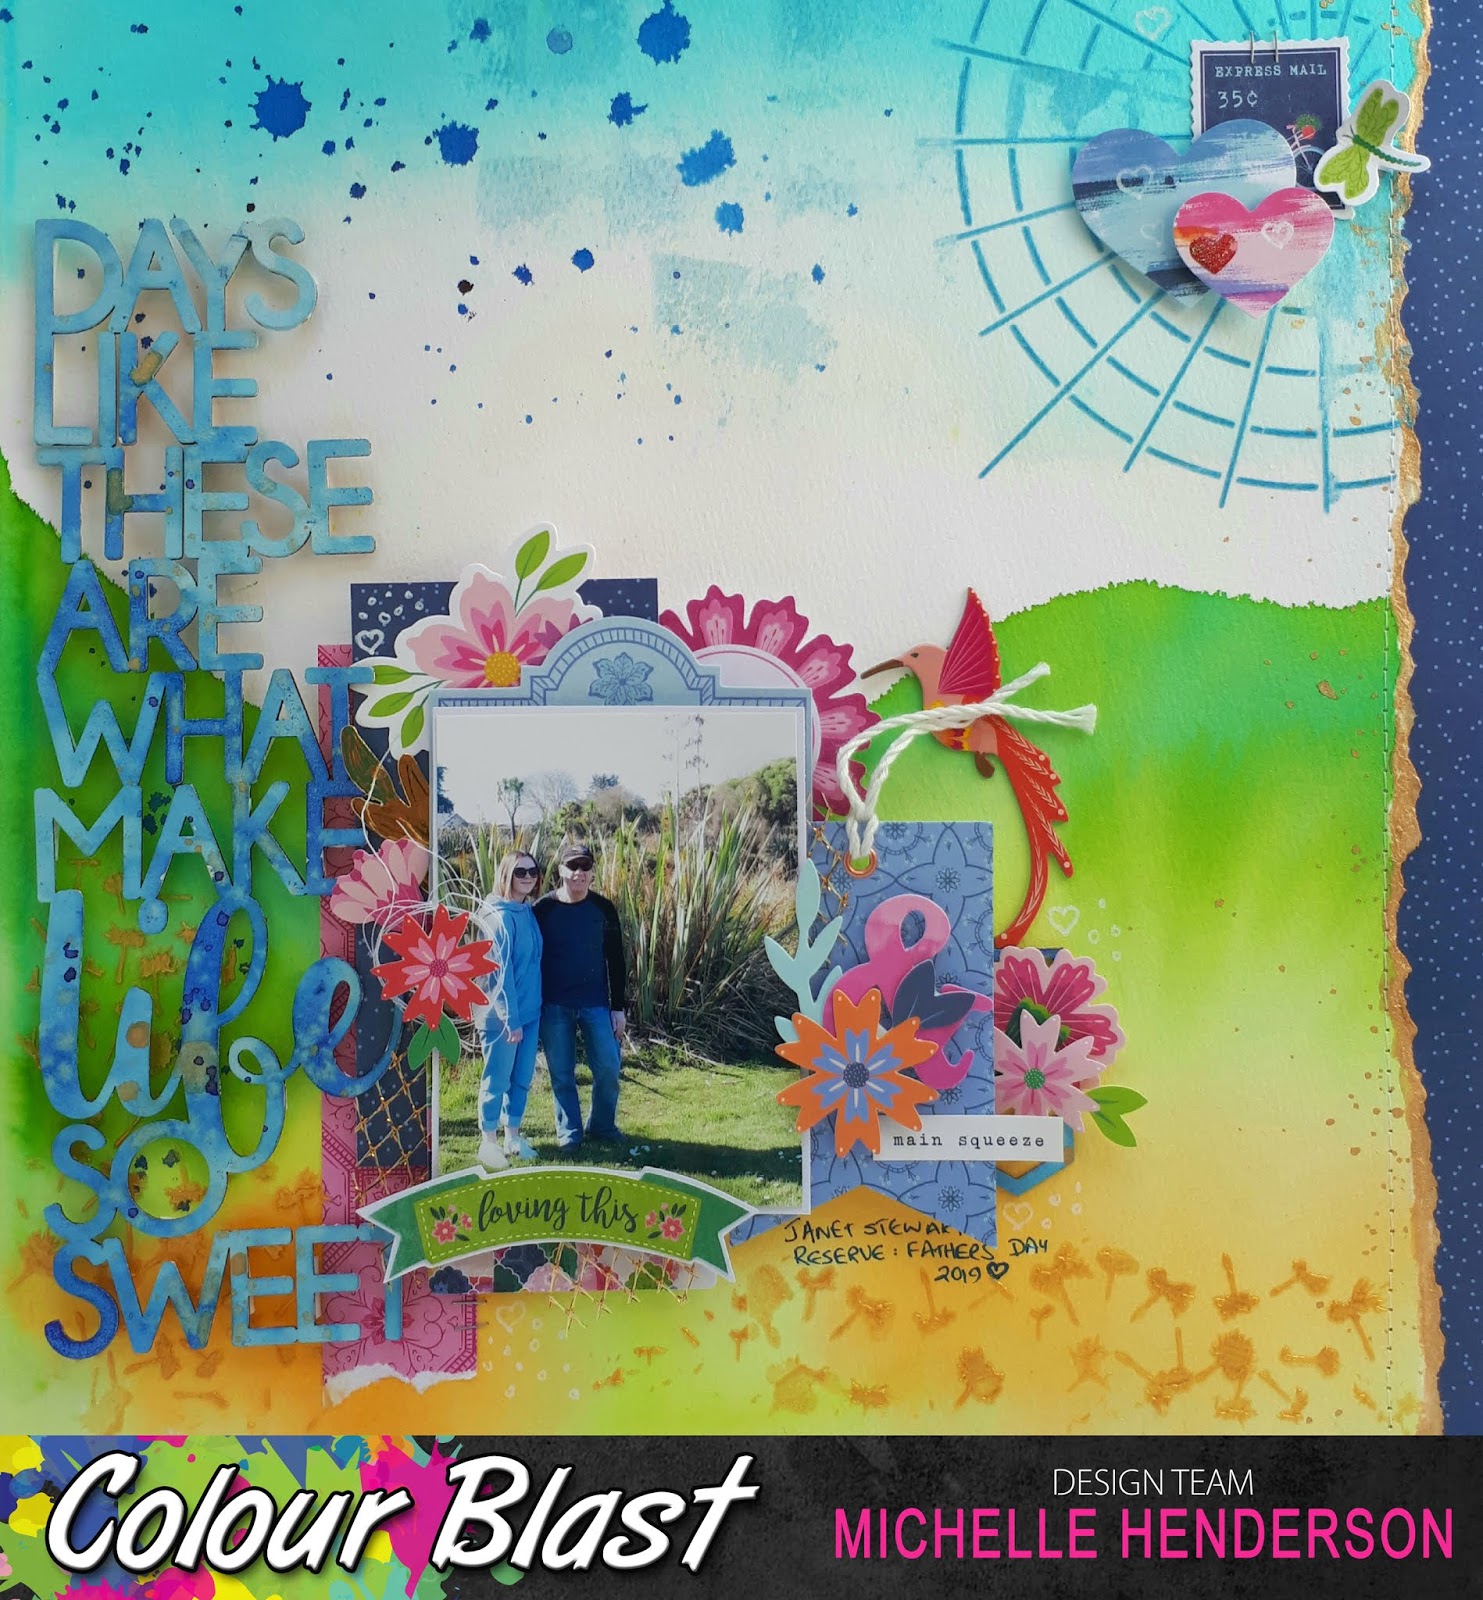
Days like these....by Michelle Henderson

Hello and happy Friday everyone! I'm at a retreat so busy working on my next projects as well as some things just for me πŸ˜€
I have a watercolour page today using a little bit of everything - here's s little hint...


  My background was done on watercolour paper, and I used the wet on wet technique with Colour Artist Inks in Lime, Mermaid, Grass, and Barley. By wet on wet, I mean I painted the edge if my hills with water only to start, then went over it with thinned colour so it would blend down the page.


I then did the same thing at the top of the page with Calypso Colour Artist Ink.


While that was drying, I prepped the chipboard title with Heavy White Gesso.


I mixed a little Colour Shimmer Dust in Duke up on my (very!) messy mat, and then swiped the title through it, patting it into the colour again where I needed it. This gave me the lovely mottled look I was going for.


I wasn't keen on the way the right edge looked, so I ripped it off and added some navy paper, after edging the rip with Light Gold from the Shimmery Gold Watercolour Pan set. I also splattered a little of it down this edge, and on the title. 

I used Colour Paste in Singin' the Blues and Bling through stencils, and also smudged a little in the sky.


I still had a little bit of the Duke left over, so I made some big splatters and drips using a water brush, in the sky.


I added my photo cluster and another small cluster, along with the title. I'm so pleased to have already made my Fathers day page!!!
Here's the finished page πŸ’•
 

Thanks for joining us here!


Friday, 7 June 2019

Best Friends by Michelle Henderson

Hi! Today I'm using a simple technique which has been around a long time, but has been back in the spotlight recently
Here's a little taster.....


I used a few little dots of both Black Heavy Gesso and White Heavy Gesso on damp Kraft cardstock in random spots. Then I laid plastic wrap lightly over the top, and gently smoothed the 2 colours into each other.  Every now and then I lifted the wrap and sprayed a little more water. Once I was happy with it I let it air dry  - it took quite a while!!


Once it was totally dry, I used Colour Paste in Sunshine to stencil in some areas.


Finally, I mixed a little Colour Shimmer Powder in Sunflower with water a spread some on my page near the stencilling using the packaging technique. I finished it off with a brush, and then splatters (of course!)


I had pre-arranged my photo and layers so added these on too now, plus another cluster to balance the page. That's it!


You could also add any of the mediums like Colour Artist Inks or Colour Shimmer Dust
to the gesso - I might try this later! I hope you take some time to try this simple technique πŸ˜€


Tuesday, 25 December 2018

December Story by Michelle Henderson

Merry Xmas everybody!
I hope everyone is having a totally magic day, and that Santa has been very good to you all πŸŽ…

Our poor little cat in this page - I had to scrap it though!


I started with some plain Bazzill Marshmallow cardstock, and I used a little Kaisercraft stencil along with White Heavy Gesso.


Once I had done that in a few places and it was dry, I thinned down some Colour Artist Inks in Lime, Grass, Sunburnt, and Cranberry. I brushed it on here and there randomly, without overlapping. It wouldn't have made a great colour if they had mixed.


I had some cute little chipboard Xmas trees, but I didn't have the embossing powders I wanted handy, so instead I stippled them with Colour Paste in Apple of My Eye, Envy and finally Bling.


Time to put everything together! I mostly used some Pinkfresh paper and ephemera I had from last year. 

Of course then I had to add a few gold splatters, so I used the Colour Shimmer Brush Marker; I also used it to colour just the edges of the wood veneers.

Some close ups for you - just look at those treesπŸ’“πŸŽ„


Now go put your feet up and enjoy the rest of your day - I'll see you in the New Year!