Showing posts with label Shimmer Dust. Show all posts

Sunday, 11 September 2022

Happy Little Moments By Tracey Campbell

 Hello Bee Arty friends. 

Today I have a layout to share with you that has stamping, stencilling and the magic of Shimmer Dust.... what more could you want?

I started off by blocking out around the Dusk stencil with some plastic and placing it roughly in the centre of some heavy white cardstock.

I then spraying three different shades of  purple Shimmer Spray; Rose Petal, Royalty and Indigo through the stencil onto white cardstock. 

I then moved the stencil to the left, lining up the print and strayed again.

The photo above is how the sprayed stencilling turned out. 

Next I sprinkled two colours of Shimmer Dust; Velvet and Duke, across the bottom of the cardstock,

I then activated it with water.


As the Duke Shimmer Dusk was move bolder than colour than the Velvet I decided to sprinkle a bit more Velvet on and sprayed more water to make the coloured area bigger.


On the bottom of the cardstock I used the excess Shimmer Dust fluid that had run off the page and my finger to spread it over the bottom edge.


Here is how the base turned out, I love how vivid and bright the Shimmer Dust is compared to the muted Shimmer Sprays.


Once dry I used some waterproof black ink and stamped various images; Kind Heart, Heartfelt, and Meridian, around the bottom edge and half way up the left and right edges of the cardstock.
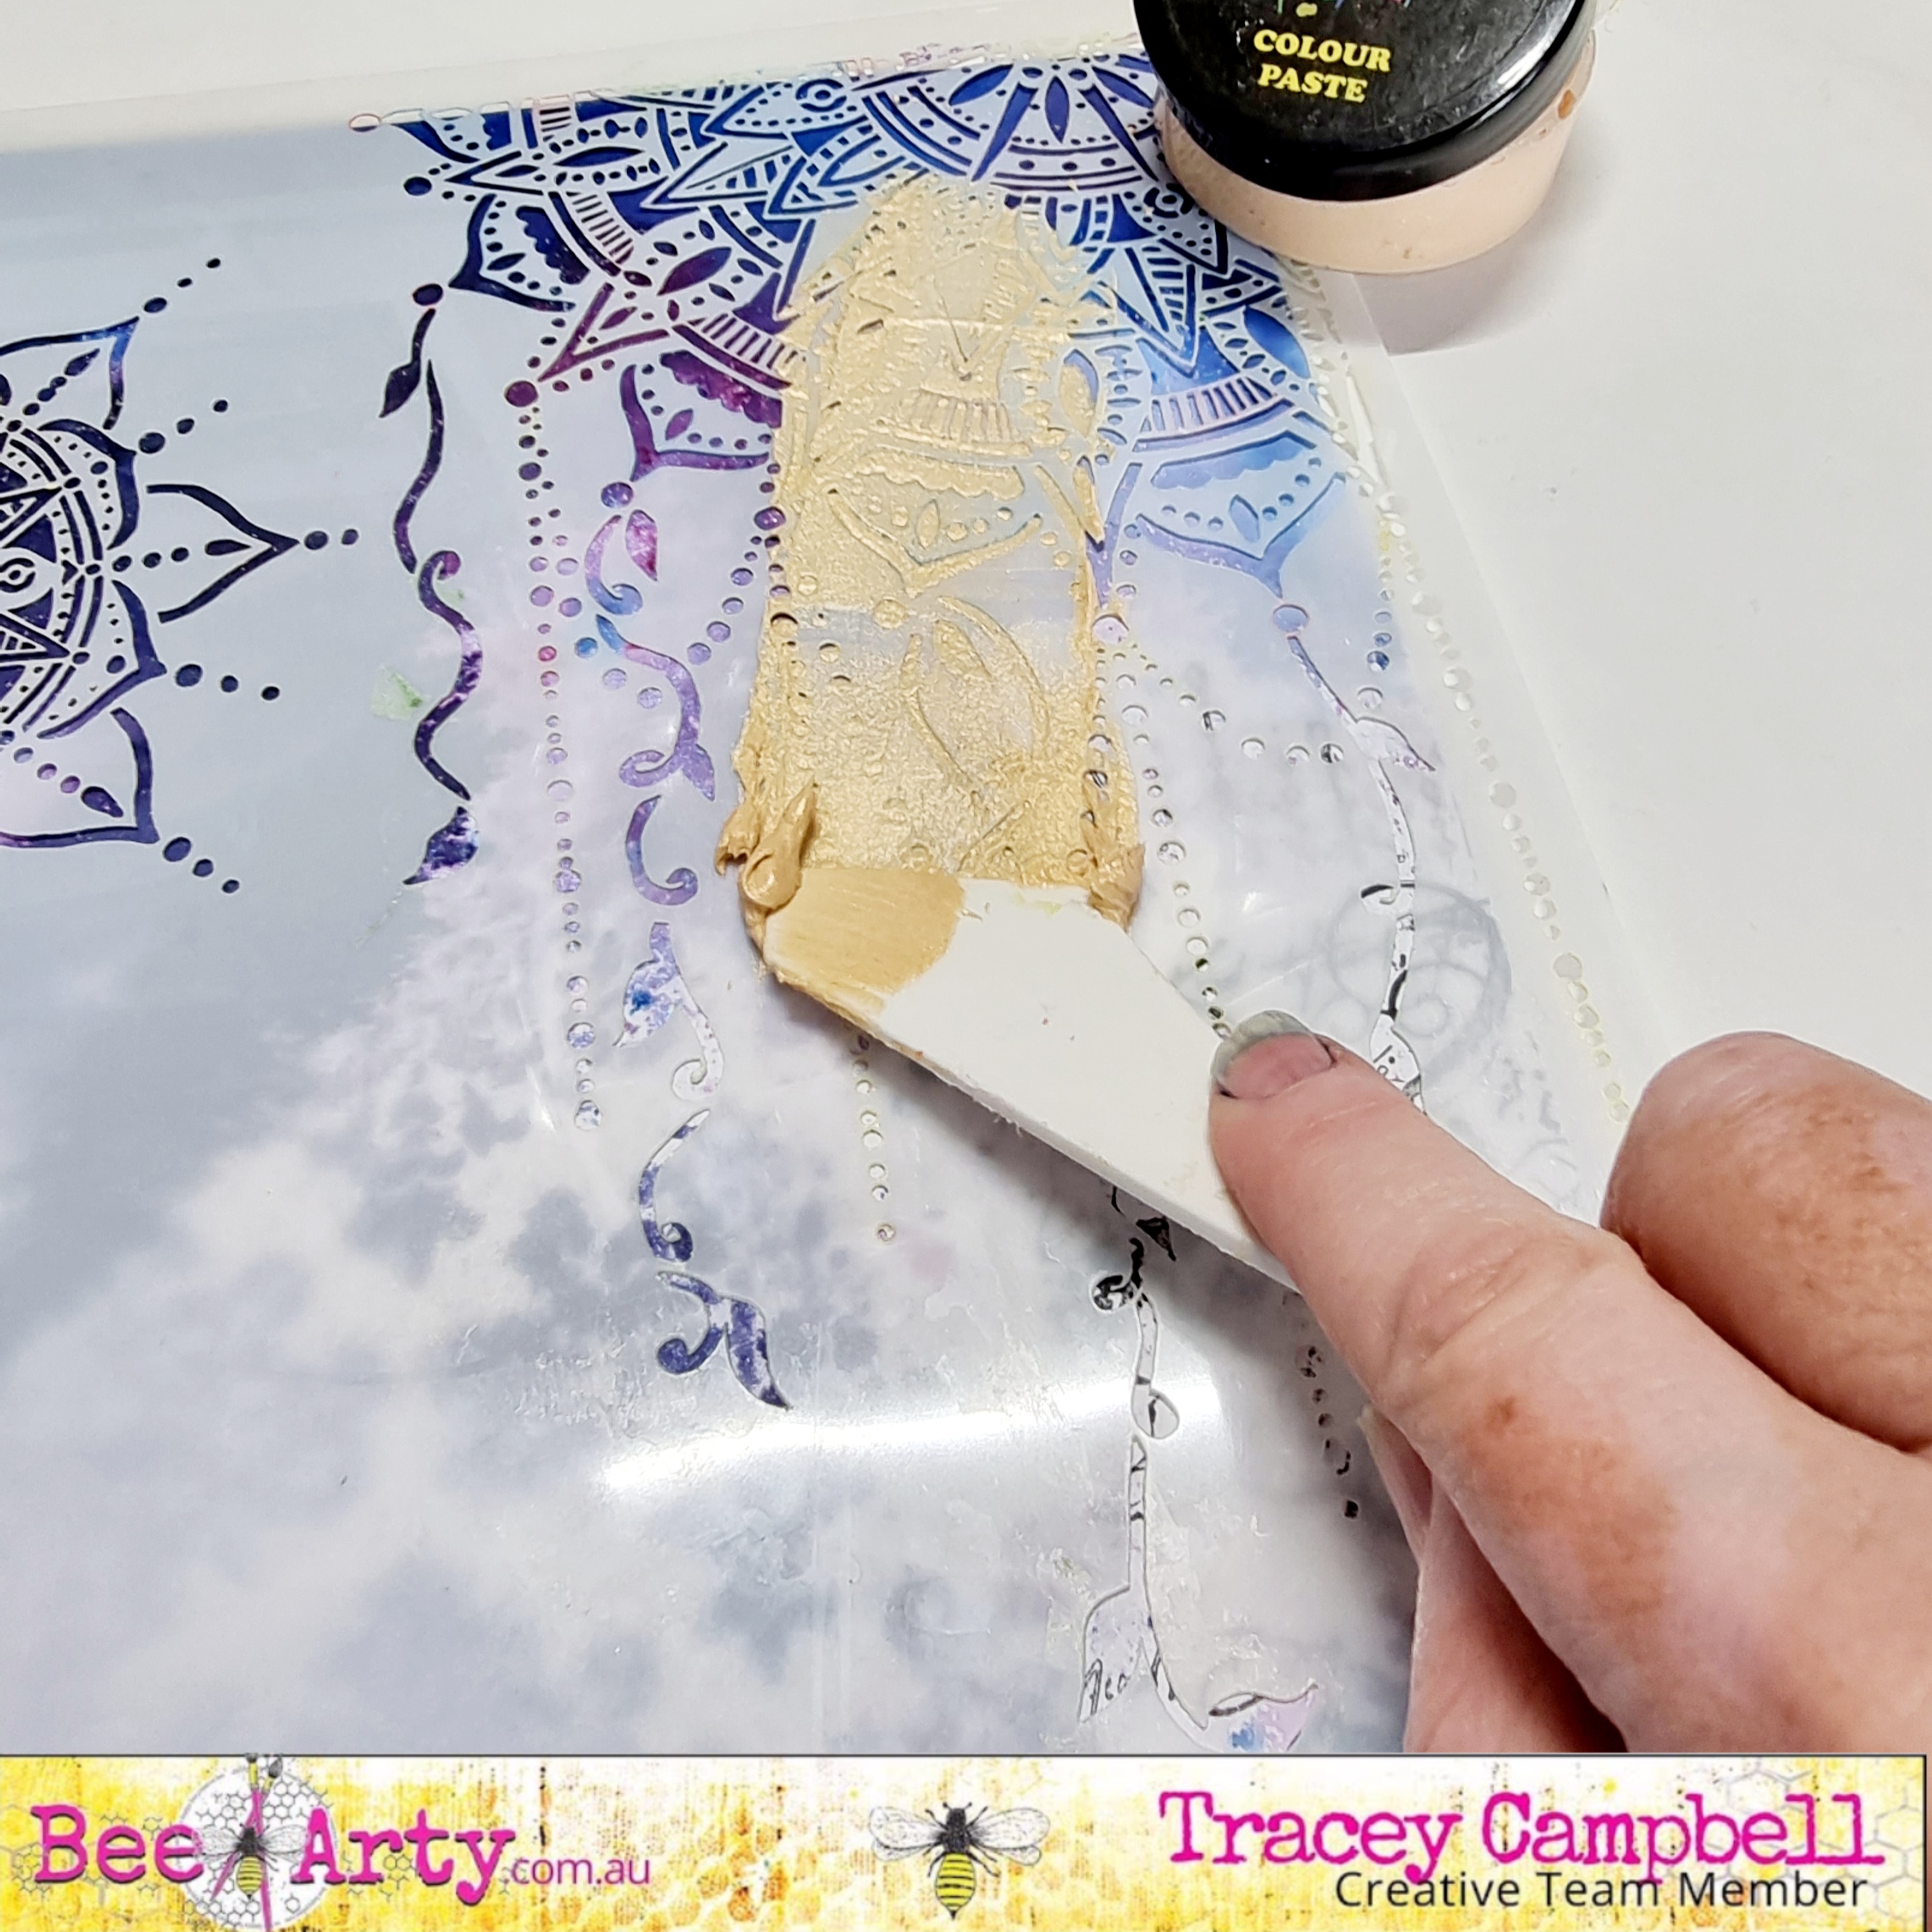

I then use Bling Colour Paste through the Mandala stencil.


Here is how the base turned out.


Next I backed a 6x4 photo with some vellum paper and gold foil cardstock and adhered it to the centre of the base.


Next fussy cut some flowers from the Tea Time in Wonderland Collection


Adhere the flowers around the photo, using some tacky glue in the centre and some 3 dimensional tape around the edges. Use a pen to press the centre of the flower down to the stick it to the cardstock. Use you finder to turn the flower pedals up to give them some dimension. 


I used the end of a paint brush to add some Bling Colour Paste to the centre of the flowers to give them a touch of shimmer. 


Using some Black waterproof ink I stamped the title "Happy Little Moments" from the Happy Stamp Set to the bottom left hand corner of the photo. 


Wanting a bit more dimension in the flowers I used the Flower Stems metal dies and cut out four of each stem from the green coloured papers in the Embrace Change Collection


I then adhered the die cuts around the fussy cut flowers. 


Here is how the final layout turned out. I love creating my own back ground with a bit of stamping and stencilling with the magic of Shimmer Dust, you never really know how it will turn out but it always looks stunning.

Thanks for popping in.


Hugs
Tracey

Tuesday, 17 May 2022

"All You Need Is Love" by Charmane Koch

 Hello & Happy Tuesday to you all!

Well, I have just got back Sunday night from a lovely Bee Arty Retreat! And it was definitely what I needed to refresh & reboot! Although now, I am in recovery mode - Retreat Hangover! LOL!

Thanks so much to Paige for EVERYTHING! I would be beside myself, with last minute changes to the venue & sorting everything out! But it did in the end, and it was AMAZING!

Anyway, so while I was there I managed to scrap a "few" layouts - too much chatting does limit the amount to create!

I wanted to share with you one of the two layouts I created based on the May Moodboard/Sketch Challenge at Bee Arty... 

I went with the colours and added a few flowers based on the image of the flowers too....

I started off by gathering all the Bee Arty colours - Candy, Sunflower, Apple of My Eye & Blush - either in Mica Powder or Shimmer Dust - splattering these colours to Bee Arty Thick White Cardstock that I had added White Heavy Gesso too.

I have then collected some bits and pieces that I have accumulated on my scrappy table to create clusters around my photo. The photo I have matted using one of the lovely NEW Bee the Sunshine papers, I have also backed the White Cardstock with Bee the Sunshine Paper too.


I've coloured the #bestday chipboard with Wine Shimmer Dust & also the Diamond Metal Die.


I've stamped the cute Man & Woman stamp from the Scrabble - Clear Stamp Set randomly on the page using the Apple of my Eye Mica Powder & Water.

Here is the end result...


So, if you haven't already make sure you give it a go if you haven't already!


PS... here's a sneak of the other layout I created based on the sketch.... using the NEW Snow White Shimmer Spray - it's so gorgeous!


Thanks for popping in! Now, time to get scrappy!

XO Charm


Monday, 7 December 2020

"Happiness" by Anita Enright

 Welcome Back Everyone

 For my share today I thought I would share with you another layout that I completed using the Fearless Brave and Free, Three Six Five and Arty Farty collections along with Artist Inks, Shimmer sprays, Shimmer Dusts and Embossing Powders.

For my page I used the MUSE patterned paper from the Arty Farty collection designed by the super talented Michelle Grant. Using the Arches A5 stencil and some matching distress inks I applied colour through the stencil to the patterned paper.  I added some 'splats' to the page using a blue shimmer spray. From one of the collection I used a white Hexagon die cut and after making a mix of Duke Shimmer Dust and water, coloured the white die cut.  

 I created a colourful piece of smooth white cardstock using Artist Inks in Lime, Marine, Mermaid and Calypso.

I then used this piece of cardstock and die cut the FRAME metal die from the Fearless Brave and Free collection and also the  GEO DIRECTION metal die from the Three Six Five collection designed by the amazing Tania Froud. 

The GEO DIRECTION die cut was cut in half and applied to the back of the mounted photo, as was the hexagon die cut that was coloured earlier.  The FRAME die cut was glued on top of the photo.


Wording on the page came from the FREE word sheet from the Fearless Brave and Free range designed by mega designer Fiona Paltridge.

I heat embossed the happiness chipboard word with Apple of My Eye Embossing Powder.

 
Before layering all the pieces down I grabbed some washie tape in matching colours and designs and applied where the photo was being applied.
 
To finish the page I used a Charms Creation tab, yellow twine and different enamel dots, arrows and triangles.

 
Thanks for stopping by.
 
I hope you find some crafting time to create your next memory.
 
 
Take care 
Anita
xx


Monday, 27 July 2020

Confidence by Anita Enright

Hi Everyone, welcome back again to the Bee Arty blog.

For my share today I created another layout using items from several different collections.  I think I have an addiction to these ranges, but these are gorgeous so why not :)

This page I did a couple of months ago for a challenge entry.  You know how sometimes everything just falls in to place.  I knew what I wanted to do and it just seemed to come together perfectly.


To start I took the Sassy patterned paper from the Trendsetter collections and coated it with a clear gesso.
Next using the Heavy White Gesso and the Interwoven stencil from the Three Six Five collection add the image to the patterned paper.


Next, taking the Calypso Artist Ink add a couple of droplets to the page over the stenciling.  Hit the page with a spray of water.  Remember you can always add more water, so take it easy to start. I move it around the page firstly by picking up the paper and tilting it in directions for it to move.  If it needs further movement I use my fanned brush to give it a hand.


Allow to dry naturally if you can, but you can always use your heat gun to speed up the process.
Taking the Passion Shimmer Dust lightly sprinkle over the stenciling and again spray with water.  Move the colour around the page.
Next, on a piece of watercolour paper, I used the Calypso Artist Ink and the Passion Shimmer Dust to create a piece of patterned paper.


From the patterned paper created with the Artist Ink and the Shimmer Dust die cut 3 of the Diamond metal die from the Forever My Always collection.
I then created the layering behind my chosen photos using smaller pieces of patterned paper from the Trendsetter collection, the Diamond die cuts and a paper doily.


When you are happy with the layering cluster with your photo, attach it to the page.
I added a few extra embellishments from my stash including a matching purple paper tag, a Charms Creations embellishment, flower and sequin bow.
To finish I chose a title from the word sheet in the Trendsetter collection, deconstructed it and mounted it on 3D foam tape to the reverse before mounting it on the page. To finish framing the layout I took a white pen and did a freehand frame around the edge of the patterned paper.

Below are a stack of photos of the layout showing the details a little closer.


I hope you enjoyed stepping in to my world for a little while, and enjoyed my tutorial.

Take time to find some 'me' time in your week and create with all your heart.

Until next time..... keep safe.

Anita E


Sunday, 29 March 2020

Love You by Tracy Jackson

Hello everyone! 

Today I'm sharing my very first post for Bee Arty.
Over the months I hope to share many more cards, tags and Art Journal pages


But for today I'm here to show you my "Love You" card.


I picked out Floral Delights 2 stamp set which is such a versatile set and a fussy cutters dream. Then, I wanted a background stamp so choose the Meridian stamp set.


After stamping out 3 different size flowers with Stazon on watercolour paper I was time to pick out my Shimmer Dust colours. As I have never used these before I decided to do each size flower a different shade of blue and wanted to see how they reacted adding the Green Paris colour as a highlight.


While my flowers were drying I used a dry paint brush to tap dry Shimmer Dusts in Peacock, Colbalt and Paris onto some water colour paper. I then sprayed some water onto card and to activate colours and used heat gun to dry. 

Once I was happy I stamped a strip of circles from the Meridian stamp set and used Paris and Peacock shimmer dusts to darken some of the circles to make them stand out.

I also wet a little bit of Midnight shimmer dust so I could go around the edges of the card.


And finally after fussy cutting all the flowers, placing them on the card and cutting out the words "love You" from Mantras Untangle paper, I have a card!


My verdict on the Shimmer Dusts as a first time user.... Love them!
They blend lovely together and a lot goes a long way. I'm looking forward to using these on more projects.

Until next time, Happy Crafting!