Showing posts with label Bee The Sunshine Collection. Show all posts

Tuesday, 9 May 2023

Adventure Bound - Rikki G

 Hi Rikki here kicking off my May design team shares. You would have seen that we run a monthly challenge and it  has a moodboard and a sketch.... did you know you can enter either challenge? Or  you can combine the challenges.


So I had a little brain wave, why dont I work my posts this month around the challenge. So I will start with the sketch, how to break down each step, each layer and each embellishment.

Theres even a process  video for you to follow along with.


*** If you do the sketch part of the challenge you  can complete it in any colour you like.

Sunday, 23 April 2023

Sweet Vibes - Rikki G


Good evening how are you all? Rikki here on this fine Sunday to share with you my latest creation for Bee Arty and this is for this months current challenge either a moodboard or the sketch or like myself... why not combine the two?


Heres my take in the challenge, you still have plenty time to enter and win !!!


Want to see how it was created? Follow along with a process video.


To start off use a stencil like the Honeycomb Spray Stencil.... to build up the colour in the background I used Tim Holtz Oxide - Pickled Raspberry, Spiced Marmalade, Squeezed Lemonade, Kitsch Flamingo.


Stamp Find Your Way to the left hand side of the page with an archival ink.

Follow this up with stamping the right hand side with the Geo Grunge - the one with the Bee, set this aside for layer on.


Now its all about adding your pattern paper layers and to soften you can add some vellum as your last layer.


Add some fussy cut elements from Sunny Days 12x12 Paper.


Add photos and title.


Now with the Geo Grunge Stamp - stamp though out the background randomly, if you keep your stamp unmounting it will help with the random effect.


Now its time to get messy with Colour Artist Dye - Slipper, Citrus, and Spiced.

Flick over the background and dilute in places with water. 

Dont forget to cover your photo.


To finish off use Shimmer Spray - Bling with a brush flick and let it run like honey.....


So why dont you join us in this challenge, just follow the link:


Honeycomb Spray- A5 Stencil


Bee The Sunshine - Paper Collection Pack


Sunny Days - 12"x12" Scrapbooking Paper


Sunday, 23 October 2022

Be Kind - With Karyn Schultz!

 Hi Bee Arty Lovelies!

Its Karyn here and today I have a scrapbook page to share with you made using lots of fabulous arty products from the Bee The Sunshine collection at Bee Arty
 
  
I started with a sheet of 350gsm Heavy White Cardstock and added a watercolour wash using Tan Shimmer Dust

 
I added background stamping using the Find Your Way stamp and Brown Archival ink. Then I added black splatters using Midnight Shimmer Dust
 
Here is my completed page. 

 
 I used photo mats from offcuts of Bee The Sunshine collection papers and book paper. Words are from the Honey paper in the collection. I've used black cardstock and book paper diecuts created using the Flower Stems metal die set and a black cardstock bee diecut created using the Wingspan metal die set.

 
 I used the Floral Arrangement stamp set to stamp on some hexagon wood veneer and also direct to the page (using a brown ink pad)


Thanks so much for stopping by

Crafty Hugs xx


Saturday, 27 August 2022

Sunshine Altered Hoop by Sunila Mahajan

 Hello Bee Arty Lovelies,

Hope you're all doing well! Sunila here, and today I'm sharing a pictorial on altering an embroidery hoop. 

I enjoy  mixed media because it opens up plenty of opportunities to play with. Layers, elements, textures all come together beautifully in a single piece. The altered hoop makes for a great home decor piece as well as a gift for someone special.  

Here's a look at the hoop:


Let's begin creating it!


Step 1- I've chosen the Bee The Sunshine Collection for my Hoop. Fussy cut elements, pick out papers for the base and to die cut some elements. Paint the rim of the hoop with Bling Colour Paste. 


Step 2- Die cut elements for the hoop. The round frame makes for a great shaker element. Die cut it several times, adhere together for a thicker layer. Cut a circle on a transparent sheet and white cardstock to back it up for the shaker. I've used a piece from the collection with the quote to back my shaker. 


Step 3: On the base paper, stencil with colour pastes. 


Step 4: Add black stamping on the dried stenciled base.


Step 5- Adhere the hoop onto the base paper. Stamp on the rim of the hoop.


Step 6-  Glue the fussy cut elements, the die cut pieces and the focal shaker element to complete the composition. 


Hope you enjoyed this creation!

Hugs,

Sunila


Supplies used:

Bee The Sunshine Collection

Colour Paste- Bling, Rosewood

Stencil- Stardust

Stamp- Memories

Die- String Leaves


Sunday, 24 July 2022

Simply Perfect - With Karyn Schultz!

 Hi Bee Arty Lovelies!

It's Karyn here and today I have a scrapbook page to share with you made using lots of fabulous arty products from Bee Arty.  
 
 
 I started with a sheet of 350gsm Heavy White Cardstock and spritzed it with water along the right and left of the page (where I wanted to add colour). Then I used a fan brush to add Cool Mint Mica powder. I  continued to spritz more water and add more colour until I had achieved the desired look. 
 
 
Next I added some stencilling using the Honeycomb Spray A5 stencil and Stormy Weather Mica powder (mixed with water and applied with a sponge). 

 
I added stamping using the Find Your Way stamp and Black Archival ink
 
 
 I used a combination of Jet Black and Taupe Embossing powders from the Romance Embossing bundle. You could use any combination you prefer (or a single colour), but I love the rustic look of multiple colours.
 
 
Here is my completed page. 
 
 
 I added a photo mat from Chit Chat Alpha paper and black cardstock diecut created from the Compass metal die.
 
 
 The white cardstock diecuts are created using the Flower Stems metal die set.
 
 
Thanks so much for stopping by

Crafty Hugs xx


Saturday, 2 July 2022

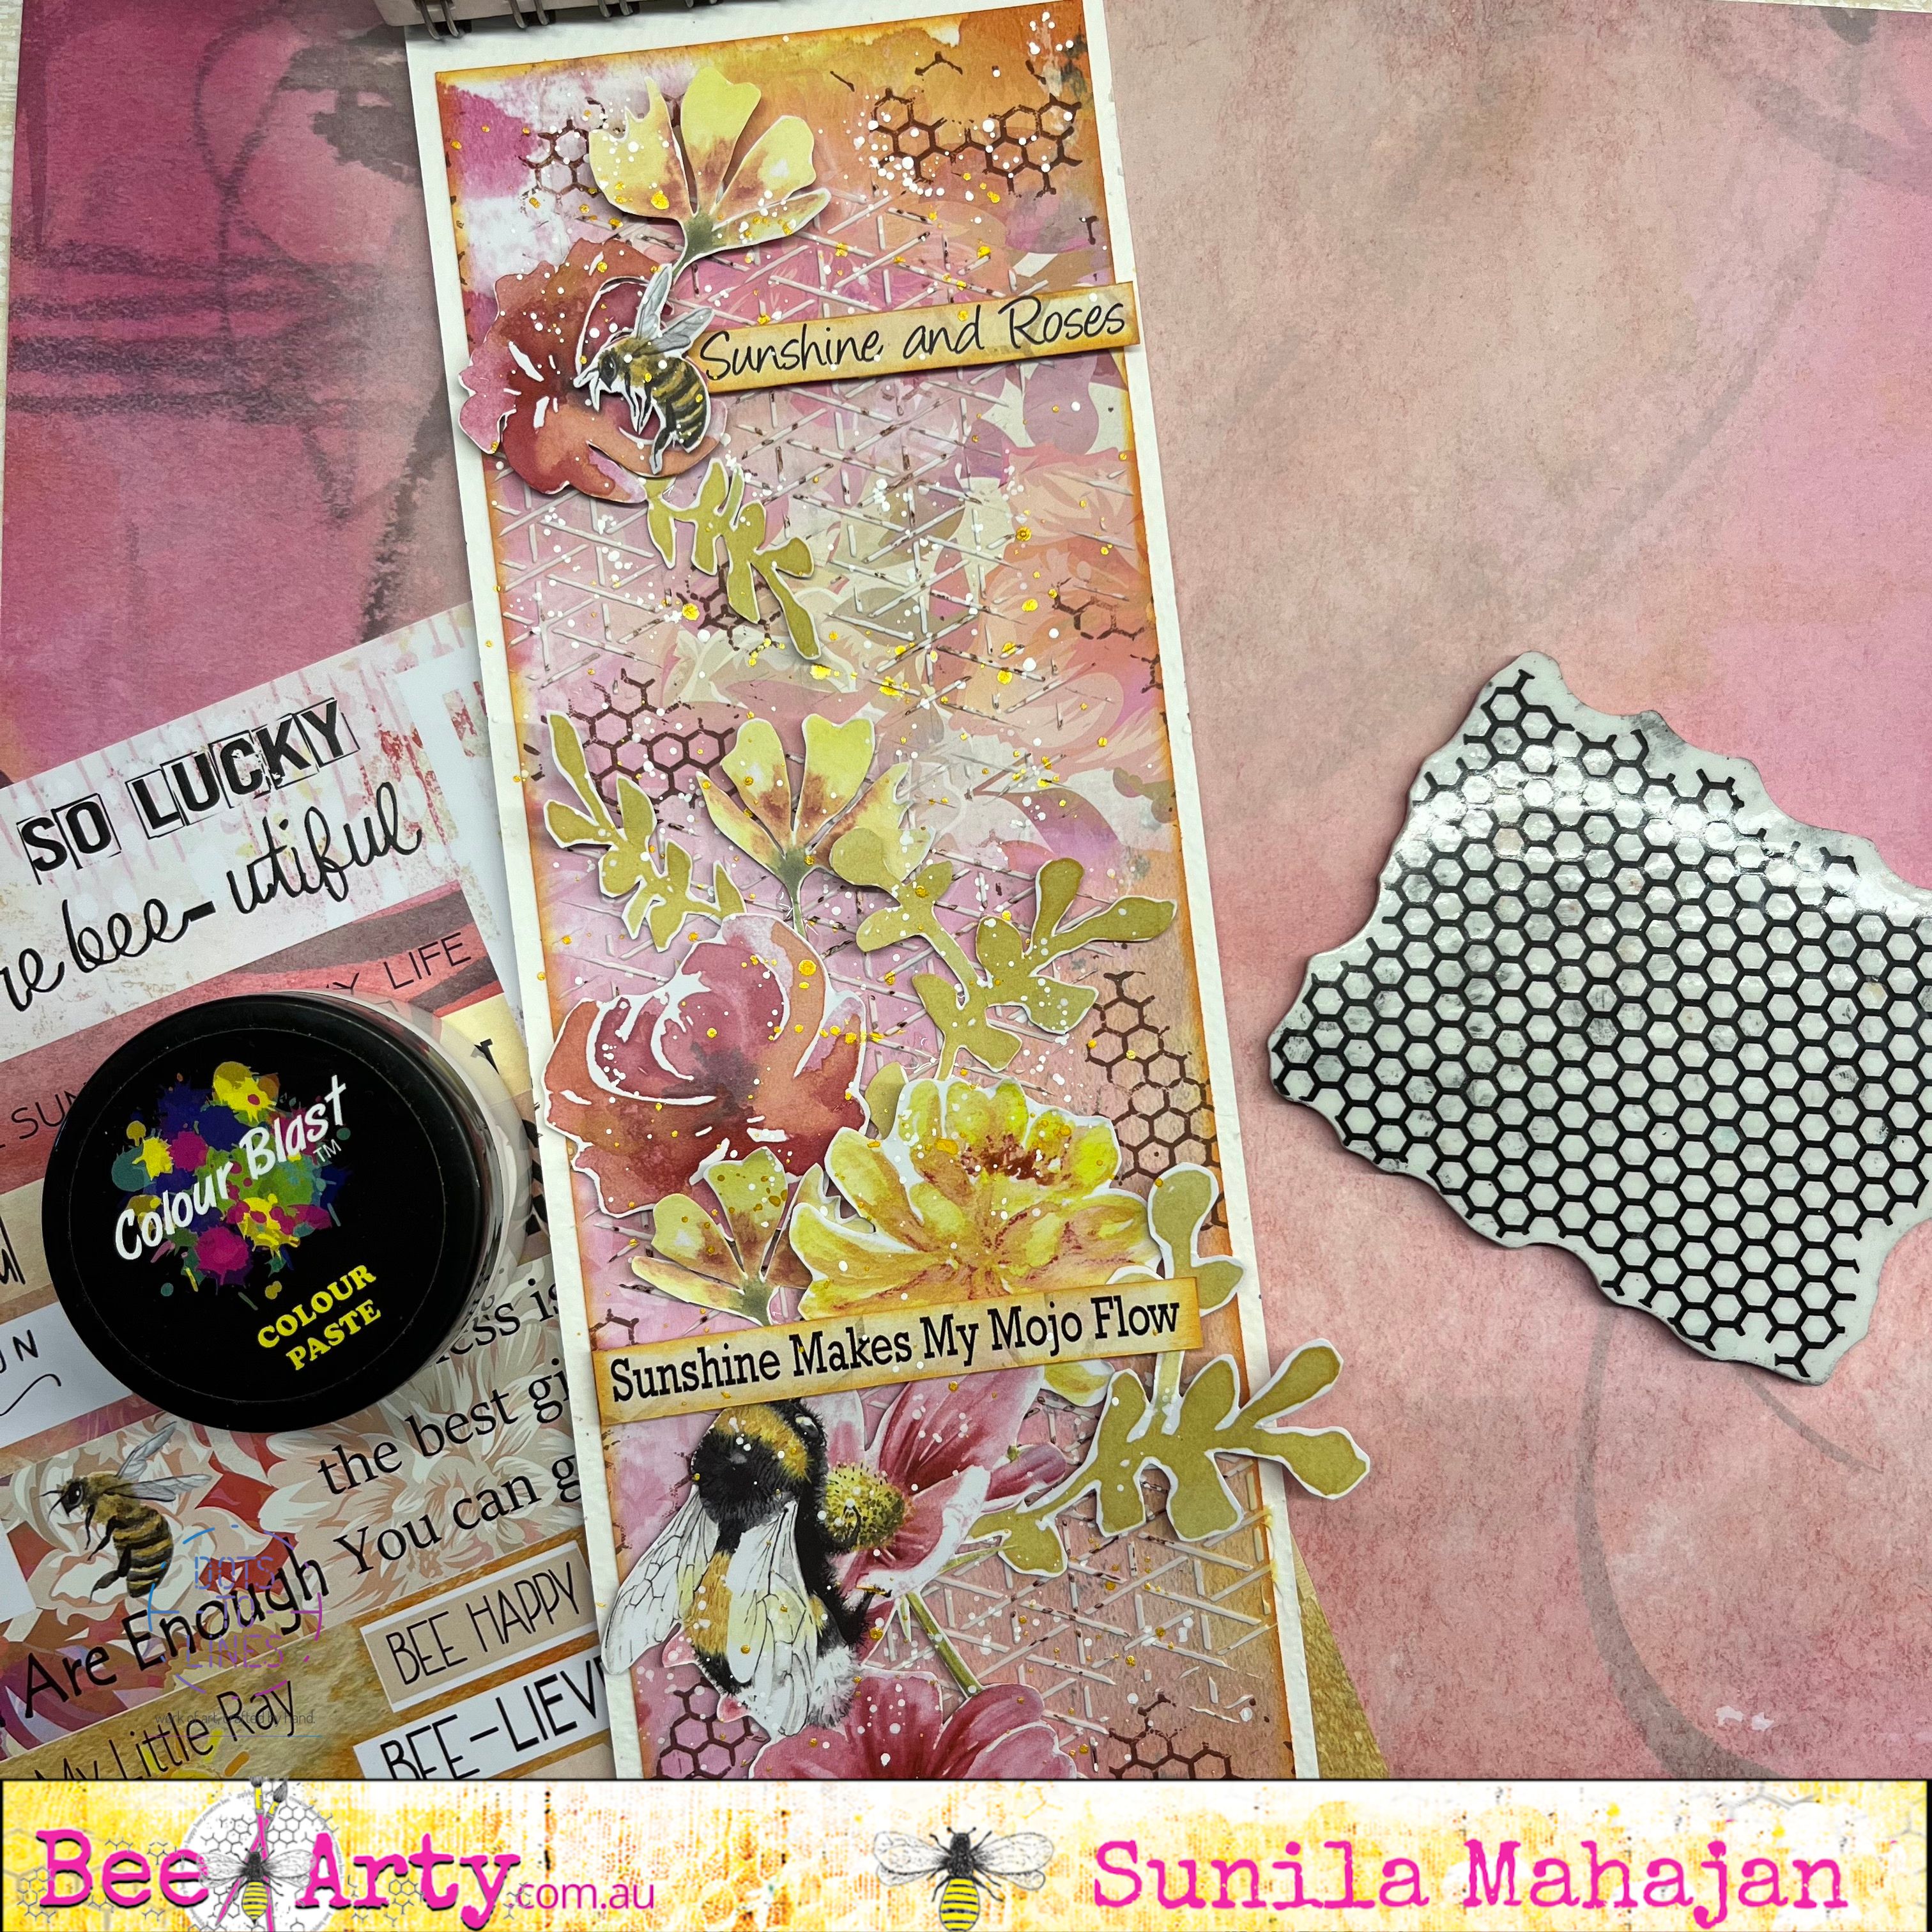
Sunshine and Roses Journal Page by Sunila

 Hello Bee Arty Lovelies,


Today I'm back with a pictorial for you all! This time, I'm sharing a mixed media style journal page with simple easy steps using the Bee The Sunshine Collection. 

This collection is fun and vibrant, just what I enjoy when creating. So get your scissors out, and start fussy cutting all the lovely elements.

Here's a look at the page.


Step 1- Cut a piece of pattern paper from the collection depending on the size of your journal. I usually like to leave an 1/2 inch border on all sides. Distress the edges of the paper and adhere it down in the book. 


Step 2- Apply White Paste through a stencil randomly on the page.


Step 3- Add texture, with a background stamp and inks. Black inks and coloured inks that go with the existing colours, work well for this. I've used a shade of Brown. 


Step 4- Pick out all the fussy cut elements from the collection, and layer them on the page. Stick some flat down and some with foam tape, bringing in dimension,


Here's a look at some close-ups:


Supplies used:

Bee Arty Collection- Bee The Sunshine

Rhythm Stencil

Memories Rubber Stamp

Snow White Colour Paste


Hope you enjoyed this tutorial!

Hugs,

Sunila