Showing posts with label Love and Grace. Show all posts

Monday, 12 June 2023

I love you berry much by Charmane Koch

 Happy Monday everyone!

Today I wanted to share a layout I have created using the Raspeberry Fizz Collection...

My background started with the gorgeous Raspberry Fizz Gingham Paper...


Then using a mix of Slipper Artist Ink & Light Moulding Paste I have used the Tattered Basketweave Stencil....


I did use the leftover Slipper/Moulding Paste onto the scrap of cardboard, but then went over it again with gesso before I coloured it again with the Slipper...

The rest of the layout is a lot of gathering bits and pieces - I used tags from Flora Mora Paper...

I also created a Charm Creations Big Love Heart using the Raspberry Fizz paper too...


Then from my stash I've used Flowers, acrylic hearts, bows, Wood Veneers & twine for the tags...


You may also notice the cute little Daisy paper - which is actually from the Love & Grace range... this paper is the LAST paper left from that range if you want it - Find it HERE!


I cut out the "I love you berry much" from the Let's Party Paper... there's some really great word cut outs to use on this page...


I had lots of fun putting this layout together - & if you want to see how I put it altogether there's a video that will be going up on the Bee Arty Hive soon!


Thanks for popping by & hope I've inspired you to get YOUR Raspberry Fizz Collection out!

Happy Creating!

XO Charmane

Friday, 17 September 2021

Hello Weekend Adventure by Charmane Koch

 Hey guys! Happy Friday! I love Fridays.... because that means WEEEKEND!

Since the horrid "Covid" Ashan & I have started going on Date Nights & possibly stay the night somewhere else - of course not too far away! I created a layout of us, I still need to do the rest of the weekend! haha!

This layout I have created using a mix of Road Trip papers and some Bee Arty dies that I think matched well with the papers!

I started off with this gorgeous paper for the background - Open from the Road Trip Range... How gorgeous is this paper? I didn't even want to USE it! All the papers are just beautiful!


This reminded me of the Metal Die Arrow - "Seeker" from the Follow your Dreams Range & also the stamp from the Fearless Brave & Free Collection....

So I decided to cut out the Seeker Die twice using the Breathtaking Road Trip Paper. I also cut out the word Adventure from the Road Trips Word Die & decided I needed more layers so also cut out the Honeycomb Metal Die from the Love & Grace Collection.

To create the stamped effect I have mixed Heavy White Gesso with Polar Mica Powder to create a light blue paste that matched really well with the paper, as I wanted it to blend in, but still be seen.


I dabbed with a sponge dauber gently on the stamp - I must admit I did test it out on a spare bit of paper to make sure it worked!

I have layered papers tearing some and distressing others to create lots of texture on my page, also adding the Honeycomb Die in different layers of the paper too.

Here are some extra closeups...


I finished off with some machine stitching & a few extra embellishments from my stash... and of course journalling!

Here is the final outcome...


I hope I have inspired you to have a play with the Road Trip Collection & maybe mix it up with different Dies & try out the stamping technique too!

Happy Creating Everyone!


XO Charm

Monday, 24 May 2021

You have my Heart by Charmane Koch

 Happy Monday Everyone!

Hoping your week will be a wonderful one!

Today I wanted to share with you one of the layouts I created based on a Challenge that we had at the AMAZING Bee Arty Retreat!

Here's a closeup...


We had to use the Love & Grace Elmore paper - which is gorgeous just by itself...


Sorry I don't have any step-by-steps as I didn't take any on retreat! {silly me!}

I however started off by stencilling the gorgeous Rose Reveal stencil from the Love & Grace Range using some modelling paste to the top left & bottom right of the gorgeous designs on the page... I have then quickly dried with a heat gun.


Using Apple of my Eye & Blush Mica Powder I have added water to colour the Rose Reveal stencil, & the White Doily that I have tucked behind the photo.

Before sticking everything down, I also lightly stamped the Memories Stamp which was another requirement for the challenge!

I cut out a few dies using the 350gsm White Cardstock - Runway, String Leaves & String Wreath and then embossed them using Key Lime & Baby Pink from the Mermaid Embossing bundle! Such beautiful colours!


Here are the Dies, Stamp & Stencil I used for this layout:


To finish off my layout I have trimmed the edges and distressed and backed with the fabulous nice and thick 350gsm White Cardstock.

I really love how this page turned out using so many of the AWESOME products at Bee Arty!


Thanks for stopping by and I hope I have inspired you to play today!


XO Charm

Tuesday, 16 June 2020

'Be Free'
with Lisa Amiet


Hello all!
It's Lisa here on the blog today,
to share some crafty inspiration with you all.

Here is my layout,

'Be Free'


For this one, I have started with a white cardstock base.
I have used some of my Colour Sprays,
in 'Bubblegum', 'Roadbase' and 'Saffron',
to splash my page, in a circular pattern.


I have fussy cut the flowers from 'Heart - Cut & Colour' page from the 
Love & Grace collection. I have used my Colour Sprays to paint them.
I have used 'Saffron' as the base colour for my flowers, 
and I have added some highlights with the 'Bubblegum'.

For the leaves I have mixed 'Saffron' and 'Lagoon' to make the green. 
I then adhered them to opposite corners. 


I have fussy cut the floral frame,
from the 'Annie' 12 x 12 paper, 
and have adhered it to the centre of my page, 
overlapping the flowers.


I have then used the daisy square from the 'Lucas' 12 x 12 paper,
adhered as a diamond rather than a square.


I have then adhered my photo to the centre of the diamond.
I have also used the 'Sweet Floral' Die, to die cut from blue cardstock. 
I have trimmed it up a bit to suit my page.  


I have then adhered sentiments from the 'Love' Word Sheet Paper,
to my page. I have also added a fussy cut bee from the 'Heart' paper.


I really love the boho hippy feel to the page, 
it describes my daughter and her bestie perfectly.

I hope that you like what I have created,

Until next time!

Lisa


Bee Arty Products Used:

Friday, 5 June 2020

Mix Match by Tracey Campbell

Hello and welcome, it is my turn on the blog today and I am sharing a layout I created by mixing and matching a few of the Bee Arty ranges together. For this layout there is a lot of controlled tearing, this means to tear images from a range of patterned papers, do it slowly so you don’t accidentally tear the image. If you do have a mishap just stop tearing and try and tear around it – it can be glued back together when you adhere the image to the background paper
From Effie pattern paper in the Love and Grace range, tear out the foliage images.
Control tear around the flowers, twigs and bee images from the Portia pattern paper in Love and Grace range.
Tear around the flowers and leaves from the Heart cut apart sheet in the Love and Grace range.
Adhere with glue the foliage, bees and flowers to Muse pattern paper from the Arty Farty Range, roughly in this formation.
This is the arrangement I did when I glued them down onto the base page.
Once the glue is dry use a sand block or a fine grain piece of sand paper and sand the edges of where the torn paper meets the base pattern paper.
Using the Heavy White Gesso dry brush over the paper. For the newbies, dry brushing is when you use a dry brush and only lightly dip the top of the bristles into the Gesso and apply a little bit at a time to giving you many streaks, an opaque look and texture to the page.
This is how my final white dry brushing turned out.
Next add colour back to the page by continuing to dry brush, I have added three different colours, the next three photos show what colours and how I made them. Mix Saffron Colour Spray with Heavy White Gesso and then dry brush it onto the background in random areas. Tip: Mixing the Colour Blast Colours with Heavy White Gesso dilutes them down.
Mix Duke Colour Shimmer Dust with Heavy White Gesso and then dry brush it onto the background in roughly the same areas as the diluted Saffron, but do not completly cover all of the Saffron colour you want all three colours to be seen.
Mix Olive Green Colour Mica Powder with Heavy White Gesso then dry brush onto the background. This will give nice shimmery look to your base. Apply randomly over the base paper.
While the Heavy White Gesso is still wet place the Laced stencil over it and wipe off the coloured gesso with a baby wipe. Move the stencil around on the page to take off more gesso in random areas.
This is a photo of how it looks once the gesso is wiped off.
Using Script stamp from the Memories stamp set and some brown ink randomly stamp the script image over the page.
Next use the Magic stamp and some red ink stamp the image onto the background, in the rough area where you will place the photo. HINT: Don’t ink all of the image and use your fingers to randomly press down the stamp, this creates a more ad-hoc image and not a full stamped image.
Add some stamped foliage on the page by using the leaves stamp from the Floral Delights 1 stamp set and some blue ink. Set aside to dry.
Once the ink is dry use the packaging technique to add some Coffee Colour Spray to the back ground. For newbies the packaging technique is when you take some plastic (from old packaging) and spay some colour spray onto it and press it down over the paper – it creates random splotches of colour.
Here is how my background is looking at this stage. You can see the placement of the stamps and Colour Spray.
Mat a 6x4 inch landscape photo with Beloved patterned paper from Vampyre Rose range with a 5ml boarder. Distress the edge with a paper distressing tool or a sharp pair of scissors. Next double mat the photo with white wood look from the Elmore patterned paper in the Love and Grace range, distress the edges.
 
 Add splatters to the background with the straw from the Coffee Colour Spray.
Add the title by using the Live Life stencil from the Love and Grace range and spread through Leather Colour Paste with a palette knife. Repeat this so that you have three titles running down the page. See final image for the positioning.
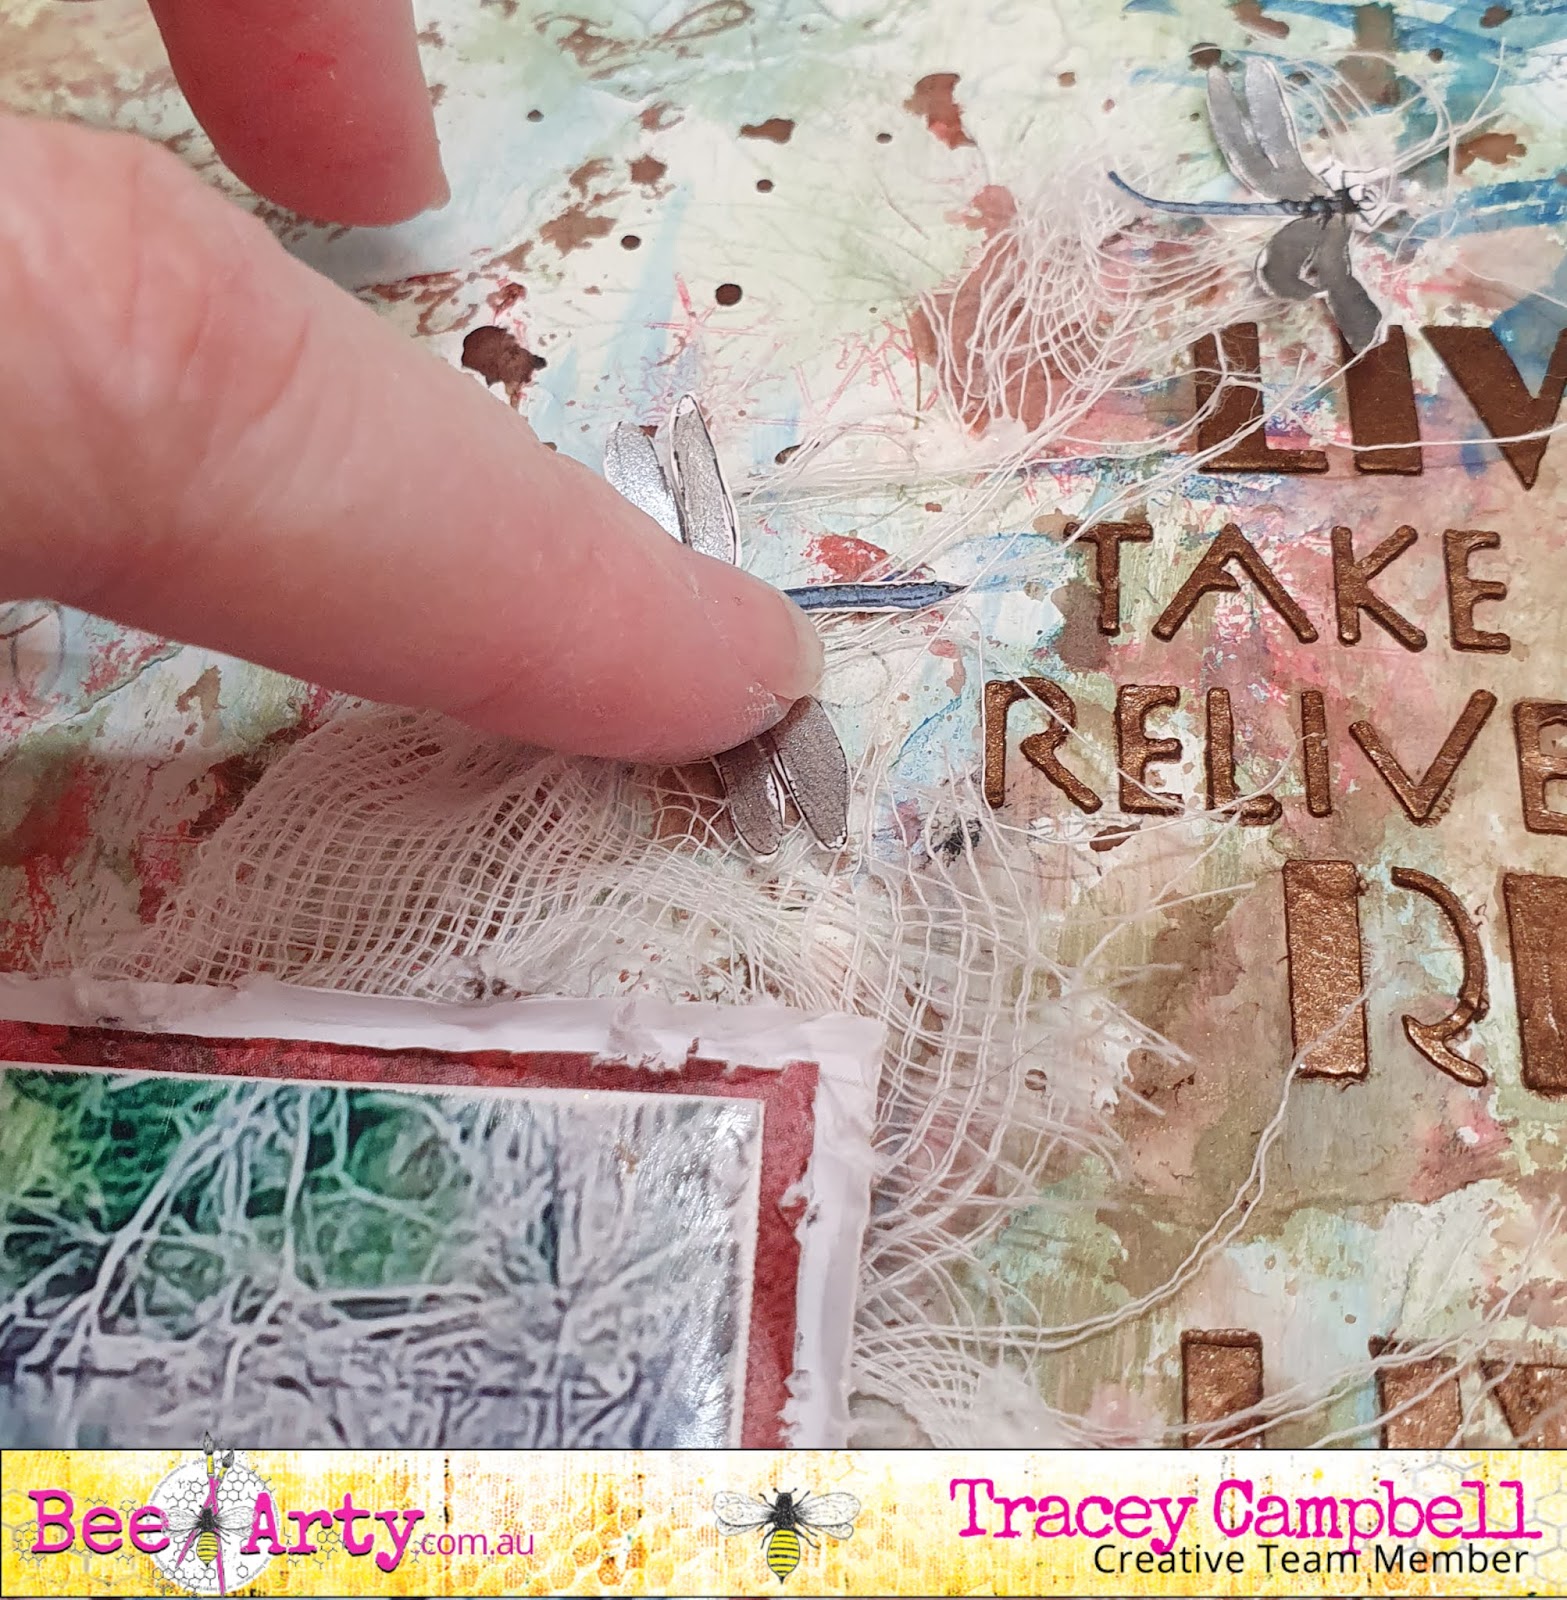
Using the Ultramarine Watercolour from the Colour Blast Pan Watercolour set from the Inspired collection, the Steel Shimmer Pot Watercolour and a water brush  paint the five dragonflies on the Bliss cut a part sheet from Life's a Beach range. Once dry fussy cut them out.
Use your finger to spread a layer of Leather Colour Shimmer Spray on to the journalling spot from the Bliss cut apart sheet from the Life's a Beach range. Tip: I used my finger as it give it a light layer and it speeds up the drying process. Once dry fussy cut out the shape and use a black marker to write some journalling about your photo.
Adhere the mated photo to the background, see final layout for the positioning. Adhere some gauze at the top right and bottom left of the photos. Adhere the journalling spot over the gauze positioned under the bottom left hand side of the photo. Glue the dragonflies on and for the final touch add some green bling  diagonally across the page, running from top right to bottom left.Tip: Placing photos and embellishment on your layout in diagonals helps to create movement as you eye moved over the flow of the layout.
Hopefully I have inspired you to pull out some unused papers from any range that you have left and look at how you can change them slightly and use up your stash. 

Take care and keep scrapping.