Showing posts with label Lagoon. Show all posts

Tuesday, 16 June 2020

'Be Free'
with Lisa Amiet


Hello all!
It's Lisa here on the blog today,
to share some crafty inspiration with you all.

Here is my layout,

'Be Free'


For this one, I have started with a white cardstock base.
I have used some of my Colour Sprays,
in 'Bubblegum', 'Roadbase' and 'Saffron',
to splash my page, in a circular pattern.


I have fussy cut the flowers from 'Heart - Cut & Colour' page from the 
Love & Grace collection. I have used my Colour Sprays to paint them.
I have used 'Saffron' as the base colour for my flowers, 
and I have added some highlights with the 'Bubblegum'.

For the leaves I have mixed 'Saffron' and 'Lagoon' to make the green. 
I then adhered them to opposite corners. 


I have fussy cut the floral frame,
from the 'Annie' 12 x 12 paper, 
and have adhered it to the centre of my page, 
overlapping the flowers.


I have then used the daisy square from the 'Lucas' 12 x 12 paper,
adhered as a diamond rather than a square.


I have then adhered my photo to the centre of the diamond.
I have also used the 'Sweet Floral' Die, to die cut from blue cardstock. 
I have trimmed it up a bit to suit my page.  


I have then adhered sentiments from the 'Love' Word Sheet Paper,
to my page. I have also added a fussy cut bee from the 'Heart' paper.


I really love the boho hippy feel to the page, 
it describes my daughter and her bestie perfectly.

I hope that you like what I have created,

Until next time!

Lisa


Bee Arty Products Used:

Monday, 18 May 2020

'Grunge Cards' by Amy C

Hi All!

Amy here with you today - sharing handmade 'Grunge Cards'.


Being a mum of boys, I like to have handmade cards in our cardbox for my boys to be able to go with their friends' gifts.


For these cards I used some Colour Blast Colour Spray in 'Lagoon' and Colour Artist Ink in 'Lime' for the background.

After both of the backgrounds had dried I did some stamping.

The 'Life is Tough' stamp set by Colour Blast was the perfect set up for my grunge theme.

I used the sentiment from this stamp set on the lime card as pictured.


I used various images from this stamp set on both cards.


To add more detail over the stamped background I used a make-up sponge to smooth some Black Heavy Gesso through the 'That Way' stencil over various parts of the cards.


Finally, I added a few splatters of Colour Spray in 'Road Base' randomly around the cards.

Once dried, I added a few embellishments fro my stash. 

Here are some close ups of the finer details.


Thank you for stopping by. I hope it leaves you feeling inspired - happy creating!

Amy ðŸ˜Š


Wednesday, 13 March 2019

"Remember This" by Sue Plumb


Hi everyone! 
Sue Plumb here with my latest design team project with you. Today I have a mixed media scrapbook layout to share that features a combination of Colour Spray, Colour Shimmer Spray, and Colour Paste. It also features a photo of my kids that I took at Easter time at school last year.


For this layout I decided to pull out some products that I hadn't used in a while - my sprays. (Since the Colour Artist Inks were released I have tended to use those more often as I like the brighter, more vibrant colours and they also tend to fit better with the techniques I use.) However, I didn't want my older supplies being totally neglected so I decided to re-visit them for this page. 

I began by sticking a stencil over the top third of my page, masking off the areas that I din't want sprayed with the Colour Spray using scrap paper. (I always stick my stencils down with old washi tape, as it makes removal so much easier afterwards.) I started with a light spray of Lagoon, then added a little Saffron over the top. 


Once I had applied a light covering, I carefully removed the stencil and allowed it to dry. You can see how I chose a stencil with a very "organic" pattern, and how when I masked off the top edge I did it with paper torn unevenly to avoid a straight edge along the top.


Next, I want to go for a completely different look in the bottom portion of the page. I selected some complimentary Colour Shimmer Sprays (Deep Water, Sunshine and Apple of My Eye) and applied the spray directly from the bottles using a brush. I added small amounts of colour along the bottom edge of the stencilled section of the page, holding the cardstock vertically and allowing the colour to run down the page. 


I started with the Deep Water spray, then followed with Sunshine and Apple of My Eye. I allowed a short time for each colour to dry a little before moving onto the next one. I also tried to place the colours to limit the amount of blending that would occur, as I wanted each one to be visible. (You can see how they look once dry in the bottom photo below.)


With all my "runs" in place, it was time to work on the line where they met the stencilled pattern above on the page. I wanted to add a little texture, and also define the focal point for my layout, so I chose a stencil so I could apply a single floral line. Just like the sprays I had used, I also wanted a combination of colours so I chose Sunshine, Singin' the Blues and Apple of My Eye Colour Pastes


I used a narrow palette knife and started with the Sunshine paste, applying it to the stencil without covering it completely. I then added the Apple of My Eye and Singin' the Blues pastes, filling in the gaps I had left and overlapping the colours. 


The result was a gorgeous mix that showcased all three colours within the stencilled design, and blended perfectly with the sprays I had already applied to the page. I then left the paste to dry.


Once dry, I was happy with my background and set about creating the structure of my page. Again I did some stash-busting and used some older supplies (this time some scraps of a Jillibean Soup collection from long ago) that matched perfectly with my colour palette.


I added a torn strip of paper along the focal line of my page, as well as a couple of strips along the top edge of my page. I then used various pieces of paper, along with coordinating die cuts and stickers to create layers under and around my photo. 


Next, I fussy cut a number of butterflies from one of the patterned papers, which I adhered along the paint runs in the bottom section of the page. I stuck each butterfly by the middle section only, allowing me to bend up the wings away from the page to give it dimension.


To help balance out all the butterflies in the bottom section of my page, I also added a small embellishment cluster near the top edge of my layout. 


To finish off my layout I used a roller stamp and some grey ink to stamp out the word smile repeatedly near the butterflies. 

That's all from me today, thanks for stopping by. I will be back in a couple of weeks with another project to share. 
Until then, happy scrapping! 


Thursday, 4 October 2018

Your Smile... by Suzy Loudon

A big Hello to all. Today I share a layout using Colour Sprays, Paste & Embossing Powder...oh & Gesso.
Keep reading to find out how my layout came together.


To begin my layout I spread Heavy White Gesso  where I wanted to add colour.


Using my Lagoon Colour Spray, I added small amounts onto the gesso using a dropper. Then a spray with water before using my heat gun to dry, moving the colour around as I dried pooling the colour. This made some areas deeper. I did this until all the gesso was covered.


I spread  Dusty Charcoal Colour Paste through a stencil.


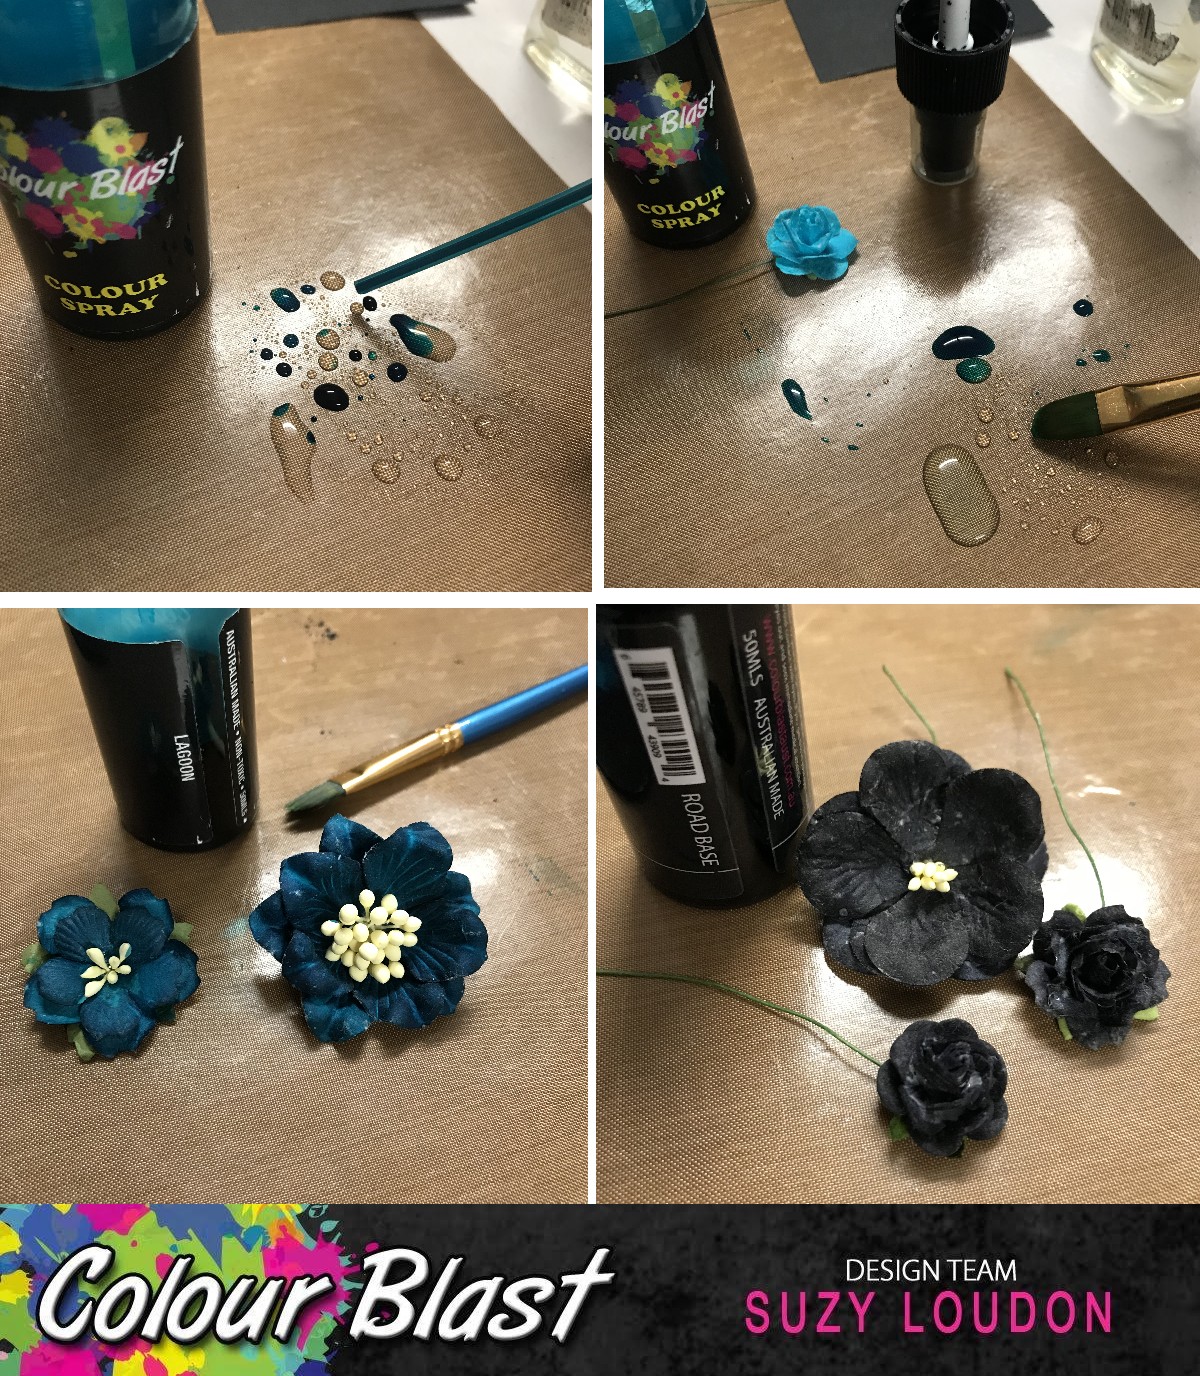
It was time to colour my white flowers. Using my Lagoon Colour Spray I put a small amount onto my messy mat then added water. Using my paint brush I dabbed the colour onto the flowers letting them absorb the colour. With each flower I added a little more water making them lighter as I went. I forgot to take a photo of all the flowers, but all of them are using Lagoon only...from no water to lots of water.
Lastly I used Roadbase Colour Spray for some black flowers.


After raising my photos with some backing cardboard I covered them before splattering some watered down Heavy White Gesso around my layout.


I painted my chipboard title with Heavy White Gesso before embossing it with Snow White  Colour Embossing Powder.


I painted my chipboard with Heavy White Gesso before spraying it with Rainforest Colour Spray.


I put all my elements together adding some lace, art stones & frame.
Here's a few close ups of my finished layout.


Thanks for stopping by.
xxx Suzy


Tuesday, 26 June 2018

"Live Laugh Love" by Rachel Dutko

Hi Colour Blasters!
Well it was my birthday a few days ago, so what 
better excuse to share a selfie layout!


I created my layout on black cardstock for the Colour Blast products 
to really shine and shimmer!

For my first background layer I used Colour Shimmer Sprays in Deep Water 
and Singin The Blues through a Stencil Girl stencil.


Once that was dry I added some Punch Colour Paste 
through a script stencil.


The next step was to mix some White Heavy Gesso with some water 
on my messy mat, then add some splatters to my page.


I then coloured some paper flowers and chipboard pieces with Lagoon Colour Spray.


I added my photo, a cluster of embellishments and a die cut title.


Some close ups-


Thanks for looking
Rachel x x