Showing posts with label Rain Forrest. Show all posts

Thursday, 4 October 2018

Your Smile... by Suzy Loudon

A big Hello to all. Today I share a layout using Colour Sprays, Paste & Embossing Powder...oh & Gesso.
Keep reading to find out how my layout came together.


To begin my layout I spread Heavy White Gesso  where I wanted to add colour.


Using my Lagoon Colour Spray, I added small amounts onto the gesso using a dropper. Then a spray with water before using my heat gun to dry, moving the colour around as I dried pooling the colour. This made some areas deeper. I did this until all the gesso was covered.


I spread  Dusty Charcoal Colour Paste through a stencil.


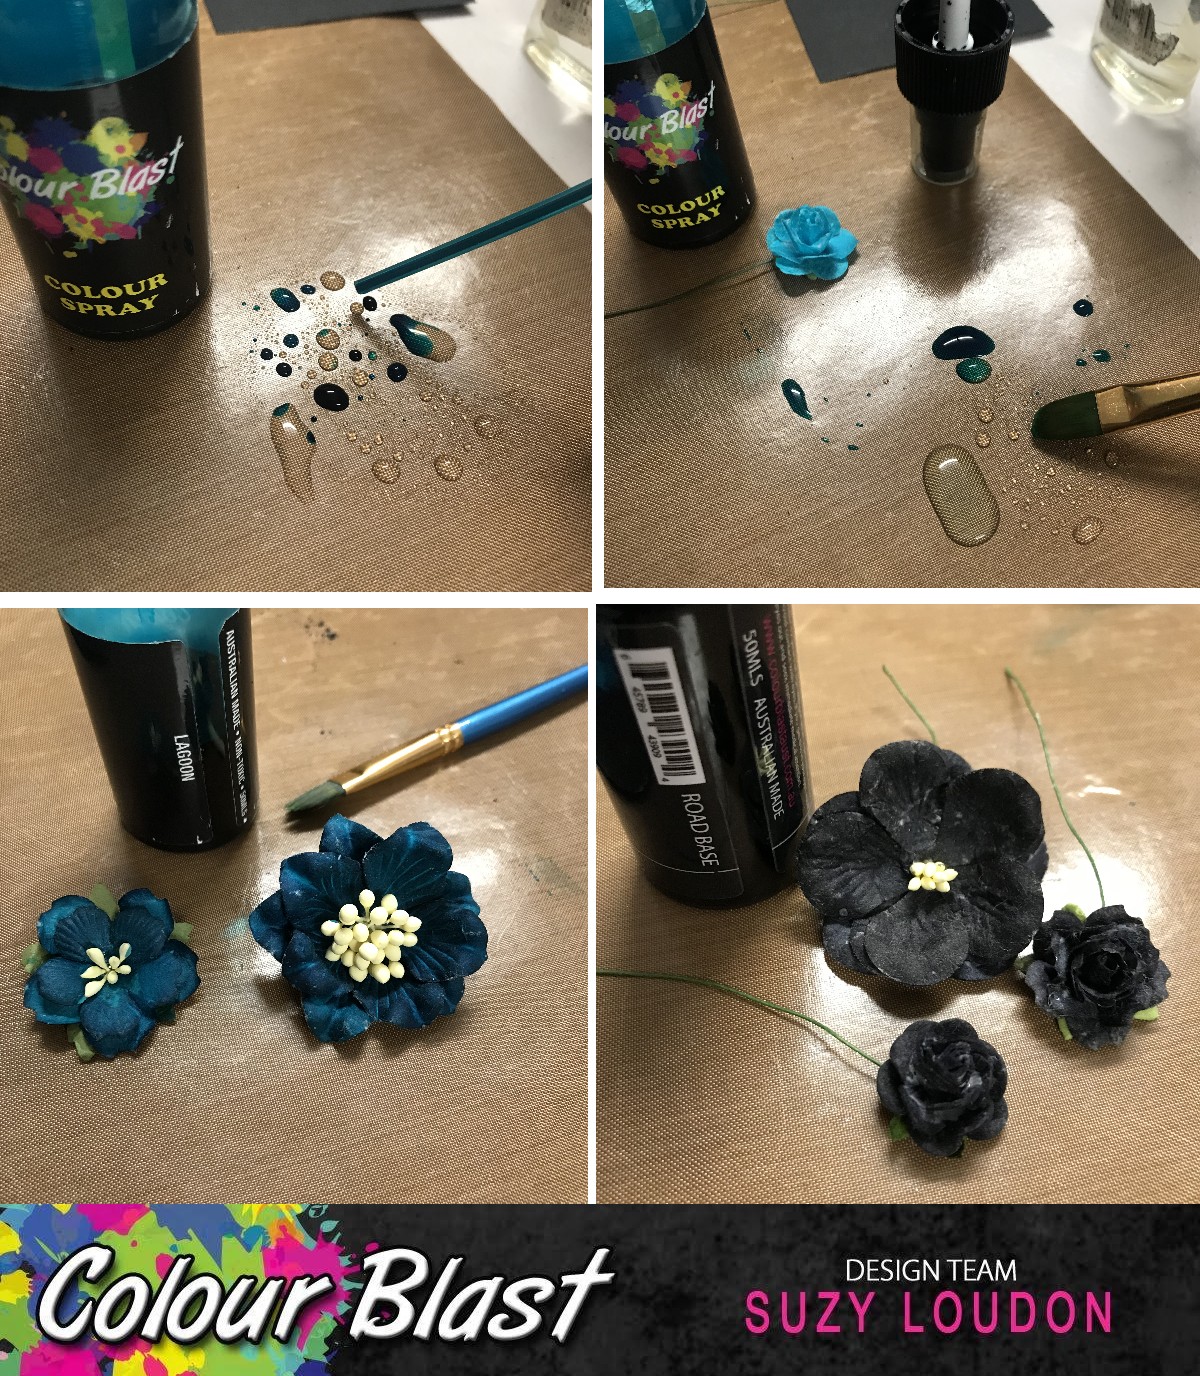
It was time to colour my white flowers. Using my Lagoon Colour Spray I put a small amount onto my messy mat then added water. Using my paint brush I dabbed the colour onto the flowers letting them absorb the colour. With each flower I added a little more water making them lighter as I went. I forgot to take a photo of all the flowers, but all of them are using Lagoon only...from no water to lots of water.
Lastly I used Roadbase Colour Spray for some black flowers.

After raising my photos with some backing cardboard I covered them before splattering some watered down Heavy White Gesso around my layout.


I painted my chipboard title with Heavy White Gesso before embossing it with Snow White  Colour Embossing Powder.


I painted my chipboard with Heavy White Gesso before spraying it with Rainforest Colour Spray.


I put all my elements together adding some lace, art stones & frame.
Here's a few close ups of my finished layout.


Thanks for stopping by.
xxx Suzy


Tuesday, 17 July 2018

"Awesome" Scrapbook layout + process video by Louise

Hi Crafters

Louise here for my final share on the blog.

I've so enjoyed my time with this team and my goal in sharing my work is to inspire you to try a new product or technique and stretch you crafting comfort zone.
Before I joined this team I loved coming to the CB blog to check out all the step by steps from the team and I look forward to checking out the new DT's work in the future.

So for my last page, I'm sharing a combo of two great Aussie Company's - Cocoa Vanilla Studio and Colour Blast = Perfect Match!

"Awesome"


For this page I've used the following

Colour Spray Rainforest
Colour Shimmer Spray Apple of my eye
Colour Paste Just Blue

***

Using a spatula, I'm adding some Colour Paste Just Blue and allowing it to dry naturally.


While it's drying, I've cut a circle with my Cameo and then sprayed it with Colour Spray Rainforest and Colour Shimmer Spray Apple of my eye.
The two together create a lovely green shimmer!
I've dried this with the heat gun and I love the way the circle has kind of warped and has such a textured feel to it - I decided to leave it this way on the page.


I next went on and did some paper layering and fussy cut the title.


The background still needed something to help it POP!
So I went to my "go to" product - Black heavy gesso.


Once everything is dry, I've added the rest of the layers and some stickers.


Black gesso over colour paste gives a gorgeous effect and I can't wait to try this with the "Sunshine" paste.


The green sparkly textured circle is one of my favourite parts of the page and I'm looking forward to doing this again in the future.


You can see the whole process in the video below.


Thanks for visiting.
Happy Scrapping


Tuesday, 27 February 2018

"Heart Eyes" Scrapbook Layout + process video by Louise Turner

Hi Crafters


I'm sure it's not just me, but I've noticed lately that my style has gone from bright and bold to a more subtle colour palette.

I think this page is half way - bold colours but more subdued.
Would love to hear your thoughts ... 

"Heart Eyes"


2018 for me is about stash busting - so I dug out some papers and got creating.


Lately I've discovered a love for the reverse stencilling technique - so this page is to share that with you.


For this page I've used the following Colour Blast products

Colour Spray Rainforest
Colour Spray Carribean
Colour Shimmer Dust Amber
Colour Shimmer Dust Navy
  
***

I firstly chose the Colour Blast products to match the photo and papers.

Firstly I chose a stencil and grabbed a piece of 9x12 paper.


Spray through the stencil - liberally!


With what's left on the stencil - flip it over and print it onto a new piece of cardstock.


While I let that dry naturally, I'm going to colour a doily that I cut with the cameo.

I've sprayed it with Colour Spray Sunset


Once dry the colour needed a little bit of vibrance so I've used the Colour Shimmer Cube Tangareen Dream


I repeated the reverse stenciling process with the same stencil and Colour Spray Carribean
Then added some Tangereen Dream splatters.


Finally, I've added some background stamping, chosen a title and adhered my layers.


The title was looking a little white, so I've coloured it with Colour Shimmer Dust Navy


Here's another look at the final page.
I've also added some stickers and a doodled border.


You can see the whole process in the video below.


Thanks for visiting.
Happy Scrapping


Monday, 14 November 2016

An art journal page by Anguree Jansen van Rensburg

Hello there dear Colour Blast friends

I am back on the blog today with something a little different. I don't do many art journal pages but found it an excellent way to clear your mind create without over analysing too much. It's also a great way to use any scraps from other projects.


First you will need a blank art journaling page. Yours might be in a journal or just a A5 size piece of paper which you could paste in the journal when you are done. Size is not crucial so feel free to use whatever you want.


Use some modeling paste though a stencil to create some texture in the background.


Next layer some scrap paper strips and grip tape on your page crossing over each other and adhere with your favorite adhesive.


Add some Rainforest Colour Spray with a paintbrush and  dry.


Apply additional texture by adding Stormy Weather   Colour Paste through a stencil and dry.


Add more scraps of paper or shapes. I punched some shapes out of 7Dots paper and tags.


Last but not least add your embellishments, journaling strips and chipboard words.


I hoped you enjoyed this and look forward to seeing our creations in the Facebook group.

Till next time have fun playing with all the gorgeous products.