Showing posts with label Colour Sprays. Show all posts

Sunday, 7 November 2021

Go For It with Belinda Spencer

 Hello Arty Bees!!


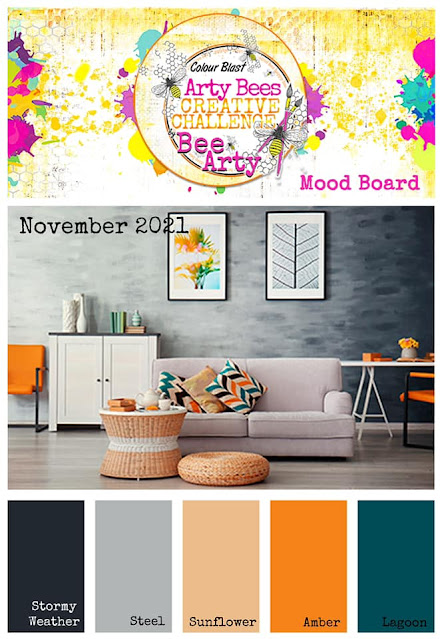
It's Belinda here today to share my latest layout for Bee Arty inspired by the November Mood Board.


Here's a peek at the mood board for November:

I started my layout by cropping a piece of Graffiti Grunge patterned paper and mounting it onto a sheet of the 350gsm White Cardstock. I then spritzed a little Sunset Colour Spray in three places and then placed a piece of plastic over the top to spread out the ink.


I repeated this process using Lagoon Colour Spray.


And for a third time adding Road Base Colour Spray. I then flicked all three colours over the page and dried with a heat gun.


I added some stencilling using the Three Six Five A5 Stencil Three Six Five and the Black Heavy Gesso. I stamped some stars over the page too using the Going My Way Clear Stamps and Ranger Jet Black Archival Ink.


I used the Graffiti Grunge Linked In Metal Die to cut two pieces from extra white cardstock and stapled them onto the page.


I added a paper stack on top of the die cuts using some patterned papers from both the Graffiti Grunge and Fearless, Brave And Free collections. I added my photo on top.


Next I used some Ranger Archival Inks to stamp some more stars using the Going My Way Clear Stamp set again. I fussy cut the stars and added to the layout along with all remaining elements.


I cut the quotes from the Graffiti Grunge Be Yourself Word Sheet and added them to the layout using 3D foam.


Thanks so much for stopping by the blog today. I hope you find some time to play along with the November challenge too.

Cheers
Belinda


Sunday, 24 January 2021

"Fearless"...with Belinda Spencer

 Hello Bee Arty fans!!


It's Belinda here today to share my latest inspired by the fabulous January mood board and featuring some awesome Bee Arty products.

'Fearless'


Here's a peek at the mood board. Gorgeous colours right?!


To start my layout, I mounted the stunning Chance patterned paper from the Fearless, Brave and Free Collection onto a sheet of the Bee Arty White Cardstock.


Next I added some extra pattern to the background with some stencilling. I added a little Sunflower Shimmer Dust to some Bee Arty Heavy White Gesso and mixed it in really well before applying through the stars on the That Way Stencil. I used a latex make-up wedge to apply the paint as it gives a really lovely smooth finish. I applied the paint very sparingly to avoid any bleeding under the stencil.


Once the stars were dry, I applied the next layer of stencilling. This time I added a little Love Colour Spray into some of the white gesso to create a soft. pretty pink. I used the dots on the same stencil with the pink blend to add more interest to the background.
I flicked some Sunset Colour Spray over the background too.


I had some leftover coloured gesso so I painted my die-cuts to match. I used the pink mix for the Diamond and the yellow blend for the Polaroid Butterfly.


I added some messy thread as well as the diamond to the layout. I cropped some pieces from the Within patterned paper and layered them together. I added these pieces to the layout using 3D foam.


I added my photo cropped to fit the Polaroid Butterfly frame. I fussy cut some triangles/diamonds from the back of the Fearless Brave and Free Collection pack title page and added those. I added a triangle and arrow from the Leap patterned paper as well as butterflies and feathers from the Follow Your Dreams Collection Possibility patterned paper. Finally I added the title and quote cut from the Leap patterned paper and all other embellishments.


Bee Arty products used:

Thanks so much for stopping by the blog today. I hope you find some time to play along with the mood board too.

Cheers
Belinda

Thursday, 17 September 2020

Don't Give A Damn! II Chrissi Mannix

Hello Lovelies,

Today I am playing in my art journal, and using a mixture of stencils to create a unique focal image. 


Starting with Colour Sprays, I have created my background, using them with a paint brush to give me a water coloured background. I've added layers of colour to give me a vibrant background. 

Using my stencils, I have added texture to my background, and then also made my focal point., 
I have used to separate quote stencils combined, to make a unique quote. 

I really love how this page turned out. To see it come together, check out the process video.


Products Used:

Love Colour Spray 

Bubblegum Colour Spray

Saffron Colour Spray

Boxed In a5 Stencil

Like a Boss a5 Stencil

Keep going a5 Stencil


Thnaks for stopping by

Chrissi xxx


Wednesday, 22 July 2020

You Got This by Ros Aggett-Madley


Hello, 
today is a super quick share.  It started with a scrap of paper that had been removed from a journal and cut in half.
There was extra Colour Blast Spray in Bubblegum and Colour Artist Ink in Calypso on my desk and I used this to mop it up.  
I thought I'd die cut it or something but one side of the paper is torn and I couldn't stop looking and touching it, loving how organic it felt.


I added some stamping that I'd done on some tissue paper.  Some marks have been made with a giant Sharpie.  Some Heavy Black Gesso with the Stardust Stencil has also been added.  I only used the edge of this, trying to get just the circle and star bursty type shapes.


Some black gesso mixed in water was then used to add a few flicks to the top.
Short and sweet but a good time.

Hope you've been inspired 💙


Wednesday, 24 June 2020

Keep Going by Ros Aggett-Madley

Hello everyone.  Today's page just happened.  No plans, no pre conceived ideas, just creative fun.

My focal point, the face was stamped onto a piece of card that was used to mop up some Calypso Colour Artist Ink.  A little colour on her lips and some stitching finished this part off.


The background started with some torn pieces of Scrap FX rice paper and some Calypso ink and Bubblegum Colour Spray  I added this to the outer edges and dragged it into the centre of the page.


I have then used some Deep Water Colour Paste with the Footprints Stencil.  When it was dry I popped a little crackle paste over the top.


The title 'Keep Going'  was done with some Heavy Black Gesso and the Keep Going Stencil.  All finished off with a few splashes of watered down black gesso.


Hope you've been inspired 💙


Wednesday, 18 March 2020

'You Rock' by Amy C

Hi Everyone! 

I am sharing this page today for Bee Arty to showcase some of the fantastic products in store. 

I set out to design a masculine page with a photo of my eldest, Josh, when he attained his Learner's Permit.


I started with the 'Graffiti Grunge' range of papers and a sheet of white cardstock. I added some layers of other media over the layered papers - adhered together.

I splattered 'Road Base' and 'Rainforest' Colour Spray over the white cardstock alongside my doodling around the border. I have also stamped in various places using the 'Life is Tough' clear stamp set.


Before I adhered my photo down I used a strip of corrugated paper from my stash. I love using the corrugated cardboard as it adds a delightful texture to the page.
I applied some of the 'Steel' Colour Blast Colour Paste over the top of some 'Black' Heavy Gesso.
After I heat-dried the gorgeous 'Steel' paste, I applied some if the Shimmer pen, in 'Pewter', as pictured.
The combo of the black, steel and pewter provided a rustic look that compliments the papers well.

Finally, for my title, I used a quote from the 'Graffiti Grunge' range. I love how this page came together. 

In these close-ups, you'll see some Bee Arty and Colour Blast products - here is a list of them - with links to them 'in-store':

'Graffiti Grunge' papers
'Road Base' and 'Rainforest' Colour Sprays
'Life is Tough' Clear Stamp Set
'Steel' Colour Paste
'Pewter' Simmer Pen


Well that's it from me today - thank you for stopping by. I hope this leaves you feeling inspired.
Happy crafting!
Amy


Saturday, 7 March 2020

"My Heart Belongs to You" by Anita Enright

Hi Everyone, Anita with you on the blog today.

For today's share I wanted to create something a little different. 

I love the Vampyre Rose paper collection and after creating several other projects I had bits and pieces from my 12x12" papers left that I really didn't want to just throw away so I decided to create a box and then I matched it up with a gorgeous card.

A perfect combination for the someone you love.


I received an online purchase in the mail the other day and it arrived in a little kraft box.  I nearly threw it in the recycle bin but thought.... hey what a gorgeous gift box it I bling it up.

To start I painted the box with the Heavy Black Gesso both inside and out.


Using the stunning Darkness patterned paper, cut out pieces to cover all outside pieces of the box.


Next I die cut four of the edge die from the Desire metal die set in a red cardstock. Working from the centre of each side of the box and the centre of the die cuts trim down the die cut pieces and adhere using glue to the four sides of the box.


Next I blinged up the box with some red bling from my stash around the top of the box and along the top edge of the four sides at the top of the die cut images.


 Taking the Gargoyle patterned paper, colour in the four flower images using some matching green and red.  I used some of the Grass Artist Ink and Love Colour Spray with an aquabrush to colour the images. After they are dry..... fussy cut them out.


Two of these fussy cut and coloured flowers were used on the top of the box along with a couple of leaves and flowers from my stash to finish the box.


I then decided to make a matching card to go with the box.

To start I decided on making a 5x7" card. I used a white card base and covered the font with a piece of red cardstock of the same size.

Next, I cut our a piece of black cardstock 1/4" smaller than the card.
Using the Fire Engine Colour Paste and the gorgeous Devotion stencil create the card background. Once dry attach over the red cardstock on the card base.


Next chose a couple of patterned strips from the Gargoyle patterned paper.  I also cut out two more of the Desire die in matching red cardstock.


Attach the two cut die pieces to the reverse of the pinkish patterned paper.  Add 3D foam tape to the reverse of the strip before adhering in the centre of the white patterned paper strip. Add some more 3D foam tape to the reverse of the white patterned paper before adhering to the card base.
**Make sure you add some glue to the foam tape before attaching to the card as the foam tape will not attach permanently to mixed media and the glue will ensure it strip stays in place.


I chose the wording from a tag for my card.  I deconstructed the wording and mounted them on 3D foam dots.  Keep the heart and scroll for another project.


To finish your card use the remaining two coloured in flowers that you created, a couple of flowers and other items from your crafting stash to finish. I was lucky enough to have a gorgeous Charms Creations heart in my stash so added that too.  


Check out some closeups of the finished projects.


Thanks so much for stopping by.

Happy creating.

Anita E