Showing posts with label Rainforest. Show all posts

Friday, 20 August 2021

Life is Better with ART in it by Charmane Koch

 Love my title? Life is definitely better with ART in it! Especially these days! It definitely has helped me through tough times! Nothing better than some "Art Therapy"!

Looking at ART makes me happy too! I am loving the Street Art around Adelaide that I have been seeing as we explore our own city!

Today I am sharing with you a layout that I have been slowly creating over the last few weeks...

I wanted to create a similar feel to the actual photo of Street Art that I happened to find while walking past a backstreet in Adelaide!

I started off by colouring White Gesso with Rainforest Colour Spray, I have then used the Drifting Leaves stencil around the 4 corners of the White Cardstock. With the left over Gesso I have smeared with a palette knife lightly over the rest of the page. I have then dried using a Heat Gun.

Next I have then used a palette knife to stencil the Rose Reveal Stencil with White Gesso...

I've waited for that to dry naturally {or I was too busy and couldn't continue!}

Meanwhile I have torn some cardboard from a box and painted with Gesso to use as a backing to my photo.

After that I have decided to use the Brickwork from the Pavement Stencil in the middle of my page to create the similar brickwork on the wall. I've used White Gesso again & dried with a Heat Gun.

Once everything has dried I have slowly coloured the Rose Reveal Stencil using Apple of My Eye & Blush Mica powders with a splash of water. I have also used Leather Mica Powder to colour the brickwork. This has been done in layers until I was satisfied with the colours.

I also stamped using the script on the Bokeh stamp lightly over the top in places on my layout to create a "graffiti" effect like on the door of the photo.

I have doodled around the edges of the stencilled background, so that the images are highlighted a bit more.

I have layered the photo using the cardboard, I coloured part with the left over Apple of my Eye Mica powder.

I have then added a swirl of kitchen string and flowers to add extra interest. And of course a Charms Creations Heart to match.

Thanks for popping by, I hope I have inspired you to create your own background using a stencil or two ;)

XO Charm


Wednesday, 18 March 2020

'You Rock' by Amy C

Hi Everyone! 

I am sharing this page today for Bee Arty to showcase some of the fantastic products in store. 

I set out to design a masculine page with a photo of my eldest, Josh, when he attained his Learner's Permit.


I started with the 'Graffiti Grunge' range of papers and a sheet of white cardstock. I added some layers of other media over the layered papers - adhered together.

I splattered 'Road Base' and 'Rainforest' Colour Spray over the white cardstock alongside my doodling around the border. I have also stamped in various places using the 'Life is Tough' clear stamp set.


Before I adhered my photo down I used a strip of corrugated paper from my stash. I love using the corrugated cardboard as it adds a delightful texture to the page.
I applied some of the 'Steel' Colour Blast Colour Paste over the top of some 'Black' Heavy Gesso.
After I heat-dried the gorgeous 'Steel' paste, I applied some if the Shimmer pen, in 'Pewter', as pictured.
The combo of the black, steel and pewter provided a rustic look that compliments the papers well.

Finally, for my title, I used a quote from the 'Graffiti Grunge' range. I love how this page came together. 

In these close-ups, you'll see some Bee Arty and Colour Blast products - here is a list of them - with links to them 'in-store':

'Graffiti Grunge' papers
'Road Base' and 'Rainforest' Colour Sprays
'Life is Tough' Clear Stamp Set
'Steel' Colour Paste
'Pewter' Simmer Pen


Well that's it from me today - thank you for stopping by. I hope this leaves you feeling inspired.
Happy crafting!
Amy


Tuesday, 5 June 2018

"Friends" Scrapbook Layout + process video by Louise

Hi Crafters

Sharing a new scrapbook layout inspired by the colours of my chosen photo.

"Friends"


This page (for me at least) is VERY mixed media!!!


I've used the following

Colour Artists Ink Soot
Colour Spray Rainforest
Colour Shimmer Dust Lush
Colour Spray Sunset
Colour Paste Tangareen Dream


***

I firstly chose a photo - the little pop of orange in the picture was my inspiration for the pop of orange on this layout.


The Colour Artists Ink come with a dropper - so I wanted to use this to make my background.
I've lightly sprayed the edge of the page with water and then used the dropper to add colour and let it run.


As each layer dries, rotate the page and repeat.
I let the ink dry naturally overnight and then added some Colour Paste Tangareen Dream through a stencil in some of the square areas of the ink drips.


To help with the flow of my orange theme, I've trimmed the outside of the inked cardstock and mounted it on orange.
I also added some background splatters with Colour Spray Sunset


While playing around with the layout, I decided I needed to frame the photo.
I pulled out a chipboard circle and added some White Heavy Gesso


I thought about embossing, but decided to pull a little of the green from the elements of the paper collection I've used and firstly painted the chipboard with Colour Spray Rainforest.


It just wasn't green enough so I then coloured it with the Colour Shimmer Dust Lush  - much better!


Finally, I've added some diamontes, wood veneer, flair and cheeseclothe.


This is so different to my normal creations but I love how it turned out.


***

You can see the whole process in the video below.


Thanks for visiting.
Happy Scrapping


Friday, 18 May 2018

‘Dream Catcher Tags’ by Amy C


In this tutorial, I’ll show you how to make mixed media tags.
This demonstrates the use of several techniques. I love the transformation from plain white paper to an amazing piece of art!


First, as this project uses a lot of water and spray liquid, it is ideal to use either watercolour cardstock or to use a heavy-duty piece.
Using a spray bottle, I sprayed the paper with water completely. Using Rainforest, Sunset, Violet, and Sapphire Colour Sprays, I sprayed randomly around the page and then set aside to dry.
After it dried, I sprinkled water around the page to create a water droplet look – love it!
Once all dried again, I trimmed down to tag size. If you have a ‘tag-shaped’ die… go for it!


Using background stamps of my choice, and a permanent ink, I stamped over the tags to my liking.


To tone the background down a bit, I rubbed 'White Heavy Gesso' lightly over the surface, using a baby wipe.


To create the circle for the dream catchers, I used a large stitched circle stamp from my stash. If you don’t have one you can simply trace a circle using a craft marker.
I stamped some feathers onto the catcher, and around the page.
Next, using Stormy Weather  Colour Paste and a star stencil from D-Lish Scraps, I applied the paste over the tags.


To create a border, I ran the stalk of the Roadbase  Colour Spray loosely around the border. Before it dried, I sprayed it with water and left it to drain in the vertical position, as pictured.


Once I was happy with the effect, I dried it with a heat gun.
The tag was looking a bit dark at this point, so I added some white splatters. This also served to create a ‘starry night sky’ effect.


The combination of water and 'White Heavy Gesso', mixed on a stampers block, worked well to achieve this splattered look.
Finally, it was time to embellish – and complete the tags – with feathers!
This was absolute fun to create!
Here are some more close ups – take a look!


Thank you for stopping by!

Ciao, Amy


Thursday, 17 May 2018

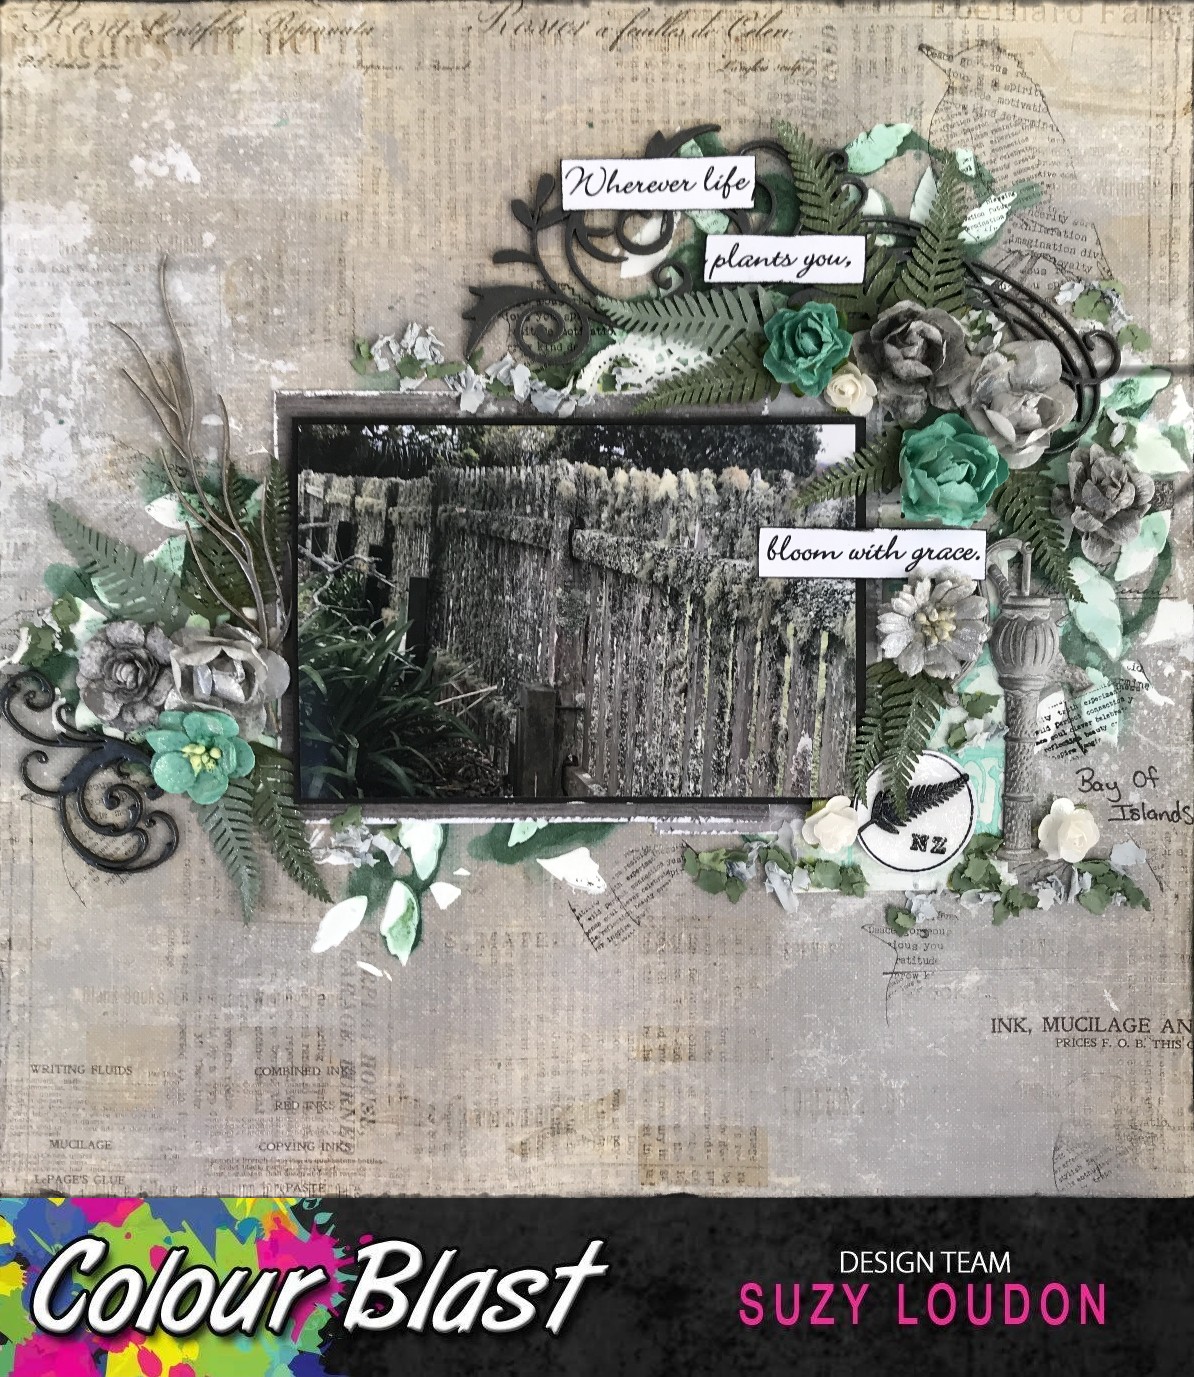
Bloom With Grace by Suzy Loudon

Hi everyone. Today I am sharing a layout I created using a photo of af old mossy fence I found during a tour around the Bay Of Islands, NZ last year. I found it behind a little church cemetery & was just devine.


Whilst I was thinking about creating this page I thought I could use some wondersoft. Not having any or any stores that I could get to I started thinking. Just the day before I had taken out some feathers I had done in a mould & remembered when I was cleaning it up, the fine bits I was pulling off would work perfectly...and so I made my own.
I mixed in some Grass Artist Ink into some No More Gaps. After mixing well I added a little more for a darker colour.


I couldn't get it quite dark enough so added some Soot Artist Ink. After mixing well I spread the mix out fairly thinly on the back of one of my silicone moulds.


I mixed up some more with with Soot to make a grey colour. After spreading it an the silicone mat I left it to dry for a day.


Once dry I peeled them off & tore it into tiny little bits.I thought it looked like moss quite well.


I used Envy Colour Paste through a stencil on a little tag. I then used some Heavy White Gesso on the edges. I used my finger to spread it on.


Using Dusty Charcoal Embossing Powder I gave my chipboard two coats.


I didn't want the mica that was left on the paper after tipping the Embossing Powder back into the container to go to waste. So I used my finger to rub it into a metal charm that was white.


I sprayed some white flowers with Steel Shimmer Spray.


Then lastly a few with Snow White Shimmer Spray


To finish off my embellishments I used Steel Shimmer Spray on some chipboard.


After assembling all my elements & sticking down I went over my fern leaves with the Clear Shimmer Brush Marker, giving them a lovely shimmer.


And with that I was done.
Here's a few close ups.


My homemade moss.


Thanks for looking,
xxx Suzy