Showing posts with label bohemian bliss collection. Show all posts

Monday, 11 April 2022

Do what you can ... by Linda Pearson


This project was way out of my comfort zone as I normally create painterly mixed media journal pages.  However, with this project I have not used any paints rather I have allowed the beauty of this amazing paper collection be the focal element of this page …. and I have used lace in a very paper crafty way. 

Wild Child 12x12 scrapbook paper

Bohemian Bliss Collection cut-out sheet

Boho tags sheet

Scripted stencil or Garden Poem 

x-press it double sided tape 6mm

Kind heart clear stamp set

Versamark Stamp pad translucent

Embossing powder – snow white

Sakura Gel Roll pen in White and Black or Life of colour or similar paint pens

Liquid Adhesive

White lace

Mounting Tape

Paper Artsy paint gold (or similar brand)

If creating a photo layout keep the paper at 12x12 size, however if creating a journal trim this paper down to suit your journal (sample is A4).


Fussy cut a section from the Wild Child 12x12 scrapbook paper from top to bottom of the right-hand side of the sheet following a line of flowers, leaves and stems.


Line the trimmed Wild Child 12x12 scrapbook paper cardstock along the right hand edge of the underpaper, attach this edge using glue or double sided tape  (N.B. keep the fussy cut edge open to allow the lace to be secured to the background page before adhering theWild Child 12x12 scrapbook paper cardstock completely).

Loosely pencil outline the fussy cut cardstock to mark the area where the lace will be glued between the two cardstock sheets.


Carefully glue the lace following the pencil line … check placement by overlaying the Wild Child 12x12 scrapbook paper moving the lace to be showing correctly.  Glue the wildchild paper over the lace to secure the paper.  Allow to dry.


Pounce gold paint through the Scripted stencil with a silicone sponge randomly across the page.  Dry off


Stamp the mandala from the Kind heart clear stamp set onto the background using Versamark Stamp pad translucent

.  Sprinkle with Embossing powder – snow white embossing powder, set powder thoroughly using a heat gun.


Outline some of the flowers using Sakura Gelli Roll pen or similar white paint pen.


Select and cut out 2-3 tags from the Boho tags or add your images if making a photo layout.  Also fussy cut a selection of butterflies, birds and leaves from the Bohemian Bliss Collection cut-out sheet.  Adhere randomly around tags/photos and page.  You may wish to outline these embellishments with the Sakura Gelli Roll pen or paint pen to highlight.


Add a title or sentiment and you are done.  I hope you are happy as I was in creating this page so out of my comfort zone, but I am very happy with the results.   Happy crafting and see you again soon. 


  Bye for now!! from Linda 

https://www.yourcreativepalette.coma.au 


Sunday, 13 February 2022

Beautiful Mistake part two by Tracey Campbell

Hello everyone, happy Sunday to you all. Here is my latest layout I have created.

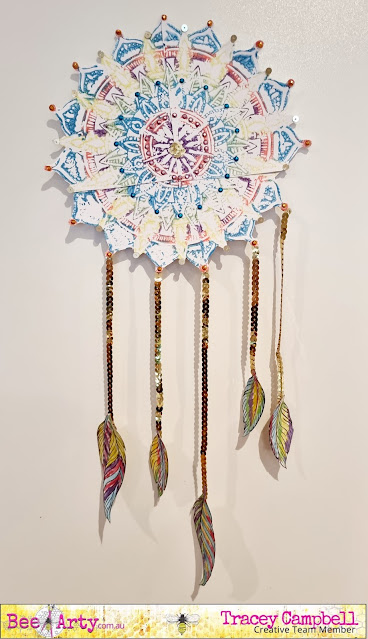
The other week I ended up creating this Dream Catcher from a mistake that I made. 

I blogged about it here... if you want to see how I create it. This week I am using the Dream Catcher on a layout and continuing my Beautiful Mistake journey. 

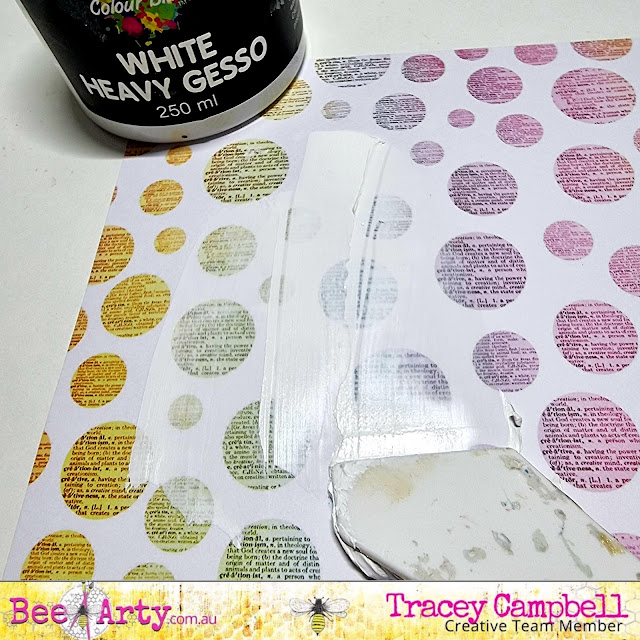
I used the patterned paper with the word circles on from the Arty Farty Collection as my background I applied a layer of Heavy White Gesso to the area where I was going to position the Dream Catcher. 


Applying the Gesso dulls down the printed area of the paper to create a colour block, " a perfect space" to create. The duller background allows the photo or the embellishment to stand out more.


When the gesso was dry, I used some Bling Colour Paste and the Boho Mandal Stencil to add the beading of the Dream Catcher back. When fussing cutting the Mandal out to create a Dream Catcher I had to cut off the vines and beads, as they were way too fiddly for me to cut out. I positioned the beads roughly to the positon where they would have sit fir still attached and where I knew I wanted to glue my Dream Catcher down to, on the background.


I also added the small half mandala from the Boho Mandala Stencil to the right hand side of my background paper.


Here is the positioning of the stencilling with the Bling Colour Paste. I must admit of all the colours of the Colour Paste, the Bling is my favourite, the gold is perfect (not too yellow or dull) and the way it dries makes my heart pitter patter. Once dried I adhered the Dream Catcher over the top, see the final photo for the positioning.


Next I found a photo (4x6 inches) that I thought would suit and cut out 6 different rectangles, the same size of the photo. I also cut out two pieces of vellum the same size. For my papers I used a variety of patterns and colours from the following collections:


Next I distressed the edges of the rectangles with a distressing tool, then screwed them up into loose balls of paper, untangled them and flattened them out. Tip: if you don't have a distressing tool use the edge of a pair of sharp scissors and run the blade across the paper edge but be careful of your fingers. 


Once flat I stacked them under my photo so that at least two of the edges of each rectangle were peaking out. This creates a photo mat with "attitude"  :) it is quiet hight and adds lots of dimension to the layout. Adhere the photo stack to the bottom right hand side of the Dream Catcher. 


To create some addition layouts I tucked in some gold paper doilies and string wreaths that I cut out of some white cardstock with the Sting Wreath metal die. 
I shortened up the gold sequins string, that attached the feather to the Dream Catcher so that they didn't dangle off the page.


Next I cur out a stack of single words from Sweet Talker cut apart in the Bohemian Bliss Collection and distressed the edges. I then adhered them around the layout in random places (see final layout below for positions).


Some close ups.


So I hope I have inspired you to keep going if you make a mistake and not to throw it away, try and create something from it. 

Hugs until next time,
Tracey


Sunday, 30 January 2022

Beautiful Mistake by Tracey Campbell

 Hello lovely people, Tracey Campbell here again today to share my creation with you. Have you ever had an idea in your head and when you go it execute it, it doesn't work out how you planned and turns into a red hot mess??

Well that was me today - I wanted to create a layout with a Mandala on it using the Entangled patterned paper from the Find Paradise Collection but it didn't go as planned.


I ended up with this!!! But from mistakes beautiful things can be created, so stick with me and I will show you have my mess turned out to be a beautiful mistake.


I started by mixing some clear Gesso with some Colour Mica Powders in Sage, Polar, Peach Nectar, Lemon Zest and Wisteria to create coloured Gesso. Now this was my mistake, the clear Gesso was too runny, I should have used the Colour Blast Heavy White Gesso instead. 


Using a silicon paint palette I spread the coloured Gesso through the Boho Mandala stencil on to the Entangled pattern paper. 


I used all five colours to create a nice pattern to the mandala. Tip: when doing a large amount or fussy stencilling use a bit of washi tape to hold your paper and stencil in place.


When I lifted the stencil off the paper, I discovered that the Gesso was too runny and had bleed under the stencil creating this mess. I was really disappointed with it and was going to give up and throw the sheet of Entangled out, so I started my clean up.


I flipped the stencil over and pressed it down with a scrap of cardboard to get off the excess Gesso. When I took the stencil off the paper again I discovered a soft imprint of the Mandala, on both the Entangled paper and the scrap of cardstock, giving me an idea.


I grabbed some white cardstock and place the Boho Mandala stencil between them and ran my palm over the backside of the cardstock. I now had two soft images of the Mandala, which I thought were lovely and my mind was running away. I scrapped my original idea to do a layout with a Mandala and instead decided to create a dream catcher.


I continued to use the stencil as a stamp and created a few more images. I did have to load more Gesso onto the stencil to get a few more images. Once they were dry I fussy cut them out.


And stuck them together to create a Mandala, actually had enough images to create two.


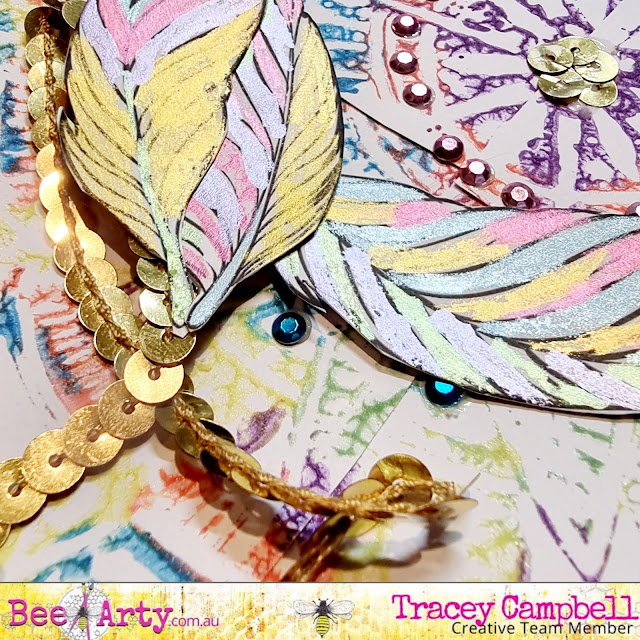
Next I used sequins and gems to decorate.


To turn the mandala into a dream catcher I painted the feathers on the Free Vibe pattern paper from the Bohemian Bliss Collection with Colour Shimmer Cubes. If you don't have the Shimmer Cubes you can make use the Colour Shimmer Spray to paint them. I picked five colours that matched the Colour Mica Powders that I made the coloured Gesso from: Sunshine, Apple of My Eye, Punch, Singin the Blues and Lovely Lilac.


Once dry fussy cut them out.


I then glued some gold sequin string to the back of the feather and the Mandala.


Here is how it turned out, such a fun and pretty Dream Catcher - my beautiful mistake


A few photos of the details in close ups below.


I am still thinking about using this on a layout and now that I have a spare Mandala I just might, so pop back into the blog in a few weeks to see what I come up with.

Hugs
Tracey


Monday, 24 January 2022

To The Moon And Back by Tracey Campbell

 Hello it is Tracey Campbell back for 2022 sharing my latest creations and hopefully inspiring you to pull out the absolutely awesome Bee Art Collections and Colour Blast Products. 

For my first Blog Post for 2022 I wanted to share a layout that I created mixing and matching a few different Bee Arty Collections. I must admit that one of my favourite things about the collections is that you can use your left over scraps from multiple collections together to create wonderful new layouts.

To The Moon and Back

Bee Arty Collections used:

Grateful Heart

Find Paradise

Bohemian Bliss

Arty Farty

Embrace Change

My first step was to use some Bling Colour Blast Paste with a paint palette knife and scrape it through the Scripted A5 Stencil onto the Faith patterned paper from the Grateful Heart Collection, making sure that it is white woodgain side. Colour Paste is as soft as butter and so lovely to spread; tip: start with just a small about (around the size of a 10 cent piece) at it spreads easily and by using only a small amount you don't waste any of it.

Continue to move the stencil around the Faith patterned paper to spread the image around the paper. See the photo above for the final positioning, let dry. The Scripted Stencil is one of my favourite Bee Arty Stencils, because it gives you bot a nice script writing and the small diamond shapes which both add lots of texture to a background and is very versatile. 

When dry I applied some Saffron Colour Spray with a Brayer to spread it out across the page.

Here is what the base looked like after the Colour Spray was applied.

Once the Saffron Colour Spray was dry I used a stiff paint brush and dipped it in a bottle of Sunset Colour Spray and flicked dots across the Faith patterned paper. 

Leave it to dry thoroughly. 

While waiting for the Colour Spray to dry mat three 10x7.5 cm photos (landscape orientation) with Festival from the Embrace Change Collection.

Cut three sperate rectangles using the following measurements and papers listed below:

27x6 cm from the Transform patterned paper in the Arty Farty Collection

21.5x11cm  from the Botanicals patterned paper (using the B side pattern) in the Find Paradise Collection

16x14cm from the Free Vibe patterned paper (using the B side pattern) in the Bohemian Bliss Collection

Once the rectangles were cut out I tore off the bottom edge from each triangle and then scrunched them to give them a distressed look.

Adhere the matted photo strip and the patterned papers to the base like in the photo above.


Fussy cut the following elements from the cut-a-part sheets:
2 x lace doilies from the Grateful Heart Collection
The Tile "To the Moon and Back" from the Embracing Change Collection

Cut the lace doilies in two and then position everything on the layout. You can see the positioning of the fussy cut elements in the final layout below. 


Well I hope that I have inspired you to pull out all your Bee Arty and see what pieces go together. It is so much fun seeing how the final layout turns out.