Showing posts with label paperclay. Show all posts

Monday, 11 February 2019

Imagine by Suzanne Franin


Hey Everyone Suzanne here

My turn on the Colour Blast Blog - make sure you check out the rest of the blog for lots of inspiration and check out the Colour Blast Kit Club - Check what kit would suit you 
It's so convenient everything you need all in one box 

I found this picture of John Lennon with the words to the song Imagine 
It's such a powerful song which we all need to read and do


I primed the canvas with the Colour Blast Heavy White Gesso


I used four different Colour Pastes - Apple of my Eye, Fire Engine, Sunshine and Tangerine Dream


 I used the four different Colour Pastes through the Memory Maze Pavement Stencil scraping each colour letting them overlap here and there
I liked the look of it as it was similar to the photo of John Lennon 


Here I'm rubbing some Dorland's Wax Medium over the paste - 1 it helps the paste from sticking to other thing and two it helps make the effect below (I'm sure there are lots more things I can use it for but we'll get to those)


Once I've heated where the wax is it bubbles all over and gives the pattern a really cool look
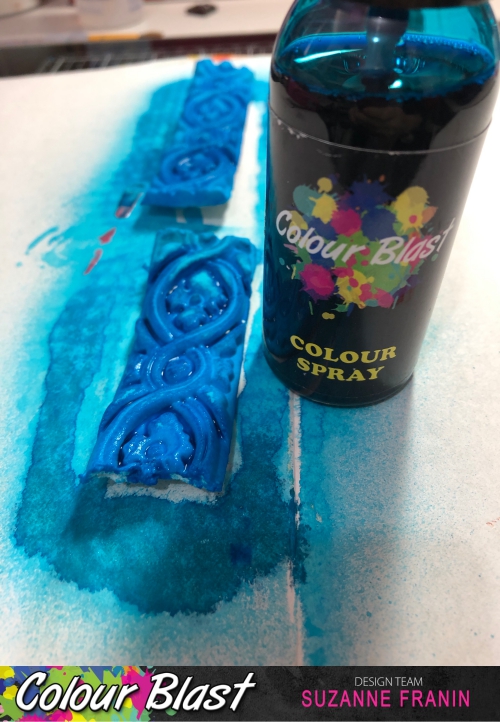
 

I sprayed a paper clay border with Colour Spray Carribean for a different pop of colour


I used Tim Holtz Idea-ology Small Talk sticker quote that I thought appropriate 
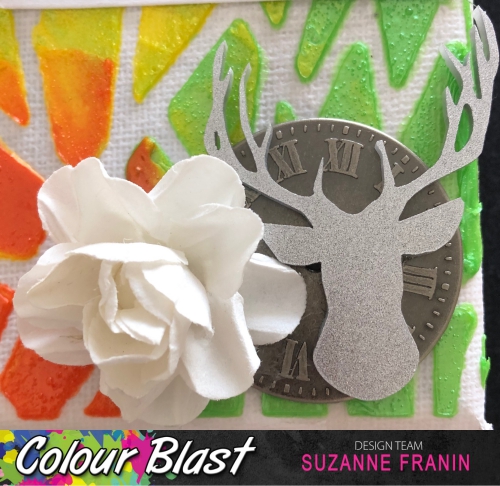


Here I used a Kaisercraft flower, a metal clock face from my stash and a Memory Maze Acrylic Deer Head


I used a Tim Holtz Transparency Globe an old Making Memories ribbon slide and a paper clay man from mum 


Thank you for visiting and I hope you come back soon x


Monday, 14 January 2019

Graduation by Suzanne Franin


Hey Everyone

This weeks project is of my son's Graduation from SEDA 
He did so well, it was the best decision we made to send him there for his last two years of High School
He excelled at all that he did and put 100% into everything
His teacher even said on stage in front of the whole Year 12 classes that Jack was the best student he'd taught in the 7 years that he had worked at SEDA 
So needless to say we were very happy and proud parents

Make sure to check out the Colour Blast Blog and the Shop where you will find links to Facebook and Instagram so you won't miss out on anything that's happening


I started with some Colour Blast Colour Artist Ink Spice drips on the paper (Kaisercraft Time Machine it's embossed so it has parts that the ink won't stay on)


I used the Colour Shimmer Dust Midnight which I made into a spray bottle on the background paper as well and then sprayed some paper clay embellishments you can just see a little bit of shimmer in the photo but if you could see them they have so much shimmer


I had a little dot stencil that I used randomly with the Colour Paste Stormy Weather


I added an Art Pebble to the basketball to give it dimension


I had a Flair Button that I thought was perfect for the page so I added it to a bottle cap but it left a gap so I filled in the gap with some Zinc glass beads and added some wings


Awhile ago I had won a pack and it had the word #swag in it so I coloured it with the Colour Artist Ink Spice that was left over on some paper towel that was still wet by patting it till it was all coloured 
I added some metal accents for some interest and dimension


And I added this Make a Difference disc because that's what I think Jack will do with his life.

Thank you for visiting and I hope you come back soon x


Monday, 17 December 2018

Fan by Suzanne Franin


Hey Everyone Suzanne here

This week on the Colour Blast Blog I used a fan that I had gotten when I went to Hamilton Island a few years ago it was a very special trip

Make sure you check out the Colour Blast website and see all the awesome stencils and stamps from Michelle Grant and while you're there check out the Kit Club it could be a great Christmas gift to yourself for next year  

I have also made a YouTube Video of the process which you can watch and make sure to subscribe to the Colour Blast  Channel to keep up with some tips and tricks the Design Team show


I started off trying something else and didn't like it so I got the Heavy White Gesso to cover up everything and then went from there

So I decided to go with some Colour Shimmer Dusts - I went out of my comfort zone and chose blues


I used the Colour Shimmer Dust - Duke, Cobalt and Peacock sprinkled across the fan then spritzed it with the water and dried it


I used Sunflower Colour Shimmer Dust that I have pre-made in a bottle of water (I use this one a lot) and sprayed the flowers


I used the Midnight Colour Shimmer Dust on the clock which is made of paper clay and gave it a little swipe of Old Silver Wax from Finnabair to show up the details


I filled in the gap of the mask with the Watermelon Colour Mica Powder which I had added some  Heavy Body Gel from Finnabair (which I also used to adhere everything to the fan)


I love how vibrant the colours are


Thank you for visiting and
 I hope you will be back soon x


Monday, 8 October 2018

I am Me by Suzanne Franin

Hey Everyone Suzanne here

This project for Colour Blast was made for a new friend for a reminder of where she has come from and where she has been in her life 

Make sure you visit the rest of the blog and discover what fabulous creations have been made here lately 


So I started of by painting everything with the Colour Blast White Gesso to give everything a nice even surface to work on
I then mixed in some Colour Mica Powder Espresso with some clear gesso too make a nice shimmery colour for the frame and some of the embellishments 
It's a shame the camera doesn't pick up the shimmer
Tip - Make sure to put the powder in first that way you won't get the dust floating up as you mix it together


Then on a few of my embellishments that I used the Colour Mica powder mix on I added Colour Embossing Powders - Bling and Sienna just a little sprinkle on them for some contrast


On the Memory Maze Ladies form with decorative wings I added the Bling so it would stand out and then used some Colour Artist Ink in Slipper which I also added to a few of the other embellishments to brighten up the piece


On the background of the frame I glued some material using the Helmar Super-Tac Glue it's a good strong glue and keeps things in place for ever 
I then too some Colour Artist Inks in Soot and Rust and added them to the background spraying water as I went until I was happy with the colours


Then the fun begins arranging everything I placed a sheer piece of fabric in the back under all the flowers to soften things 
I thought I'd use yellow flowers as it's such a happy colour and the quote is quite heavy and deep and then the little pink paper clay embellishments scattered I think add a bit of fun 


Thank you for visiting and I hope you will come back soon x