Showing posts with label Colour Shimmer Cube. Show all posts

Sunday, 17 July 2022

Wonderful Days in the Woods by Tracey Campbell

Good morning lovely people, it is Tracey Campbell here today with my Creative Team share. I decided to give the Monthly Challenge a go as the colour palette is so pretty and the sketch is something a bit different than how I normal put my layouts together. 


If you would like to join in on the Bee Arty Monthly Collection you can find it in our Facebook Group here: Bee Arty Hive


To start my layout I kept the colours from the colour palette in the Challenge in mind when I sorted through my patterned papers, I didn't stick to just one Bee Art Collection, I went through all of the ones I have looking for the one that I thought would work, I was pleasantly surprised by how much I found. I added some stamps and metal dies to the ever increasing pile. 


Once happy with the papers and colours I was going to use I grabbed a pieces of white cardstock to use as my base, I drew light scribbled lines across the page using a lead pencil. I then used the straw from a bottle of Sunset Colour Spray and flicked small splatters of spray in the top right hand and two bottom corners of the white cardstock. I left to dry.


I wanted to add some bigger splatters to the white cardstock so I used a soft paint brush and dipped it into Grass Colour Artist Ink and let the droplets fall, roughly in the same areas as where I splattered the Sunset Colour Spray. Tip: The higher you lift your brush away from the paper where you want the splatters the bigger the splats will be. Let dry.
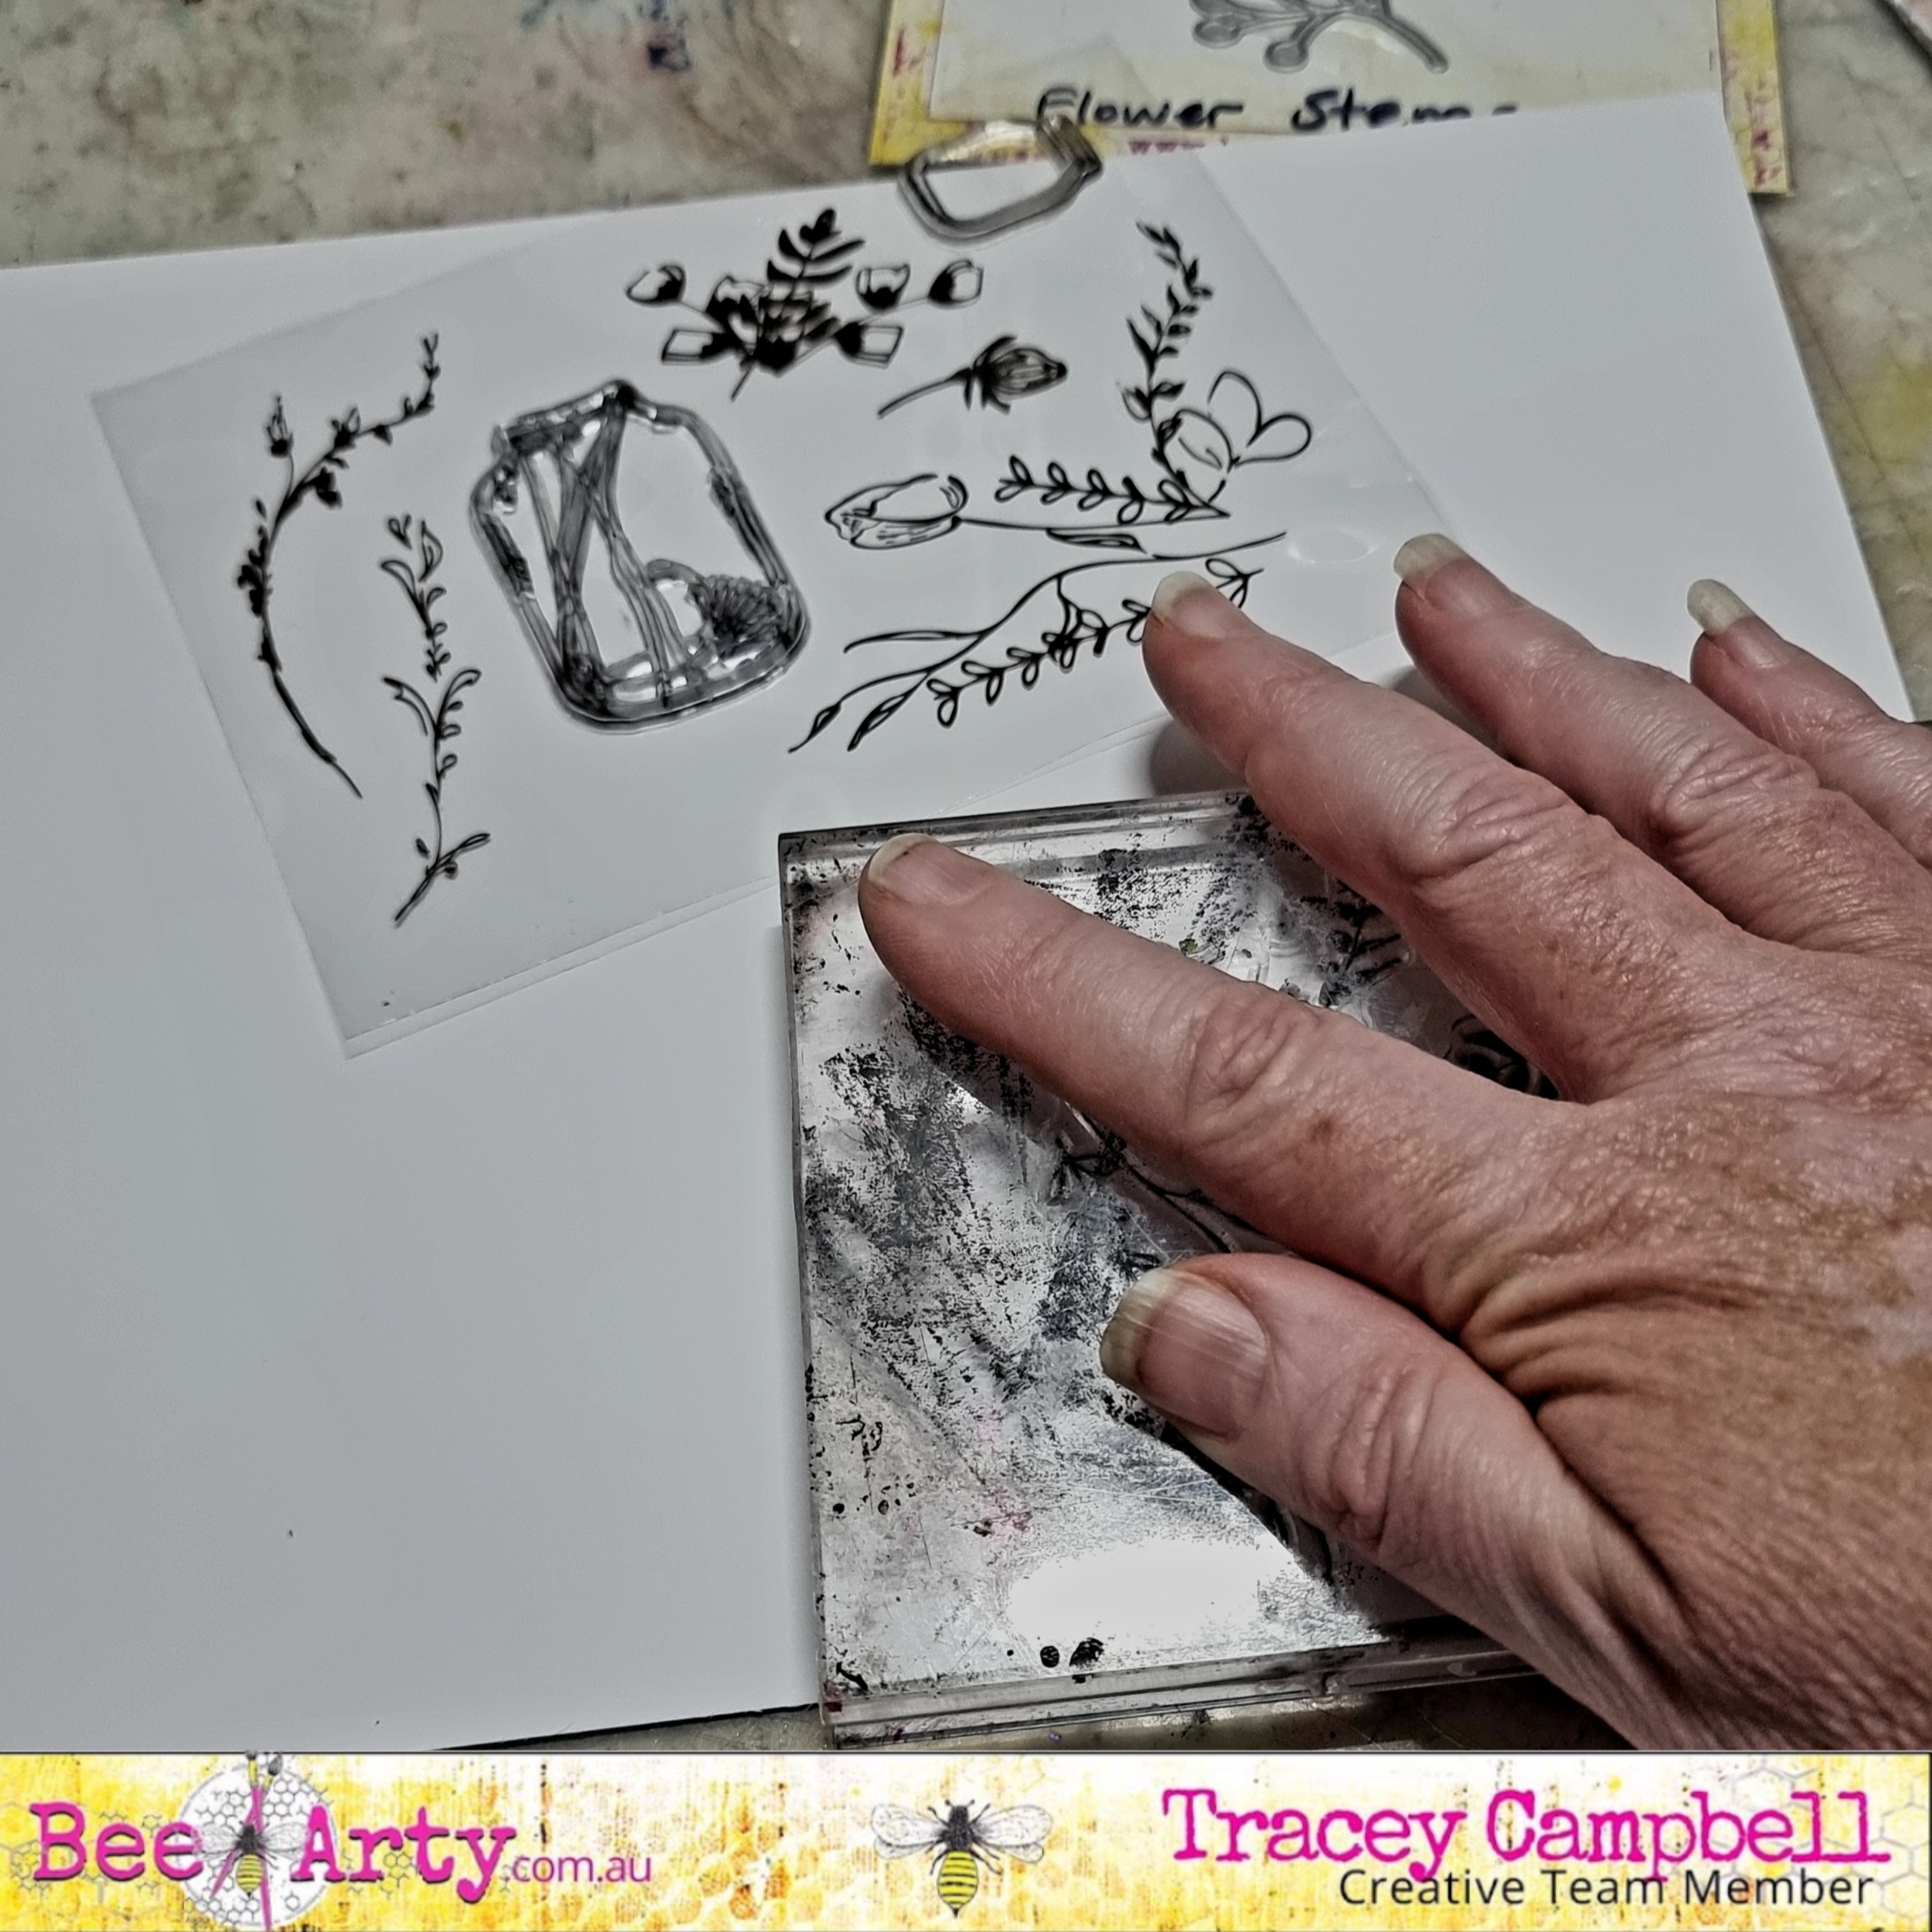

While the Colour Artist Ink was drying I used a water proof ink and the stamp sets Floral Arrangement and Celebrate Nature to put images onto some white cardstock, with the thought of using these as the floral images around the circle in the sketch.


I also stamped the jars from the Floral Arrangement Stamp Set onto some of the light blush colour on the B side of the Falling patterned paper in the Embrace Change Collection


When the ink is completely dry fussy cut the stamped images along with a word block for a title from the Natures Words cut apart sheet in the Whispering Woods Collection and some flowers from the Imagery patterned paper in the same collection.


Cut out a circle with a diameter of roughly 20 cm from the B side of Falling patterned paper in the Embrace Change Collection and use a distressing tool to distress the edges.


Cut out four strips from the B side of Fernery from the Whispering Woods Collection to created a wooden frame around a 8x9 cm portrait photo.


Cut the remaining patterned paper elements that are represented in the sketch from papers that match the colour palette. I have cut a tag from the Woodland Tags patterned paper in the Whispering Woods Collection and hand cut a bigger tag from the Olive Green square on the Spice Patterned Paper in the Embrace Change Collection, a rectangle 5x15 cm in a dusty dark pink colour from the Vampyre Rose Collection and a 10x14 cm rectangle with rounded corners from a light pink paper in the Entangled Patterned Paper in the Find Paradise Collection. Distress all the edges using a distressing tool.


Using a double sided sticky tape adhere all the elements to the page, arranging to represent the sketch. I used 3 Dimensional tape to adhere the framed photo and the tags on the right hand side to add some dimension to the layout. I ended up turning the photo and the tags on a slight lean as I thought it made them look a bit softer, given the whimsey subject in the photo, I thought a softer look was more suited.


Using some Colour Shimmer Cubes paint the stamped images, use a range of three different pinks on the flowers and an olive green for the leaves. 


If you don't have the Colour Shimmer Cubes then you can use normal water paints or like I have done for the olive green leaves mix some Colour Mica Powder in Olive Grove with some water to create  a shimmer paint. Once the water paints are dry arrange the fussy cut elements around the circle to replicate the inspiration from the sketch in the Monthly Challenge.


Here is my final layout, I really like how it turned out and think that I will use this sketch again for another layout a bit later on.

Thanks for popping in I hope that I have inspired you to give the Monthly Challenge a go and to try and mix am match your collections so that you can get a different look from the Bee Arty Collections, it really is amazing how they all work together.

Hugs
Tracey


Sunday, 13 March 2022

Breathe by Tracey Campbell

 Hello Bee Arty Peeps, it is Tracey Campbell here today with another Creative Team creation to share. I decided to give the Bee Arty Creative Hive (Facebook Groups) Monthly Challenge a go. The cool fresh colours and beautiful sketch made me wish for crisp spring mornings in this dreary wet weather we are having. I am in New South Wales and we have had two weeks of rain, with for to come, there is flooding and mud slides happening around us. So retreating into my creative zone with this months challenge was a great way to escape. 

Here is the sketch and colour combo for the March Challenge, no you don't have to use both, but I have. You can find the challenge here: Bee Arty Creative Hive


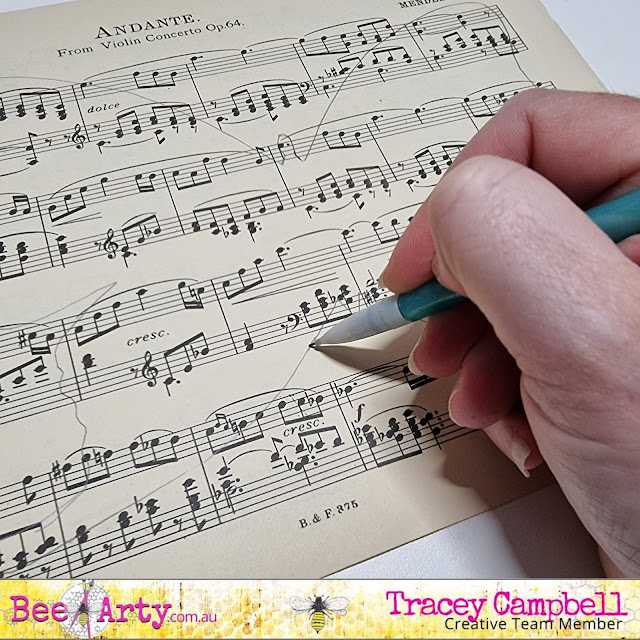
To start with I drew an outline of butterfly onto some sheet music.

Next I fussy cut the hand drawn butterfly and two butterflies from the Turning cut-a-part sheet in the Embrace Change collection


With a paint brush paint Tangareen Dream Colour Shimmer Spray in the centre of Steel Plate pattern paper from the Graffiti Grunge Collection. Graffiti Grunge is an older collection that is full of fun surprising papers that are great a starting place for messy backgrounds and perfect to represent the grey from the colour challenge for this creation.


Next I spread some Apple of My Eye Colour Paste through the Party Lights stencil. I repositioned the stencil so that the leaves ran off in three different directions, pointing towards the top left and top right corners and then bottom left hand corner. See the photo below to see the positioning. Once it was dry I repeated the stencilling process with Lemon Zing Colour Paste. Sorry I didn't take a photo with the Lemon Zing stencilling at this stage, but you can slightly see the two over lapping colours in the final layout, it is very subtle.


When the Colour Paste was dry I used the straw from the bottle of Stormy Weather Colour Shimmer Spray to splatter drops of the stray across the page.


To add the line boarder that is on the sketch I used a fine paint brush and some Stormy Weather Colour Shimmer Cube to paint the outline around the very edge of the base. Note: the Colour Shimmer Cubes are no longer available in the store as but you can substitute this part by using a thin paint brush and the Colour Shimmer Spray. If you choose to do this, don't shake up the bottle of the Shimmer Spray dip the brush in to get the thick sediment that settles on the bottom. It will give you a great amount of media to paint at the right consistency. If you do shake it up, then you will have to apply a few coats over the outline, letting to dry between each application. 


The photo below is how my base looked before adding the photo, title and embellishments.


Next while waiting for the Colour Shimmer Spray and Cube to dry I fussy cut a title and a few words. One of the great things of the Bee Arty Collections is that you can mix and match things from a few different collection. Here I have fussy cut from:
The word "Breathe" from the Breathe patterned paper in the Find Paradise Collection, the words "I Love You Even When You Do Dumb Stuff" from the Love Letter patterned paper in the Chit Chat Collection and the words "Happy Memories" from the Love patterned paper from the Love and Grace Collection.


Next I double matted my photo, I did a thin 2 mm mat with the blue side of the Journey patterned paper from the Aim High Collection and then a 7 mm mat with some of the lime green tones found in the Arty Farty Collection. 


I then adhered the music sheet butterfly in roughly the same position as on the sketch onto my base. Then stuck the matted photo down overlapping the butterfly. At this stage as I was embellishing with the fussy cut butterflies from the Embrace Change collection I decided that they were a bit dark and I wanted to add a pop of colour. So I pulled out some of my very ignored butterfly punches and punched out some from the blue and lime green paper that I used before to mat the photo. Tip: If you don't have butterfly punches you could always stamp the butterflies and emboss them to the colour you want. The Bee Arty Beautiful Butterflies Stamp/Die Set would be perfect for this and at only $10 (available at the time of this post) it is an absolute steal. 


I finished off the layout with some yellow and orange twine tied in bows and adhered the fussy cut words down.


Thanks for popping in and I hope I have inspired you to give the challenge a go and to pull out those collections you and an mix and match.

Hugs
Tracey


Monday, 28 January 2019

Fly by Suzanne Franin


Hey Everyone Suzanne here

Here's a little project I did using the Colour Blast Colour Pastes 

Make sure you visit the Colour Blast Blog and see all the awesome creations from the Design Team and look out for all the new products that are coming out
And don't forget we have a Colour Blast Kit Club make sure to check that out as well


I started by using the Heavy White Gesso on this timber frame giving it a good coat


I used the Colour Paste in Sunshine, Tangerine Dream and Blush trying to blend each one after the other (not that successfully but I think it still looks good) through this flourish stencil


After the paste was dry I used the string to wrap around the frame in every angle I could go 


I painted some paper clay leaves with some Colour Shimmer Cube Apple of Eye (are no longer available but you might find some online stores still stock them)


I just got this Colour Spray Carribean and it's so nice- it has a matte finish but it still pops 
I sprayed it onto this paper clay filigree 
I love the way it was depth it went into the grooves and stayed darker
I then stuck the quote onto it 


Added a few different flowers I think then end one is Prima and the other two are Little Birdie Crafts
You can see the paper clay leaves sticking out of the sides of the flowers  


The butterfly was a photo I found on the internet and just loved it I printed it out then fussy cut around all the white it had
I folded the wings up so it looks like it was flying


I then glued the butterfly to a metal ring that has flowers all the way around


I love this flower from Little Birdie with the Smile cabochon in the middle so I made the butterfly fly to that and used some metal leaves off to the side


Thank you for visiting and I hope you come back soon x

Friday, 21 December 2018

Teacher chalkboard, by Amanda H

Hi all,

I love to make custom gifts for my kid's teachers. This year I used Colour Blast to create this teacher blackboard.


Here is how I did it.

Firstly, I used Colour Blast, in Fire Engine through a word/quote stencil directly onto the blackboard.

Then for extra colour I also swiped some Colour Paste in Steel through.
I did all the stencil on the back of the blackboard, and then repeated two lines of the stencil along the bottom of the front of the blackboard.
Then I sprayed the blackboard, firstly with Colour Shimmer Spray in Fire Engine.

And then sprayed again in Colour Shimmer Spray in Steel.

I also added some painted stripes around the edges and some splatters with my old Colour Shimmer Cube in Steel.
I decided to add the butterfly chipboard flourish to the board. I inked it grey and then embossed it using Colour Embossing Powder in Steel.
In the end I used both the sprays and cubes in Fire Engine and Steel to add colour to the blackboard. These colours look so great together on the black background of the blackboard.

 And here it is!
I added the teacher's name and some stickers to finish the project.
Front of the board...
Back of the board....
Close up of the chipboard...
Thanks so much for looking today!
Amanda