Friday, 5 October 2018

Butterfly by Ros Aggett-Madley

Today I'm sharing a page I did on retreat last month.
I was lucky enough to borrow some of the Colour Artist Inks in colours I don't normally use from a friend.  

It didn't take long to realise that I need to get them all.  They are so gorgeous and easy to work with.


I started by heat embossing in white some butterflies.  I did this on water colour paper in just a random pattern but concentrated mainly on the middle area of the page.


I dropped some Colour Artist Inks in OasisLimeCitrusBerrySlipper and Sunburnt (which I didn't end up using) into a palette.

For this page, I'd actually chosen my photo first so these colours were chosen to match the butterfly on Miss Mackenzie's face.


I've then added some water to the page with a thick water colour brush.  I started in the middle, bringing the water out and over the butterflies.

Once I started adding Colour Artist Inks to the page, I did it in the same way.  One colour at a time, following a line of water and leading it out over the butterflies. I added more water as needed to help the ink flow.


I just used a paper towel to mop up any excess and have also heat dried between some colours to prevent it looking muddy.


I decided to use one of the butterfly stamps as an embellishment for the top of the layout.

For this I have heat embossed some Colour Embossing Powder, Dusty Charcoal, on some vellum.  


I assembled a few goodies for my photo stack.


The heat embossed butterfly has been fussy cut and adhered to the page with Scrap Dots for some dimension.


Hope you've been inspired.


Thursday, 4 October 2018

Your Smile... by Suzy Loudon

A big Hello to all. Today I share a layout using Colour Sprays, Paste & Embossing Powder...oh & Gesso.
Keep reading to find out how my layout came together.


To begin my layout I spread Heavy White Gesso  where I wanted to add colour.


Using my Lagoon Colour Spray, I added small amounts onto the gesso using a dropper. Then a spray with water before using my heat gun to dry, moving the colour around as I dried pooling the colour. This made some areas deeper. I did this until all the gesso was covered.


I spread  Dusty Charcoal Colour Paste through a stencil.


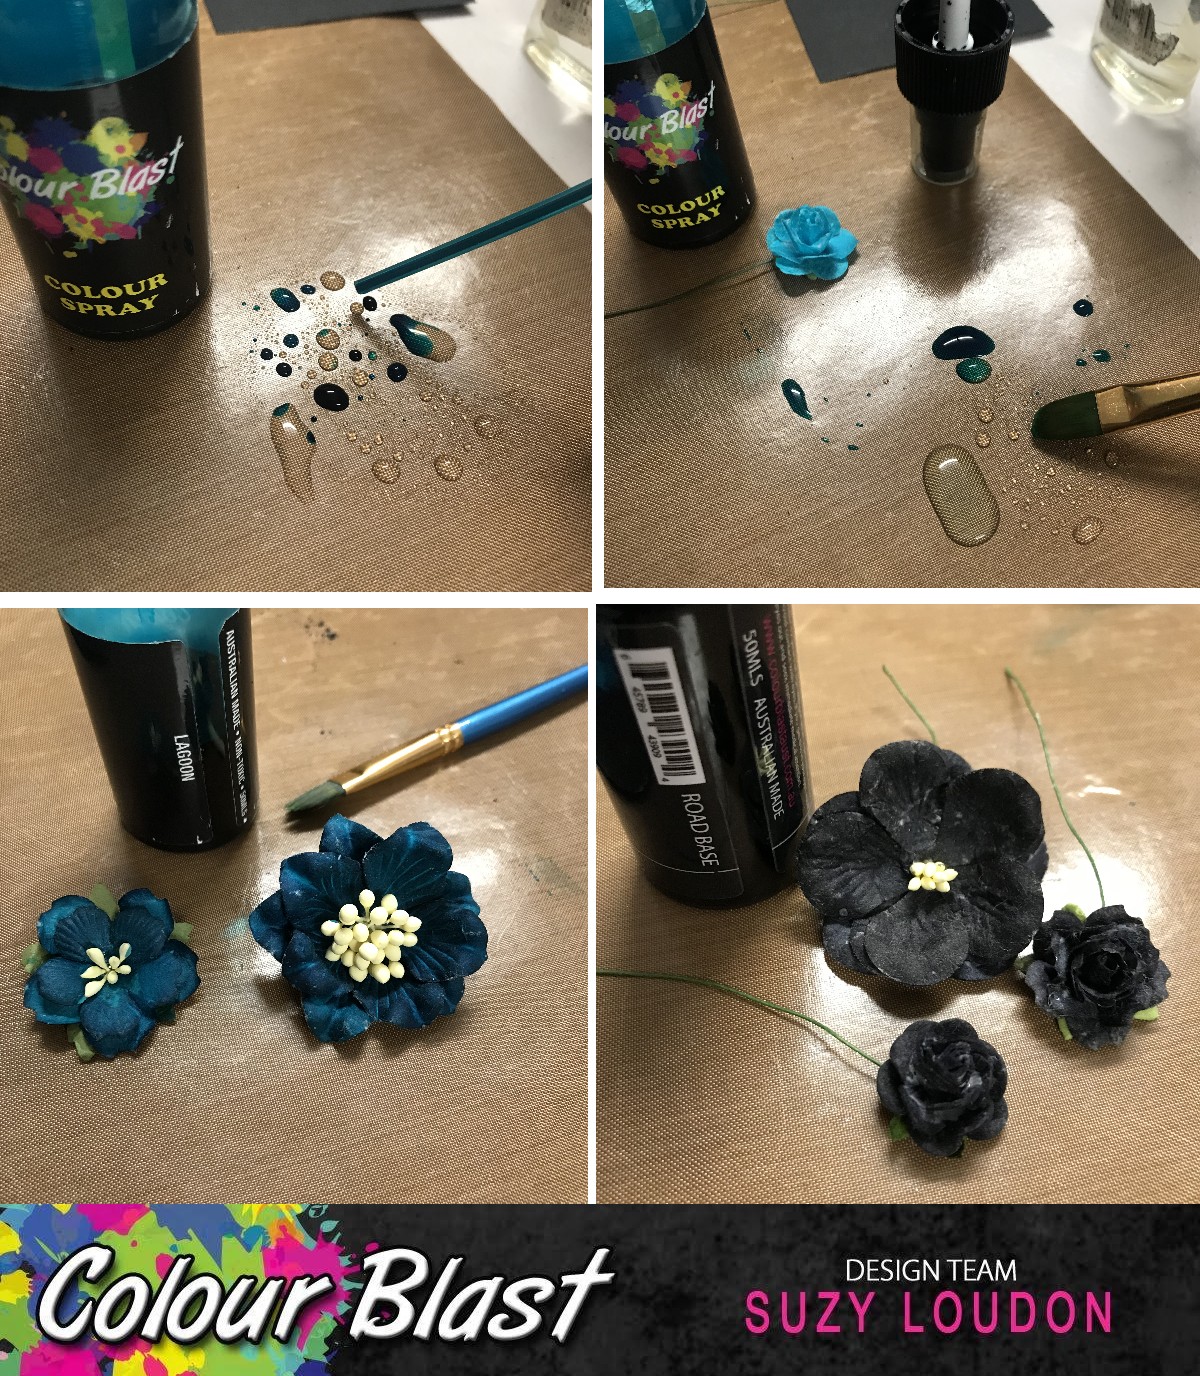
It was time to colour my white flowers. Using my Lagoon Colour Spray I put a small amount onto my messy mat then added water. Using my paint brush I dabbed the colour onto the flowers letting them absorb the colour. With each flower I added a little more water making them lighter as I went. I forgot to take a photo of all the flowers, but all of them are using Lagoon only...from no water to lots of water.
Lastly I used Roadbase Colour Spray for some black flowers.


After raising my photos with some backing cardboard I covered them before splattering some watered down Heavy White Gesso around my layout.


I painted my chipboard title with Heavy White Gesso before embossing it with Snow White  Colour Embossing Powder.


I painted my chipboard with Heavy White Gesso before spraying it with Rainforest Colour Spray.


I put all my elements together adding some lace, art stones & frame.
Here's a few close ups of my finished layout.


Thanks for stopping by.
xxx Suzy


Wednesday, 3 October 2018

"I have loved the stars" Art Journal Page- Chrissi M

Hello Lovelies!!! 
I have an Art Journal page for you today, and it would have to be one of my faves atm. I cant believe how perfectly this galaxy style page came together with my Colour Blast Colour Sprays.
So you may know, I'm an art journaler at heart. It's my favourite way to get creative. I tend to use my art journal as a mix of play, experimentation, therapy and just plain old colour. This page uses one of my favourite quotes- "I have loved the stars too fondly, to ever be fearful of the night", and for someone that has experienced grief and depression over the past few years, it means a lot to me. 
I started with a technique I've been wanting to try out- Gesso Resist. Basically, the gesso on the page, in this case through a stencil, will resist the colour spray you apply over the top. It gives an amazing result I have to admit.
So I applied my Colour Blast Heavy Gesso in White through a star stencil I had on hand. Then I dried it really well- very important.
Then it was time to add my colour. So I grabbed the colours I felt with give me a nice starry sky/galaxy background. This was, without a doubt the easiest galaxy background I have ever made. I was able to use my Colour Blast Colour Sprays in Caribbean, Sapphire, Indigo (yummy-boss lady, please send more), and Road Base and the way they just blended together worked perfectly.

I had originaly only intended to do a single page in my journal, but I had over spray on the left hand side, so I just continued to add colour to it, and on a whim this page turned into a double. As I was adding the colour to my left hand side, it turned into the perfect place to add my quote.
I wanted my black to be bolder than the Road Base had turned out, so I grabbed some Colour Blast Gesso in Black and painted a journaling space over the Road Base Colour Spray.
Whats a starry page without some white splatters for tiny stars. The best way to get bold white stars, is to use some white gesso. I try not to water it down too much other wise I don't get the desired effect of that bold crisp white. Just enough water to make it splatter.
The to add my quote, I used a good old white paint pen. I went for a very messy style of writing. I was intending to add some more stencilling over my quote, and using it as just a background layer, but I ended up liking the page just as it was too much to change it lol.
And that's my page. I hope you go experiment with some of your mediums, and have some fun playing with colour. 
Chrissi xxx

Tuesday, 2 October 2018

It Takes Sunshine and Rain by Michelle Henderson

Today I have what looks like a relatively clean page, but in reality there are a rainbow of  Colour Artist Inks in behind the cut file.

This cut file is available through Paper Issues (Stitching Heart Burst).


Once I had cut the file, I used embroidery thread in rainbow colours to stitch the lines that radiate out from the centre


I then lined the cut file up with the second layer of card and drew some guidelines so I knew where to paint...


I used Colour Artist Inks in this order to create the rainbow

 I could then put the cut file back on top for this awesome look 💓


I spattered a little of each ink again on the top layer, which you can see in these close ups..
I also used Colour Artist Ink in Grass to stain the wooden leaf.

Here's the finished layout - just a few embellies with the photo and calling it done!


Just a change from some of the more grungier pages I have been doing lately - hope you like it!

Monday, 1 October 2018

Dress Up by Charmane Koch

Hey guys! Happy Holidays! We've just started ours here in SA - and I'm guessing most of you are halfway through maybe? 

Today I wanted to share another layout created using Colour Mica powders & stencil using gesso for the background, but this time adding stamped embossing & stencilled colour paste as well.


I used a mixture of Cool Mint & Polar Colour Mica Powder sprinkled onto the page that I have little sprayed with water. I have used a heat gun to dry it, and then added a couple of strips of ripped washi tape vertically over the top. I have used gesso to stencil the blossom mask. I waited for it to dry.


I decided to have a little bit of "experiment" with the Colour Embossing Powders and using Watermark Ink I have stamped two chipboard flourishes... but decided to use two colours to emboss at the same time. I sprinkled Envy & Deep Water randomly over the top of one chipboard...


and then I've rubbed the other chipboard over the top of the leftover embossing powder.


The excess I have kept aside for the stamping I have embossed directly onto the background cardstock.

After working out the positioning of my photo, I have stamped a script stamp & then stencilled a word stencil using Deep Water Colour Paste


Using Versamark Watermark Ink I have stamped a flourish stamp and "Like A Boss" stamp. I have then sprinkled the excess Embossing powder and using a heat gun embossed.


I am loving the mix of textures - the shiny colour paste, the glossy embossing, the glittery Mica powder background... & as you can see I have also used leftover muslin that I coloured with Colour Artist Ink from the last page I created!


I hope you like the finished product!


Thanks for looking!