Wednesday, 16 December 2020

A Tropical Christmas Layout by Julie Schinkel

Hi everyone, I'm back on the Bee Arty blog today sharing a Christmas layout created with papers from the Find Paradise Collection.
 

To create this layout cut a frame from the Entangled 12x12 paper, then cut down a piece of white cardstock to 11.5x11.5 and adhere to the frame. Spray Bling Shimmer Spray around the white cardstock as shown. Cut out the two corner pieces from the Breathe and Recharge 12x12 papers, line up corners to the top centre and adhere to the base as shown.

Mat photo onto some red cardstock. From the same red cardstock, die cut a bow using the Bow Chic Metal Die and the 'ribbon' from the Runaway Metal Die.

Adhere your photo to the layout base. Arrange and adhere pieces from the Botanicals 12x12 paper and die cut pieces as shown. I've trimmed down the 'ribbon' die cut so it would fit beneath the photo and used the extra pieces around the photo.

The Merry Christmas chipboard piece is one that I've had in my stash for a while. I have double embossed it using Bling Embossing Powder and adhered over the bottom of the photo.


 Bee Arty Products Used:
 
Other Products Used:
Merry Christmas chipboard title from stash
Red Cardstock
Embossing Ink
 
I hope you enjoyed this project. Thanks for stopping by.
Until next time, happy crafting.
Julie xx
 

Tuesday, 15 December 2020

Castle Dark - With Karyn Schultz!

  Hi Bee Arty Lovelies!

It's Karyn here and today I have 3 projects to share with you made using lots of amazing products from Bee Arty. In particular with the new Castle Dark mini paper Collection designed by the talented Sue Smyth.
 
 
 For this first scrapbook page I created a background on heavy duty 350gsm white cardstock.  I started by doing some stencilling using the Devotion Stencil and Olive Grove Mica Powder mixed with texture paste. 
 
 
Once this had dried I painted and splattered Olive Grove Mica Powder mixed with water. 


 Here are some close ups of my finished page. All papers and images are from the Castle Dark mini paper Collection. I love these fussy cut flowers - aren't they so pretty. I've used the soft feminine images and patterns from the collection to create this page.


 For the next page I've chosen mainly the red images from the Castle Dark collection. These red flowers reminded me of Christmas so I created a Christmas themed page.
 
 
    I created a background once again on heavy duty 350gsm white cardstock.  I started by doing some stencilling using the Dusk Stencil and Watermelon Mica Powder mixed with texture paste. Once this had dried I painted and splattered Watermelon Mica Powder mixed with water.


 Here are some close-ups. I've used a white paper doilie to soften the background. Once again all papers and images are from the Castle Dark mini paper collection. 


  My third and final project for today is 2 art journal pages.
 
  
I started by painting and splattering Olive Grove Mica Powder mixed with water across both pages. Then I added some stencilling using the Cathedral Stencil and Olive Grove Mica Powder mixed with texture paste. 

  
 Next I added stamping using the Vamp stamp set.
 

Here is the first of my finished art journal pages. All papers and images are from the Castle Dark mini paper Collection. I finished the page with some splatters of Dusty Charcoal Mica Powder mixed with water.


Here is the last of my finished art journal pages. Once again all papers and images are from the Castle Dark mini paper Collection and I finished the page with some splatters of Dusty Charcoal Mica Powder mixed with water.


Thanks so much for stopping by

Crafty Hugs xx


Sunday, 13 December 2020

Spread Kindness by Tracy Jackson

                                                                Morning Bee Arty Fans

Woweeee its December!!!! How fast did this year go... in light of 2020 I think this DT card title says it all....

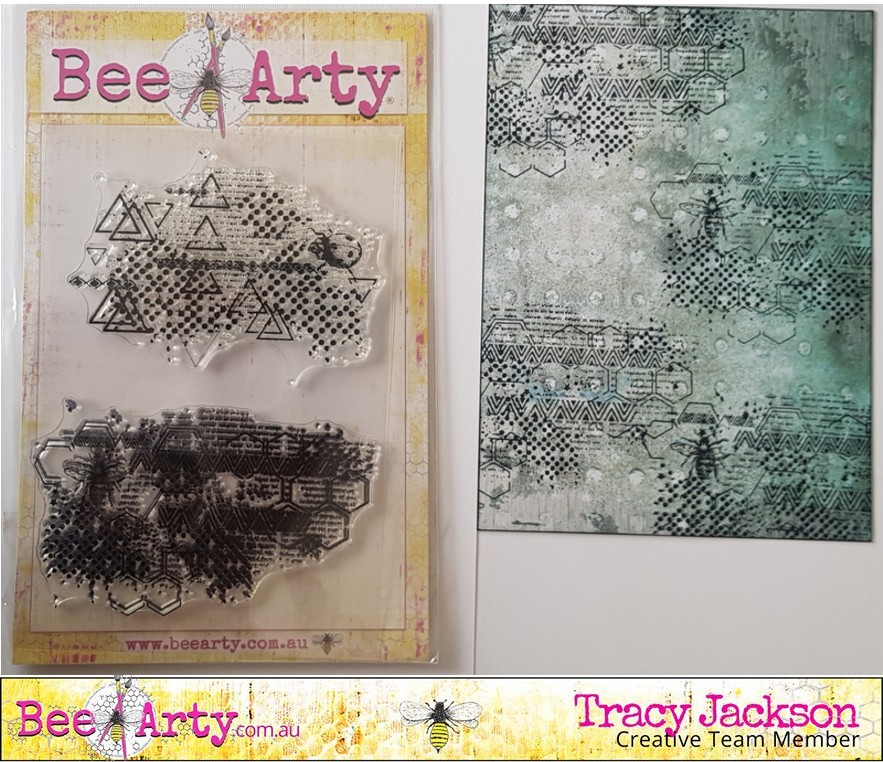
The paper collection I used this time as my background is from Spread Your Wings collection Too add a little more dimension and interest to the background I stamped it with Geo Grunge - which has a cute little Bee on it ;-)


I then added a layer by using metal  die called Honey Comb


I picked out word elements from same collection, and also stamped and fussy cut around the butterfly from the stamps set called New Dawn

The butterfly is coloured with Colour Shimmer Dust from Bee Arty - Amber, Candy, Paris, Navy

Hope you are all taking a little time out for yourselfs in the busy Christmas period....Until next time... Happy crafting

Wednesday, 9 December 2020

Shine from within by Linda Pearson

 Hi everyone,  This is my first time posting as a creative team member.  

I have created an art journal page with lots of layers and fussy cutting using a variety of Bee Arty products.  Enjoy! 😉

The following image highlights the Bee Arty products used.


General materials List:

journal book or scrap book page, gesso, paint colours; blue (background), magenta/white, leaf green, payne's grey/white, wet wipes, paper towel, brushes and palette knife, paint wedge or credit card, blending tool or foam sponge, foil card (white and light green) and adhesive.

Bee Arty products:


White cardstock  12" x 12" 350gsm x 1 sheet

My Lady – A4  Stencil Forever my always range

Within 12" x 12" scrapbooking paper  or choose an alternative sentiment for page

String Wreath – Metal Die   Love and grace collection

Bird Talk Metal Die   Spread your wings collection

*Distressed Wings stencil is no longer available.  Alternative options for background stencil:

Rhythm Follow your dreams range

Triangles Forever my always range

Colourblast Paste  -   Envy, Rose Petal and Singing the blues

Dorland’s wax medium


Surface preparation:

Apply a layer of White Heavy Gesso over page, dry off.

Apply light blue background colour over the page, dry off.


Using the *distressed wings (or alternative) stencil rub White Heavy Gesso through the stencil using a blending tool or foam sponge.


Using the same *distressed stencil (or alternative) stencil apply Colourblast Paste - singing the blues through the stencil randomly over the page, allow to dry.


Mix a touch of white paint into payne's grey to lighten a little, then using the artist's wedge (or credit card) dipped in paint add random broken lines over the surface and border also, dry off.


Using a blending tool and black archival ink rub the ink with blending tool through the stencil onto the White cardstock.  Please note: only use the floral sprays (tape off the lady's face with masking tape) in the print.  Try to fit 2 onto the one sheet of White cardstock.


Painting the flowers; use 2 shades of leaf green paint to loosely fill in leaves.  
Please note: I painted up 2 coloured sprays of flowers and left one spray of flowers with no colour.  
Paint the flower petals in 2 shades of light magenta as base colour.  Allow to dry.


With a brush load up some Colourblast Paste in Envy add thick texture to the leaves with the paste.  Repeat for the flower petals using Colourblast Paste in Rose Petal, apply loosely and thickly over parts of the petals allowing some of the background colour to show through.  Allow to dry.


Fussy cut the sprays of flowers as closely as you can (I chose to leave a tiny white outline around the shapes so I didn't have to highlight the shapes later on).  


Cut shapes using the die cuts 
String Wreath – Metal Die from the foil card (2 from each colour).
Using off cut from centre of wreath die cut out the Bird Talk Metal Die (you may not use all the diecut shapes, depends on the size of your page.

For this page I cut some of the words from the Within scrapbook page ... but you may choose to use your own sentiment.


Layout all the cut out sprays of flowers, string wreaths, birds and words onto page.  Arrange the layers to your taste.  I cut a couple of the leaves off and did not use one of the coloured sprays and a white string wreath.  Again it depends on the size of your page to determine how much you use.
When you're happy with layout, adhere all the elements onto the background page.

Finally,  apply a little Dorland’s wax medium over the areas with Colourblast Paste this help to protect your artwork from sticking to other pages.


Monday, 7 December 2020

"Happiness" by Anita Enright

 Welcome Back Everyone

 For my share today I thought I would share with you another layout that I completed using the Fearless Brave and Free, Three Six Five and Arty Farty collections along with Artist Inks, Shimmer sprays, Shimmer Dusts and Embossing Powders.

For my page I used the MUSE patterned paper from the Arty Farty collection designed by the super talented Michelle Grant. Using the Arches A5 stencil and some matching distress inks I applied colour through the stencil to the patterned paper.  I added some 'splats' to the page using a blue shimmer spray. From one of the collection I used a white Hexagon die cut and after making a mix of Duke Shimmer Dust and water, coloured the white die cut.  

 I created a colourful piece of smooth white cardstock using Artist Inks in Lime, Marine, Mermaid and Calypso.

I then used this piece of cardstock and die cut the FRAME metal die from the Fearless Brave and Free collection and also the  GEO DIRECTION metal die from the Three Six Five collection designed by the amazing Tania Froud. 

The GEO DIRECTION die cut was cut in half and applied to the back of the mounted photo, as was the hexagon die cut that was coloured earlier.  The FRAME die cut was glued on top of the photo.


Wording on the page came from the FREE word sheet from the Fearless Brave and Free range designed by mega designer Fiona Paltridge.

I heat embossed the happiness chipboard word with Apple of My Eye Embossing Powder.

 
Before layering all the pieces down I grabbed some washie tape in matching colours and designs and applied where the photo was being applied.
 
To finish the page I used a Charms Creation tab, yellow twine and different enamel dots, arrows and triangles.

 
Thanks for stopping by.
 
I hope you find some crafting time to create your next memory.
 
 
Take care 
Anita
xx