Monday, 24 January 2022

To The Moon And Back by Tracey Campbell

 Hello it is Tracey Campbell back for 2022 sharing my latest creations and hopefully inspiring you to pull out the absolutely awesome Bee Art Collections and Colour Blast Products. 

For my first Blog Post for 2022 I wanted to share a layout that I created mixing and matching a few different Bee Arty Collections. I must admit that one of my favourite things about the collections is that you can use your left over scraps from multiple collections together to create wonderful new layouts.

To The Moon and Back

Bee Arty Collections used:

Grateful Heart

Find Paradise

Bohemian Bliss

Arty Farty

Embrace Change

My first step was to use some Bling Colour Blast Paste with a paint palette knife and scrape it through the Scripted A5 Stencil onto the Faith patterned paper from the Grateful Heart Collection, making sure that it is white woodgain side. Colour Paste is as soft as butter and so lovely to spread; tip: start with just a small about (around the size of a 10 cent piece) at it spreads easily and by using only a small amount you don't waste any of it.

Continue to move the stencil around the Faith patterned paper to spread the image around the paper. See the photo above for the final positioning, let dry. The Scripted Stencil is one of my favourite Bee Arty Stencils, because it gives you bot a nice script writing and the small diamond shapes which both add lots of texture to a background and is very versatile. 

When dry I applied some Saffron Colour Spray with a Brayer to spread it out across the page.

Here is what the base looked like after the Colour Spray was applied.

Once the Saffron Colour Spray was dry I used a stiff paint brush and dipped it in a bottle of Sunset Colour Spray and flicked dots across the Faith patterned paper. 

Leave it to dry thoroughly. 

While waiting for the Colour Spray to dry mat three 10x7.5 cm photos (landscape orientation) with Festival from the Embrace Change Collection.

Cut three sperate rectangles using the following measurements and papers listed below:

27x6 cm from the Transform patterned paper in the Arty Farty Collection

21.5x11cm  from the Botanicals patterned paper (using the B side pattern) in the Find Paradise Collection

16x14cm from the Free Vibe patterned paper (using the B side pattern) in the Bohemian Bliss Collection

Once the rectangles were cut out I tore off the bottom edge from each triangle and then scrunched them to give them a distressed look.

Adhere the matted photo strip and the patterned papers to the base like in the photo above.


Fussy cut the following elements from the cut-a-part sheets:
2 x lace doilies from the Grateful Heart Collection
The Tile "To the Moon and Back" from the Embracing Change Collection

Cut the lace doilies in two and then position everything on the layout. You can see the positioning of the fussy cut elements in the final layout below. 


Well I hope that I have inspired you to pull out all your Bee Arty and see what pieces go together. It is so much fun seeing how the final layout turns out. 


Sunday, 23 January 2022

The Best Memories - With Karyn Schultz!

 Hi Bee Arty Lovelies!

It's Karyn here and today I have a scrapbook page to share with you made using the Road Trip collection from Bee Arty.
 
 
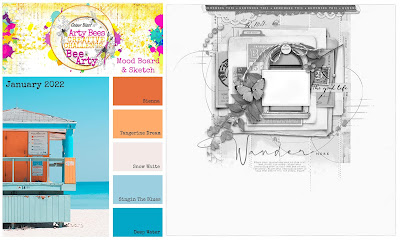
I'm playing along with the January mood-sketch challenge. We would love for you to join in with this challenge and be in the running to win a Bee Arty online voucher. You have until January 30th and you need to upload your challenge here (please follow challenge rules). 
 

I have been inspired by the colours of the moodboard and also the sketch (turned on the side).
 
I used a painting with plastic technique to add Oasis, Calypso and Mermaid Colour Artist ink to some 350gsm Heavy White Cardstock, then I added splatters of each colour.
 
I used the City Nights A6 stencil from the Road Trip collection and Deep Water Colour Paste to add dimension to the page.  

 
I added stamping using the Mapped stamp and the Making Tracks stamp set from the Road Trip collection, and Black Archival ink.  
 
 
 Here is my completed page.
 
 
 I've used a sheet of Road paper and cut matts for my photo using different designs on the front and back of this paper. My photo is 9cmx12cm printed with a white border. I've added 5 different patterned paper layers, some book paper, a kraft tag, and torn cardboard layers.   
 
 
 I've fussy cut elements from the Spy paper as well as leaves from the Road Trip Collection Cover paper. The words are cut from the Vacay paper, also from the Road Trip Collection.  
 
 
 Lastly I've added some orange enamel dots and outlined my page using a fine black Life of Colour paint pen.


Thanks so much for stopping by

Crafty Hugs xx


Saturday, 22 January 2022

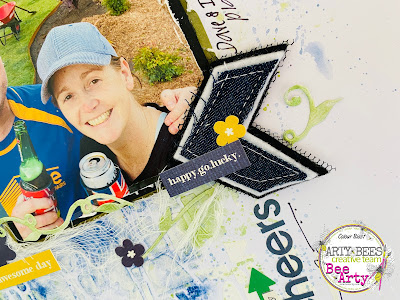
"Cheers", by Amanda Hartmann

 Hello again!

A quick an easy page today....

Here is what you need:

Stencil the brick pattern from the Pavement - A4 Stencil down the page using some light white modeling paste.

Add a few sprinkles of Mica Powder in Just Blue to some plastic packaging and spray with water. Smoosh the colour onto the page. You don't need much!

Next do the same with the green Apple of my Eye.

Use a brush to push colour where you want it and to add splatters.

I finished with some doodling, stickers, muslin, a Charms Creation, and the title. I also diecut a vine with DeVine - Metal Die and painted it green with Apple of my Eye Mica Powder to add into the cluster under the photo.

EASY AS!


Thanks for looking,
Amanda


Thursday, 20 January 2022

Travel 2 Escape by Charmane Koch


Hello Everyone! 

Today I am sharing with you a layout I created based on the Kraft Plus Challenge for January - using Kraft and something to do with Travel... so I thought Destination Anywhere Collection would be perfect!

It's a layout I also scraplifted of my gorgeous friend and fellow Bee Arty Creative Team Member  Amanda Hartmann!


I made a video! 


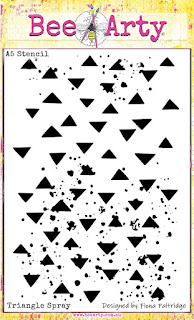
I started off with the Kraft Cardstock background where I had stencilled where I had stencilled on the Triangle Spray using some modelling paste.  I have then used the fabulous Bling Colour Paste scraping it through the AWESOME Capture Stencil.


I have also used the Happy Stamp, stamping "Happy Little Moments" & "Today is a perfect day"

Also I have cut out the Grungy Film Strip die, using the Destination Anywhere Journey Scrapbooking Paper. A piece of the same paper I have used as the backing for the photo.


The Road Trip Words Die "travel & escape" were perfect for my title, so I cut them out using Black Cardstock so that it would stand out.

I was going to use torn strips of cardboard along the top and the bottom of my layout but I decided to use strips of the "Let's Go" Scrapbooking paper.

I've cut out the tags from the Destination Anywhere kit, and inked the edges and added my journalling...


And some closeups over the layering...


I got out my Bling Mica Powder just to add a bit of gold here and there over the page....


And here is the end result! I really love how it has turned out so rich & golden! 


Anyway, I hope I've inspired you to get out your Destination Anywhere papers & dies & stencils, and maybe even your Bling Colour Paste... or if you don't have any of these things YOU NEED THEM! So get shopping!


Take Care, Stay Safe XO Charm

Monday, 17 January 2022

Magic happens … journal page created by Linda Pearson


Hi everyone … I had a lot of fun creating this journal page using the newly released Colourblast Shimmer Dusts powders (Wine, Lavender, Tan and Fern).  Before doing the journal page I spent some time trying out the new colours using different mediums and have added the colour card here for you to view.

Several Bee Arty mixed media products were used in this project and the links have been provided here for you to view and purchase online. 

Bee Arty products used:

Colourblast Shimmer Dusts (Wine, Lavender, Tan and Fern plus Sunshine for bees)

Darice 6 well paint palette

A4 Cardstock 250gsm (3 sheets approx. my project was A5 size)

Beach Fence die  please note:  the beach fence die is now discontinued but you could substitute the new  forest favourites (whispering woods collection) die just as easily

Bee Arty white Gesso

Honeycomb metal die

Make me happy rubber stamp

Versamark embossing ink pad

Colourblast Embossing powder –  clear and stormy weather

Craft Powder Spoon


Mounting tape

adhesive


In the sample colour card above I have added the Colourblast Shimmer Dusts to a variety of mediums to demonstrate how these versatile products can be used in a variety of ways.  I have used Bee Arty white Gesso, Texture Paste, Colourblast Embossing powder and water.  The intensity of colour will depend on how much shimmer dust is added.  I like intense colours but simply adding more medium (e.g. water or gesso) will change the hue to suit your requirements.

GESSO    using a Craft Powder Spoon add a quantity of Shimmer Dusts to the Gesso and mix thoroughly (n.b. the colour will lighten considerably due to the intensity of the gesso), simply add more shimmer dust to strengthen hue.

TEXTURE/MODELLING PASTE    again add a quantity of Shimmer Dusts to your preferred brand of texture paste, mix thoroughly then spread paste through stencil.

EMBOSSING POWDER    stamp image using Versamark embossing ink pad, sprinkle with clear Embossing powder, then heat set the powder.  Mix a small amount of Shimmer Dusts in water then with small brush add shimmer liquid to the stamped image to colour.  Dry and add more for greater intensity of colour.

WATER    add a quantity of shimmer dust to a small welled Darice 6 well paint palette

 and some water (with pipette) to each colour, mix thoroughly.  On this card I added an intense mark on the bottom, then a wash above it by adding more water to the mix.


Use up the excess shimmer colours in palette onto several pieces of card, see above,  on the two pieces that I was going to use in the journal page I splashed with a little water after applying the shimmer liquid to create splotches / texture over the card.


 Below are the instructions for the journal page I created using two of the backgrounds from above.


When playing with the leftover shimmer colours I created this background using the Shimmer Dusts Lavender, Fern and Tan colours.  Some water had been added to lighten the hues for the background.  I ‘flicked’ some water (with fingers) onto the wet card to create the textured effect.  Allow to dry.  The second Tan and Wine card is used to cut the Honeycomb metal die through a machine.


I stamped the side flower and the bees from the  set onto a piece of card with Versamark embossing ink pad.  Cover with Embossing powder then set using a heat gun. 

Colour the flowers using Lavender Shimmer Dusts.  The bee was coloured using Sunshine Shimmer Dusts.  Fussy cut the flowers and bee shapes from the card.


Run the Beach Fence die (or equivalent die shape) on A4 Cardstock 250gsm through the die machine.  Brush the fence with Tan and the grass in Fern Shimmer Dusts.


When dry adhere to prepared background card.


Adhere the flowers and a bee onto Honeycomb metal die-cut shape.  Add mounting tape to the back behind the flowers.  Add the focal element to the card over the fenced die-cut.


Cut another piece of A4 Cardstock 250gsm slightly larger than the main layer.  Colour the border of the card with the Wine Shimmer Dusts allow to dry.  Place the main card background onto the back matt leaving a small border around the main card.  Cut the back matt to correct size, then adhere in place. Add splatters of Fern and Tan Shimmer Dusts


Add the two remaining bees to the sky using mounting tape to lift off the page.  Loosely brush over some Fern and Tan Shimmer Dusts over the foreground to ‘ground’ the elements to the page.

Add sentiment to the page.  Draw borders using black pen around the edge of sentiment words and main layer’s edge.

I hope you have enjoyed the process for ‘playing’ with shimmer dusts and if you haven’t experimented with these amazing products I urge you to give them a try you’ll be hooked I’m sure.

Thanks for dropping by and I look forward to seeing what you create. 


Bye for now!  From Linda

linda@yourcreativepalette.com.au


Saturday, 15 January 2022

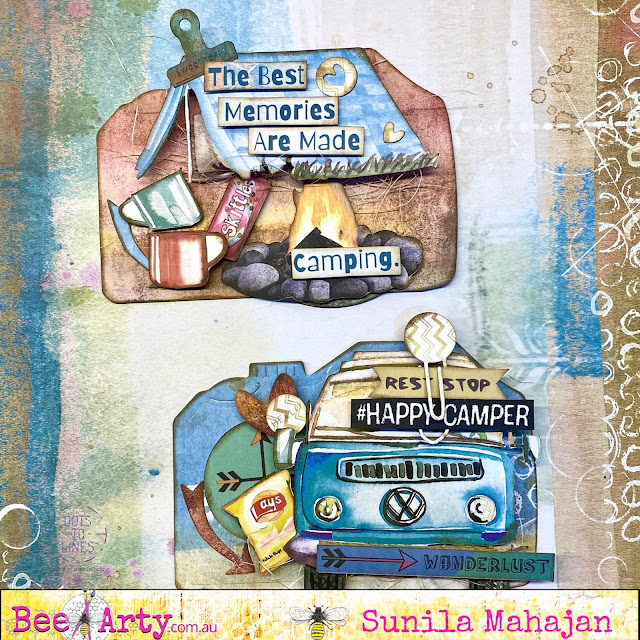
Camera Postcard by Sunila Mahajan

 Hello Bee Arty Lovelies,

My name is Sunila, and I will be filling in my daughter Aditi's spot for a while. I have had so much fun diving into the Bee Arty supplies and creating.

Today, I'm sharing a quick inspiration with you all. Camera style postcards. 

Here's a look at them:


These were easy and quick to make. What I also like about them is the fact that they are quirky and make great gifting cards.

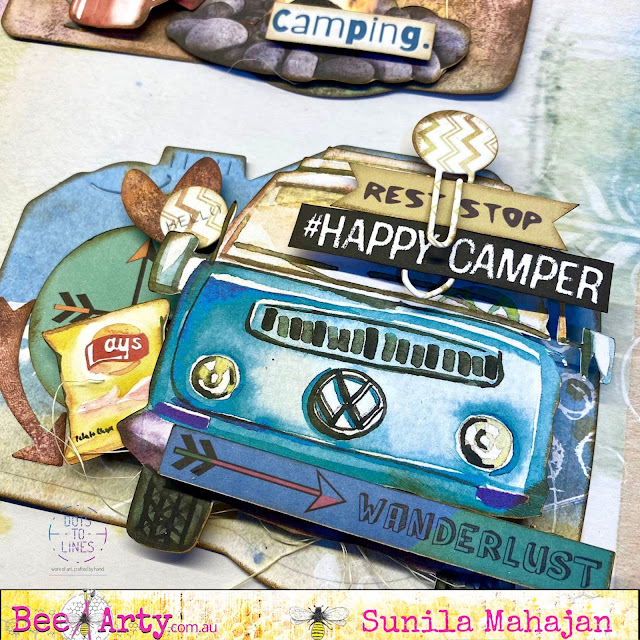
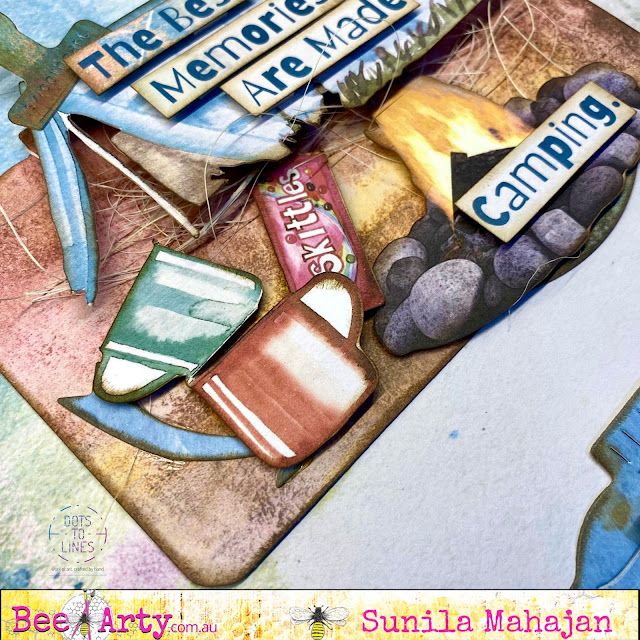
I die cut the base shape on a piece of patterned paper, and then add elements I fussy cut from the same collection. I used foam tape for a few pieces giving them depth. I used some words from the sheet and added them to bring in more meaning. 

Here's a look at some close-ups:


Supplies used:

I hope you've enjoyed my first post here!
Looking forward to sharing more of my creativity with you all!
Hugs!