Showing posts with label Grape. Show all posts

Monday, 6 July 2020

Inspirational Mixed Media Cards by Amy C.

Hi everyone!

My turn up on the blog today with some mixed media cards using the inspirational Three Six Five paper collection pack designed by Tanya Froud


I used various papers from the 365 collection for the backgrounds, the sentiments and the butterflies!

I used some Black Heavy Gesso with the 'On Point' A6 stencil over the patterned paper as well as being stamped with the 'Life Is Tough' clear stamp set over various parts. 

To add a bit of dazzle, I applied some of the gorgeous Colour Blast 'Bling' Colour Paste through the 'That Way' A4 stencil over the background.

After I fussy cut the butterfiles from the 365 Collection I coloured them with Colour Spray in 'Grape' and 'Carribean'.

The sentiments for the cards were trimmed from the 'Untangle' range.

I also included thread and enamel dots from my stash.

Here are some close ups!


Products used.
Colour Paste - Bling
Colour Spray - Grape, Carribean
Clear Stamps - Life is Tough
Stencils - That Way - A4, On Point A6

I hope you have been inspired - happy crafting!

Amy


Friday, 16 August 2019

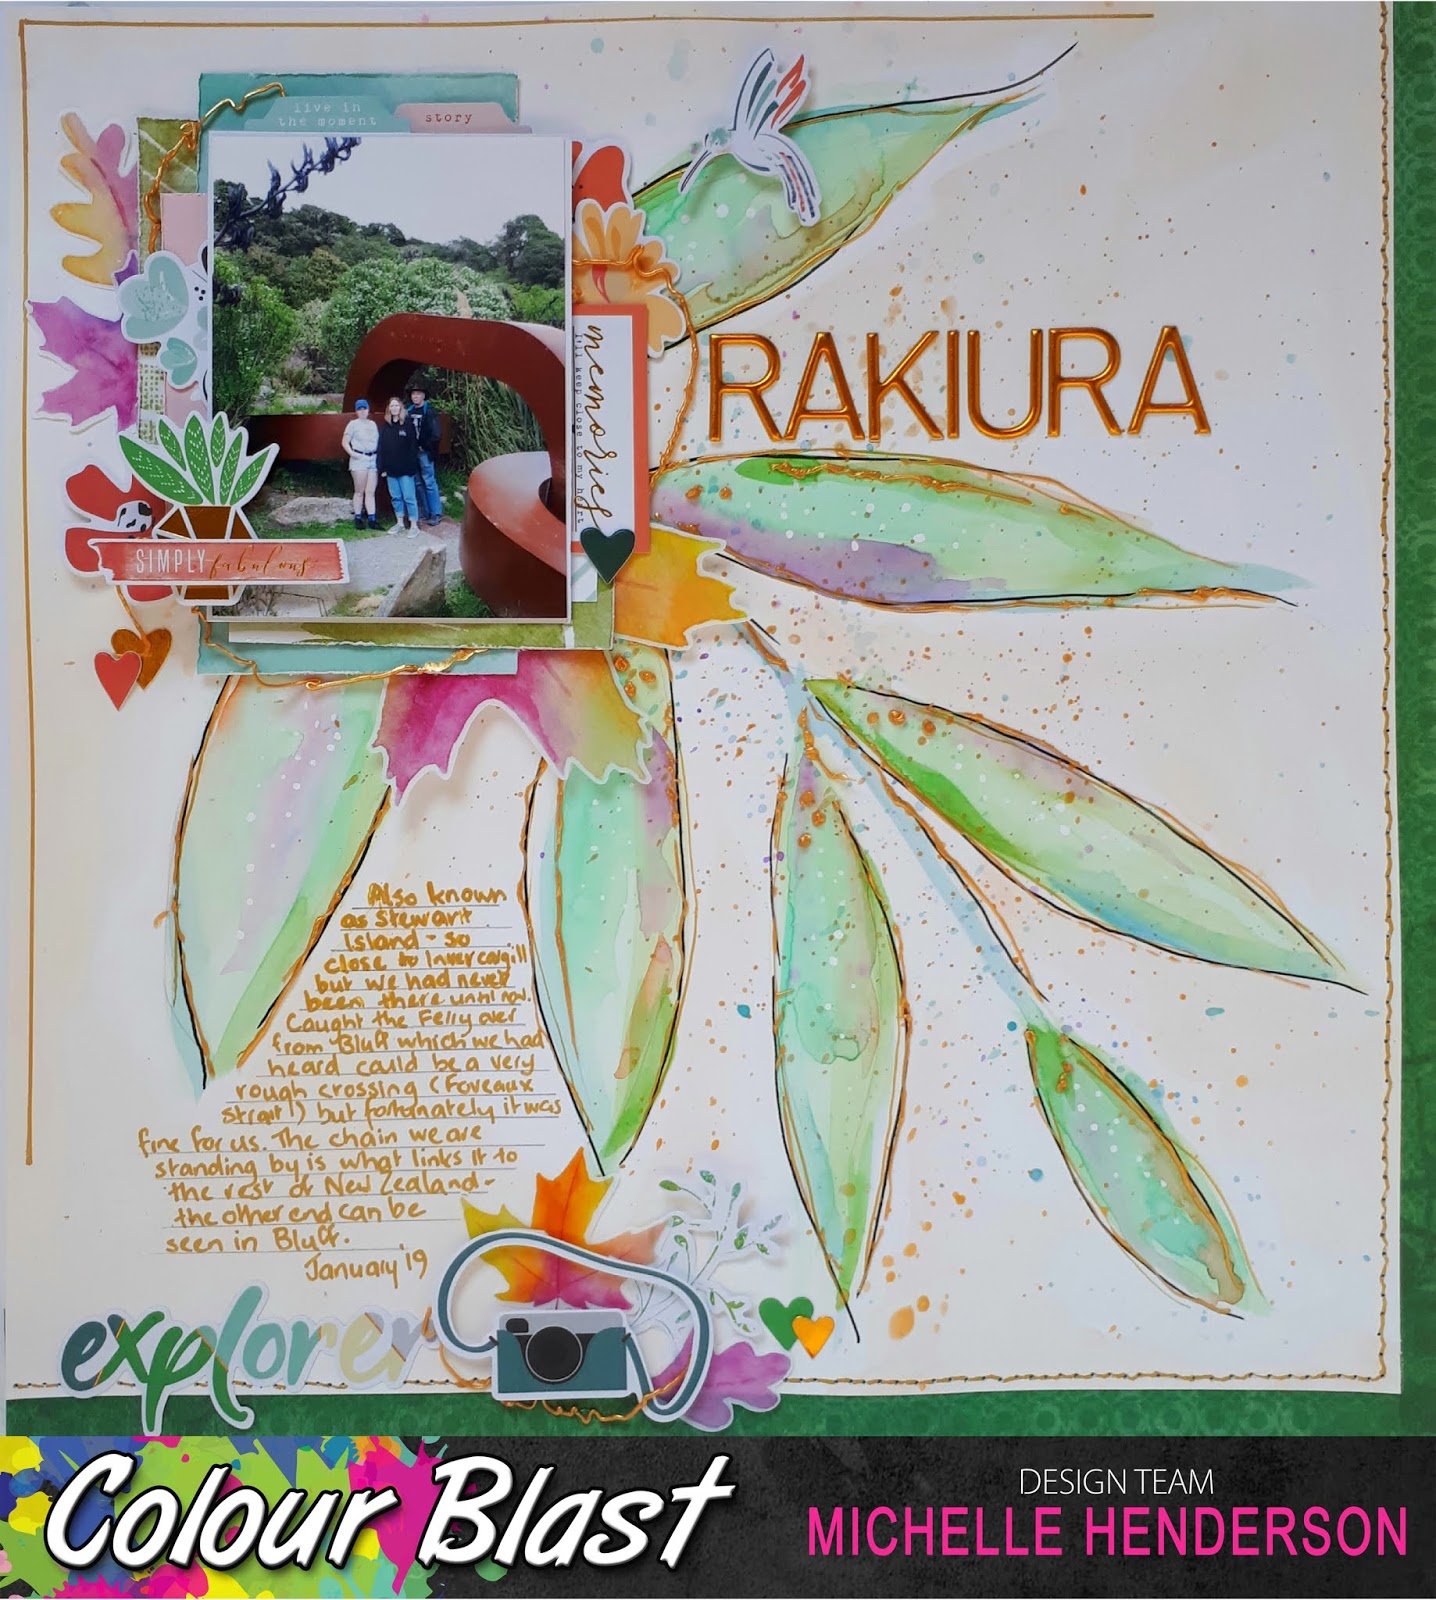
Rakiura by Michelle Henderson

Happy Friday again friends - counting down to the weekend!!

Today I have somewhat of a cross of an art journal and scrapbook page for you.


I was going to be using ephemera from the Pinkfresh Studios Be You collection, so I took one of the leaves that features and drew it lightly on my page with pencil.
Love the new watercolours, so I used these to colour the leaves, starting with a mix of Seafoam and Pear, then highlighting with Carrot, Grape, and Ultramarine. For the stem I used Umber and Ultramarine . I added some splatters of each of course too 😀


Once it was dry, I added some more highlights with Green from the Shimmery Bright palette.


I lightly went over everywhere else with , from the watercolour set.. I wasn't trying to be neat, and there are some patchy areas. I re-spattered, then also added some Yellow Gold from the Shimmery Gold Watercolour Pan Set.


To do the outlines I used both gold and black Posca pens. Then I took some Colour Paste in Bling, filled a syringe and roughly went over the pen outline. I LOOOOVE this look, it makes me think of Moorcroft china and lead lights. I still had some left in the syringe, so I squeezed it out onto a messy mat and left it to dry.


Once the paste had all set I put together my photo, layers and embellies. I decided to trim some off the edge and added a darker border on 2 sides.
I glued it all down, and twined the extra Colour Paste "string" around the edges.


Have fun creating this weekend!


Friday, 26 July 2019

Dishing the Dirt by Michelle Henderson

Hi folks!
I was so happy to get my hands on the new watercolour sets this week! 

I just took them for a light test drive this time 😀

To start, I used White Heavy Gesso through a stencil. I dried it off to puff it up a little. 


Then I used a nice soft brush and the watercolours Carrot, Fuchsia, Ultramarine and Grape to apply a thin coat over the areas that would come out from behind my photo and cut file. I did this a couple of times to build up depth of colour. I also spattered a little of each colour.


I put my cut file on then, and decided to splash some of the Light Gold from the Shimmery Gold Watercolour Pan set also. Love the variations in golds in this set!


I added my photo, some stitching and a title and Voila!


Such fun to try, you're going to see me using these heaps (although I'm sure my other faithfuls will still be showing up too!!)


Tuesday, 6 November 2018

Its a plan by Kristy Abela

Welcome back peeps to my new journal page.
I am using a layering technique here where I create colour and then push it into the background with a neutral and then repeat the process till I am comfortable with the look. I loved the quote in this; when I journal I never know what I am going to get. Let me walk you through the process.


I squeezed on my work surface Colour Artist Ink in Grass. I didn't dilute this as I wanted to have a really vibrant back ground come through all my layers.


I turned over the page and smooshed and dabbed spreading the colour as far as it would go.


I repeated the process with Colour Artist Ink Barley and then Walnut using only a small amount of the darkest colour so I didn't drown out the others


I had planned to spray the Colour Spray Grape through the mask and add another layer (bottom corner) but felt that it was going to drown out the original brights. SO... I flipped the mask over and used it like a stamp seeing as it was already loaded with ink.


I wanted to add some texture and contrast. Here I used my Colour Paste in Sunshine and lightened the page again.  


When you do this style you have to able to surrender your background an not be afraid to cover it up. A total leap of faith!


So here you can see that I have added a neutral layer, by adding black or white to the project you create a fresh surface to alter.


I added a layer of interest with my Colour Paste in Steel...


I'm jumping ahead a little.. Using my Michelle Grant Stencil from the Flight of Fancy range I added a neutral layer in White with Colour Blast Heavy Gesso... And pushed it into the background again with the a black layer.. (you can use an inkpad or Heavy Gesso Black with a sponge) and darken the edges to close in the focus of the project.

I lost a few pictures along the way but if you look closely at the original pic you can see that I blended the background in with some Colour Blast Heavy Gesso in white so I could add my focal point as a feature. With so much noise in the background I ran the risk of a hot mess... I used my finger to smudge it on so I didn't get a thick layer and cover it up all together..


I used a charcoal pencil to outline the Paper Dolls. Another technique for focusing the eye and added a rub of my Colour Shimmer Brush Marker in Clear to the buttons. Splattered away making sure I had covered up my focal point and Viola!!


Hope you enjoyed this process and will give it a go.. I really like knowing if I have managed to inspire.. Post some pics of how you went on our Facebook page or leave a comment on my post. 
Thanks for looking! 

Abela Artistry

Thursday, 26 July 2018

Laugh Every Day by Suzy Loudon

Hello everyone. Welcome back. I hope I can offer some inspiration with my layout.  Keep reading for my process.


To begin my layout I added some Heavy White Gesso through a small stencil.


I sprayed some water on my page then dropped some Grape  Colour Spray, then I gave the drops of colour a spray with water. I dried each section with my heat gun, pooling the colour. I repeated this process until I had the coverage I was happy with, then built up the layers some more.


I layered up my photo with cardboard and papers.


I coloured all my white flowers.To do this I sprayed some Grape  Colour Spray onto my craft mat. I added some water then using my paintbrush painted my petals. After each flower I added more water, making my flowers lighter as I went.


I embossed my chipboard with Dusty Charcoal Colour  Embossing Powder. I did a small section at a time. Before setting my second coat of embossing I sprinkled some glitter on top. Then when I heat set it the glitter set into the embossing but the heat also changed the glitter green, purple and gold.


I used some watered down Black Gesso and sprinkled it around my layout. (I added a few more sprinkles after I had put my page together)


I sprayed my cheesecloth with some Road Base  Colour Spray. I dried it gently with my heat gun.


Here's a few close ups after my page was done. I tried to capture the cool glitter colours but it was a bit hard.


Thanks for looking.
xxx Suzy.


Sunday, 4 June 2017

Gorgeous Art Journal Page by Farrel Tailor

 Happy Sunday Everyone!!! 
Farrel here to share with you my latest mixed media art journal page. So sit back and relax while I step you through the process in creating this very fun page.


I started off by tearing some paper out of an old book and adhered it with Matt Gel Medium and then applied a light coat of White Heavy Gesso all over.


Once the gesso was dry, I then added some different patterned strips of washi tape in black and white..after realising that I needed the washi tape to be sealed for the next step, I and then applied another coat of White Heavy Gesso. Next I added Indigo Colour Spray using a paint brush and used water to let the colour run across the page.


I dried the spray with my heat gun and then repeated the process but used Grape Colour Spray . I also used the excess off my brush to add some splatters all over.

I added some random stamping using a black archival ink.


The next I used my black archival ink and dabbed through a stencil. I wanted to heat emboss the image so I started with using Steel Colour Embossing Powder  but it was a little too light so I went over it using Dusty Charcoal Colour Embossing Powder.


My next step was to cover my ScrapFx chipboard with Black Heavy Gesso. Once it was dry I then sprayed Royalty Colour Shimmer Spray  all over for that extra sparkle!!


The last step was to cover my stencil with White Heavy Gesso...why??? I felt the colour and stamping in the background was taking the focus away my stencil. Before it dried I then used a baby wipe to remove the excess off the embossing areas.


And there you have it another art journal page!!!
Hopefully I have inspired you to create something gorgeous today.

Until next time - Happy Creating xx