Saturday, 14 July 2018

Dreams Canvas with Melinda Sweetman

Hey everyone and welcome to the blog today! 

I have something a little different to share with you
but oh boy, I love it!! It's not often I do "pretty" and "feminine" but I sure did for this and I got to have another play with the awesome Colour Artist Inks! Here is my project, a 12x12 canvas for a friend's daughter for her 15th birthday in June and it was well received!


If you have been on the internet at all in the last couple of months you will know straight away that this idea is most certainly not mine, I was inspired by the one and only Paige Evans and then all the people that were also inspired by Paige so got creating!


I started by working on the butterflies I had cut earlier on my Cameo. I left them on the mat to make it a bit less fiddly to colour. A quick, light coat of White Heavy Gesso which dried super quickly!


And then some random stamping with some Versafine Black ink. I popped that aside to dry thoroughly and started work on my canvas background.


Next I painted my black stripes. I have used the Black Heavy Gesso on my messy with a little bit of water to make it more of an acrylic paint consistency and used about a 1" brush to apply random black brush strokes across my canvas, varying where they started and ended.


While that was still wet I added some BIG black splatters on the diagonal from the top right to the bottom left by adding a bit more water to the black gesso and using my fingers to squeeze the bristles of the brush together to get big splats! I love this look!


Next I chose my warm colours in the Colour Artist Inks to play with knowing that they could mix together and would not get any mud! The colours I used (from left to right) are:
Citrus, Barley, Cider, Spice, Sunburnt, Cranberry & Bordeaux. 
If you haven't yet got your hands on these inks then it's important to note that these are beautiful vibrant colours. I was after something a little softer so I spritzed my paper with water and then randomly added drips of all the colours to my page and turned and tilted my page to get a good coverage.


When that was dry I went in with splatters of all the colours using a paintbrush and also some splatters using the Bling Colour Shimmer Spray; using both the nozzle and a paintbrush. This I left to air dry as well.


I grabbed my now dry canvas and added in some splatters of the Bling as well, once again using the Colour Shimmer Spray. I added these to tie in the gold from the butterflies.


While the canvas was drying I pulled all of the butterflies off of the cutting mat, stacked them on top of each other, adhered with a tiny dot of glue and then ran through my sewing machine, leaving all of the threads long for extra texture.


I wanted to add a little something more to the background so grabbed a stamp set and some white tissue paper. I stamped a bunch of butterflies and also the sentiment which formed my title and had a bit of a play with placement. When I was happy I adhered my stamped tissue paper with matte medium and left to dry.


When the matte medium was all dry I adhered all of my butterflies, added some sequins following that diagonal and my canvas was completed! Here are a few close up's where you can really see the dimension of all of those butterflies!


I seriously love how this turned out and when I gave it to my friends daughter she LOVED it!! Winning!!

Also, head over here for the process video if you'd like to see this canvas come together!!

Anyways, I hope I have inspired to create something today and I'll see you again later this month for my very last post as part of the Colour Blast Design Team!


Friday, 13 July 2018

‘Holiday Sunset’ by Amy


Hi All!
My first share for July! 


This sunset was captured on our family farmstay holiday last year. We enjoyed a fabulous week away with a special friend and her gorgeous family. They have a beautiful sheep farm in Victoria. Our trip left me with a deep admiration for this hard-working family, who made us feel so welcome.


To start with, I grabbed a sheet of this rustic coloured patterned paper. Using a chunky hog bristle brush and 'Black Heavy Gesso' I painted it horizontally onto the page and set it aside to dry. The Gesso dries very quickly.


To keep with the rustic / ‘industrial’ theme I found this stencil in my stash. The contrast of the ‘Bling’ texture paste was perfect to use against the black. 


The next step was to splatter randomly, both Sunshine Colour Spray and Sunshine Shimmer Spray over the black areas.


After this was completely dry, I tore strips of some tissue Washi tape from my stash and placed it over the black.


To add some more colour to the background, I painted and splattered both Sienna and Sunshine Shimmer Cube mixed with water.


Finally, using a baby wipe, I rubbed some 'White Heavy Gesso' over the black. This allowed the background to blend in better. Oh! …and I splattered some 'White Heavy Gesso' mixed with water randomly around as well. After the background had completely dried again, it was time to embellish the page using things in keeping with the rustic / industrial theme.


Here are some closeups of the layout.


Thank you for stopping by today so that I could show this to you.

Amy 😊


Thursday, 12 July 2018

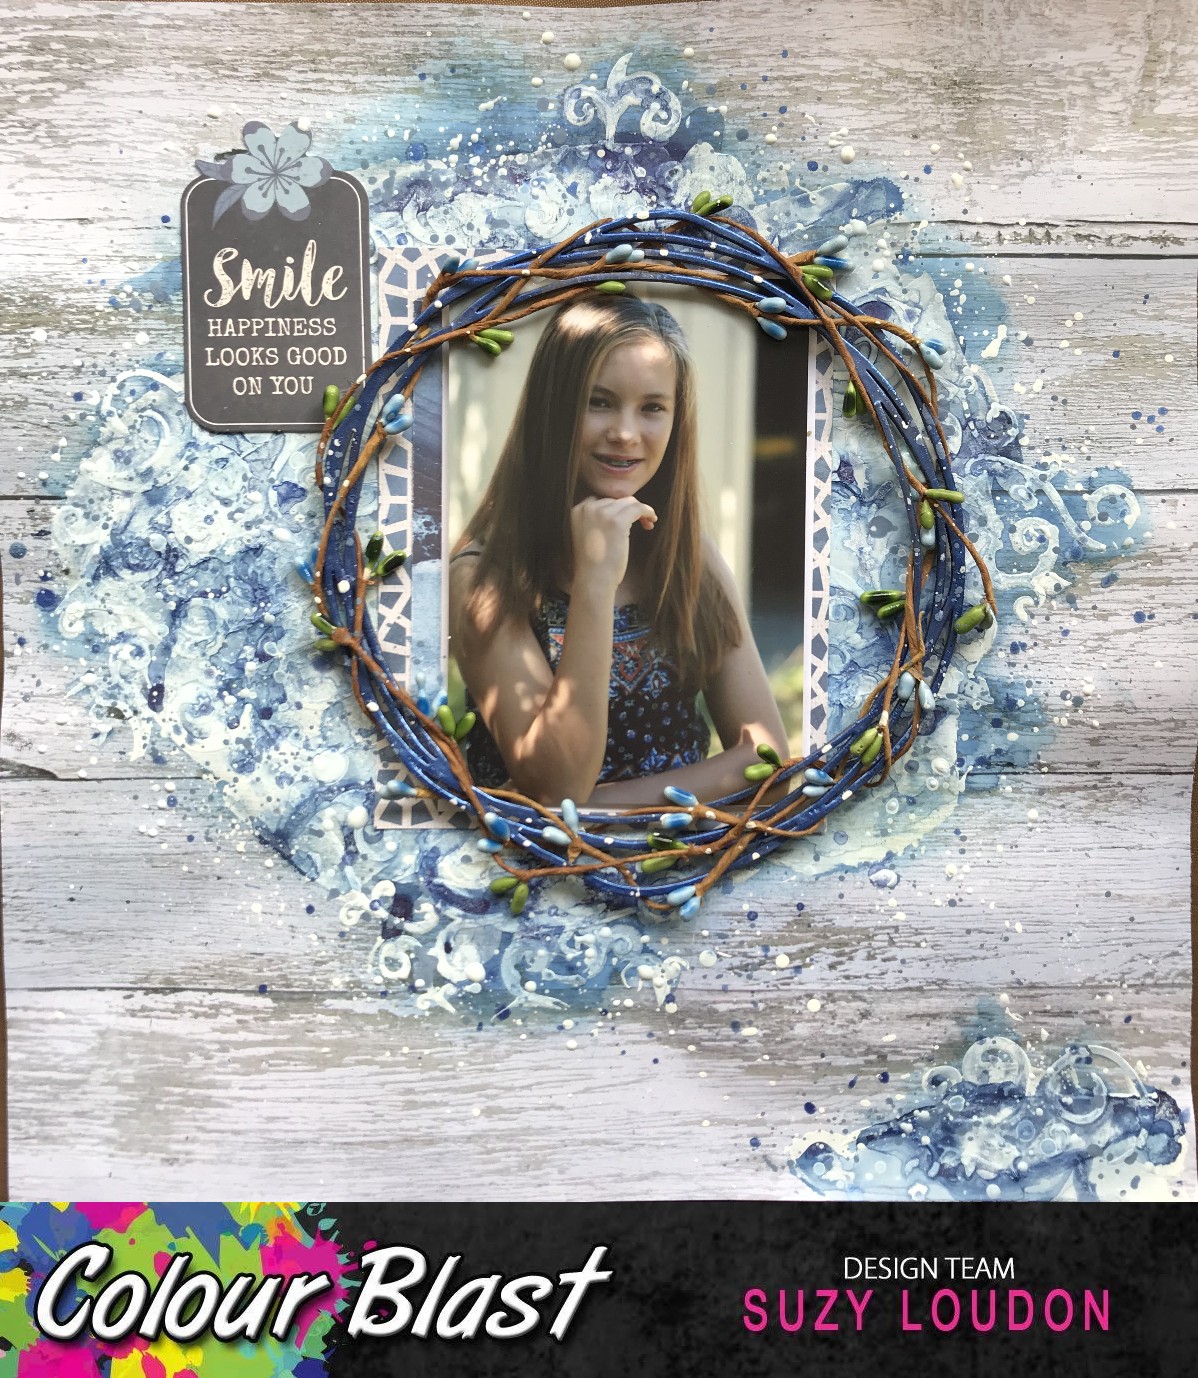
Loving Life by Suzy Loudon

Hello all. I generally use quite a few Colour Blast products on my layouts. But today I've only used four. So even if you only have a few products, you can still create lovely layouts.


To begin my layout I smeared Heavy White Gesso with a palette knife.


Once dry I spread more Heavy White Gesso through a a stencil. I did it really rough & fast not worrying about seepage as I figured it would just add extra texture & you really won't be able to tell. So don't worry if it's not "clean".


Once dry I made up a spray with Navy  Colour Shimmer Dust. I then sprayed some onto my page before adding more sprays of water, spreading the colour around. I dried the area with my heat gun before continuing around the page,


I heat embossed my chipboard with Just Blue Colour  Embossing Powder before twisting a vine around it,


I layered/matted my photo on some patterned papers


After sticking my photo down (& a tag) I covered them before splattering watered down Gesso around.


With the leftover watered down gesso I added some Navy Shimmer Dust stirring it through until fully activated. Then splattering it onto my page.


I grabbed my Just Blue Colour  Shimmer Spray. Gave it a good shake before using the spray nozzle to splatter around.


After all the splatters had dried I thought it needed some more white, so I added another layer of white splatters. Here's what it looked like once it all dried. 


I sprayed some flowers with my Navy Shimmer Dust spray.


Using my finger I dabbed Heavy White Gesso around some words & hearts.


After I had glued down my embellishments -sprayed flowers, the cut out butterflies from the Kaiser Indigo Skies Collection that I was using, as well as cheese cloth & pearls. I then finished off by brushing my butterflies with the Clear Shimmer Brush Marker.


Here are a few close ups.


Thanks for looking.
See you next time
xxx Suzy


Tuesday, 10 July 2018

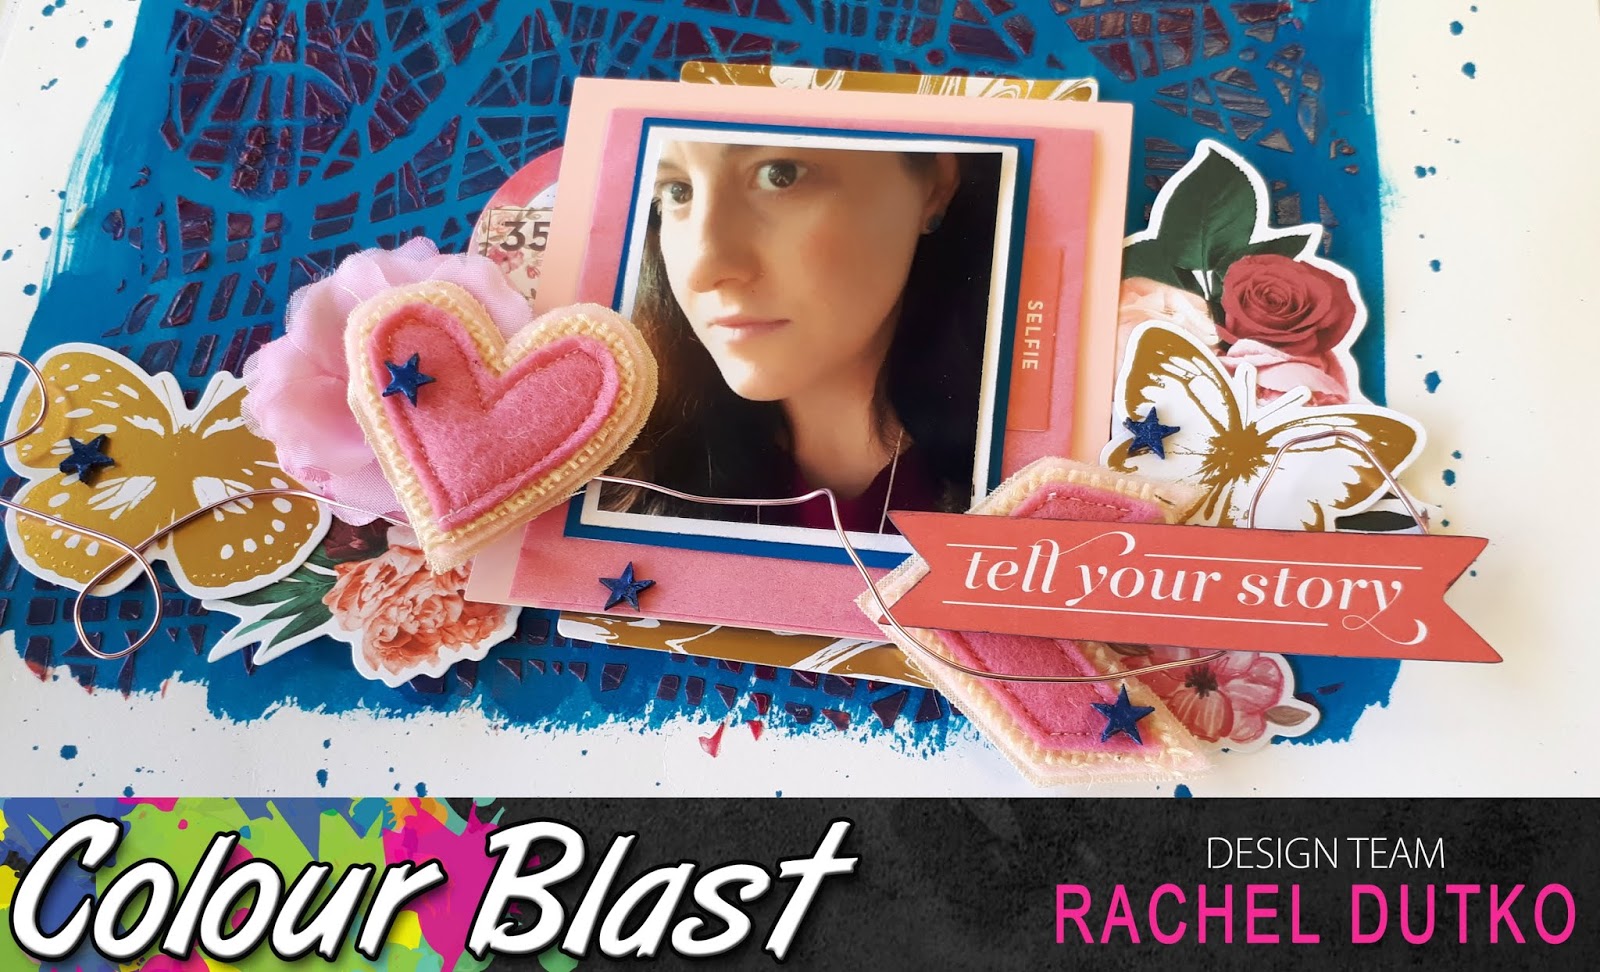
"Tell Your Story" by Rachel Dutko

Hi everyone!

Rachel with you today, with a 12x12 layout to share-
"Tell Your Story"


To start my page I used a small paintbrush and painted some 
Marine Colour Artist Ink onto a sheet of 
heavy weight cardstock. I then added some splatters.


Next I added some Punch and Lipstick Colour Pastes through a StencilGirl stencil.


The stencil had so much detail and I really wanted the background to be a feature so I added my photo and embellishments 
along the lower edge of the background rectangle.


I then heat embossed some chipboard stars with Just Blue 
Colour Embossing Powder, and then scattered them among the embellishments.


Don't be afraid to get in front of the camera 
and scrap those selfies.

Thanks for looking.

Rachel x x


Monday, 9 July 2018

Owls with Selena Stevens

This is a fairly simple page today.  I have also included a process video for you to watch.  Click here to see the video.


To start this page I used one of my new favourite mediums, a resist spray, through a homemade stencil.  Once it was dry I sprayed Colour Spray (Sapphire & Indigo) and Colour Shimmer Spray (Lovely Lilac) once it dries then the resist starts to show through.


I painted some simple owls in with acrylic paint using several colours.


Colour Paste (Sunshine) was applied with a palette knife to give large luminescence eyes.


Heavy Black Gesso was used to add in pupils to the owls’ eyes.


To give the wings the effect of small feathers, a watermark pen was used to make marks for the feathers. Colour Embossing Powder (Lovely Lilac) was poured onto the watermark areas, the excess tipped back into its jar. The Colour Embossing Powder was set with a heat gun. 


With a white pen used for highlights, bring us to the end of this page.


I  hope you enjoyed it.
Selena