Showing posts with label texture paste. Show all posts

Tuesday, 30 March 2021

COLLAGE GIRL CANVAS by Linda Pearson

 Hi Bee Arty friends ....  We are now in lockdown again but let's make the time to create some amazing art.

Today I am sharing a canvas I did last year using lots of mixed media products.  


Bee Arty Products used in this project:

Other products used:
  • Collage papers - Assorted Gel print papers, coloured photo of myself 
  • permanent water colour pencil in dark blue
  • Fiber paste
  • texture paste
  • gel matt medium
  • pink paint
  • plastic bag
   
   
Tear the gel print and photo paper into similar width strips.


Glue torn strips of paper to cover the whole canvas.  Cover the page with a coat of white paint or Gesso to a translucent finish.


Mix the Colour paste - Licorice paste with some Shimmer dust –  Duke.  I also added some fiber paste to the mixed to make a heavily textured paste, but this can be omitted if you haven't any.  Apply the mix thickly through the Face Side Profile 2 - A4 Stencil.  


Mix a  good quantity of texture paste with black Gesso, add some black paint if the colour isn't dark enough for you.  Spoon the paste into the plastic bag, snip a corner of the bag then pipe the texture paste to form the hair line and strands of hair.
Pipe a lace trim along the bottom edge of the portrait silhouette.

Mix some pink paint with texture paint then apply paste through the Flux A6 stencil stencil around the outer edge of the canvas.  Outline around the edges with permanent water colour pencil (dark blue), then add some water to the pencil outline to blend some shading to the stencil.


Thank you for stopping by and hope you are inspired to have a go at creating a canvas for yourself .... enjoy the Easter break 
linda@yourcreativepalette.com.au 
Your Creative Palette


Friday, 13 July 2018

‘Holiday Sunset’ by Amy


Hi All!
My first share for July! 


This sunset was captured on our family farmstay holiday last year. We enjoyed a fabulous week away with a special friend and her gorgeous family. They have a beautiful sheep farm in Victoria. Our trip left me with a deep admiration for this hard-working family, who made us feel so welcome.


To start with, I grabbed a sheet of this rustic coloured patterned paper. Using a chunky hog bristle brush and 'Black Heavy Gesso' I painted it horizontally onto the page and set it aside to dry. The Gesso dries very quickly.


To keep with the rustic / ‘industrial’ theme I found this stencil in my stash. The contrast of the ‘Bling’ texture paste was perfect to use against the black. 


The next step was to splatter randomly, both Sunshine Colour Spray and Sunshine Shimmer Spray over the black areas.


After this was completely dry, I tore strips of some tissue Washi tape from my stash and placed it over the black.


To add some more colour to the background, I painted and splattered both Sienna and Sunshine Shimmer Cube mixed with water.


Finally, using a baby wipe, I rubbed some 'White Heavy Gesso' over the black. This allowed the background to blend in better. Oh! …and I splattered some 'White Heavy Gesso' mixed with water randomly around as well. After the background had completely dried again, it was time to embellish the page using things in keeping with the rustic / industrial theme.


Here are some closeups of the layout.


Thank you for stopping by today so that I could show this to you.

Amy 😊


Friday, 1 June 2018

‘Mixed Media Tags’ by Amy


Hi there ColourBlast fans! I hope you all have been doing some creating. I wanted to share with you, a project based on using mixed media. 


I love making tags, as gifts, as you never know when they might come in handy as a handmade present for someone!


To begin I heavily sprayed water over an A4 sheet of water colour paper. While still, wet, using Sunset, Sunshine, Violet and Sapphire Colour Sprays, I sprayed various areas of the paper then dried it completely with a craft heat gun.


Then I randomly splattered water around the page: this creates a cool water droplet look that I love.


Once all dried again, I trimmed the paper to tag size – if you have a tag-shaped die – even better!


As an experiment, using the water and stencils of my choice, I sprayed the tags with the water, then heat-dried them. This did not quite work out as I had hoped – but you never know until you try!


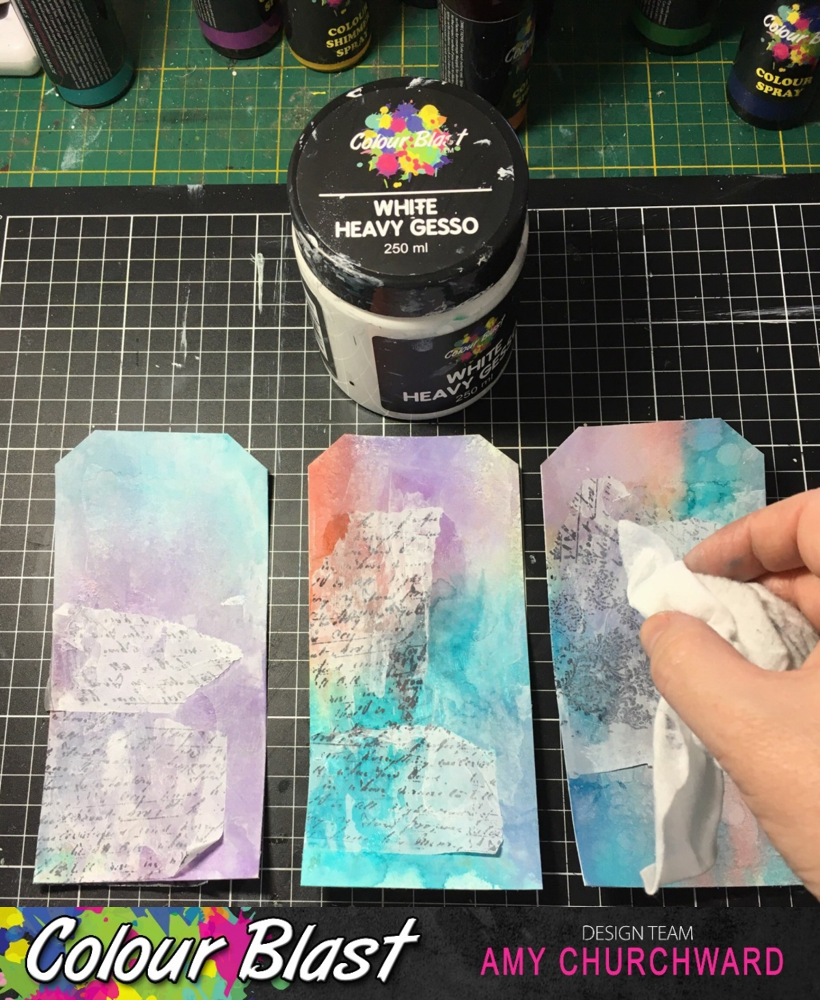
To continue with the mixed media theme, to give some texture, using gel medium, I adhered some plain tissue paper that I stamped with a permanent ink in my stash. To allow the tissue paper to blend in, I rubbed some 'White Heavy Gesso' with a baby wipe.


As pictured here, I stamped the tags using a permanent black ink and various stamps from my stash. To give more dimension to each of the tags, I used various stencils to apply Envy, Lovely Lilac, and Tangareen Dream Texture Paste. I then dried this with a craft gun.


To create an outline for each of the tags, I used the stalk of the Roadbase colour spray and ran it around the edges. 


Then, before the Roadbase outlines dried, I sprayed over the outlines with water and held the tag vertically, (not like in the picture, sorry!). This allowed the ink to run down the tag. I repeated this step for all the tags, and heat dried them.

Next, to brighten the tags, I lined them up and splattered some water mixed with 'White Heavy Gesso' over them – and set them aside, flat, to dry.


While they were drying, I started to browse through my stash of embellishments to choose some to compliment my prepared tags.
And here are the close-ups. 


It was great fun making these tags. I’m really looking forward to seeing your projects for this month’s challenge!


Please join in the ColourBlast Creative Corner!

Amy 😊