Showing posts with label palette knife. Show all posts

Wednesday, 25 October 2017

"My Fave Stars" layout by Sue Plumb


Hi everyone!
Sue Plumb here today to share another design team project with you. This one was a true "stash-busting" layout for me, in every way. I was recently inspired by a comment made by Krisy Podolak about scrapping "old" photos. (You know the ones that you print, don't scrap right away and then they get put aside in a growing pile?) Well this collage, featuring a shot of my Scrapbooking Memories cover from a couple of years ago; along with photos of my boys seeing themselves on the cover was one from my pile.


I started this layout by creating my background on a sheet of cardstock. I sprayed Saffron Colour Spray through an old stencil from my stash. (Whilst the stencil was wet, I also created a reverse monoprint by laying another sheet of cardstock over the top to soak up the excess spray; which I will use for a future project.)


The next step in my process was to add some contrasting colour and texture; which I did by applying some Envy Colour Paste through star stencil from Flutterby Designs. I also smeared the excess paste from my palette knife directly onto my page.


To add further contrast and interest, I took some Road Base Colour Spray and Lipstick Colour Shimmer Spray and splattered them both around my page. I then set my page aside to dry thoroughly.


Once it was dry, I then continued my stash-busting efforts and began adding the other elements of my page. I took the opportunity to use up some old papers, ephemera and washi stickers to create some layers. I then pulled out my sewing machine to add some stitching, which provided subtle texture.


Once my photo was in place, I added my title using up some older Thickers from my stash. (I had run out of the letter 'S', so I improvised by cutting up a 6 and an 8 instead.) I jazzed up my alphas by adding some faux stitching with a Sharpie pen.


Finally, I added a few stamped phrases and my handwritten journaling and my page was complete.


Thanks for stopping by today so I could share this with you. I hope I have inspired you to grab an old photo or two, some neglected supplies from your stash, and to breathe new life into them by mixing them with Colour Blast products.
Until next time, happy scrapping! 

Wednesday, 30 August 2017

Too Glam to Give a Damn by Sue Plumb

Hi everyone! Sue Plumb here today to share my latest Colour Blast project with you. I have been lucky enough to attend two separate scrapbooking retreats in the past month and a half (still not sure how I got that past hubby! haha); which has meant lots of scrappy time for me.
Today I am sharing a project I actually created whilst on retreat, featuring a fun Snap Chat photo of my daughter and I together.


My colour palette for this page was guided by the colours in the photo, so I started by creating my background using some Duke Colour Shimmer Dust, which I mixed with a little water and brushed onto my cardstock.


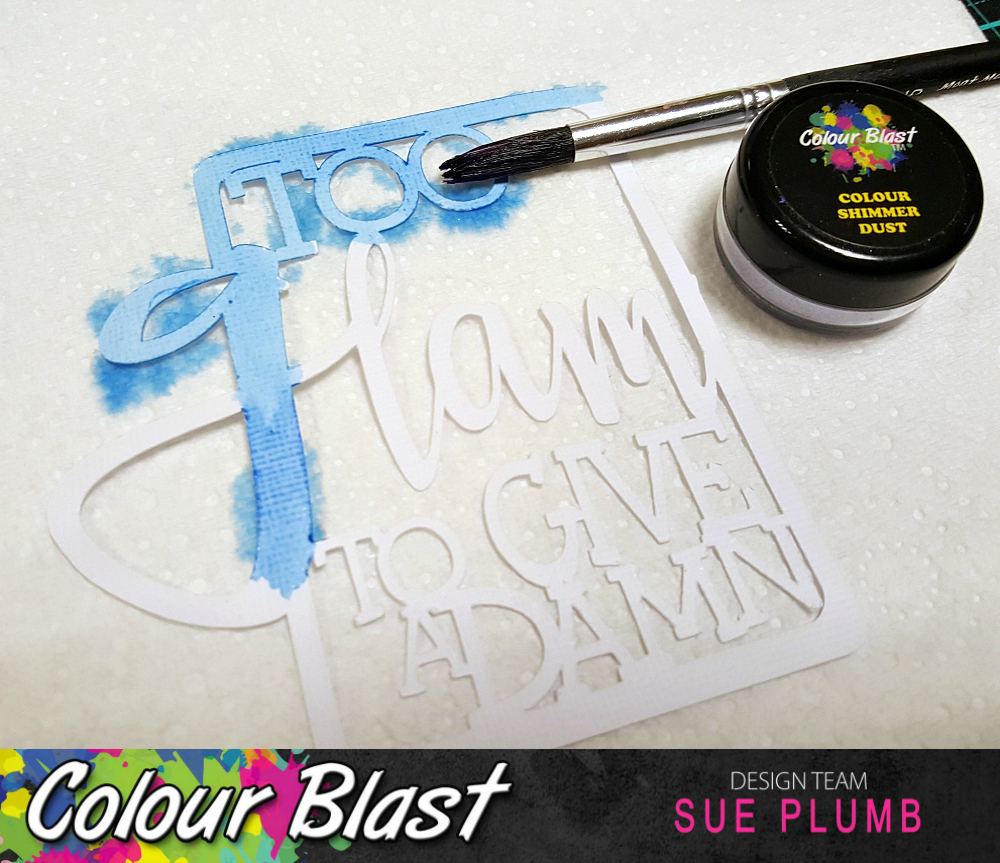
As part of our goody bag we received at retreat, we were given the "too glam to give a damn" cut file cut from white cardstock; which I decided to use as my layout title. I painted it using a small brush and the Colour Shimmer Dust left over from my background.


The next step on my background was to apply some contrast, so I used a star stencil from Flutterby Designs to apply some Blush Colour Paste to random areas of my page. I also used my palette knife to add a few random "smears" of colour, then set it aside to dry.


The final step in my background process was to apply some extra splatters of colour, so I used Colour Shimmer Sprays (Blush, Stormy Weather and Bling) and flicked them around the page.


Once all my mediums were dry, I constructed the remainder of my page. I started by adding a paper doily to the focal area of my page to act as my photo mat and topped it with some frayed gauze.


I then backed my title piece with a project life card and a small piece of scalloped glitter card.


I then mounted my photo and title piece on some scrap cardboard to raise them up, and tucked an extra piece of the scalloped card and some messy pink thread in behind each of them.


Next, I added a Charms Creations handmade heart embellishment, which I topped with more pink thread and a flair button from Cocoa Vanilla Studio.


To finish off my page, I added a few punched glitter butterflies; some sequins and stamped phrases and I was done! (Pages like this are ideal for those who are on a scrapping budget, as there were very few additional materials used beyond the mediums.)


Thanks for stopping by today so I could share this with you. I will be back again in a couple of weeks with another Colour Blast project for you. Until then, happy scrapping!

Wednesday, 10 May 2017

Epic Summit by Sue Plumb

Hi everyone! 
Sue Plumb here to share my latest Colour Blast project with you. Today I have a mixed media 12x12" page to share, featuring photos of one of my boys at our local park. This park has miniature versions of the Glass House Mountains that kids can climb on; and as my hubby climbs the big versions of these mountains all the time; Kaden thought he was awesome climbing to the top of "Mount Beerwah" just like his dad.


I started this layout background with some white cardstock and Colour Shimmer Dusts in Paris and Lush. I first mixed up the Paris dust with water; and then used a wide brush to paint it onto my background. Whilst it was still wet, I took another small dry brush and dipped it into my pot of Lush and then flicked it onto select areas to add a little extra depth of colour. (As the Colour Shimmer Dust hits the moisture on the page, you can see it activate and the colour comes to life.)


The next step in my process was to add some splatters of colour around my page. I first used Rainforest Colour Spray, then Coffee Colour Spray, and applied them both by taking the nozzles from the bottles and flicking them about. I then set my page aside to dry.


Once my background was completely dry, I took my Sienna Colour Paste and a woodgrain pattern stencil; and used a palette knife to apply the paste through the stencil around my page. (Look how the Colour Paste changes from the process photos to the finished layout. Once dry, it becomes rich, vibrant and shimmery.)


Here you can see close up how the Sienna Colour Paste has dried to a beautiful copper finish.You can also see the areas where I sprinkled the Lush Colour Shimmer Dust have dried to reveal a beautiful mottled pattern.


I used patterned papers from Cocoa Vanilla Studio for the layers behind my photos. Into my layers I also tucked a paper doily and some frayed gauze; and then used some copper wire to form a frame over my photo, which I attached using staples.


My other embellishments (die cut ephemera, stickers, enamel shapes, woodie and a flair button) were also from Cocoa Vanilla Studio. I used them to cluster around my photo.


I chose some shiny copper coloured alphas I have had in my stash for ages (I knew I would need them one day!), as they worked beautifully with the copper tone of the Colour Paste; and I adhered them directly across my photos for my title. And with that, I was done!

Thanks for stopping by the Colour Blast blog today, I will be back again in a couple of weeks with another project to share with you.
Until then, happy scrapping!

Wednesday, 15 February 2017

Yum by Sue Plumb

Hi everyone!
It's Sue here, and I am excited to share another of my Colour Blast creations with you. Today I have a 12x12 layout that features Colour Paste and one very chocolatey cake! I made the cake for my daughter's 8th birthday last year after she specifically requested a "minion cake". I have been sitting on these photos for a while, but as soon as my recent package of Colour Blast goodness landed on my doorstep, I knew exactly what I was going to use with them!


Doesn't that Colour Paste look good enough to eat? 
(And believe me, my kitten thought it did! haha)

Here's how I created my layout...
I first started by prepping my cardstock with Heavy White Gesso, which I always applying by smearing it on with an old gift card as it gives good, thin, even coverage.


Next, I used Sunshine Colour Shimmer Spray, which I applied like a watercolour paint by tipping a small amount out of the bottle and then painting it on using a wide brush.


After the spray had dried, I grabbed my Leather Colour Paste as I wanted to play on the rich chocolate in my cake photos. I applied it roughly with a plastic palette knife as I was aiming for the paste to give the appearance of chocolate frosting that had been smeared across the page. I also wanted to draw in the other main colour, so I included some smears of Sunshine Colour Paste as well. (You can see how I scraped it back in parts to allow the Sunshine Colour Shimmer Spray I had applied first to come through.)


Remember that the Colour Pastes dry to a richer and darker colour than they first appear in the pots. Look at the beautiful, vibrant colour once dry (and tell me that gorgeous texture doesn't look like chocolate!)


Next, I grabbed some "paintable" ephemera pieces I had in my stash, which were just waiting for a touch of custom colour. I used the Sunshine Colour Shimmer Spray again, which I applied with a brush dipped straight into the bottle.


My final touch of colour was to add some splatters of Colour Spray in Road Base. (Every project needs a little splatter, right?) I simply take the nozzle out of the bottle and flick it directly on. (Do this before sticking your photos down, or make sure you cover them up if you don't want them splattered too.) 


After all my background work was done, it was simply a matter of applying my photos, remaining embellishments and a little stamping. 
Here are some close-ups of my finished project so you can appreciate the true deliciousness of those Colour Pastes...


Look at that texture and shine!!


I didn't wait for the Colour Paste to dry before applying my alphas, I simply pushed them into the fresh paste so it would squish around them.


Is it obvious that I love to layer? ;)


Thanks for stopping by today so I could share this project with you. I hope I have inspired you to pull out some photos you've had laying around and get them scrapped! 
(With Colour Blast products you can make your own custom background to match so there are no excuses!)
Until next time, happy scrapping!