Sunday, 27 February 2022

Love This by Tracey Campbell

Hello everyone, Tracey Campbell back again to share with you today. Did you know that Bee Arty has a monthly challenge? You didn't !! Well if you would like to find it head to the Bee Arty Hive on Facebook, here you will find the challenge along with all sorts of inspiration from the Creative and Design Teams, beautiful layouts that the members of the Hive have done, along with a group of friendly lovely people ready to say hello and welcome you.  I used the Bee Arty February Challenge as inspiration for my layout, so grab a cuppa and sit back with me as I take you though my process.

The February Challenge was a sketch challenge with beautiful hues of purple. Now you do now have to use both the sketch and the colour palette together if it is too challenge. You can simply do the sketch or just use the colours. The choice is yours.
I deicide to give both a go.
I started by going through my stack of Bee Arty paper supplies to see what purples I had. I found lots of smaller pieces of  paper left over from the Trend Setter Collection and a piece of Symbolic from the Three Six Five Collection but I didn't find a complete 12x12 for the background so I had to create one.
To do this I took out a piece of  White Cardstock, the Vamp and Basket Background stamps
Using a clear Embossing Ink stamp the large image from the Vamp stamp set onto the centre of the white cardstock, the repeat so that the image spread across the base. See the photo below for the final placement of the stamping. You will only be able to see a slight image of the stamp at this stage, I have already applied Embossing Powder to this image below. Which is the next step I will take you through.
One at a time sprinkle some Colour Blast Embossing Powder randomly over the wet Embossing Ink and tip the excess back into the pots. I used Lovely Lilac, Blush and Rose Petal, all three colours beautifully match the colour selection for the challenge. Remember to sprinkle, then tip off the excess. Do not do another colour until you have tipped off the first colour or you will mix up the colours of the remaining Embossing Powders.
Next use a heat gun and activate the Embossing Powders. You will create a stamped background that has the image with various colours through it. 
Next use a purple ink and stamp the crosshatched flower image from the Basket Background stamp over the top of the Embossed Vamp image. Tip: I have actually cut the rectangle boarder off from the Basket Background creating two separate stamps. I did this simply by pushing through a very pointed pair of scissors through the blank corner of the stamp and cut around the Basket Background, being very careful where the two images get very close to each other. It can be a bit scary doing this but it gives you more flexibility with the stamp - creating two from one.
Next I used Lovely Lilac Colour Shimmer Spray and squirted it around the page. Hint: When using the Shimmer Sprays if you press the squirt head down slowly it creates large drops, when you press fast it created a fine spray.
The photo below is how the back ground looked after I had finished spraying the Lilac Colour Shimmer Spray on it.

I felt it need a bit more contrast to the background so when dry I took the lid off the Royalty Shimmer Spray and flicked drops of it across the page using the straw as the tool to create droplets.
Here is the final background. 
Next I cut and tore two pieces of the purple papers from the Trendsetter and Three Six Five collections. I left straight edges on the top and left hand side of the paper and tore the edges of the right and bottom edges. I then used the Vamp stamp set and the Rose Petal Embossing Powder to stamp the left and bottom of the rough rectangles and set it with a heat gun.
I then adhered the paper rectangles together, overlapping the bottom right corner of one and the top left corner of the other. I repeated this and adhered the photos the same way. This created a funky shaped photo mat.
I then glued the matted photos to the background, see the final layout for the positioning. The next step was to create a rectangle boarder around the photos.
To do this I used the rectangle edge from the Basket Background stamp. I covered up my photos with some scraps of cardstock, so that they wouldn't get any ink on them. I then used some purple ink and stamped the rectangle around both photos. 
I then decided that the background didn't look complete I felt it need a bit more of a mulberry colour to it to complement the colour palette in the challenge. So I mixed my own colour using two Colour Blast Colour Sprays. I poured a small amount of Bubblegum Colour Spray into a container then added two tiny drops of Indigo Colour Spray. I mixed them well and added a boarder around the very edge of my base. I then added a drop of the liquid to the edge and blew through a straw to make the liquid spread out across the cardstock. 
I embellished the layout by adding some paper flowers.
The final step was to add a title. 
I am happy with how it has turned out, I do know I need some more purple tones and hues in my scrapping supply for the future as I am now out of them. They are not usually a colour I use much but I really like the monochromatic way it all looks.
Thanks for stopping by.
Hugs
Tracey


Saturday, 26 February 2022

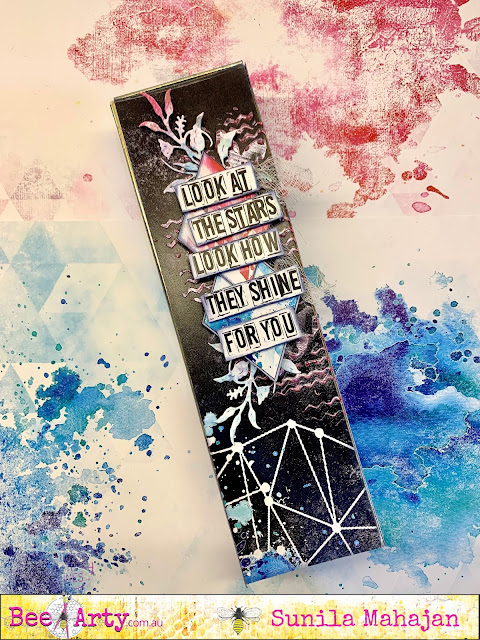
Altered stationary box by Sunila Mahajan

 Hello friends,

Sunila, here and I'm back with some quick inspiration for you all. I have an eye for altering and upcycling objects. At home, everyone checks with me before discarding anything, just in case I can upcycle it. 

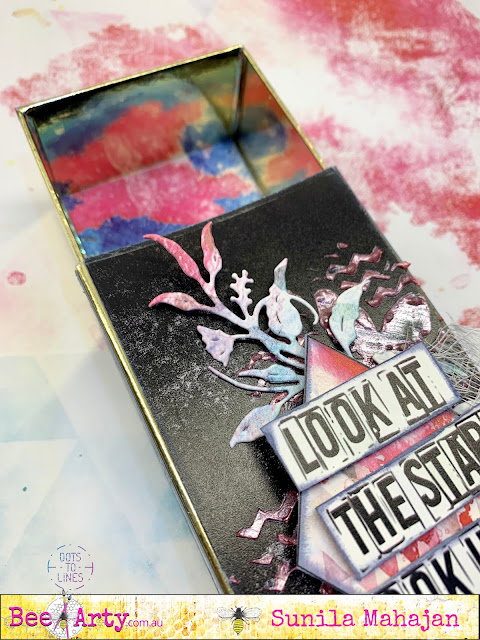
Today, I've upcycled an incense stick box, to create a stationary holder. It makes for a perfect gift, as well as utility item to hold pens, pencils, brushes, etc. in place. 

Here's a look at it:


I've used the Fearless. Brave and Free Collection. 


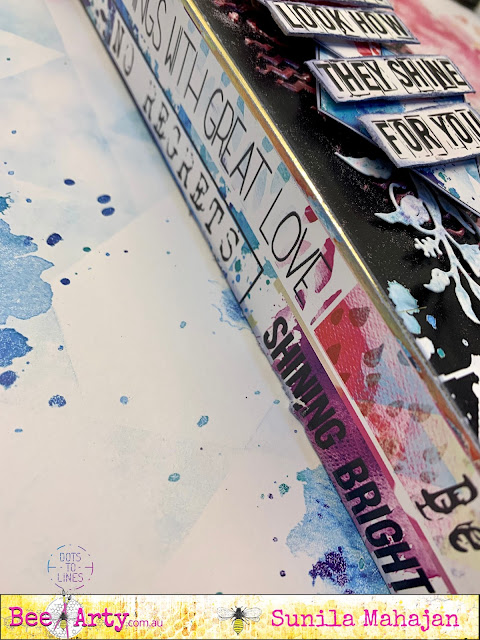
I trimmed pieces of paper to glue on the inside as well as outside front and sides of my box.


After gluing these, I used a stencil and colour paste to add texture on the top, and added some elements from the same paper pack to create a focal point.


I cut out a phrase and added that to add more  meaning to my box. I particularly loves the sides with all these optimistic words, that I'm bound to read every time I pick it up. 

Thursday, 24 February 2022

Crazy Eyes created by Tracey Thorne
 Hello creative friends, I hope you have received your new Fireworks kits or have picked out some favourites and are ready to create with them... this range is AHmazing!


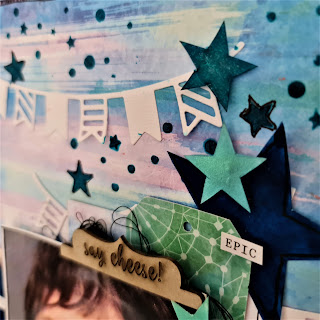
I had so much fun creating this page. Inspiration for this one came from the Party Metal Die - I cut a whole heap of those amazing banners with the Cuttlebug  & white cardstock. I then chose to use a sheet of Magical printed cardstock as my base - I used the A side of the page and layered the banners up and down and across the page. After gluing them down I used the A4 stencil Fireworks  and a mix of Liquitex Matte Super Heavy Gel and Colour Shimmer Dust in Peacock to add some highlight dimensions near the banners.


While this was drying I chose some other papers to create a photo stack - Showtime cards, Big Hugs and Bunting. I bordered these with black pen. The green papers I cut corners and made them into tags to layer behind the photo. I gave the photo height by adding some thick cardboard under it before adhering to the page. I also created a black border around the outer edge of the page using a fudeball pen. 


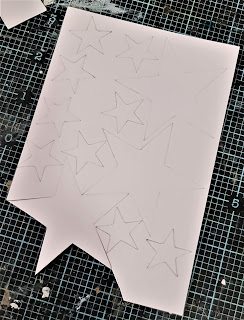
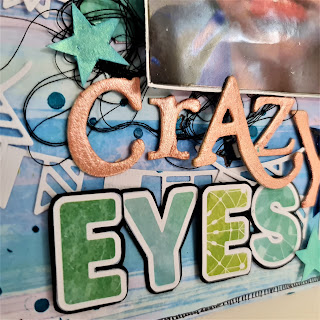
I wanted to add a bit more dimension to the page so I drew some stars on white cardstock and then cut these out and coloured them with a range of Colourblast powders and inks. 3 Large stars were coloured using Dye Ink Marine, 9 smaller stars coloured using Mica Powders - Envy, Deep Water and Shimmer Dust - Peacock. The larger stars were given black borders. The smaller stars had foam tape added to help lift and give them dimension. The stars were placed around the top of the photo & down the bottom near the title. 


The title was created using a combination of fonts. I had a chipboard font in my stash that I coloured using Reeves Irridescent medium and Tangarine Dream - this is textural and blended well with the skin colour of the photo - it has a fabulous shimmer to it too. I cut the second part of the title out of the Alphabet cardstock, the letters were backed on to black cardstock before being added to the layout. I added foam tape to the E's to give them a little lift also.


A great finishing touch to the page was adding a Dusty Attic tab that came in the kit just above the photo. I have also added a little journalling by typing up some words and placing them around the photo.


Overall this kit with a few little extras is a must have my friends. I'm loving how this has turned out & it fits in perfectly with the fun photo I have chosen.


Have a fabulous creative week


Tuesday, 22 February 2022

Adventure by Charmane Koch

Happy 22/02/2022! We won't see that again will we?

Hope everyone is getting into the swing of things for 2022! Can't believe it's going to be MARCH next WEEK! How does that even happen?

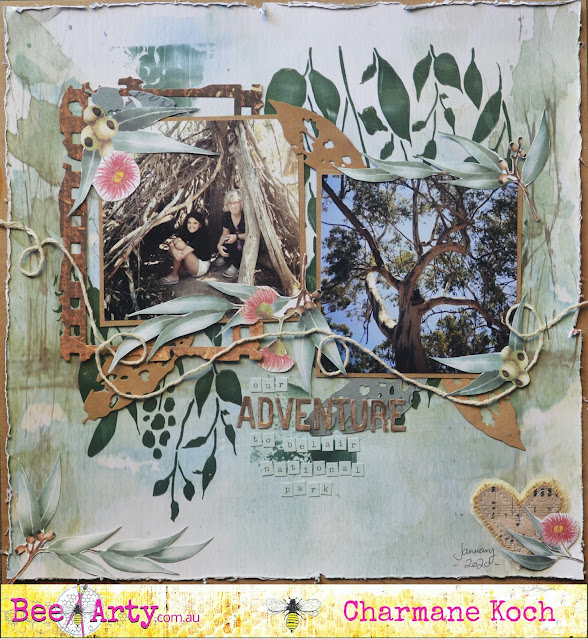
Anyway, today I am sharing with you a layout I created combining Road Trip & Embrace Change Collections - as they can blend in together really well - as you can see with this layout!


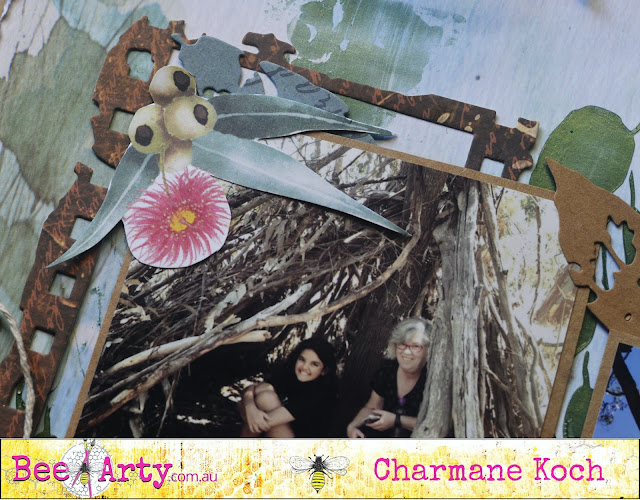
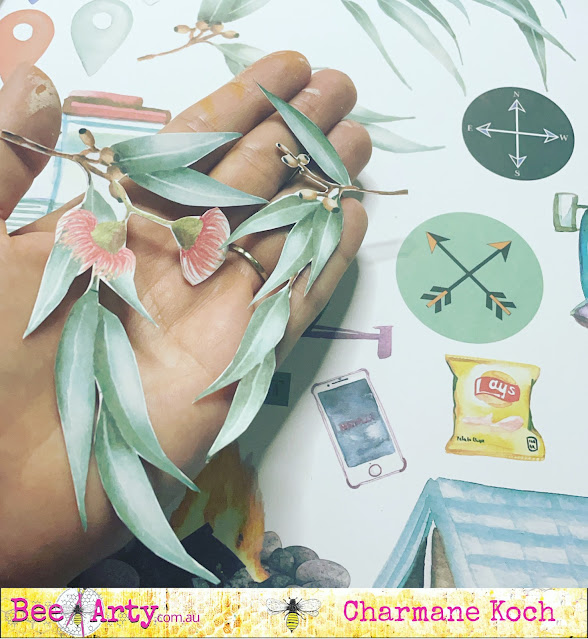
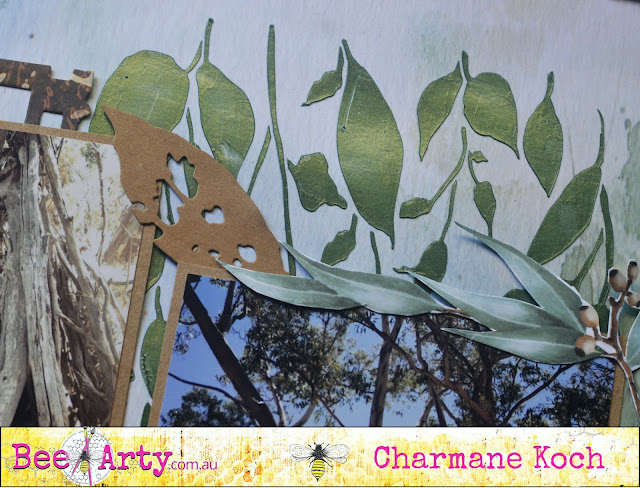
I thought the Exclusive cutouts from the Road Trip Collection were cute, so cut some of the leaves out, as I had in my head an Australian gum tree themed layout.


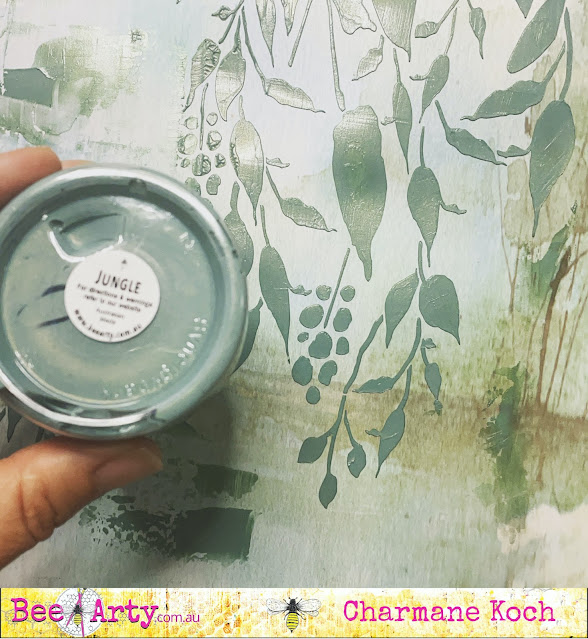
Using the Road Trip - Scenic paper as my base, I scraped some Jungle Colour Paste using a spatula over the top of the Cascading Leaves Stencil...


Once dried with a Heat Gun, Jungle is such a gorgeous colour!


This layout was quite easy to put together! All I did was matte my photos with Kraft cardstock and layer the cut out gum leaves, and also some "Old Leaves" Die cut outs using Kraft cardstock. I also had cut out a Grungy Film Strip


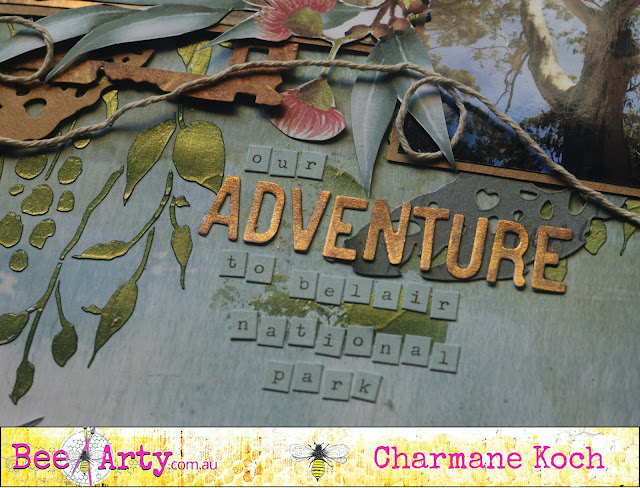
To create my title I used the Road Trip Words "Adventure" colouring it with Bling Mica Powder & Water.

I added my trademark swirly kitchen twine with a few staples... and of course a Charms Creations Heart to finish off the layout! 


Here's what I have used...


Thanks for stopping by & hope I have inspired you to create an Australian themed layout!


Take Care & Stay Safe!

XO Charm

Monday, 14 February 2022

Katy you're a Firework!


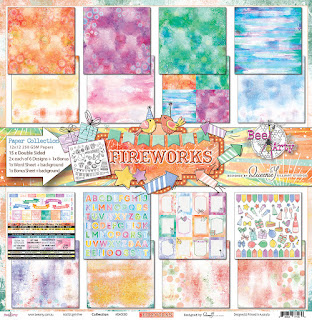
Hi Bee Arters ... Today I am highlighting the new FIREWORKS collection designed by Queenie Y @ Silluart Studios  and being released tomorrow. 

For your opportunity to grab this and other upcoming collections, subscribe to the Bee Arty kits today ...  Join kit club 


This collection provides great opportunities to celebrate special occasions in a fun and very cute way.  As an art journaler and mixed media artist I looked at this collection with a different lens - Firework was a very successful song by Katy Perry and is a great addition as 'dance party music' so I created a journal page with the chorus lyrics as a link to the collection.  Of course a photo could be used to create a celebration layout.  Enjoy the process and hope you have lots of fun with this collection. 

Fireworks collection designed by Queenie @ Silluart Studios

Music A6 stencil

Fireworks A4 stencil

Party metal die

Uppercase stamp set

Fireworks Cardstock –Big hugs paper(2 sheets – use back quad papers for die-cut shapes)

Showtime Tag Sheet

Colourful word sheet

Bunting (rockets)

Colourblast Shimmer dust – passion, lollipop, amber

Life of colour pens or paint pens

Craft Powder Spoon

Gesso – Bee Arty heavy primer 250ml White

Mounting tape

Archival Ink Pad Jet Black

Texture paste

Modge Podge dimensional magic


Textured background –

a) Lay out three small amounts of texture paste out onto a palette.  Using a Craft Powder Spoon

small amounts of Colourblast Shimmer dust – passion, lollipop, amber to the paste, mix thoroughly.

b)  Carefully spread the mixes through the Fireworks A4 stencils creating a rainbow effect e.g. begin with passion mix, then lollipop mix in middle with amber at the end of the spray/stars. I added the paste across the top of the page. Allow to dry.


c)     Once dry, brush a small amount of Modge Podge dimensional magic over the textured stencilled areas to create some shine to the fireworks.

d)     Add Music A6 stencil to the remaining parts of the cardstock using Gesso, a makeup sponge or dauber  by lightly pouncing the gesso through the stencil. Dry off.


e) Add some fire burst ‘ghost’ stamping around the sheet using the Uppercase stamp set and black ink.


Wording and song lyrics

a)     Carefully add the word F I R E W O R K to the page using Uppercase stamp set and Archival Ink Pad Jet Black.  Add detail colour to the stamping using blue, orange, violet, pink (Life of colour pens or paint pens). 

b)    Write the Chorus lyrics of the song to the page (type or write onto cardstock if preferred).  Add a loose (double border around the text using black paint pen, then colour using the same colours as before).


Focus Image/Photo -

a)     Cut out the rocket tag from Showtime Tag Sheet, add an image/photo cut to size to fit inside the white area of the tag.  Cut out three ‘rockets’ from the Bunting (rockets).  Then die-cut the Party metal die and the party hat from the Fireworks Cardstock – Big hugs paper (back - quad sheets) and the words dance party music from the  Colourful word sheet.

b)     Mount the photo tag to the bottom of the page using thick mounting tape, then adhere the rockets, party hat and bunting to the page.  Add the words sentiment to the image also.

c)     Add a border to the cardstock sheet using the violet and black paint pens.

Thanks for stopping by and look forward to creating again for you soon.

Cheers from Linda


linda@yourceativepalette.com.au