Sunday, 13 February 2022

Beautiful Mistake part two by Tracey Campbell

Hello everyone, happy Sunday to you all. Here is my latest layout I have created.

The other week I ended up creating this Dream Catcher from a mistake that I made. 
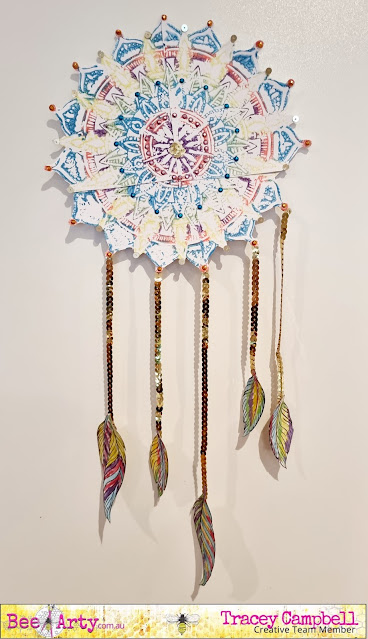
I blogged about it here... if you want to see how I create it. This week I am using the Dream Catcher on a layout and continuing my Beautiful Mistake journey. 
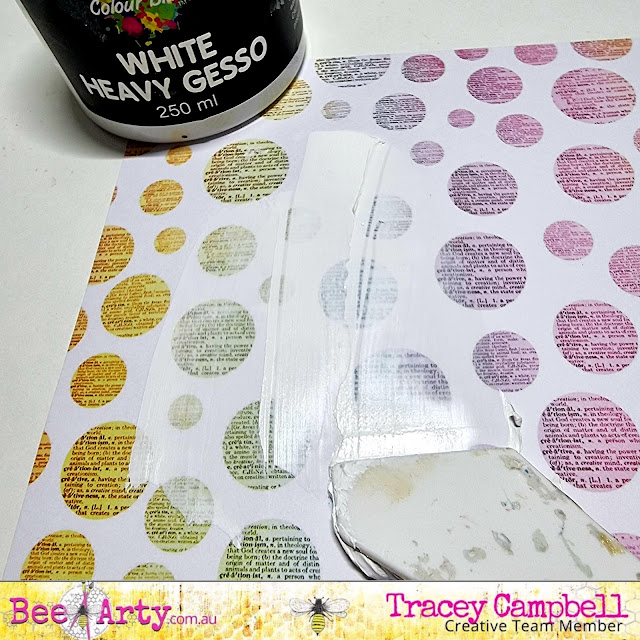
I used the patterned paper with the word circles on from the Arty Farty Collection as my background I applied a layer of Heavy White Gesso to the area where I was going to position the Dream Catcher. 


Applying the Gesso dulls down the printed area of the paper to create a colour block, " a perfect space" to create. The duller background allows the photo or the embellishment to stand out more.


When the gesso was dry, I used some Bling Colour Paste and the Boho Mandal Stencil to add the beading of the Dream Catcher back. When fussing cutting the Mandal out to create a Dream Catcher I had to cut off the vines and beads, as they were way too fiddly for me to cut out. I positioned the beads roughly to the positon where they would have sit fir still attached and where I knew I wanted to glue my Dream Catcher down to, on the background.


I also added the small half mandala from the Boho Mandala Stencil to the right hand side of my background paper.


Here is the positioning of the stencilling with the Bling Colour Paste. I must admit of all the colours of the Colour Paste, the Bling is my favourite, the gold is perfect (not too yellow or dull) and the way it dries makes my heart pitter patter. Once dried I adhered the Dream Catcher over the top, see the final photo for the positioning.


Next I found a photo (4x6 inches) that I thought would suit and cut out 6 different rectangles, the same size of the photo. I also cut out two pieces of vellum the same size. For my papers I used a variety of patterns and colours from the following collections:


Next I distressed the edges of the rectangles with a distressing tool, then screwed them up into loose balls of paper, untangled them and flattened them out. Tip: if you don't have a distressing tool use the edge of a pair of sharp scissors and run the blade across the paper edge but be careful of your fingers. 


Once flat I stacked them under my photo so that at least two of the edges of each rectangle were peaking out. This creates a photo mat with "attitude"  :) it is quiet hight and adds lots of dimension to the layout. Adhere the photo stack to the bottom right hand side of the Dream Catcher. 


To create some addition layouts I tucked in some gold paper doilies and string wreaths that I cut out of some white cardstock with the Sting Wreath metal die. 
I shortened up the gold sequins string, that attached the feather to the Dream Catcher so that they didn't dangle off the page.


Next I cur out a stack of single words from Sweet Talker cut apart in the Bohemian Bliss Collection and distressed the edges. I then adhered them around the layout in random places (see final layout below for positions).


Some close ups.


So I hope I have inspired you to keep going if you make a mistake and not to throw it away, try and create something from it. 

Hugs until next time,
Tracey


Saturday, 12 February 2022

One Page Album by Sunila

 Hello Bee Arty Lovelies,


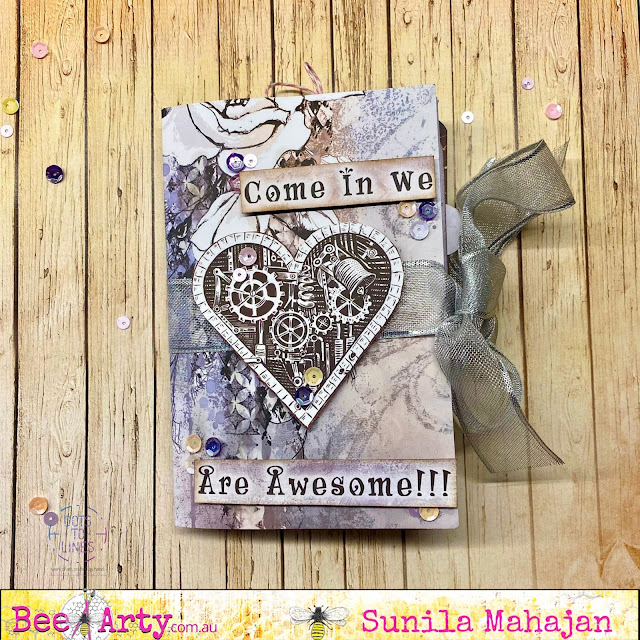
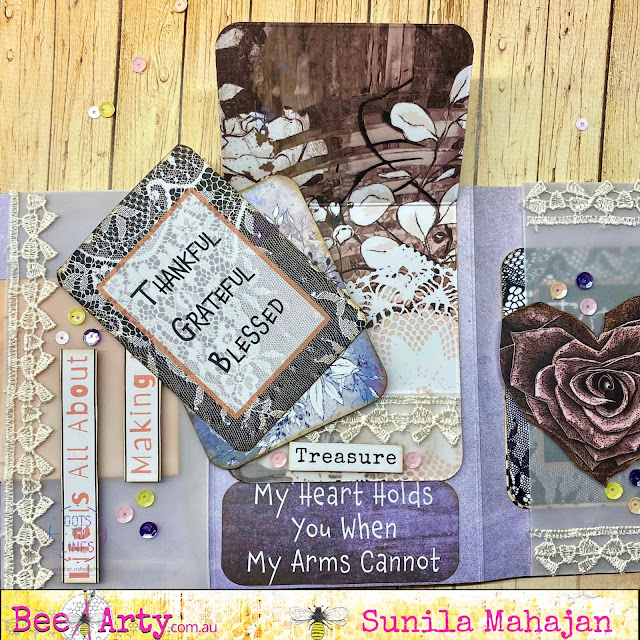
Hope you are all doing well! I'm back on the blog and this time I'm creating a One Page Mini Album. With Valentine's around the corner, I thought this would be a perfect creation to hold mini photos and make for a perfect gift. 

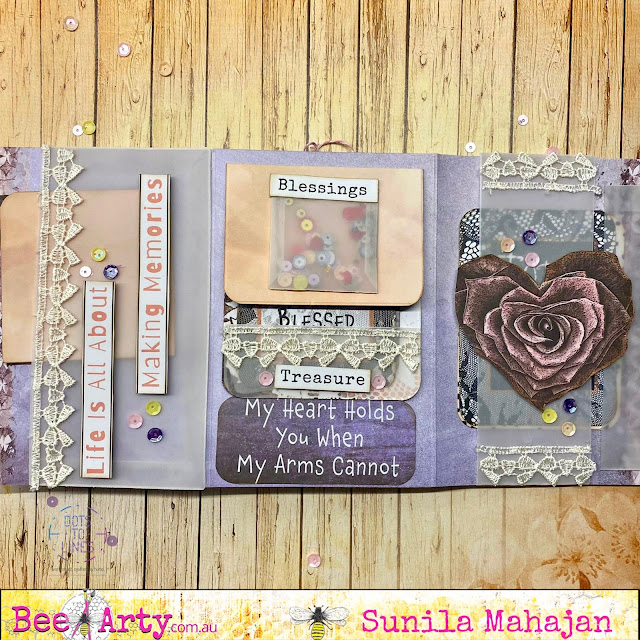
Before we see how to create this, here's a look at it. 


I'm sharing the basic steps of creating the book. Decorating it and adding elements is a personal preference and also depends on the collection one is using.

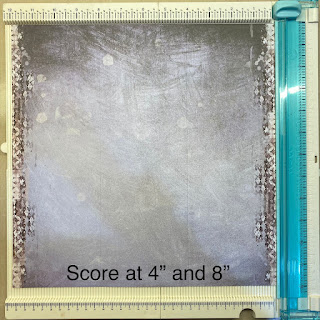
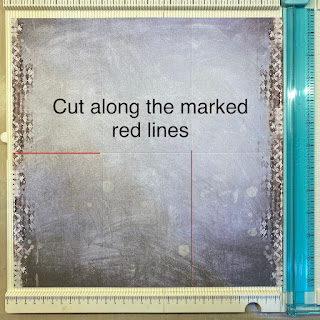
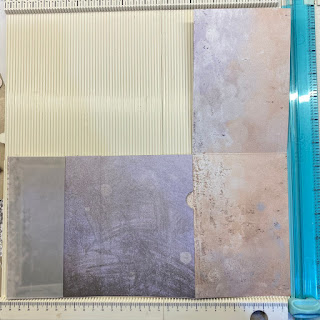
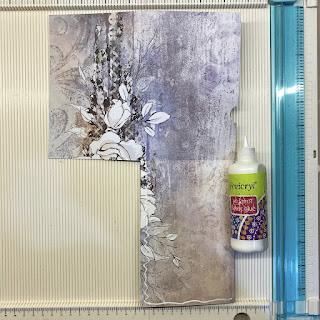
Step 1: Start with a 12" paper and score as indicated. 


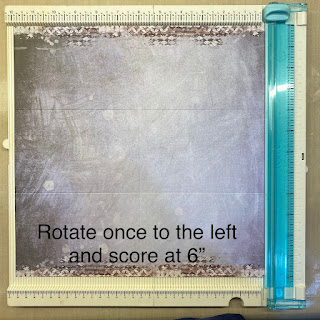
Step 2: Rotate the paper and score.


Step 3: Cut as indicated in the picture.


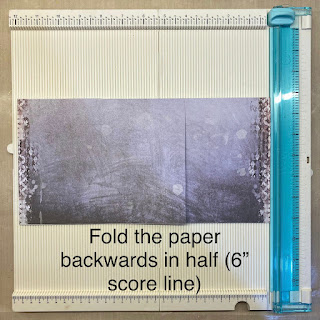
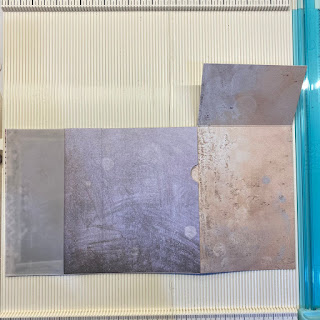
Step 4: Fold half, backwards.


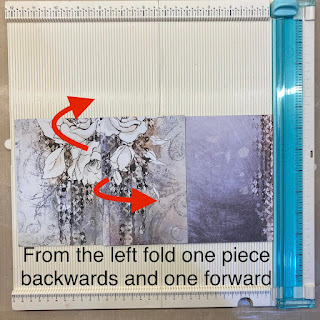
Step 5: From the left fold one piece on top and one piece at the bottom to start closing the book.


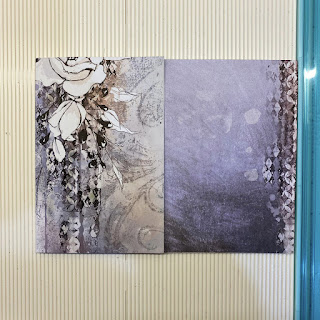
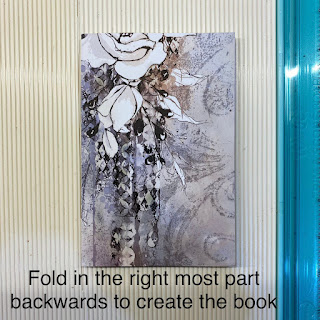
Step 6: Fold the remaining part on the right backwards.


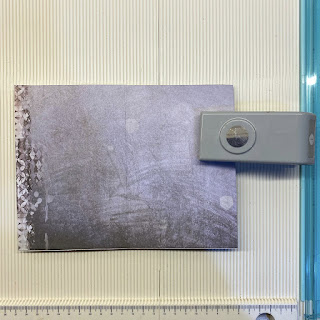
Here are a few pictures, of how to add some tabs and pockets using a punch and vellum. 


Glue the flap to create pockets.


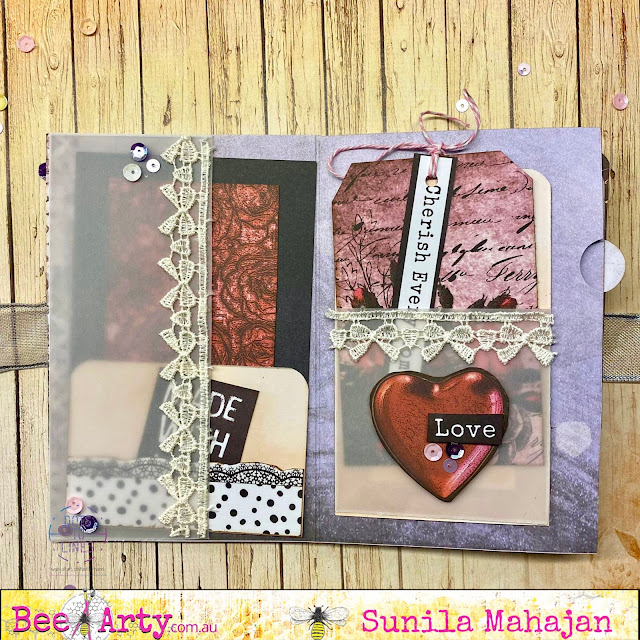
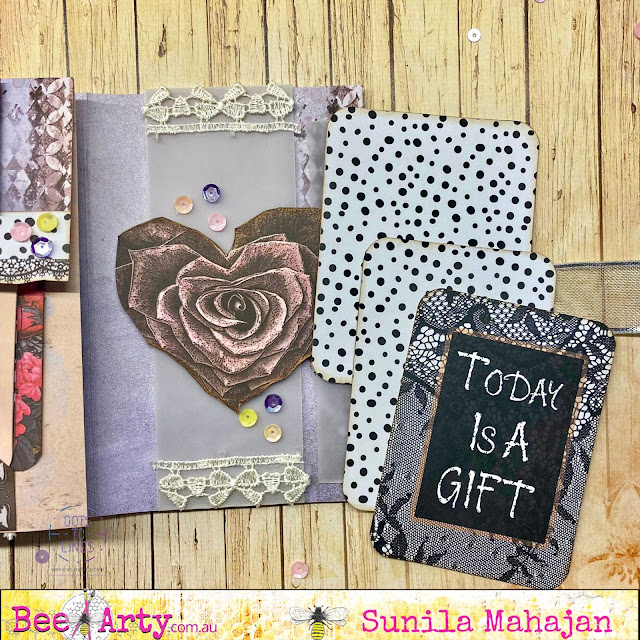
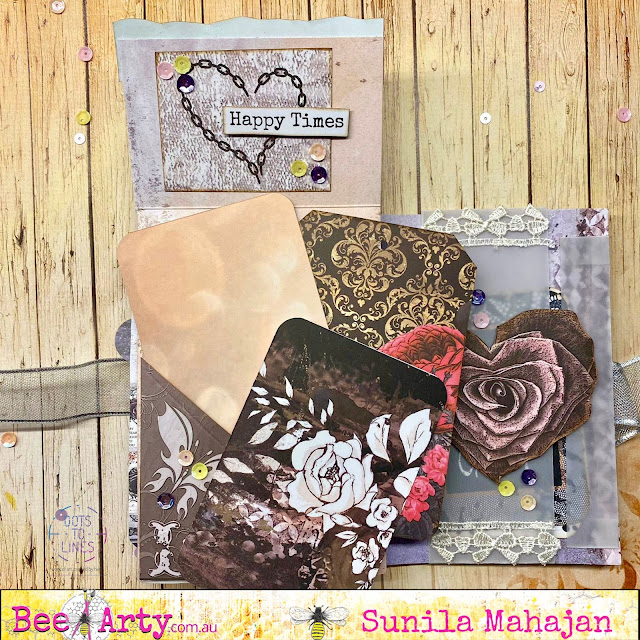
With this the base is ready. Here are some photos of how I decorated it.


Supplies used:
I've used left over papers from Grateful Heart and Vampyre Rose


Hope you enjoyed!
Hugs,
Sunila


Wednesday, 9 February 2022

JOY created by Tracey Thorne

 Good morning to all you wonderful Bee Arty readers and creative peeps.

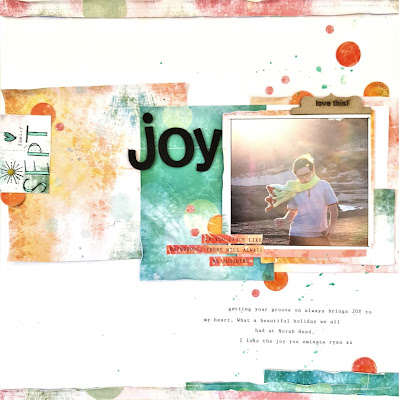
I am just too excited about the new release of the Fireworks collection coming up designed by the lovely Queenie Yeung that I created this12 x12 page last night and just had to share. The vibrancy of the papers you will get in the kit are outstanding. 

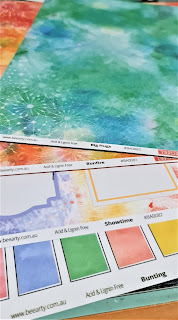
Now I did not want to give too much away to you all because next week is the big reveal where you get to see the whole range... but here are just four of the fabulous papers that will be available... Yes they are double sided so in my sneaky share layout I have used 2 A sides and 2 B sides and the quality and feel of this printed cardstock is amazing.


I have started with a base page of 250gsm white cardstock and to that I have cut 10cm wide squares from Big Hugs and Alphabet. I have also cut 2 x 1cm strips from Bunting. The photo stack was created by layering smaller offcuts of these papers so that they were just protruding past the photo. 


After finding placement of the printed paper I have sewn the top strip and also a strip through the middle of all the pages . 

I have created an embellishment to the left by using the stamp Uppercase....absolutely love this ... it has some cute extra little stamps that are great for that little extra on your page. 


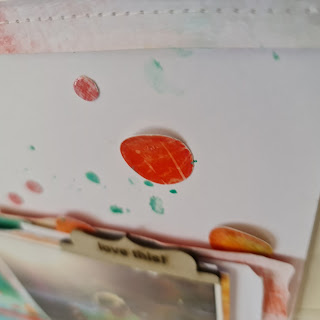
All of the punched circles were added with a dot of glue and then Glossy Accents were added, as this dried naturally it has slightly lifted the circles giving them a nice lift and added some dimension to the page.

I have then gone and lifted the edges of my paper using my fingers. I have typed a quote on a little of the Bonfire cardstock and adhered this with tape. I have also added more journalling to the bottom of the page on white cardstock.

Colourblast Colour Mica Powder in Envy was splattered a little above and below the photo. I have also painted in the hollow of the Alpha stamp - SEPT with a little of the powder. Oh and not to forget the great addition of the chipboard tab from the kit to finish off the layout. 

This range is a pure joy to work with and I am sure you will love it as much as I have loved working with it. The team have a lot of fabulous work coming up to share with you - You really don't want to miss out on purchasing this one!


Happy Creating


Tuesday, 8 February 2022

"Road Trip" by Charmane Koch

 Happy Tuesday Everyone!

Hope you are all navigating through this very interesting start to 2022 - at the moment it's Online Learning or back to school or both! Life has never been more confusing! And we thought it was going to get better?

Anyway, we just gotta go with the flow, don't we? 

Today I wanted to share with you a layout I created for a recent Aussie Day Crop - and how perfect was the Road Trip Collection to use?

I started off with this AWESOME "LOST" paper:


I knew I didn't need to do much with the background and that the "Tracked" Stencil would be perfect!

The Which Way Die was a perfect addition to my layout {the sign with the bird on top!} I decided to keep it plain so that it would stand out!


I just loved the little bits and pieces to cut out from the Exclusive piece in the Road Trip Collection pack! 


The "Road Trip" Word was perfect too! I kept that plain to stand out too!


Quite a simple layout to put together once I had cut out all the bits! Added a bit of journalling, corrugated cardboard & a Charms Chevron!


Thanks for popping by and I hope I've inspired you to use your Road Trip Collection! Or if you haven't got your hands on it yet - check it out! Especially the fabulous Dies & Stencils!

These are the ones I used:

\


Happy Creating!


XO Charm