Thursday, 13 January 2022

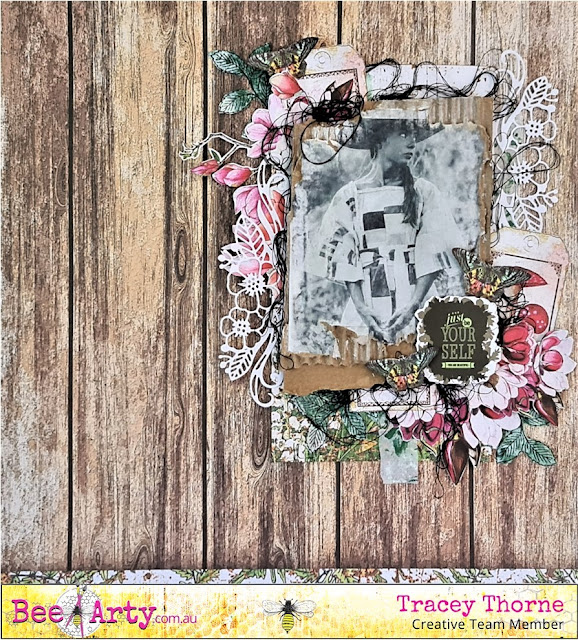
Just be Yourself created by Tracey Thorne

 Hello Crafters 

I have had a play with the Whispering Woods collection by Sue Smyth and oh my, there are so many wonderful elements that are being called out to me to be layered. I really enjoyed putting this 12 x 12 layout together and I hope you enjoy my process using these beautiful goodies.

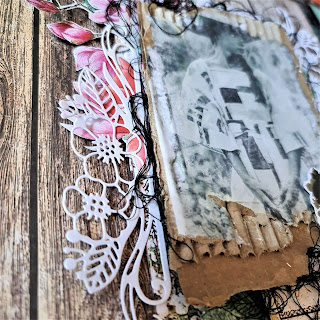
 I have decided to do a little image transfer of a photo of my daughter onto a piece of corrugated cardboard. I prepared a piece of corrugated cardboard by painting it with Gesso. I have printed the photo onto copy paper from my home printer and then applied Gel Medium to the photo and to the corrugated cardboard. Both are then joined right sides together and left for a few minutes to dry. I have then peeled the copy paper away to leave the photo image. Remaining paper pulp on the project was sprayed with water and gently rubbed off. I finished the image off by brushing over a layer of the Gel Medium to seal the photo.


The B side of Fernery cardstock with its rich wood texture is the perfect base for the background to my layout. I cut a piece of  Whispering Woods Forest Floor cardstock 11.5cm x 21cm and adhered this to the page. I have then chosen 3 florals from the Whispering Woods Imagery cardstock and fussy cut  the floral ephemera as well as 3 of the butterflies on the same cardstock. These were set aside for layering. 


I prepped a piece of tissue paper using my Gel plate, white & green paint and the A5 Vampyre Rose Dusk stencil. I have let this dry and then stamped some leaves from the Celebrate Nature Stamp. These were fussy cut and set aside. I have cut two of the flower elements from the Forest Favourites Metal Die out of white cardstock. Other ephemera needed to complete the page were two tags cut from the Woodland Tags cardstock and the sentiment square from the Natures Words cardstock.


To put the Layout together I have torn some of the tissue to layer under the photo layer. I added foam tape to the photo, the sentiment square and to the wings of the butterflies before layering the elements on the page. Black cotton was also added under the cardboard of the photo. I have layered the very delicate and beautiful die cuts just under the photo offset on both sides.


Thanks for taking the time to have a look at my Layout. I hope it has inspired you to create your own little bit of magic with these papers.


Happy creating


Tuesday, 11 January 2022

Authenticity - With Karyn Schultz!

 Hi Bee Arty Lovelies!

It's Karyn here and today I have an art journal page to share with you made using lots of cool products from Bee Arty.
 
 
I'm using a calico page in my DWM art journal. I start by using a pipette to put droplets of Royalty Shimmer spray on the page then using some plastic packaging to "smoosh" it across the page. Once dry I added drops of Berry Colour Artist Ink and repeated the process. Then I added some Passion Colour Shimmer Dust mixed with water. I also add splatters of each of the colours.
 
 
I added stamping using the Bokeh stamp set from the Grateful heart collection, and black Archival ink.

 
I used the Lined Stencil with Snow White Colour Paste to add some stencilling across the page.  


Here is my completed page. I found a picture on Pinterest and printed it on photo paper and added to the page.

 
I've embellished with papers, fussy cutting and word elements cut from the Untangle collection papers.  I've added white cardstock diecuts created using the Honeycomb metal die. I've added some torn music paper that I sprayed with the Royalty Shimmer spray. I've outlined the words using a fine black Life of Colour paint pen


Thanks so much for stopping by

Crafty Hugs xx


Sunday, 9 January 2022

Escape The Ordinary - With Karyn Schultz!

 Hi Bee Arty Lovelies!

It's Karyn here and today I have an art journal page to share with you made using lots of cool products from Bee Arty.
 

  I'm using a cotton rag watercolour page in my DWM art journal. I start by painting Steel and Stormy Weather Mica Powders across the page. 

 
I used the Free Hand Stencil and applied Navy Colour Shimmer Dust mixed with water using a sponge. Then I used the Directions Stencil with Sienna Colour Paste to add some stencilling across the page.  


I then added stamping using the Mapped stamp and the Making Tracks stamp set from the Road Trip collection, and black Archival ink.  


Here is my completed page.

 
The image is from the Tick paper from the Time Flies collection.  I've embellished with fussy cuts from the Time Flies collection pack. The title is cut from the Curious paper. I've added a white cardstock Compass die cut, and a book paper Grungy Filmstrip die-cut. I've outlined my page using a fine black Life of Colour paint pen.


Thanks so much for stopping by

Crafty Hugs xx


Saturday, 8 January 2022

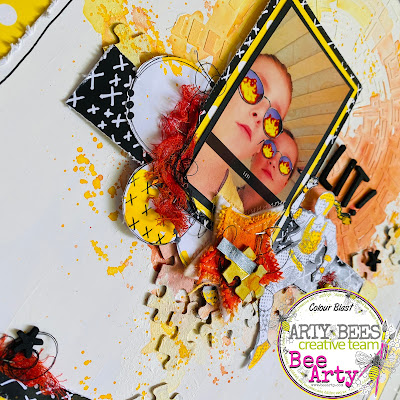
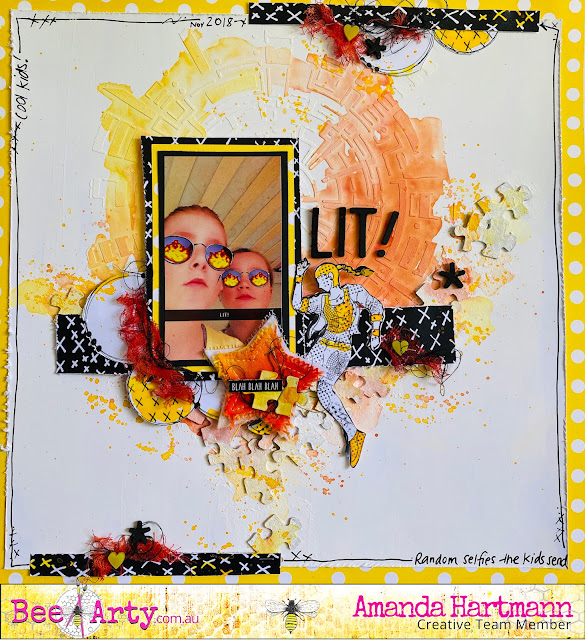
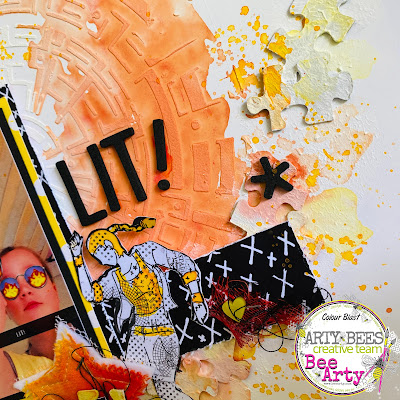
"Lit!" by Amanda Hartmann

 Hello Bee Arty fans!

Welcome to January 2022! Hopefully it will be totally "Lit!"


Today I am sharing a fun and quirky page - full of colour and technique!


I created a mixed media background, and finished with some papers fussy cut from the  Electric Dreams - Mini Collection Paper Pack.

The background:
If you want to see how I created the background - with Gesso, stenciling, puzzle pieces and Colour Artist Inks - you can watch this video: https://www.facebook.com/amanda.hartmann1/videos/10160036158493066/
This was a Facebook live video and I ended up with a spare background - finally pulled it out, and finished a page! Please skip the first 5 or so minutes on the video where I am mucking about, and then see how I create this mixed media background.

Products used for the background:
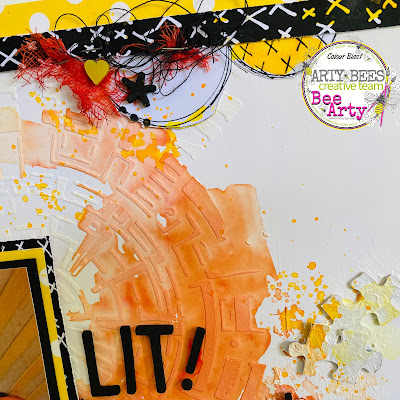
  • The stencil used is: Interwoven - A4 Stencil – Bee Arty - one of my favourite stencils of all time - I used modeling paste through the stencil
  • Heavy white Gesso - gesso'd background and more gesso over the puzzle pieces.
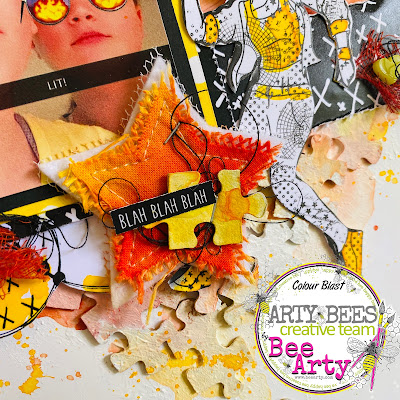
  • Added colour with Colour Artist Inks - I used Citrus, Cider and Spice. - used to colour puzzle pieces, stenciling, the Charm Creations star, to paint some fussy cut elements and to add splatters. Also used to colour the muslin.
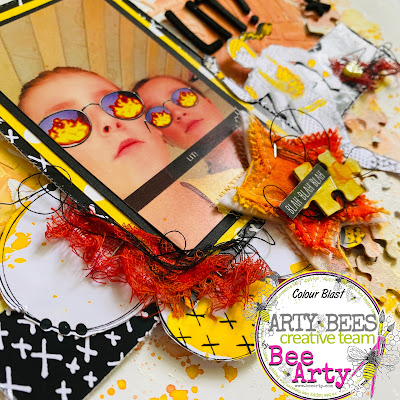
Here are some close ups to see the details!


Thanks for looking,
Amanda


Monday, 3 January 2022

Be strong … when being strong is all you have. By Linda Pearson


Happy New Year everyone!!   On the blog today I have created an ‘off the page’ project using a framed canvas board from Eckersley’s Art store, but a standard canvas or journal book could be used as an alternative.

Bee Arty products used:

White Cardstock 350gsm250gsm A4 sheet

Gesso white to prepare the canvas

Darice 6 well paint palette

Versamark Stamp pad translucent

Embossing powder – Stormy Night

Shimmer dust – Navy, Midnight, Passion, Lollipop and Peacock

Eye spy stamp

Gridlock A6 stencil

Craft Powder Spoon


Other products and tools used:

Stamp Press

Eckersley’s – Jasart Floating Canvas Board

Heat Tool

Acrylic Paint; DW Ocean and A by M Mermaid

Small round paint brushes

Make up sponge or dauber/blending tool

Fussy cut scissors

‘Strong’ die cut  (own stash) use stamps or other word to suit

Teal Foil Card (own stash)

Pipette

Posca Pen or equivalent  (white)

Texture paste or moulding paste

Masking tape


Mask the floating frame with masking tape to protect from the shimmer paints etc.


Cover the canvas board with a coat of Gesso and dry off.  Then apply 2 coats of Ocean paint drying between each coat.


Add a small amount of Ocean paint to a palette with a small amount of Gesso or white paint.  Tap the makeup sponge(dauber) into the paint (do not mix the paint … you want to apply an ‘ombre’ style effect of colour through the stencil.  Using the Gridlock A6 stencil gently pounce the two colours through the stencil.  Shift the stencil around to cover the canvas board.  Don’t be concerned if the colour looks a little messy. Dry off a little. Do the previous step 2 to 3 times more adding a little more white colour to lighten for each layer.  Be sure to end in a ‘whiteish’ layer to finish off.  Dry off.

Spread the texture paste through the Gridlock A6 stencil over the surface.  Allow to dry completely.


In the meantime prepare quantities of the Shimmer dust (Navy, Midnight, Passion, Lollipop and Peacock) colours in the   Darice 6 well paint palette using a  Craft Powder Spoon  … add some water to each colour and mix thoroughly.   Test the colours to ensure they are rich in colour before adding to canvas.


Prepare the area with a piece of paper towel to absorb the run-off of shimmer colours.  Lightly spray the canvas area (image below) then using a small round brush drip the colours onto the canvas


I began with Lollipop then Passion and finally Navy Shimmer dust.  

Allow to dry then apply more if needed.


Finally apply some of the Midnight Shimmer dust .  Lay the canvas flat for this step to keep the colour towards the top of the canvas with only a few drips across the canvas allowing under layers to show through.


Once dry, water down some Mermaid paint (A by M) to add some splatters over the canvas.


Apply the Eye spy stamp to the stamp press with a sheet of White Cardstock 250gsm A4 sheet paper, cover the stamp with a generous layer of Versamark Stamp pad translucent.  Imprint the stamp onto the white card.

Sprinkle a generous amount of Stormy night Embossing powder over the stamp imprint.  Activate the powder using a heat tool. 

Using a small paint brush apply the Shimmer dust around the outside area of the stamp being careful not to colour the eye area.  Again, I added the lollipop, passion then navy in turn to cover the stamped area.  Dry off, then add more colour if necessary.  Dry off.

Pupil area apply some peacock Shimmer dust to the iris carefully.  Dry off.


Carefully fussy cut the stamped image from the card keeping as much of the lined detail as possible.

Adhere the stamped image to the top area of the canvas board.  Before doing this the image was raised by adding two pieces of cardboard to the back of image then adhered to the board.


Word … using the foil card run a word diecut (strong) through the machine then adhere the word to the bottom area of the canvas board.  Remove the masking tape and the project is complete.


I hope you are encouraged to create your canvas representation of this project.  Change the stamp and word sentiment to suit your own circumstances.

Thank you for stopping by and I look forward to creating for you again soon.


Cheers from Linda Pearson

linda@yourcreativepalette.com.au