Showing posts with label forest floor. Show all posts

Monday, 22 May 2023

Forever In My Heart by Charmane Koch

 Hello Lovely People!

Just a quick share from me today, using few layers of the Whispering Woods papers, that I thought matched perfectly with a photo I found of my baby brother... and the chipboard title was also perfect.

I Embossed the Chipboard title using Olive Sparkle Embossing Powder 


I also created a Charms Creations Heart to match with the papers.


I thought this 80's photo was perfect with the colours of the Whispering Woods paper.


I kept it quite simple by adding a few embellishments - sequins, paper flowers, bow & Paper Doiley.

There'll be a little video over on the Bee Arty Hive to show you how I layered it altogether & embossing the Forever in my Heart chipboard.

I did do a bit of machine sewing over the top of the layered papers, just for a bit of extra texture too.

I used two sheets of the Forest Floor paper...


I used Olive Sparkle Embossing powder from the Sweet Stuff Embossing Bundle {only $20 for 4 colours!}


I hope I've inspired you to whip up a layout! Just layer up your papers, a little bit of paper tearing - stick it all down, add a few embellishments and you have a layout! Oh, and why not have a play with some Embossing Powder while you are at it!

Happy Creating :)


Thanks for popping by!

XO Charm

Thursday, 13 January 2022

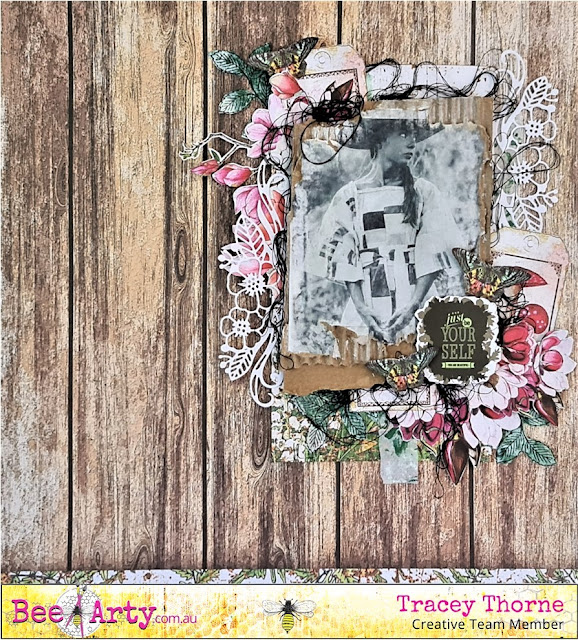
Just be Yourself created by Tracey Thorne

 Hello Crafters 

I have had a play with the Whispering Woods collection by Sue Smyth and oh my, there are so many wonderful elements that are being called out to me to be layered. I really enjoyed putting this 12 x 12 layout together and I hope you enjoy my process using these beautiful goodies.

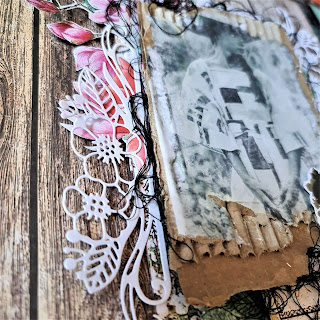
 I have decided to do a little image transfer of a photo of my daughter onto a piece of corrugated cardboard. I prepared a piece of corrugated cardboard by painting it with Gesso. I have printed the photo onto copy paper from my home printer and then applied Gel Medium to the photo and to the corrugated cardboard. Both are then joined right sides together and left for a few minutes to dry. I have then peeled the copy paper away to leave the photo image. Remaining paper pulp on the project was sprayed with water and gently rubbed off. I finished the image off by brushing over a layer of the Gel Medium to seal the photo.


The B side of Fernery cardstock with its rich wood texture is the perfect base for the background to my layout. I cut a piece of  Whispering Woods Forest Floor cardstock 11.5cm x 21cm and adhered this to the page. I have then chosen 3 florals from the Whispering Woods Imagery cardstock and fussy cut  the floral ephemera as well as 3 of the butterflies on the same cardstock. These were set aside for layering. 


I prepped a piece of tissue paper using my Gel plate, white & green paint and the A5 Vampyre Rose Dusk stencil. I have let this dry and then stamped some leaves from the Celebrate Nature Stamp. These were fussy cut and set aside. I have cut two of the flower elements from the Forest Favourites Metal Die out of white cardstock. Other ephemera needed to complete the page were two tags cut from the Woodland Tags cardstock and the sentiment square from the Natures Words cardstock.


To put the Layout together I have torn some of the tissue to layer under the photo layer. I added foam tape to the photo, the sentiment square and to the wings of the butterflies before layering the elements on the page. Black cotton was also added under the cardboard of the photo. I have layered the very delicate and beautiful die cuts just under the photo offset on both sides.


Thanks for taking the time to have a look at my Layout. I hope it has inspired you to create your own little bit of magic with these papers.


Happy creating