Showing posts with label dt melinda sweetman. Show all posts

Saturday, 2 December 2017

You Are My Sunshine Scrapbook Layout with Melinda

Hello and happy Saturday Colour Blast fans! Today I am here sharing my take on the December 2017 challenge! Yep, I said December!! Can you believe it is already that time of year?!

Here is a little sneak peek of my "metal pieces"


And here again is this months challenge.


This really did challenge me as I don't really have metal embellishments. I had to think outside of the box and I came up with making my own using some awesome dies and some metal sheets I have in my stash!


Here is my completed page. You can see my whole process in the link below or pop on over to the Colour Blast YT channel!


And here are my step-by-steps

For this page I have used a piece of the Bazzill Marshmallow cardstock for my base as it means I don't need to use gesso and I really prefer the way the packaging technique dries off on paper. I grabbed my Sunshine Colour Shimmer Cube, activated with water and simply added some colour and extra water to my packaging and got to smooshing. Yep, that's the technical term ;) You could also use the Colour Shimmer Sprays if you don't have the Colour Shimmer Cubes!

Just a side note too, if you own some of these little pots of awesomeness - make sure they are completely dry before you pop the lid back on. I actually store mine without lids at all and only use the lids when travelling but as soon as I get  home, the lids are removed again!


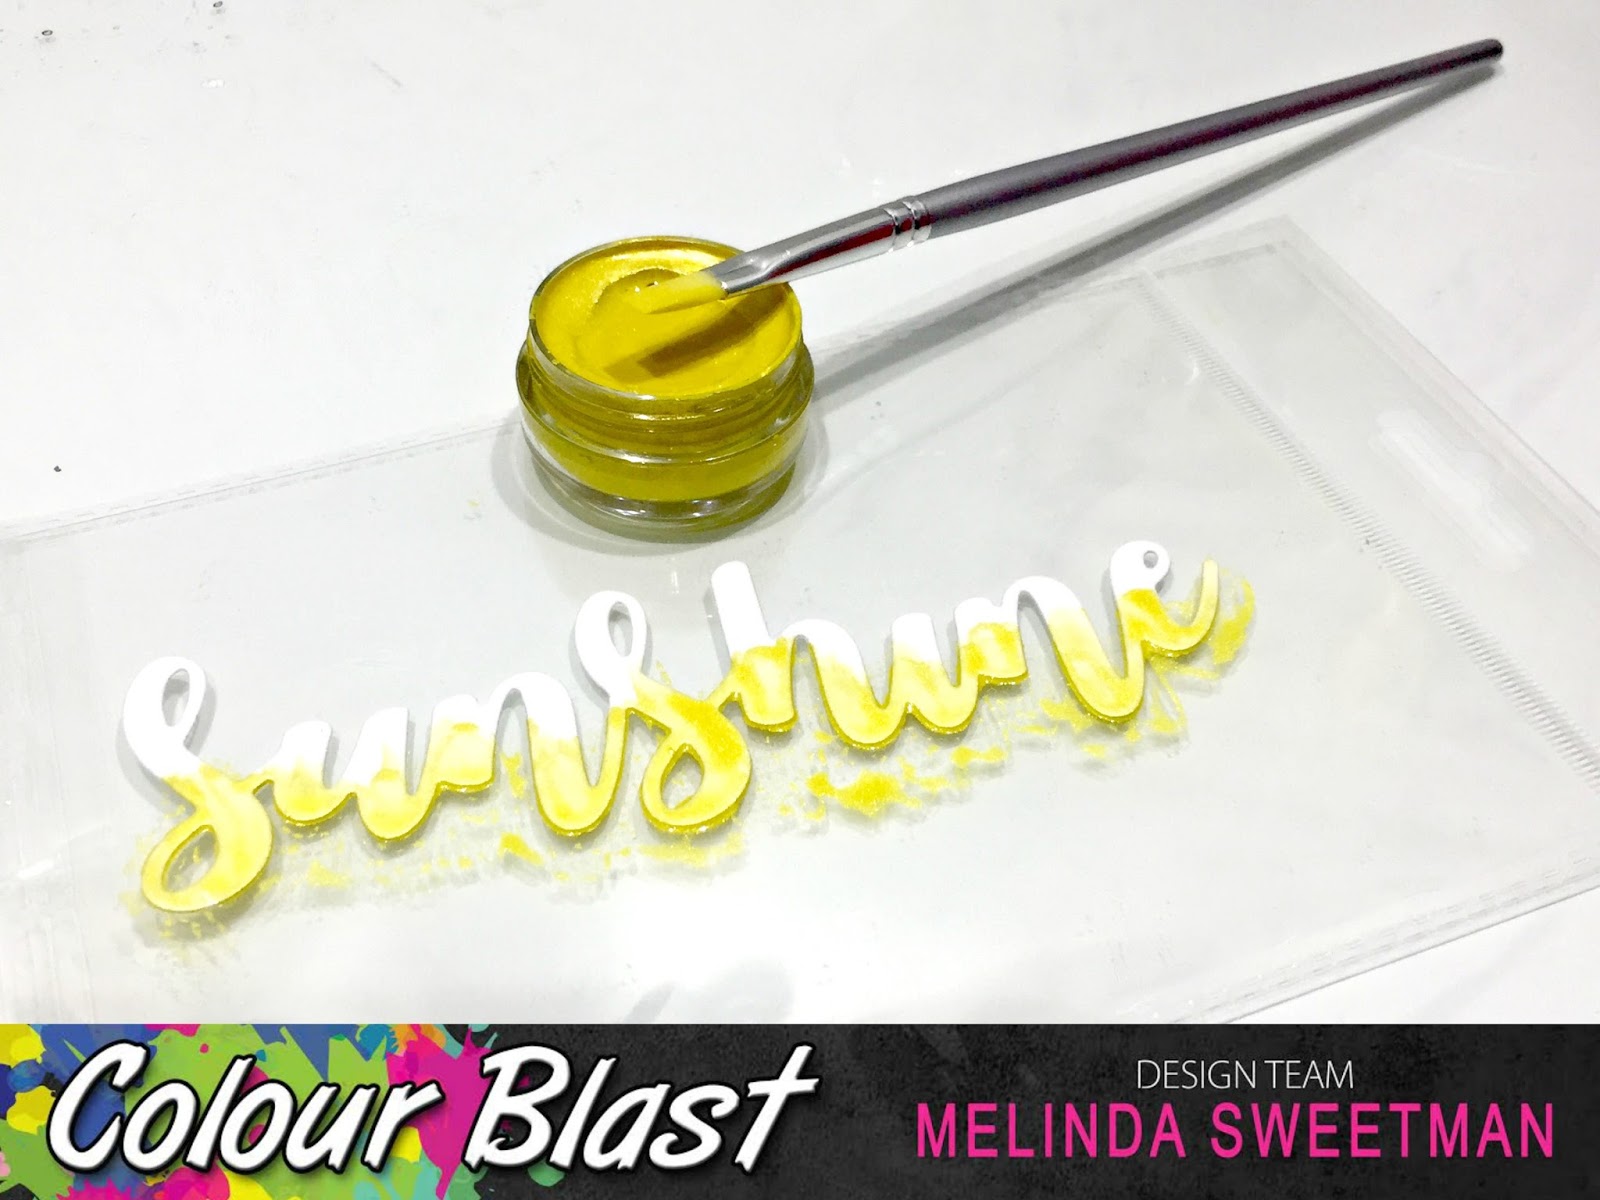
While I had my Shimmer Pot out I decided to colour my die cut title. I used a paintbrush and just painted to bottom of the word with the colour and then used a clean, wet paintbrush to blend the colour out a little.

Next for some texture. I grabbed a mini layering stencil and my Sunshine Colour Paste and randomly added some paste where I knew I was going to be working. I also added some to the "sunshine" title piece where the colour was already applied.


While that dried I stamped out the rest of my title "you are my" and coloured that a tiny paintbrush and again, my Sunshine Colour Shimmer Pot.


I next added some stamping using a grey archival ink and a couple of different texture stamps and love the extra dimension this gives to my layers.

When my paste was dry, time for some splatters. I have once again used my Sunshine Colour Shimmer Pot but I have added in the Saffron Colour Spray for a deeper yellow. I also activated my Stormy Weather Colour Shimmer Cube and added splatters of that, with a paintbrush also.


When I put all my bits and pieces together I decided I needed a little more texture and another pop of colour so decided to pull out some chipboard. I grabbed these filmstrip pieces and embossed them with my Story Weather Colour Embossing Powder.


Time to put all the bits together. A couple of layers behind my photo using some paper scraps in yellows and greys and also a glassine bag where I can pop in a tag and add some extra journalling. I used my Saffron Colour Spray to colour the 
re-enforcer for the tag.


I really love this colour combo - yellow and grey - and love the fun whimsy those die cuts bring to the page, especially using metal which is not something I would have done without the prompt of this challenge!


If this is a little outside of your norm, give it a go! Think outside of the box, make your own metal embellishment. You can colour them with gesso and then add ANYTHING from the Colour Blast range. Or leave them the white or black from the gesso. You can dry emboss if you have the same metal sheets I do. You can leave them plain because they fit your page PERFECTLY just the way they are!


Have a bit of fun and play along, making sure you load up your take on the challenge over here in the FB Group - Colour Blast Creative Corner!

Until next time, happy scrapping!


Melinda
xx

Saturday, 18 November 2017

Spread Your Wings ~ Mixed Media Card with Melinda

Hi there, Melinda here with you today and I am sharing a card I made for a work friend who has left and started a new life for herself overseas!

Here's a little peeky....


Here is my process video if you are interested in seeing this card come together


And read on for my step-by-steps


First up, after I cut my card front to size (10cm x 14.3cm) I grabbed this very pretty stencil from my stash (it is a Dusty Attic one) and my Bling Colour Paste. I'll tell you a little secret here - I wasn't 100% certain of where I wanted this card to go so I took inspiration from my last DT project and ran with it!


I let that air dry and then came back and started to add colour. I had already picked some pieces I wanted to use to embellish with so grabbed my matching colours in Sunshine and Tangereen Dream in the Colour Shimmer Cubes and clean cup of water. I added a little water over the top of the stencilling and then added my colour, moving the card stock around to get the colour to move and adding water/more colour when necessary.


I did get impatient and used my heat tool to dry that off so I could move onto my next step. Splatters! Using the same colours and paint brushes I added in splatters - Sunshine to the Tangereen side mostly and Tangereen to the Sunshine side. 

When that was dry I grabbed a damp baby wipe and rubbed over my Colour Paste to get the Bling to pop once again without any additional colour on top! Did you know that you could do that?? 
It really makes the colours of the pastes pop once again!


Next up, I dumped all of my pretty things onto my base and decided I needed a dark pop of colour behind all the bits so I grabbed a mini doily from my stash and my Dusty Charcoal Colour Shimmer Cube. 

I love having white options because it makes it so easy to customise colours for any project. I just used a paint brush and painted over the doily - be careful if you are doing this that you are not too rough or you may rip/tear the doily! I almost did!! Again, I used my heat tool to dry this off and then applied a second coat in the same way.


One last step before bringing it all together - splatters in Dusty Charcoal. Again, same as above but with a different colour. I love the contrast it gives and that darker colour really makes the whole design just pop! 


And here is my finished card. I think my friend will love it - it is being hand delivered by another friend to Dubai next week! I added in some stamping in a dark grey ink and mounted my card front onto this fun and bright yellow card stock to finish it off!


Thanks as always for stopping by! I hope I have given you some inspiration for whatever you have currently sitting on your desk and I'll see you again in couple of weeks! Please make sure you head over to the FB group, Colour Blast Creative Corner, to share all of your projects using Colour Blast goodies, we love seeing them and being inspired by you all!


Melinda

Saturday, 4 November 2017

Shine by Melinda Sweetman

Hey, hey Colour Blasters!! Melinda here with you today with my latest DT share. 

Here's a little sneaky peek I shared on my FB page the other day


And this page was inspired by this month's challenge and a very cute kit I won from an Aussie company, Kit The Habit.


So, feathers!! I love feathers and was so excited when I received this little kit in the mail with all of those gorgeous texture-y feathers, swoon!

Onto the step by steps!


First up I used a fun feather stencil by Flutterby Designs paired with the gorgeous Sienna Colour Paste and just applied a small amount in a small area on my page in my art journal.


While that dried I decided to colour my fabric doily using the beautiful Just Blue Colour Shimmer Spray.


I left that mostly to air dry (I did get a little impatient!!) and then added some colour using my Just Blue Colour Shimmer Spray. I simply sprayed right onto the page and then lifted and turned it to get the colour to move all around my stencilling.


I did air dry that and when it was done I did some splatters using Sienna and Just Blue Colour Shimmer Cubes. I also did some splatters with Roadbase Colour Spray.


Lastly I added a little bit of colour to a few flowers using a paint brush and my Sienna Colour Shimmer Spray.

When that was all dry I added all my bits on and LOVE the finished design. 


Again, another "not typical for me" page but I am so loving doing different things and playing with products!!


You still have almost the whole month to get your groove on and play with your products, just make sure you incorporate feathers in some way!!

Happy scrapping and I'll see you again soon!


Melinda

Saturday, 21 October 2017

Beautiful with Melinda Sweetman

Hey, hey scrappy friends!! It's Melinda here with you today sharing not only my latest DT make but also my take on the awesome October challenge!

Here's a bit of a sneaky peek and a little secret, this page is NOTHING like what I thought I was going to make!! But I love it!


So, if you have missed it here is the October challenge....TRIANGLES! I don't know why but I just LOVE triangles so was very excited when I saw this challenge this month!


However, that is enough chatter and here are my step-by-steps

I chose a cut file and cut that on my cameo and then I chose the ephemera packs and 1 piece of patterned paper I was going to use and trimmed up my cut file - those flowers just were not going to work! 

From the patterned paper I picked the colours I wanted to use and not knowing exactly where this page was going I grabbed the Colour Shimmer Spray, the Colour Paste and the Colour Shimmer Pots in the colours I wanted to use - Blush, Punch and Deep Water. And at the last minute, Steel.


With my colours chosen and the cut file and photo ready to go I grabbed my White Heavy Gesso and used my fingers to spread a thin layer across the page where I knew I wanted my page design. I let that dry naturally which did not take long since the layer was so thin.


Time to add some more colour!! I started with the lightest colour - Blush - Colour Shimmer Cube, grabbed a paint brush and some packaging and added some colour randomly to my back ground. I ended up just using a wet brush and moved the colour around using that and the packaging together to get the look I was after.


I repeated the same process with Punch - again using a Colour Shimmer Cube, let that dry thoroughly and then the same process again with Deep Water - this time using my Colour Shimmer Spray (I haven't been able to get my hands on the Colour Shimmer Cube yet!!! Argh!!). I let the Deep Water dry naturally - it was dinner time - and was super happy with the dried result.


Next up some splatters - again I used the 3 matching colours in the same products and a paint brush. I added Blush and Punch splatters to the pink areas and Deep Water to the blue-y areas. At the last minute I decided to sprinkle some Steel Colour Shimmer Cube around as well just to bring that silvery colour to the page.

I surprised myself and stopped here with the colour - I really loved how it was looking and didn't want to go over the top! I added in some shadows to the cut file with a black water colour pencil. 


Some foam to mount my cut file that had been backed with the paper and my photo. Oh and some silver stitching along the triangles. A couple of very small embellishments and my page was done! 


I am super pleased with how this came together and since it is another wedding photo I haven't added a date or any journalling as I just wanted to scrap this photo!!

Here are a few close ups!


Check out the shimmer in these photo's, oh la la!!


You still have about 10 days to get your entries in for the October challenge - just enter them in this album on the FB page - and your chance to win a voucher to spend on some fun Colour Blast goodies so make some time to play!!

You can also check out my whole process on the YT channel but here is the link to watch it right now, in your browser!


Until next time, happy scrapping!!


Melinda