Showing posts with label peacock shimmer dust. Show all posts

Wednesday, 9 November 2022

Fancy by Charmane Koch

 Happy Wednesday everyone! How do these days just fly past so quickly!

Just wanted to share a quick layout I created at retreat... again!

This one was playing around with Shimmer Dusts and water - watering them down so that give a nice light watercolour to match with the gorgeous Moonshadows Dragonfly Dance paper....

What I wanted was to add more Dragonflies using the Dragonfly Flight stencil and Thick White gesso, then once dried with Heat gun I added Lollipop, Passion & Peacock to colour random dragonflies...


I was gifted the Die Cut leaves {THANKS Amanda H!} & decided to colour with Lush Shimmer Dust too...

More closeups...

As you can see I have also used some Moonshadows papers to layer behind my photo...


And I also stuck some Muslin that I had coloured with Passion to give a bit more texture.

I have used:


And the Shimmers:
Lollipop, Lush & Passion & Peacock


Just a simple but fun page to get the creative juices flowing! I had fun with this one!

Love my "fancy" coffee cups while out at sports!

Thanks for popping by!


XO Charm

Wednesday, 19 October 2022

You & Me by Charmane Koch

 Happy Days! I've just been on the fabulously AWESOME Bee Arty October Retreat - it was an absolute blast! So inspiring, so fun & so relaxing! Just NOT LONG ENOUGH!

I found my mojo which had been missing for a few weeks, so I was relieved when it came back! Quite easy when you have uber-talented scrappy people around you to ask for their opinions to help get me back in the flow again! Wish I could have a retreat every weekend! 

Anyway, this one was a fun one - it was a BLIND SCRAP - designed by Amy Evans, but instructed by Paige, and as you can imagine sometimes we all don't follow the instructions {or the instructions might not be right?? LOL}

I decided to get out the Moonshadows papers for this & then added bits from my stash as well, coz that's what you do on retreat right - use the stuff you haven't used for ages?

Paige saw the layout and said you MUST use it for the next blog post - luckily I hadn't stuck everything down {like you are supposed to haha!} So I thought I would share the fabulous background I had created...

Firstly I sprayed some Peacock from my little Mini Misters bottle onto the page, dried it with heat gun, and then I have grabbed my NEW Salty Dots stamp and with a Peacock Shimmer Dust and water combo I have stamped onto the layout - which gave the effect above... 


What I loved about this Blind Scrap was using a lot of layered papers - and deciding to use the Moonshadows Collection was perfect as I could use alternate sides... the colours are just beautiful!


The quote was just perfect for this page as well - and the cute Bee Arty Flair matched too!


With the leftover colour from {previous} stamping I soaked up the Peacock colour with strips of Muslin so I added that to the layout too :)


I did add a little bit more from my stash - stuff that was lying on my already messy table - sequins & flowers from previous layouts!

Here are the Bee Arty products I have used:


Mini Misters are fabulous!


I hope I've inspired you to have a play with a little Moonshadows & Saltwater! Spray a bit of colours onto Thick White Cardstock, tear some paper strips and stick it down!

Thanks for popping by to check it out!


XO Charm

Tuesday, 20 September 2022

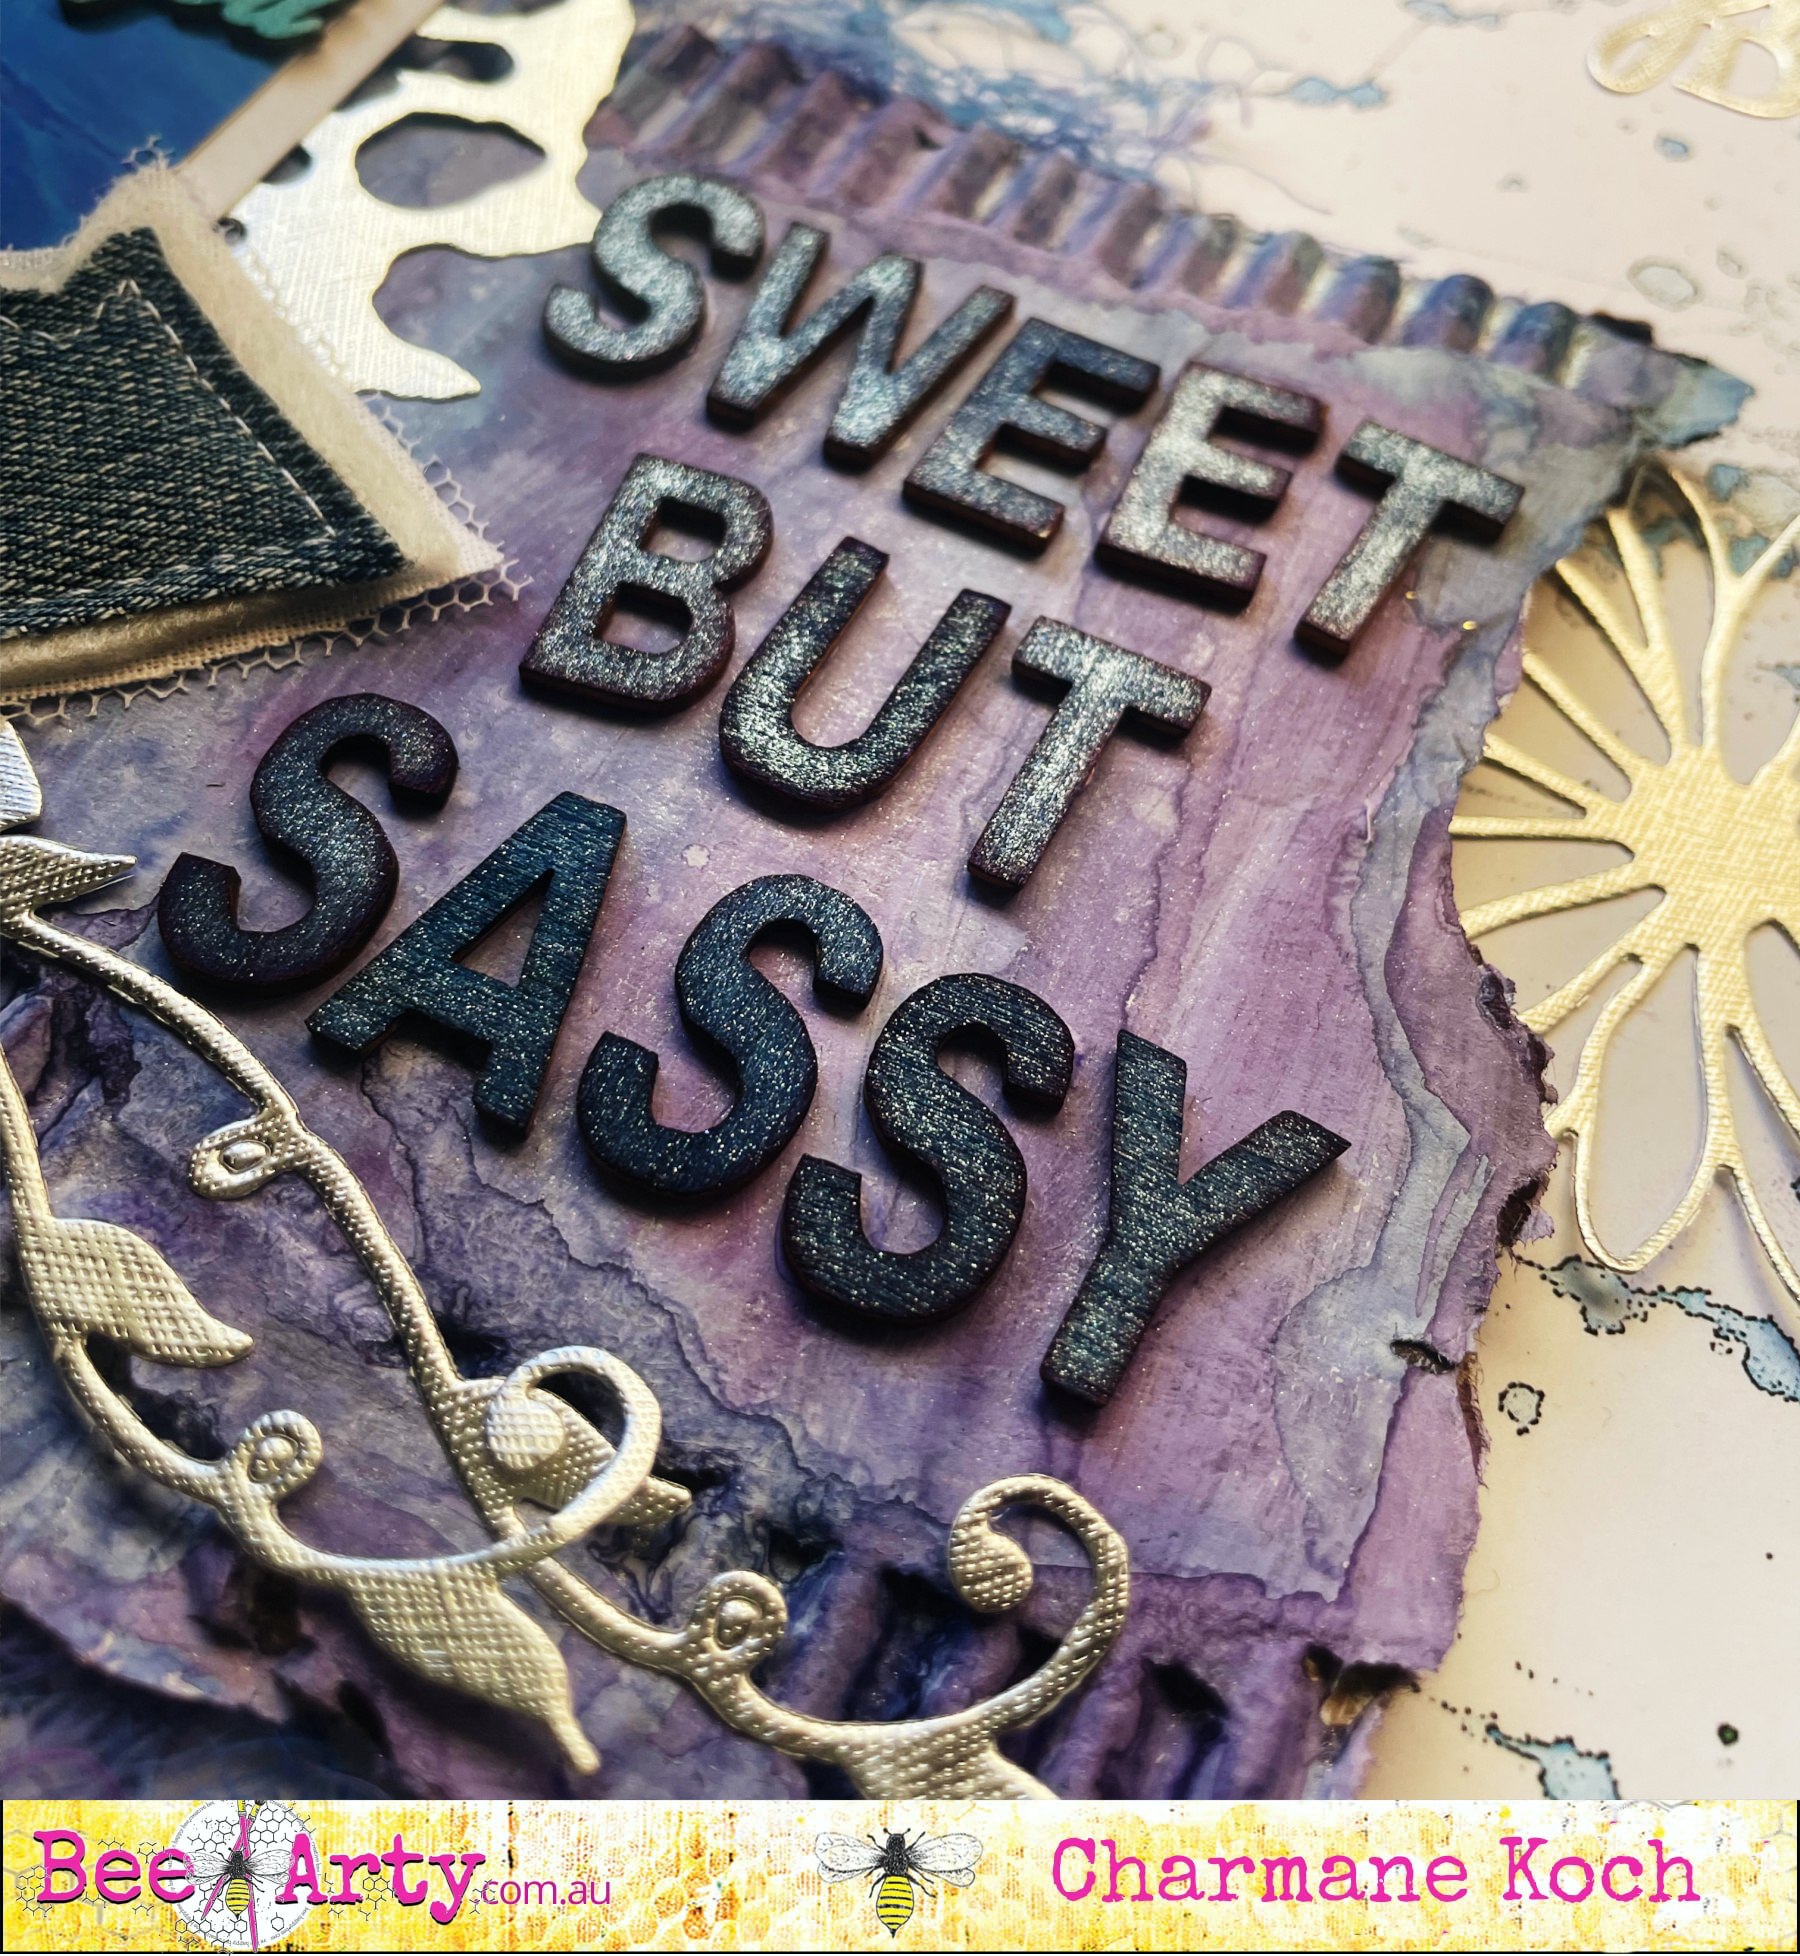
Sweet but Sassy by Charmane Koch

Happy Tuesday Everyone! Hoping life is treating everyone well!

Today I am sharing with you a layout that has been WEEKS in the making! I've had this layout ready to go in my head but do you think I could execute it in REAL LIFE??? Not sure what the deal was, but it has finally come together & I just LOVE the outcome of it!

I had a few ideas in my head with this one - the Moonshadow Stencil I thought would make great "bubbles" I also was loving the thought of using the silver Mirror board to create "silvery bubbles" too...

I also wanted to create a 3D/layered effect so thought I would get out some ripped cardboard to gesso and colour with shimmer dusts/mica  powders...

I went on a bit of a Die Cutting frenzy using Silver Mirror Board & also white Cardstock...

I used the Calendula, DeVine, Moon Rock and the Good Time/Great Day Dies...


I test ran the colour combo for my cardboard... I used Peacock & Passion Shimmer Dusts, and also a touch of Steel Mica Powder too...

I gesso'd the Chipboard heart & little words, then used the leftover mica/shimmer dusts to match the cardboard... the heart I coloured roughly to match the rustic look of the cardboard.

I coloured the Wood Veneer letters without using gesso as I wanted them to be darker - I used the Cobalt Shimmer Dust for these.


My finishing touches to this layout was to add more of the Silver Mirrorboard Dies... tucked under and around the page...


The words were perfect for this too!


Once I got it out and positioned where I wanted everything it all worked out in the end!

I'll definitely be doing similar layouts as I still have a couple more photos!

How stunning is the Moondshadows range by the way???

Thanks for popping by & I hope I have inspired you!


XO Charm


Tuesday, 23 August 2022

"Find Yourself" Tags by Charmane Koch


I had so much fun creating these tags! I used a mix of stamping on tissue paper, stencilling with modelling paste & with Colour Paste. I also found the cute little quotes on either Word Cut outs or from the Word sheets from different collections.

First I sprayed my tags using the cute little Mini Mister sprays filled with a scoop or two of Shimmer Dusts {using the Craft Powder Spoon} and water. I have used Lollipop, Peacock & Passion.

While that dried, I stamped onto tissue paper a few different stamps using black ink:
Meridian
Unfortunately the Floral one is Unavailable but I suggest substituting with the Wonderful flower stamp - it would work well too.


I've played around with each tag differently. I have stencilled the Dragonfly Flight onto one using Modelling paste. I have stuck the stamped tissue paper around the edges of the tags - positioning where I thought looked "right".

I have also stencilled "Marked" and "Distance" using Snow White Colour Paste. As you can see here, it looks white, but becomes a glittery clear colour!


The Butterfly Flair is from the Time for Tea Flairs.


I have also treated each of the DIY Hearts slightly differently too. I coloured with the Mister Sprays first on the Heart below, and then once dried I have added the stamped tissue paper, applying with Gel Medium.

I have used the Adhesive Foam to stick on the quotes to give more dimension to my tag.


The Heart below I have applied the Flowers first and then once the Gel Medium has dried I have added the Lollipop Shimmer Dust.


I have made a video - you can pop on over to the Bee Arty Hive to check it out HERE!

Some of what I've used from Bee Arty {links are all here in the blog post}:


I also suggest to use the "wonderful" flowers from this stamp, as the one I used is no longer available:


PS - the Bee & Butterfly would be fabulous for the tags too!

Anyway, I hope you've been inspired to create some tags, or at least use the techniques I have! I still am finishing off a few more tags so stay tuned!


Happy Creating!
XO Charm