Hi Creative Friends,
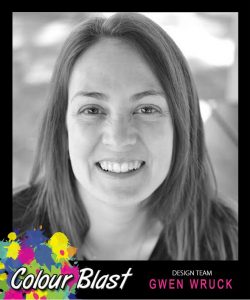
Gwen here with you on the blog today with my latest layout. This one features my little Miss and a photo taken on her 5th birthday. She was such a princess at this age and I will admit, I love love loved it! Think princesses, unicorns, fairies and all things magical - that certainly was her at this age. I have scrapped many photos already from this birthday party, so for this one, I really just wanted to document her age and for it to have that sweet soft princess vibe about it.
This page started with the idea to use a cut file word that was repeated over and over on my background. I have done similar things in the past and always loved how they worked out. (You don't have to re-invent the wheel for every layout you know.) I wanted the words to stand out from the white background so I added some Colour Shimmer Spray in Envy to my background. I used the packaging technique as well as adding splatters straight from the nozzle.

Next, I set about cutting out my words. I went with "Love this moment" and cut it out 6 times. I then sprayed the words with the Colour Shimmer Spray in Blush. I made sure to spray un-evenly, I wanted a textured look that had the colour deeper in some areas than others.

Once dried, I then layered over my background and stitched down. I just love how my die cut pieces sit on top of the background. It is the perfect base for my paper layers in my photo mat. You can see here I did not stitch them down perfectly, the bits that sit up off the page add interest and I love the effect.

Next, it was time to add my photo and embellishing. I started with a large photo mat paper cluster and added bits and pieces until I was happy.

I went with puffy stickers, wooden hearts, vellum butterflies and chipboard, all to add texture and interest. I also wanted a lot of pretty embellishments on this one to fit with the Princess theme.

Here you can see a close up of the Envy in the background and the Blush on the die cut pieces.

More close-ups of the die cuts in my background, and those pretty wooden buttons hand stitched on.

and one more close up for good measure, so you can see all of the details.
I give this project a "mess level" of Low. Very little mess and a really clean look. I did consider adding some splatters in at the end and then decided against it as there was a lot going on embellishment wise.
I give this project a "mess level" of Low. Very little mess and a really clean look. I did consider adding some splatters in at the end and then decided against it as there was a lot going on embellishment wise.
Thanks for popping by today, I hope this page inspires you to pull out your Colour Shimmer Sprays and die cut machine and give this kind of background a go. If you don't have a Silhouette or similar, you could also do this with a Sizzix or Cuttlebug machine and why not give other elements a try such as flowers, or border pieces. I love this technique and I think you will too :)
Until next time,
Gwen
xox


No comments:
Post a Comment