Sunday 29 August 2021

Happy Life - With Karyn Schultz!

  Hi Bee Arty Lovelies!

It's Karyn here and today I have a scrapbook page to share with you made using the Embrace Change collection from Bee Arty

 
I started with a sheet of heavyweight 350gsm white cardstock that I cut down to 28.5cmx28.5cm. I painted Leather Mica Powder across the page under where my photos would be placed. Then I splattered Leather, Sienna and Bling Mica Powders across the page.
 
 
Next I used the Wreath Stencil with Leather, Sienna and Bling Colour Paste. The random combination of the three colours is cool! 

 
Here is my completed page. 

 
I've matted 2 beach photos on a Grungy Filmstrip die cut on kraft cardstock, then matted onto offcuts from the Embrace Change collection pack paper. I've also added some Grungy Filmstrip die cuts created on bookpaper. 
 
 
I've created embellishment clusters from diecuts created using the Old leaves metal die, Autumn trio metal die and Calendula metal die cut on kraft cardstock, white cardstock, and book paper. Flowers and leaves were fussy cut from the Embrace Change collection pack paper


Thanks so much for stopping by

Crafty Hugs xx


Saturday 28 August 2021

Night out, by Amanda Hartmann - using Electric Dreams

Hello Bee Arty fans!

The new collection is here, and the report is... BRIGHT! FLURO BRIGHT!

Today I am sharing my first page with the new Electric Dreams Mini Collection, and the new FLURO Colour Mica powders!


Check out these colours! Classic black and white - with bright Fluro colours!

I used Fluro pink and Fluro yellow Mica Powders.

These Fluro mica powders really hold their colour vibracy! You will love how intense the colours are!


Here is my full page.....


To create my page, I layered different papers in the range with black and white cardstock - and even added some machine stitching.

I fussy cut some stars, rainbows, crosses/pluses, arrows and the camera from the papers.

I mixed Fluro pink Mica powder with water to colour the piece of tissue paper that is layered under the photos.

I mixed Fluro yellow Mica powder with Gel medium and used through a dots stencil. Then I mixed the Fluro yellow Mica powder with some water to splatter and splash on the page as well as to paint some of the geometric spaces on the white paper.


Check out all the details in these close ups.....


Finished with some stickers, a title and of course the awesome Fluro Charms Creations star and tab!

Thanks for looking.

Amanda


Please !!! by Tracey Campbell

 Hello Bee Arty fans I hope that you all happy and healthy. I have popped in to day to share my latest fun creation using the new min collection release Electric Dreams, it is fun, it is bold, it is funky, it is such a blast to use. Teamed with the new fluro colours and you have a winning combination.

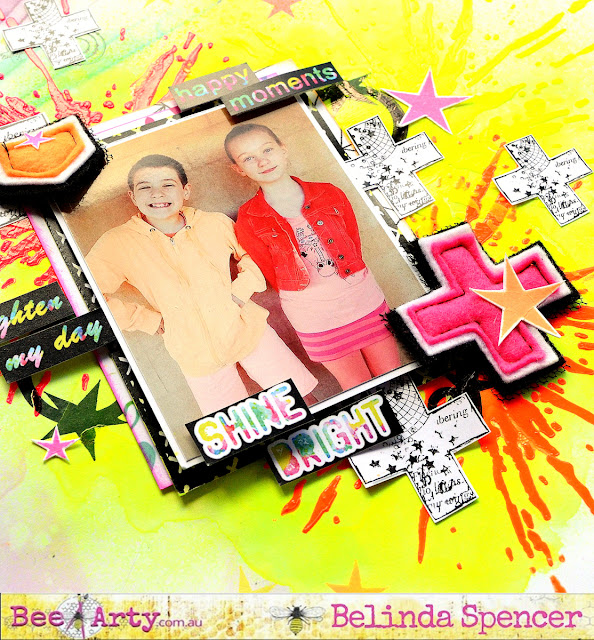
I used some older photos of my girls and made a fun page to reflect the fun they were having in the photos

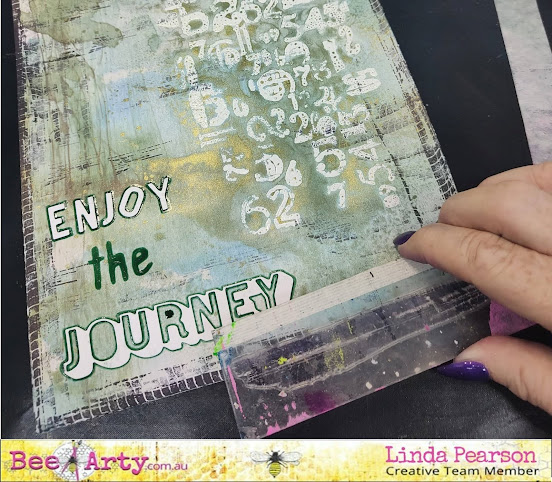
My first step was to use some black water proof ink and stamp the grid lines from the Life is Touch stamp set onto a pieces of 12x12 white cardstock

Here you can see how I have placed the stamp images.

Next I cut some strips of the Electric Dreams patterned paper in a variety of random widths. I cut the strips from four different patterns. 1. Black with coloured lines. 2. White with rainbow coloured water drops. 3. White with hand drawn circles and patterns and 4. Black with Xs.

Using a distressing tool distress the edges of the strips. Note: you might tear some of the strips a bit or even in half, do not panic as you will tear them some more in the next step.

Layer the distressed strips over the inked grid lines. Tear off smaller pieces of the strips and layer them over the larger ones.  This is how I built it up.

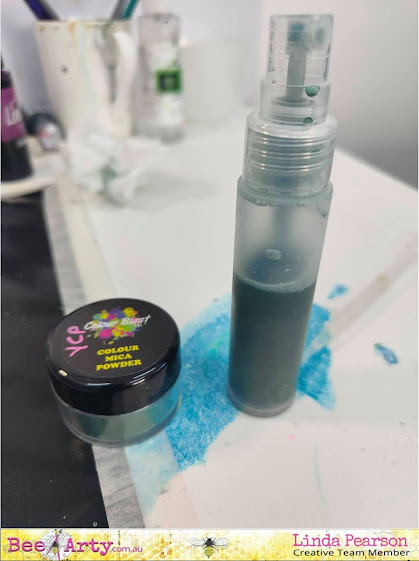
Next I mixed a small amount of the Pink Fluro Mica Powder with some water in a small spray bottle and slowly squirt the cardstock. Tip: the slower you squeeze the lid of the spray bottle the bigger the droplets you will get.


Here is what my base looked like after spraying with the Pink Fluro Mica Powder


I decided it needed more colour so I mixed up some of the Orange Fluro Mica Powder with water and using an old stiff glue brush I flicked splats of the Orange Fluro colour onto the base.


Then to tie the colour back to the black in the Electric Dreams papers I decided to add black splats to the base. This time I used Road Base Colour Spray, I took the lid off the spray bottle and used the straw to flick the splats across the page.


Next was matting the photos. I used two different black and white papers from the Electric Dreams mini collection and left a 3 mls boarder around the top, right and bottom edges of the photo. On the left side I left a 1.5 cm boarder. I then used the distressing tool to distress the edges. 
Next adhere the mated photos at fun angles over on the right hand side of the base (see the final layout for the exact positioning). 


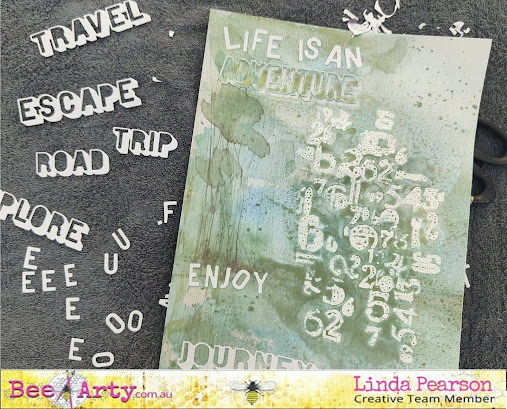
Next fussy cut out some of the hand drawn and coloured circles and some of the titles/words that suit your photos from the Electric Dreams paper. 


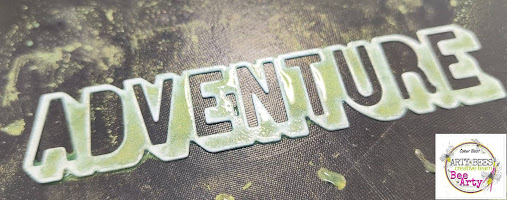
Tuck the circles behind the photos, under and over lapping some of the strips. Just randomly place them around the page. I added a title with some Foam Thinckers.


Adhere a Charms Creations felt hear beside the title.


Use the cut out words from the Electric Dreams papers as sub titles and adhere them to the page.


I ended up with two sub titles as they suited the layout. Love that this collection comes with so many options. 


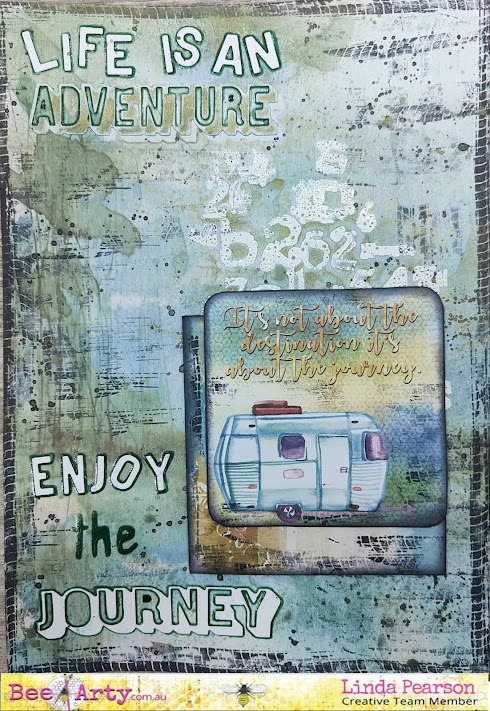
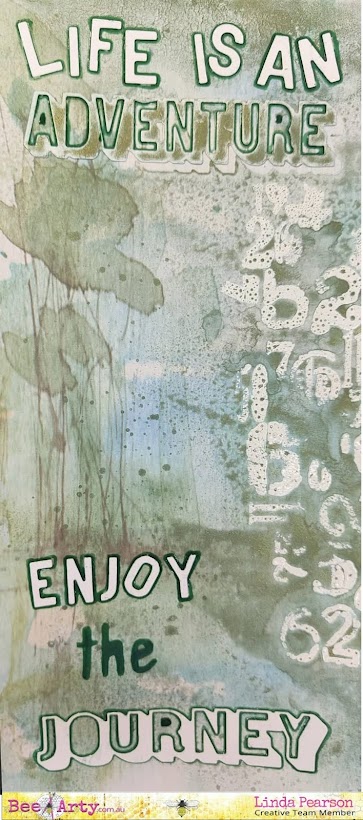
Here is my final layout. I love how it turned out, fun and colourful.

Thanks for popping in and I home that I gave you some inspiration for this fabulous mini collection.

Hugs

Tracey

Thursday 26 August 2021

Creating Beautiful Dreams- ATC coins with Aditi

 Hello everyone,


Hope you're all well! Today, I creating a set of ATC coins. A twist to the standard Artist Trading Cards, making them coins, which means circular. Sometimes, it's good to break free from the monotonous.

Here's a look at them


I have a a video tutorial creating this on the Bee Arty Hive FB group


I have used a stamp and heat embossed it on my background. Sprinkled mica powders and misted them with water to add the colours. Fussy cut and die cut elements and adhered them to create these mini beauties. 


Supplies used- 


Monday 23 August 2021

LIFE IS AN ADVENTURE by Linda Pearson

Hi everyone and welcome to my art journal page  blog for today encompassing the new ‘Road Trip collection pack’ designed by Michelle Grant Designs.  I have taken a slightly different approach with the word die-cuts using the offcuts and rearranging the letters to make a quote. 

Bee Arty products used for this project include:

Road Trip collection pack

Scenic 12x12 scrapbook paper

Words metal die

Distance A5 stencil

Making tracks clear stamp set

Open 12x12 scrapbook paper

Road 12x12 scrapbook paper

White Cardstock 350gsm

Mica powder – Jungle

Mini misters 6 pack

Embossing powder – Snow white

Versamark Stamp pad translucent

Archival Ink black

Blending tool


Run the Words metal die through a die cut machine using White Cardstock 350gsm.

Pull the letters apart but keep the adventure and journey masks aside.  From the letters make up the words; L-I-F-E  I-S  A-N  (cut an L to make I and cut an E to make F).


 In a mini-mister bottle add 10 scoops of Mica powder – Emerald then add some water to about ¾ full.  Shake to mix then test on paper for consistency, adjust if not happy with intensity of colour.


Apply the Versamark Stamp pad translucent ink through Distance A5 stencil then sprinkle the snow white Embossing powder over the wet image and heat set to activate the embossing powder. 


Place the adventure outline onto the Scenic 12x12 scrapbook paper, leave enough space for the loose letters to be added later (approx 3cm from top of page).  


Allow to dry thoroughly.


Carefully remove the adventure offcut from the page then spray the heavily with the Jungle spray, allow to dry.


Adhere the Adventure off cut to the page off centre to the watermark on the page (to create a shadowed Adhere the letters L-I-F-E  I-S  A-N  above the adventure word.  

Adhere the letters for E-N-J-O-Y to the bottom third of the page.  Leave a space to write ‘the’ between enjoy and the JOURNEY off cut from the die-cuts.

Please note: I used a Sakura glaze pen in deep green to write the word THE but you could use a paint pen or whatever you have on hand.  I also outlined the letters with the glaze pen as well.


Using the tyre tread stamp from the Making tracks clear stamp set stamp a small section of stamp around the border of page with black , also add some tyre tread ghost stamping randomly around the page too.  Add black spatters over the page.


Cut out the caravan image from the Open 12x12 scrapbook paper, age the edge of image with archival ink on blending tool. Add some black spattering also.

Cut out a larger square from the Road 12x12 scrapbook paper, also age the edge of this shape too.  Add some mounting tape behind both pieces and adhere to the page.  

To finish add some tyre tread ghost stamping on the images.


Thank you for stopping by and I hope you have enjoyed my project for the blog. 


Take care everyone and please keep safe  

Bye for now…


Linda Pearson

linda@yourcreativepalette.com.au

Sunday 22 August 2021

Shine Bright with Belinda Spencer

 Hello Bee Arty fans!!


It's Belinda with you today to share my latest layout for Bee Arty featuring the awesome NEW Electric Dreams Mini Collection.


I just love the vibrant colours in the paper collection as well as all of the funky fluro mixed media products.

For this layout, I first mixed up some Fluro Yellow Mica Powder with distilled water in a mini mister. I used one of the fabulous craft powder spoons to scoop some of the mica powder into the mini mister, added the water and then shook it up until all of the powder was incorporated. Next I spritzed it liberally over my page.


Once the layout was dry, I then added some stencilling using the Grungy Splat A5 Stencil and the Fluro Orange, Pink and Yellow Colour Pastes.


I added some stamping using the Going My Way Clear Stamp Set and Jet Black Archival Ink. I added a photo stack using some of the patterned papers from the collection under my photo.


I fussy cut some of the plus signs from a sheet of patterned paper in the collection and added those to the layout too.


I stamped some stars on the layout using star stamps from the same stamp set and Hero Arts Neon Inks.


I also stamped some of the stars onto extra 350gsm White Cardstock, fussy cut and added to the layout along with a couple of Charm's Creations Fluro embellishments.


Finally I added some quotes cut from the patterned paper.


Thanks for stopping by the blog today. I hope you are loving all of the fabulous fluro products as much as I am.

Cheers
Belinda