Sunday 31 May 2020

You make me happy - by Tracy Jackson

Good morning Bee Arty fans...

I'm back again to show you a nice simple card and tag set


I have been eyeing up these stamps for a while now and finally got my hands on them. Its perfect for all you card makers out there who love colouring. Its called "You make me Happy" which is mounted with firm red rubber. It makes a nice crisp outline when stamped which is always a winner in my eyes.

So after stamping the flowers several times and the words with Memento Ink so my copics wouldn't run I was ready to colour.


7 flowers later... time to find my scissors for a bit of fussy cutting while watching a TV program


At this stage I decided the centers needed a bit of bling, so out comes the Shimmer pen which I love, its mess free and easily adds some blingy goodness


So next I picked out a background paper which I cut from Love & Grace collection, I played around with the arrangement of flowers and words until I was happy


At this stage I had 1 flower left so made a tag by cutting one out from the same paper collection, added a bit more detail by stamping a stamp from the Textiles stamp set


After drawing my boarder around the outside, finding a word and a few leaves from the same paper collection I cut and inked all the edges then put my card and tag together.


Hope you have enjoyed this card and tag set. I love how it turned out, and will defiantly be getting a lot of use out of this stamps set

Happy Crafting


Friday 29 May 2020

'You are loved' by Elisa Ablett


Hi Everyone,

My turn up on the blog today with my latest inspiration for you, a vibrant mixed media layout !

I think you can all guess what my favourite colours are to work with - blues and greens and all shades inbetween and what better products to start your layout with other than those sparkling shimmer dusts. The colours and other products I used to complete this layout are listed below with links.

But first lets take a closer look -


Here are the product links and names:


and I have a step by step for you though I must apologise that the first few photos I took of the background unfortunately were corrupted on my camera's memory SD card:- 


Step 1 - Using Lucinda paper from the Love and Grace range by Michelle Grant as your background paper. Add small amounts of each of the shimmer dusts named above into a paint palette and add a small amount of water to each. Using a spritzer bottle, spritz water over the areas on your background paper that you wish to add colour and using a paint brush, add colour washes in layers to your page. I accentuated the hexagon shapes with the Lush green shimmer dust and also in between the hexagons with the Duke Shimmer Dust. Use the main photo to guide you where to add your extra colour.


Step 2 - Fussy cut out these elements from the Love and Grace - Heart Cut and Colour Sheet and colour using a small paint brush and your left over shimmer dusts and put aside to dry.


Step 3 - Stencil using the Imagine Stencil and Colour Paste Singing the Blue as shown in the main photo above. While the paste is drying and is tacky to touch, put the stencil back over the stencilled area - matching it perfectly and then lay small amounts of gold foil flakes or gold foil sheet and lightly press down, heat with a gentle heat gun and then lift the stencil carefully off. You should have gold foil accents on all your stencilled areas.


Step 4 - Using the Laced Stencil and the white gesso, stencil light amounts of the gesso or you could use crackle paste etc on the left hand side of the layout below the hexagons and also on the right hand side near the smaller hexagons. 


Step 5 - Add some stamping using the Memories Stamp Set and Tanya Froud's technique of adding liquid shimmer dusts to a make up sponge and using that as a stamp pad. I love this technique as it allows you to coordinate all the colours and techniques on your layout.


Step 6 - Using the Leafy Stencil and a make up sponge wet with Navy shimmer dust, stencil by gently dabbing the make up sponge through the stencil in the places as shown in the photo above. 


Step 7 - Check with this progress photo to see if you have completed all your steps and also take the time to add some splatters in your chosen colour! I went with Navy Shimmer Dust splatters. 


Step 8 - I have a great technique to use on chipboard, using your finger smooth Singing the Blues Colour Paste over the chipboard frame and while it is wet press your stamp into the wet paste. Dry with a gentle heat or leave to dry naturally. Once dry, paint a darker colour shimmer dust liquid (Navy) over the top of the stamped areas, making sure you get the darker liquid into the grooves etc. 

Once dry, wipe gently with a baby wipe to reveal some of the underneath Colour paste, giving your chipboard a multitoned textured effect. 

Start putting all your elements together on the layout as shown below.


and you are finished!


Thanks for stopping by the blog today, hope you have enjoyed the step by step.

Elisa x

Hugs 


Wednesday 27 May 2020

You Don't Have to be Perfect to be Amazing Layout Tutorial by Julie Schinkel

Hi crafty bees! I'm back on the blog today sharing a layout that I've created using a few different Bee Arty products. This layout was to be part of a kit but missed the cut so I thought I would share it here.


Start with a plain white cardstock base. Take some watered Apple of My Eye Colour Paste onto some scrap plastic and smoosh onto the white cardstock as shown.

Next take a piece of the "Go For It' 12x12 paper and tear in half. The top half with the dark areas will need to be torn in half again and arrange above and below the other half as shown on the finished layout.

Take the Chain Links A4 stencil and some more of the Apple of My Eye Colour Paste and add randomly on the top torn later. Using the same stencil, stencil around the page using both patterns with grey ink.

Randomly stamp around the page using the Life is Tough Clear Stamp Set and black archival ink.

Stamp and heat emboss flowers from the Make Me Happy Rubber Stamp Set onto some black and white cardstock using Apple of My Eye Embossing Powder as shown on the final layout. You can add more if you wish.

Die cut the Frame Set and Beaded Metal Dies using black cardstock. Arrange on the layout as shown.

Cut out the "You Don't Have to be Perfect to Be Amazing" quote and mat onto black cardstock. Adhere to the layout.

white cardstock
black cardstock
black and grey ink

I hope you enjoyed this project. Thanks for stopping by.
Until next time, happy crafting.
Julie xx

Tuesday 26 May 2020

Earth Angels - With Karyn Schultz!

Hi Bee Arty Lovelies!

It's Karyn here and today I have a scrapbook page to share with you made using lots of amazing products from Bee Arty!


Once again my white cardstock shortage encouraged me to use some old white/black patterned paper. This page had black script so I added white gesso under where my photo was going and along the left edge. I also added some clear gesso over the rest of the page. 

For my background I chose a cool colour palatte of blues and teals, using Mermaid, Oasis and Marine Colour Artist inks. Using 1 colour at a time I added drips of the ink to the page then blew the ink using a straw.  


 Once this was thoroughly dry I added splatters of each ink colour.

Again, let this dry completely than add Deep Water Colour Paste through the Bricked stencil in places across the page.


 Here is my finished page. I chose a photo of my girls from Christmas!


I cut up all the word elements from Earth Angel paper from the Spread Your Wings collection to use as embellishments. I've matted my photo on a white paper doilie.
 

Along the RHS of my page I've added an embellishment cluster using flowers, a doilie, paper elements cut from the Earth Angel paper, word stickers, some muslin dyed with Mermaid Colour Artist inks, and a white paper die cut created using the Honeycomb Metal Die.  


Around my photo I've added more embellishment clusters using flowers, paper elements cut from the Earth Angel paper, word stickers, metal embellishments, some muslin dyed with Mermaid Colour Artist inks, and a white paper die cut created using the Honeycomb Metal Die


I've left some of the honeycomb elements in place for a fun honey-like effect.
 

Thanks so much for stopping by

Crafty Hugs xx


Monday 25 May 2020

"Forever Be My Always" by Anita Enright


Hi Everyone, Anita with you today on the Bee Arty blog sharing some more inspiration using the beautiful range Forever My Always designed by Fiona Paltridge.


I gathered all my pieces together prior to starting.  My layout was a white cardstock base. 
Taking the Diamond metal die, cut out two in a rose gold foil cardstock. Cut a strip of navy cardstock approximately 1" in size. More navy cardstock is used to mount your photo,
I was lucky enough to have some lace already coloured to match the papers.  If you don't you can always colour some white lace with an ink that matches.  One colour in the Colour Blast range that will work beautifully is Bling.

On the Heart Beat patterned paper there is a fine black line that runs slightly to the right of the centre of the page.  Place the paper in your trim and cut along this line.
Take the smaller piece (the large piece is not required) and place it on the white cardstock to the left edge.  With a pencil make a couple of marks where the paper ends.  Use this as a guide as to where to do your stenciling.

Next, take the My Lady A4 stencil, place the floral part of the stencil, centred vertically, at the marks that you made where the patterned paper was ending. Apply Heavy White Gesso over the stencil.

Whilst the gesso is still very wet, sprinkle some of both the Steel and Just Blue Embossing powder over the gesso. Using your heat gun set the embossing powder.  If you like a textured look to the gesso, keep the heat on the gesso until it bubbles, but be careful not to hold the gun too close or you could scorch your cardstock.


Once you have set the gesso, attach the Heart Beat patterned paper to the left side of the white cardstock.  Attach your lace against the right edge of the patterned paper, then take the strip of navy cardstock and apply over the seam of the patterned paper and the lace.


Mount your photo on to some navy cardstock and then add 3D foam tape/dots to the reverse. My photo was printed with a border so if you like do a double mat.  

I added 3D foam tape/dots to the reverse of the photo prior to mounting on the navy cardstock. So there was two layers of 3D foam tape/dots. Add the photo to the layout.  For this layout I created the cluster whilst attached to the layout.

Add the two Diamond die cuts to the photo. Add a selection of fussy cut pieces from the Cut Apart sheet.  Mount some on 3D foam tape/dots to get depth to the layout.

The title used for the layout came from the Heart and Soul patterned paper, again mounted.
I finished the layout with a raw wood veneer. 


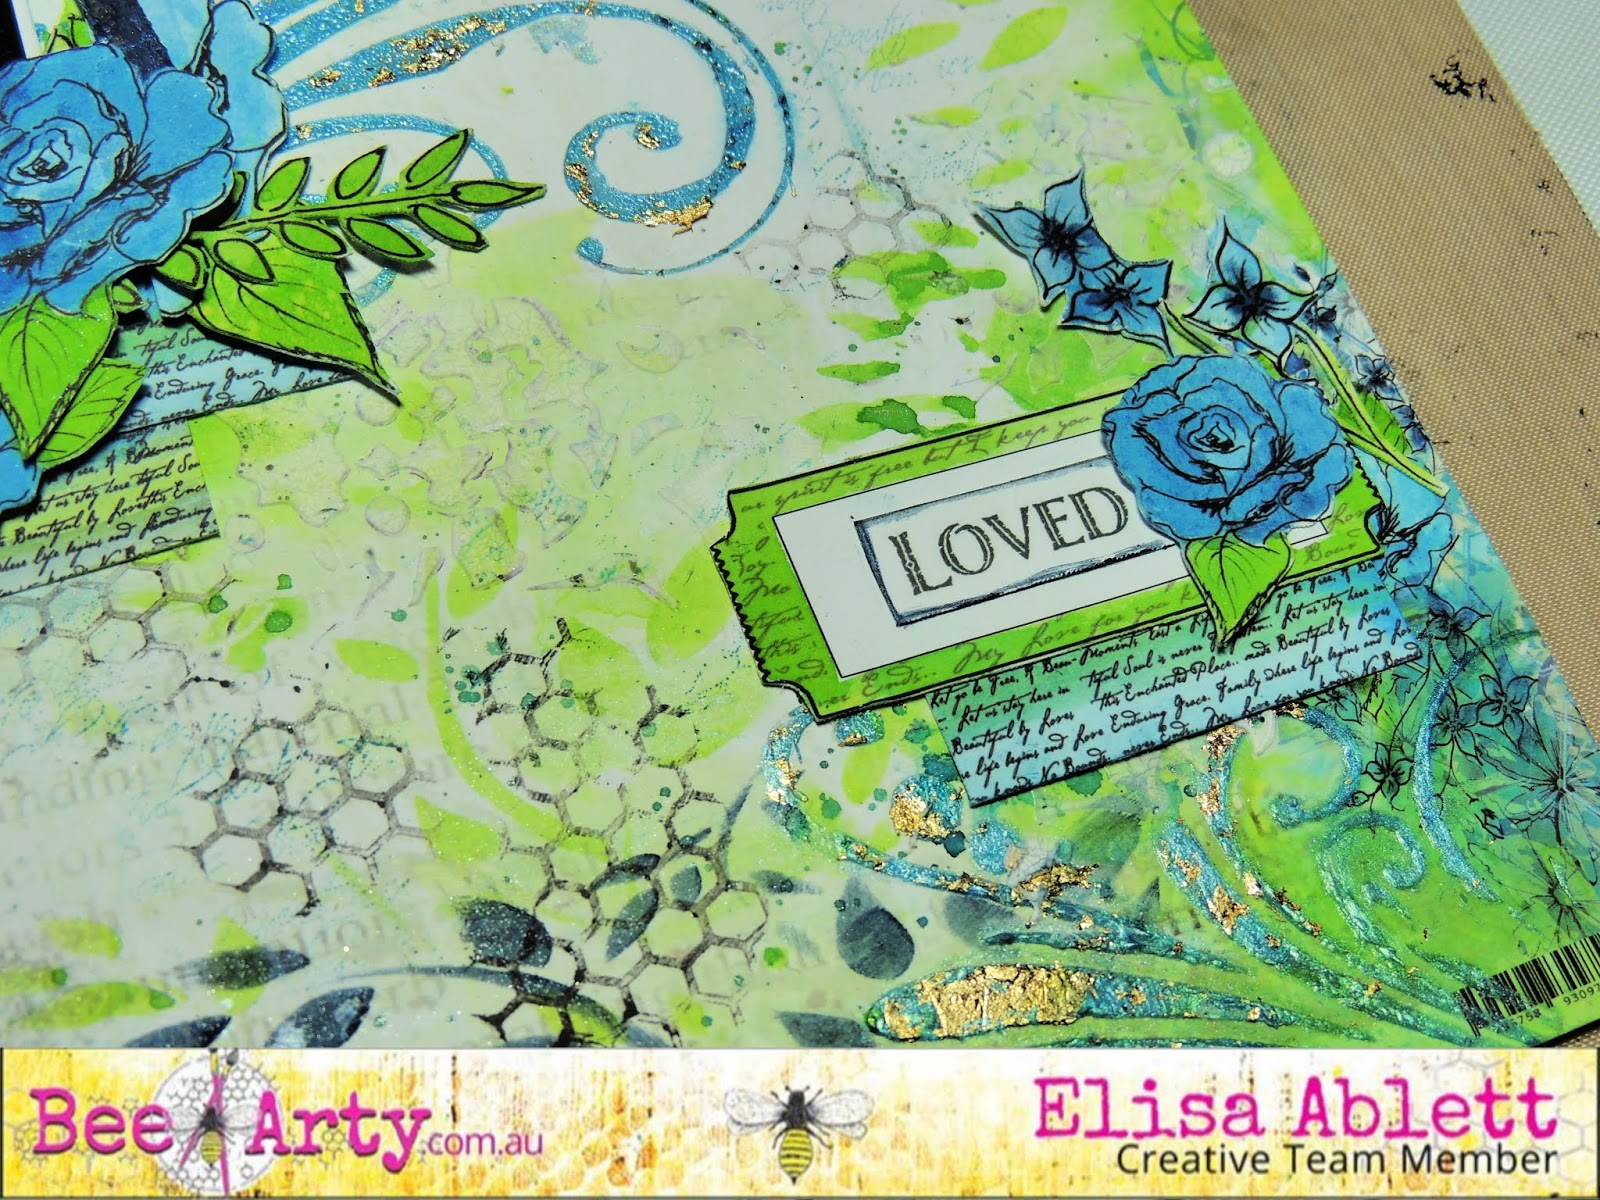
Below are a few closeups of my finished layout.


PRODUCTS USED

Forever My Always Collection

Colour Blast Mixed Media

Other Products
Navy Cardstock
White Cardstock
Lace
Adhesives
Rose Gold Foil Cardstock


Thank you for stopping by.
Make sure you get some 'me' time in every week.

Take Care for Now,
Anita E


Friday 22 May 2020

Shine Within by Tracey Campbell

Hello everyone, Tracey Campbell here with a Creative Team share using the beautiful Trendsetter collection designed by Michelle Grant. This collection is full of stunning blues and purples with a fashion runway theme to it, but versatile enough to use for other themes. I have teamed it with a photo of me taken in Hawaii in 2018. I have put together a few step-by-steps here in the blog on how the layout came about and also a link to where I have filmed my process in full, so grab a cuppa and have a read or watch. 

Shine Within

To create the background cut of a 10 cm strip from the Classy patterned paper - make sure that you include one of the lace boarders, adhere the strip to the left hand side of some white cardstock. Sprinkle a small amount of Duke and Passion Colour Shimmer dust on the bottom right corner and the centre of the Classy patterned paper and cardstock (you can see the exact positioning of the Shimmer Dust in the final layout). Activate the Shimmer Dust with a fine spray of water, blot off excess liquid with a paper towel. I felt that I needed a bit more colour so I repeated the process using the tiniest amount of Lollipop and Sunshine Shimmer Dust. Let dry.
Using a paint palette spread some Heavy White Gesso through the flowers on the Sparkle stencil. Concentrate on the bottom right hand corner and the area where the Classy patterned paper and white cardstock over laps - where the Shimmer Dust is. 
Fussy cut the flowers out of the Sparkle Patterned Paper cut-apart sheet and using the Sunshine, Carrot, Grape, Fuchsia and Ultramarine Watercolour Inspired Pan Set paint the flowers. If you don't have the Watercolour Inspired Pan Set you can used the Artist Inks diluted down with water or any other water colours.
From the "B" Sides of Classy and Runway Patterned Paper cut out three 10x10 cm squares and then cut out the centre to make square Frames. Interlock the frames together. Layer up the photo mount area but placing down half a white doily, a 7x10 cm portrait photo and the frames.
Cut out the word title "Nothing Can Dim the Light That Shines Within" from the Sparkle Patterned Paper cut-apart sheet and using the Watercolour Inspired Pan Set and a very thin paint brush fill in the letters with a blue, purple and pink ombre effect. 
Build up a cluster in the bottom right hand corner using a few strips of patterned paper. I used piece of 4x8cm from Chic and 1x10 strip from Classy Patterned Papers. Build up a cluster by placing the Patterned Paper strips and three flowers. 
Using 3 Dimensional tap adhere the remain flowers around the photo cluster, have some of the larger flowers tucked behind the frames and the smaller flowers overlapping over the top.
Cut the work title into for pieces and using a pair of scissors destress the edges of the title. Place the words "Nothing Can Dim the Light That" down the bottom right hand side of the photo cluster area and the words "Shine Within" over the cluster on the bottom right hand side. See finished layout for exact positioning. 
I have created a process video if you would like to watch how the layout was created. You can find it here on my YouTube channel. 
Thanks for stopping in and I hope I inspired you to pull out your Trend Setter range and get creating.