Monday 24 October 2022

Reality Changes by Linda Pearson

For my project today I was very excited to create using the brand new Saltwater paper collection by Amy Evans.


I went a little crazy with a variety of Embossing powders and Mica powders to create some awesome mixes to highlight the elements included.  As always this journal page could easily be adapted to include a photo image for a scrapbook layout.

Saltwater paper collection by Amy Evans

Ocean Floor 12x12 paper

Something Fishy 12x12 cut-outs paper

Under the sea A6 stencil

Aquatic Life clear stamp set

School of Fish A4 stencil

Waves metal die

White Cardstock – Bee Arty A4

Embossing powderblue, teals, green, pinks, purples, yellow,

Mica powderblue, teals, green, pinks, purples, yellow,

Shimmer dust -  blue, teals, green, pinks, purples, yellow,


Ocean Floor 12x12 paper

Something Fishy 12x12 cut-outs paper

Cut out several elements from the cut-out page e.g. 2 corals bunches, gold seahorse, 3 fishes (asst sizes) or as desired.


Ocean Floor 12x12 paper pounce Versamark clear embossing ink through the School of Fish A4 stencil, then sprinkle a mix of blue/green Embossing powder powders add some Mica powder – shimmery colours and glitter if desired, over the clear ink, then heat set the powder to activate.


A and B  Under the sea A6 stencil Add the octopus to the top of the paper with texture paste then, add the seahorse to the page also with texture paste , allow to dry thoroughly.


C  Add the School of Fish A4 stencil to the background of the Ocean Floor 12x12 paper then sprinkle a mix of blue/green Embossing powder powders add some Mica powder – shimmery colours and glitter if desired, over the clear ink, then heat set the powder to activate.


D Waves metal die – In this instance I used the waves dies as seaweed, coloured with blue/greens Embossing powders mixed with coordinating mica powders to add some shimmer to the elements.

Aquatic Life clear stamp set – stamp the shell, starfish and sponge stamps (twice) onto a piece White Cardstock – Bee Arty A4, with versamark clear embossing ink, then sprinkle with cream Embossing powder , heat set to activate powder.


Colour the textured seahorse with blue/teal Shimmer dust powders.  Once dry arrange the cut out and stamped elements as desired with shells and sponges covering the bottom of the page.  Adhere with liquid adhesive and mounting tape as desired to add depth to the elements.


Cut around some of the coral reef (printed on page) to allow some of the coloured shells etc can be tucked in behind for providing depth to composition.  Wrap the tail of the yellow seahorse around the cut coral piece.


Distress the border of the page using black archival ink, accentuate the distressing to the bottom area to add shadows to the reef.


Add the sentiment to the page using mounting tape, distress the edges.  Adhere 2 fish cut-outs to the card edges.


I hope you are inspired to create this or similar project using this gorgeous collection.  Look forward to creating for you again soon.  Bye for now from Linda.


linda@yourcreativepalette.com.au

Inspired Art Journalling AU (Facebook)

Sunday 23 October 2022

Be Kind - With Karyn Schultz!

 Hi Bee Arty Lovelies!

Its Karyn here and today I have a scrapbook page to share with you made using lots of fabulous arty products from the Bee The Sunshine collection at Bee Arty
 
  
I started with a sheet of 350gsm Heavy White Cardstock and added a watercolour wash using Tan Shimmer Dust

 
I added background stamping using the Find Your Way stamp and Brown Archival ink. Then I added black splatters using Midnight Shimmer Dust
 
Here is my completed page. 

 
 I used photo mats from offcuts of Bee The Sunshine collection papers and book paper. Words are from the Honey paper in the collection. I've used black cardstock and book paper diecuts created using the Flower Stems metal die set and a black cardstock bee diecut created using the Wingspan metal die set.

 
 I used the Floral Arrangement stamp set to stamp on some hexagon wood veneer and also direct to the page (using a brown ink pad)


Thanks so much for stopping by

Crafty Hugs xx


Wednesday 19 October 2022

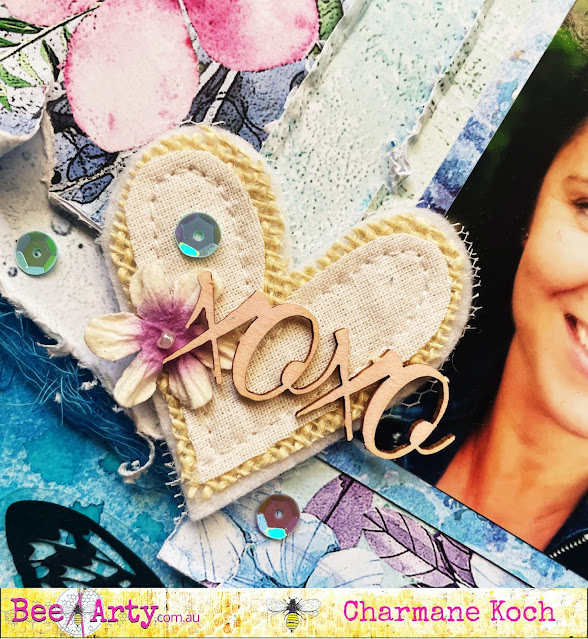
You & Me by Charmane Koch

 Happy Days! I've just been on the fabulously AWESOME Bee Arty October Retreat - it was an absolute blast! So inspiring, so fun & so relaxing! Just NOT LONG ENOUGH!

I found my mojo which had been missing for a few weeks, so I was relieved when it came back! Quite easy when you have uber-talented scrappy people around you to ask for their opinions to help get me back in the flow again! Wish I could have a retreat every weekend! 

Anyway, this one was a fun one - it was a BLIND SCRAP - designed by Amy Evans, but instructed by Paige, and as you can imagine sometimes we all don't follow the instructions {or the instructions might not be right?? LOL}

I decided to get out the Moonshadows papers for this & then added bits from my stash as well, coz that's what you do on retreat right - use the stuff you haven't used for ages?

Paige saw the layout and said you MUST use it for the next blog post - luckily I hadn't stuck everything down {like you are supposed to haha!} So I thought I would share the fabulous background I had created...

Firstly I sprayed some Peacock from my little Mini Misters bottle onto the page, dried it with heat gun, and then I have grabbed my NEW Salty Dots stamp and with a Peacock Shimmer Dust and water combo I have stamped onto the layout - which gave the effect above... 


What I loved about this Blind Scrap was using a lot of layered papers - and deciding to use the Moonshadows Collection was perfect as I could use alternate sides... the colours are just beautiful!


The quote was just perfect for this page as well - and the cute Bee Arty Flair matched too!


With the leftover colour from {previous} stamping I soaked up the Peacock colour with strips of Muslin so I added that to the layout too :)


I did add a little bit more from my stash - stuff that was lying on my already messy table - sequins & flowers from previous layouts!

Here are the Bee Arty products I have used:


Mini Misters are fabulous!


I hope I've inspired you to have a play with a little Moonshadows & Saltwater! Spray a bit of colours onto Thick White Cardstock, tear some paper strips and stick it down!

Thanks for popping by to check it out!


XO Charm

Monday 10 October 2022

QUEEN OF QUIRK an art journal page or scrapbook layout by Linda Pearson


For today’s blog I was really pushed for creative time, yet it is amazing how you can produce a layout that you are really happy with despite little time and not much thought.  I hope you also agree the simplicity of this art journal / layout has enhanced the focus image and the elements used. 

Bee Arty products used to create this project:

White Cardstock – Bee Arty A4 200 gsm white and black

Gesso

Bee Arty Colour Spray  (assorted colours) rainforest, oasis

Create metal die

Tracked stencil A4 (Road trip collection)

Encircled A4 stencil

Bee Arty Embossing powder (mix of stormy weather, snow white, bling, envy)

Versamark Stamp pad translucent

Texture Paste

Black ink or paint

Black Archival Ink

Vermillion Archival Ink

Blending tool/foam tip

Own image and sentiment

Foam tape


Run the Create metal die through the machine onto White Cardstock – Bee Arty  black cardstock. 


Spray the Bee Arty Colour Spray  – rainforest, oasis onto plastic acetate then spritz with water to mix slightly.  Place the white card over the inks mix, spread hand to rub inks across page.  Allow to dry.


Spread large drops of Bee Arty Colour Spray  – rainforest, oasis onto the card in both colours, then tap the card onto desk to encourage ‘dripping’ down the page.


Add white Gesso to the texture paste, spread the paste through the Encircled A4 stencil over two sections of the page.  Allow to dry.     


Using the number/alphabet section of the Tracked stencil A4 in three places close to the circled stencil.  Add black splatters around the page.


Create a mix of embossing powders to suit the background colours.  Use a blending tool and Versamark Stamp pad translucent pounce the ink through the Tracked stencil A4 stencil onto the black die cut image (Create metal die) .  

Sprinkle the embossing powder mix then heat set to activate the powder.

Distress the edge of the image with vermillion coloured stamp ink.

Back the image with cardboard off-cut smaller than the image.


Add the distressed and carded sentiment to the page.  

Tear the edges of the cardstock and distress with black Archival Ink.


I hope you are encouraged to create your own layout.

Bye for now from Linda 

linda@yourcreativepalette.com.au

(Inspired Art jouralling and journal art FACEBOOK group)