Sunday 28 May 2023

Magical Moments by Rikki G

 Good morning how are you this fine Sunday.  Hope you have been having some creative time. 


Now onto my final share for the month for Bee Arty. 

If you remember this month I was showing how I break down the monthly challenge, Moodboard and the sketch. 

Now its about blending the two together......


You can follow along with how I created this layout with a process video.


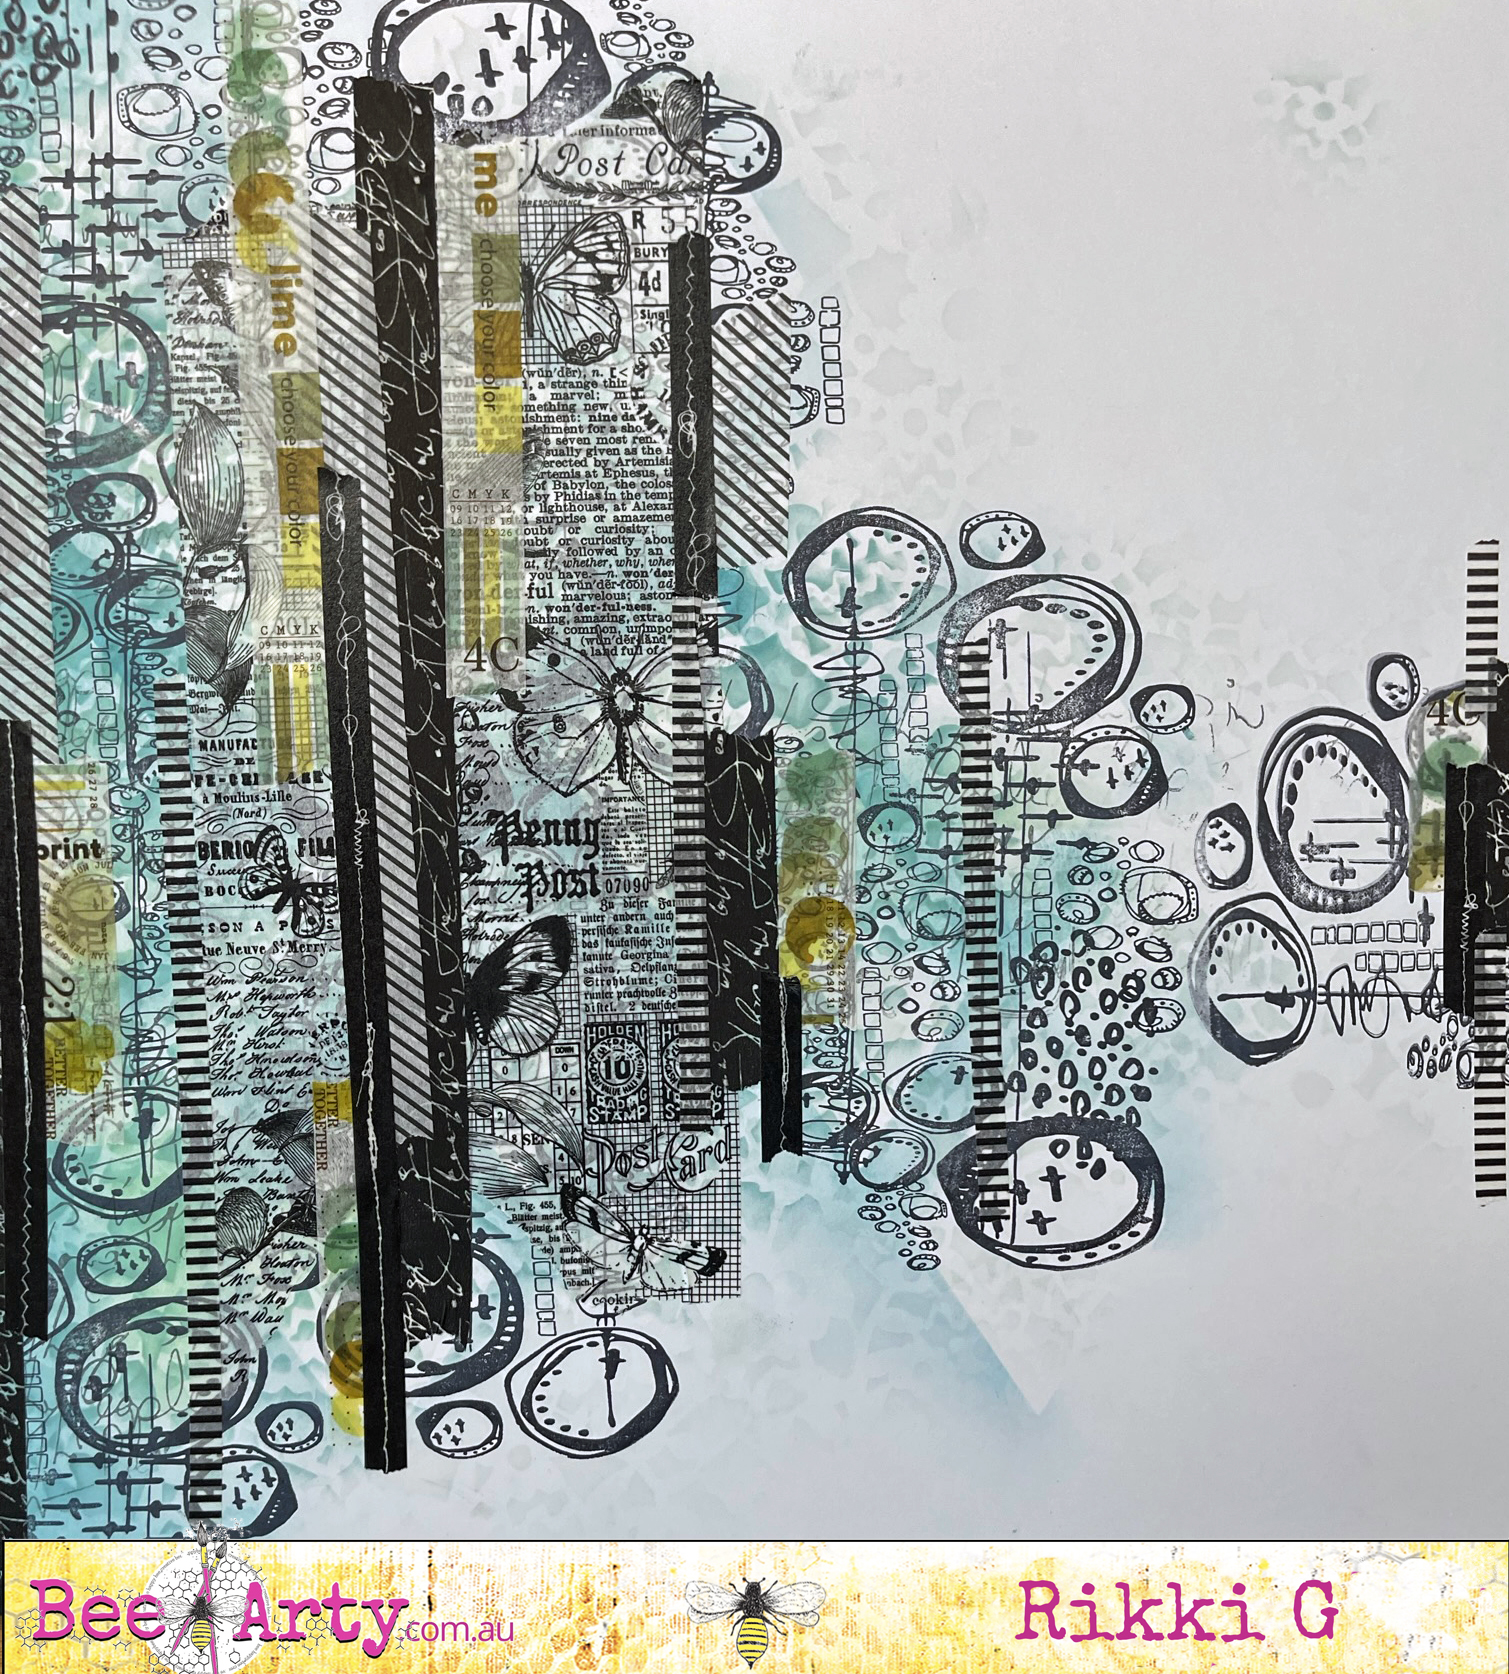
To start off, ink the background with some Tim Holtz Oxides through the Laced Stencil.


Cut a diamond shape out and repeat the above step making a pattern. 

Stamp with the Script stamp from Bokeh, with a grey ink.

With a black archival ink stamp with Fearless Stamp set all over the inked area.


Add a selection of washi tapes over the inked and stamped background. 

Till you get something like below....

Now its about following the sketch to complete the layout.


I hope this inspires you to play with our monthly challenges, you still have time to join us for this months challenge, just follow the link below.


Laced Stencil 


Bokeh - Clear Stamp Set


 Fearless - Clear Stamp Set


White Cardstock


Leap - 12"x12" Scrapbooking Paper Cut & Colour


Thursday 25 May 2023

Goddess created by Tracey Thorne

 Hello creative souls

I have been clearing out and using up all of my older kits - I love to combine them all to get maximum bang for my buck. There is never a piece of paper I throw out - classic hoarder right here, i'll put my hand up for that title.... so in the spirit of mix & match and creating something new I hope you enjoy my new share "Goddess"

To my printed cardstock I have mixed these two dye inks together to create a darker shade of purple - almost indigo - dye inks are great to mix and you can create some fabulous colours to compliment already printed cardstock in many of the ranges available at BeeArty.


After the ink has dried I have added one of my all time favourite BeeArty flourish stamps - Vampyre Rose Vamp stamp - it is perfect for background stamping and feature stamping on scrapbooking layouts, cards & mixed media projects. 


I have mixed a little Snow White Mica powder with water - how amazing is this stuff - perfect for highlighting and adding a little shimmer to your pages. I have also used it around the edges of my photo and splashed little droplets around the page off a small paintbrush.


I have mixed a little Jacaranda Shimmer Dust with water and coloured a piece of muslin. I have then washed it out in water to soften the colour. Yes it was very very dark but the dye ran out when washed and left this lovely subtle tone of lavender. I also used a little of the prepared dust watered down to paint on the frame.


I have cut the dragonflies and mandala's from two printed cardstocks, they have been used as layering  embellishments. I have found a few Kaisercraft roses to compliment the page, scattering them on either side of the photo. I have added a printed title and typed my journaling to finish the page. 


I hope you can gather a little inspiration from this 12x12 layout to help use up a few of  your pages mixing and matching the elements and printed papers.

Have a fabulous creative week


Monday 22 May 2023

Forever In My Heart by Charmane Koch

 Hello Lovely People!

Just a quick share from me today, using few layers of the Whispering Woods papers, that I thought matched perfectly with a photo I found of my baby brother... and the chipboard title was also perfect.

I Embossed the Chipboard title using Olive Sparkle Embossing Powder 


I also created a Charms Creations Heart to match with the papers.


I thought this 80's photo was perfect with the colours of the Whispering Woods paper.


I kept it quite simple by adding a few embellishments - sequins, paper flowers, bow & Paper Doiley.

There'll be a little video over on the Bee Arty Hive to show you how I layered it altogether & embossing the Forever in my Heart chipboard.

I did do a bit of machine sewing over the top of the layered papers, just for a bit of extra texture too.

I used two sheets of the Forest Floor paper...


I used Olive Sparkle Embossing powder from the Sweet Stuff Embossing Bundle {only $20 for 4 colours!}


I hope I've inspired you to whip up a layout! Just layer up your papers, a little bit of paper tearing - stick it all down, add a few embellishments and you have a layout! Oh, and why not have a play with some Embossing Powder while you are at it!

Happy Creating :)


Thanks for popping by!

XO Charm

Sunday 21 May 2023

Happy 15th Birthday - With Karyn Schultz!

 Hi Bee Arty Lovelies!

It's Karyn here and today I'm sharing a birthday card created with lots of fun products from Bee Arty. This card was created for my daughters recent 15th birthday. She loves swimming and the water so the Saltwater collection was perfect to use.

 
I created the card base from a 12"x12" page of 350gsm Heavy White Cardstock. I cut it down to 28cmx14cm and folded in half to give a 14cm square card. 
The background paper is a 13.5cm square and 13cm square cut from Saltwater paper pack. 
 The chipboard "15" is coloured with Midnight Colour Shimmer Dust (mixed with water). 
I've fussy cut black and white images from the Saltwater paper pack. 
Other embellishments were from my stash.


Thanks so much for stopping by

Crafty Hugs xx


Sunday 14 May 2023

Dream - Rikki G

 Good morning how are you? Rikki here today to share with you part two of how to break down Moodboards and Sketches. 

Now if you're a bit like me find Moodboards harder to work with than sketches.... its the colour combinations that sometimes I struggle to find the balance with. How much of what colour? Do I have to use all the colours? What Ratio should I do?


Thursday 11 May 2023

Celebrate by Charmane Koch

Hello Everyone! Hope you are well on this lovely day today!

Today I wanted to share more details of a layout I have created using the Whispering Woods papers & a few other Bee Arty products - dies, paste & Mica Powder!

There's a little video over on the Bee Arty Hive if you want to go to check it out!

I started off by applying Sienna Colour Paste through the Whitewash A4 stencil from the Raspberry Fizz Collection - this would have to be my favourite Colour Paste Colour... isn't it just magnificent?

I also cut out some flowers from the Forest Favourites Die that I tucked behind my photos and Magnolia patterned paper


I grabbed the Sienna Mica Powder mixed with water to colour my Chipboard word...


& then used a Mini Mister with a few scoops of Sienna Mica Powder & water and sprayed the mini doily and soaked up the excess with a piece of Muslin...


You can see the piece of Muslin in the image below...


Of course, I couldn't resist adding a couple of my Charms Creations Hearts to finish of the layout!


The Bee Arty goodies I have used:


There was another paper - but I think it has SOLD OUT!

As you can see, It's quite easy to mix and match Bee Arty Collections to come up with something different!

I am just in LOVE with the Sienna Colour - Paste or Mica Powder & love there is so many ways you can use the Mixed Media products!


Thanks again for popping by & hope I've inspired you to "BEE ARTY"

XO Charm